Encounter 4: Gahlran, The Sorrow-Bearer
Remember that giant, mutated bather that popped up before the previous encounter started? Well, that’s the last guy you need to take out to complete the Crown of Sorrow raid in Destiny 2.
Gahlran, the Sorrow-Bearer, can be a totally hectic fight. Make sure you’re well prepared and at least 730+ PL before starting. This fight is a culmination of everything you’ve seen in the Crown of Sorrow raid. You’ve got the following:
- blessed and non-blessed mobs and players
- transferring the blessing
- crystals that need to be destroyed
- Gahlran’s Deceptions running around
- big daddy Gahlran and his clones are also throwing Jotunn fireballs at you
There are two strategies that can work out well for you — the “Stacked Strategy” and the “Split Strategy.” We’ll discuss both in detail.
The Stacked Strategy
You’ll notice that the transparent walls are all gone and you can roam around, but stacking means sticking together. This is the Stacked Strategy, akin to the first encounter in the Crown of Sorrow raid.
You’ll want at least two Warlocks to chain their Well of Radiance, and the other classes should have supers to generate orbs. As a fireteam, you’ll stand close to one of the cauldrons as you can see in the image below:
To start the encounter, you’ll have to shoot Gahlran and then three players need to stand on the green pool to gain the Witch’s Blessing. Split your fireteam as such, making sure that each team will have one blessed and one non-blessed player:
- Team 1 – Crystal Killers (Titans or Hunters)
- Team 2 – Deception Killers (ideally your Hunters)
- Team 3 – The Chill People (ideally your Warlocks)
From here onwards, you’ll notice several blessed and non-blessed mobs swarming you from all three sections. Crystals will also spawn every 30 seconds, and a roaming Gahlran’s Deception will spawn at one section at any given time.
In general, everyone will usually remain stacked up on the same spot. Warlocks will just cycle their well of radiance supers to keep everyone alive, and teammates will generate more orbs. Players will continuously shoot blessed and non-blessed mobs depending on whether they have the blessing or not.
These are the mobs that spawn:
- acolytes and ogres are non-blessed
- knights and cursed thralls are blessed
Team Roles
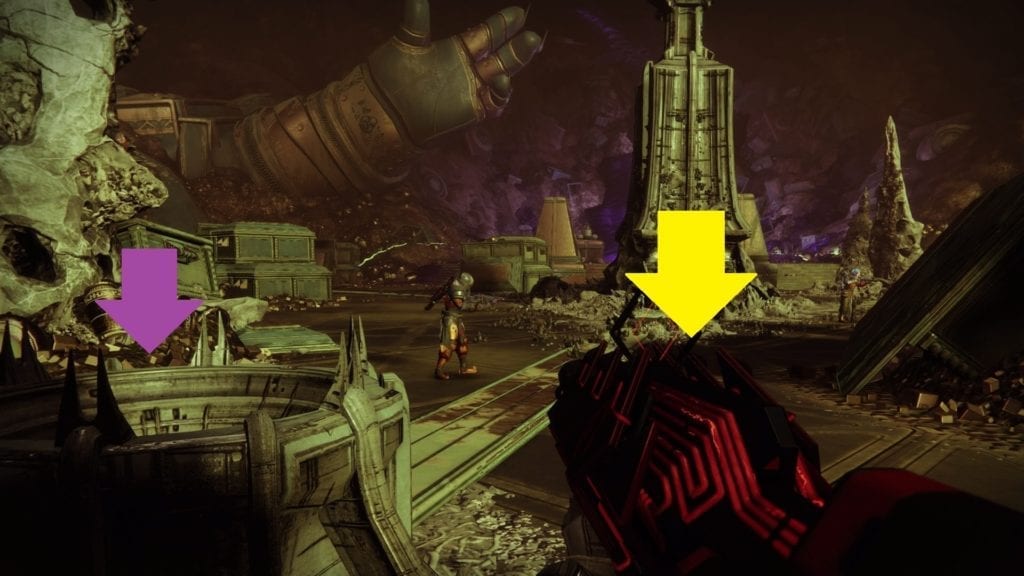
Team 1 (Crystal Killers) will periodically roam around the encounter arena to punch/shoot the crystals that spawn. Remember, one needs to be blessed and the other has to be non-blessed. Again, crystals spawn every 30 seconds clockwise.
Let’s use the image below as an example. If the crystal spawned first at the Front/Pillars section, then the next one will be at the Right/Dogs section. The one after that will be at the Left/Void section. Then, the next spawn will be back at the Front/Pillars section. Oh, and crystals can also be suspended in mid-air, so two players need to jump up and melee at the same time.

Team 2 (Deception Killers) will predominantly stay on the safe spot killing mobs. However, once the Gahlran’s Deception spawns for a particular section, they need to bait it on top of the stairs. Then, they need to punch (one blessed, one non-blessed) to take out its shield. This will stun the Deception. Gahlran (the actual big boss) will have his hand glowing. Shoot this hand and he will smack that Deception with a giant axe, killing it immediately.
Note 1: If the Deception gets stunned below the stairs or off to the side, the big guy will not kill it. You end up losing loads of time, leading to a wipe. If in case the Deception is still alive and not killed by the giant Gahlran, try have someone baiting it on the center of the dais while another player continues shooting the hand. With any luck, the axe will slam down and kill it at the right spot.
The next Gahlran’s Deception will also be spawning clockwise. If the first one spawned at the Front/Pillars section, then the next one will be at the Right/Dogs section. The third one will spawn at the Left/Void section and so on.
Note 2: The new Deceptions will only spawn after the ogres from the next sections have been eliminated.
Team 3 (The Chill People) would be your Warlocks, the saviors of every Destiny 2 raid group. Since they’re chaining their well of radiance supers, they’re staying on the safe spot the entire time, just eliminating the mobs around the arena. What happy lives these fellows must be having!
Stacked Strategy – Passing The Blessing
Everyone should gather up at the cauldron closest to the well of radiance/safe spot to transfer the buffs. Ideally, you should be doing this whenever a crystal has been destroyed, or whenever a teammate calls out that they need to switch.
Team 1 (Crystal Killers) can also decide to switch their blessing at any of the other two cauldrons if it’s safe to do so.
As for Team 2 (Deception Killers), remember the previous encounter where you’d lose your blessing if you broke the shield of a Deception? That also happens here. If you need a blessing refreshed, stand next to any of the cauldrons and have a blessed player from the other teams shoot it. This will give you the blessing without causing them to lose it.
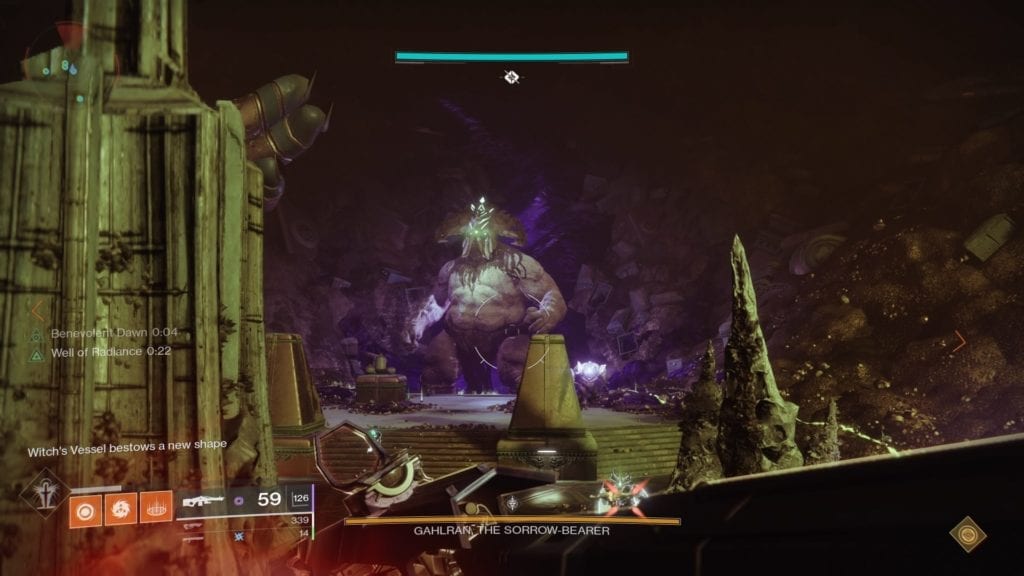
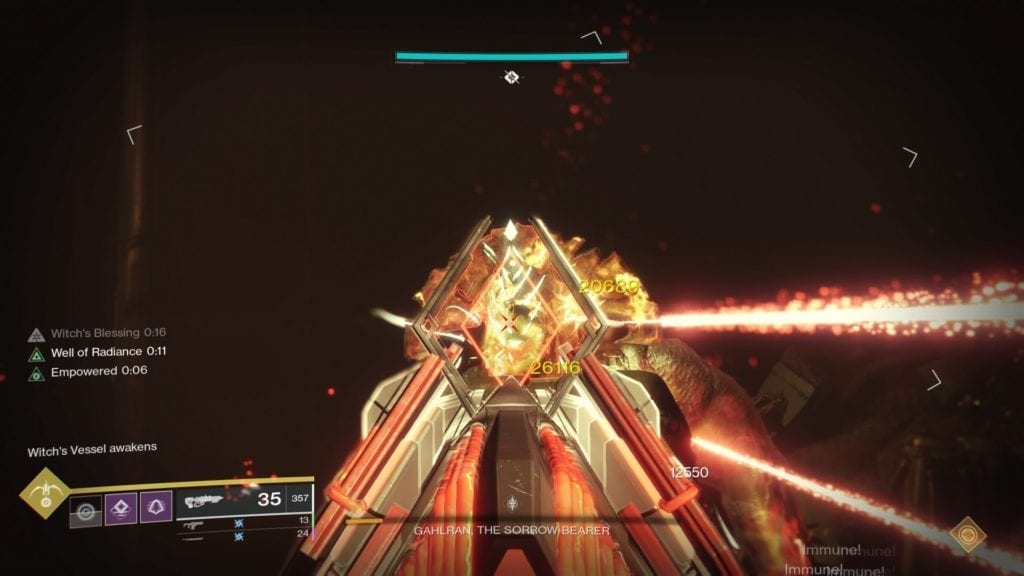
Big Boss Gahlran – The DPS Phase
When all three Gahlran’s Deceptions have been axed by the big boss, then all three giant Gahlrans will raise their hands in the air. Whatever section you were assigned to (from the previous encounter) is where you need to be shooting. Have one player shoot the left hand, while your teammate for that section shoots the right hand. Gahlran’s face opens up and you both need to shoot it. If any of these hands get fully raised, you wipe.
The two other big Gahlran bosses will disappear since they were only clones. Only one will be left. This is the guy you need to DPS now.
Pop a well of radiance close to that section and shoot the hands when they’re going up, and then shoot his face. He’ll periodically raise his hands again so shoot the hands, and then the face. Hands, face, hands, face — it’s like washing yourself in the morning.
There will also be thralls that spawn around this time. If you’re standing in a well of radiance, their damage is negligible. Also, have a Warlock melee them to create the empowering buff to boost your damage.
Note 1: Because some players will still have a blessing before the DPS phase occurs, switch blessings first before you start the DPS phase. Stack up in one cauldron and shoot it. This will maximize your blessing timer. You don’t want it to run out while shooting the boss. When the DPS phase is done, stack up next to a cauldron and switch blessings again.
Note 2: Crystals can still spawn during the DPS phase. Have your Crystal Killers always on point, remembering where to go when the crystal spawns rotate clockwise.
You should get Gahlran, the Sorrow-Bearer, to roughly 35 to 40 percent of his health bar in one DPS phase. Repeat the same steps as before and you should be done with this boss fight.
Ideal Classes And Loadouts
- Warlocks, as usual, should run Well of Radiance plus Lunafaction Boots to provide constant DPS during the damage phase. You’re not going anywhere in this raid without Warlocks. They’re part of the “Chill Team.”
- Hunters should be using tether with Orpheus Rig to generate those orbs. They can be your “Deception Killers” since they can stealth and punch the Deception without risking a melee hit. Titans can also do this. If you’ve got enough Hunters, then several should be a Gunslinger with Celestial Nighthawk equipped.
- Titans should be using hammers for mob clearing, or banner shield (blocking ogre eye beams) to generate orbs. They can also be your “Crystal Killers” since they can Titan skate around the map. Hunters can also do this role.
- Outbreak Perfected or The Mountaintop as kinetic weapons are your best bets for the DPS phase. Shotguns (Ikelos) or Loaded Question would be great for killing mobs that get up close, while machine guns (Hammerhead) can handle faraway ogres or knights.
This is just one method of completing the final boss fight in the Crown of Sorrow raid. You can also check out how to do the Split Strategy here.