Entrance cavern
The entrance cavern in Destiny 2: Season of Arrivals‘ Prophecy dungeon will teach you all about the basic mechanics that you’ll encounter as you progress.
- Ideal loadouts: Any as long as they can take out yellow bar Knights quickly.
- Ideal subclasses: Warlocks with Well of Radiance and Phoenix Protocol. Titans and Hunters can pick whatever subclass they prefer.
- Enemy power level: 1040

For starters, you’d see that the cavern is flooded with Taken Thrall, and there are also Knights at the side passages. The Thrall are a nuisance, but it’s the Knights that you need to watch out for. Once you kill them, they’ll drop three motes. Looks like you’ll be playing a bit of Gambit in the Prophecy dungeon.
Try to remember this concept: Light vs. Dark. Motes will come in two types — light and dark — and these will play a role in how/where you’ll bank them.
At the end of the cavern, you’ll notice two pedestals — one light, one dark. The goal is to pick up five motes of the same color. This will switch your view to third-person mode while also showing that you’re carrying a giant mote. You should then bank these motes in the corresponding pedestal to “cleanse” it.
Note: Banking/cleansing is done by standing on the pedestal and pressing the “fire” button (left-click on your mouse).
Changing mote colors
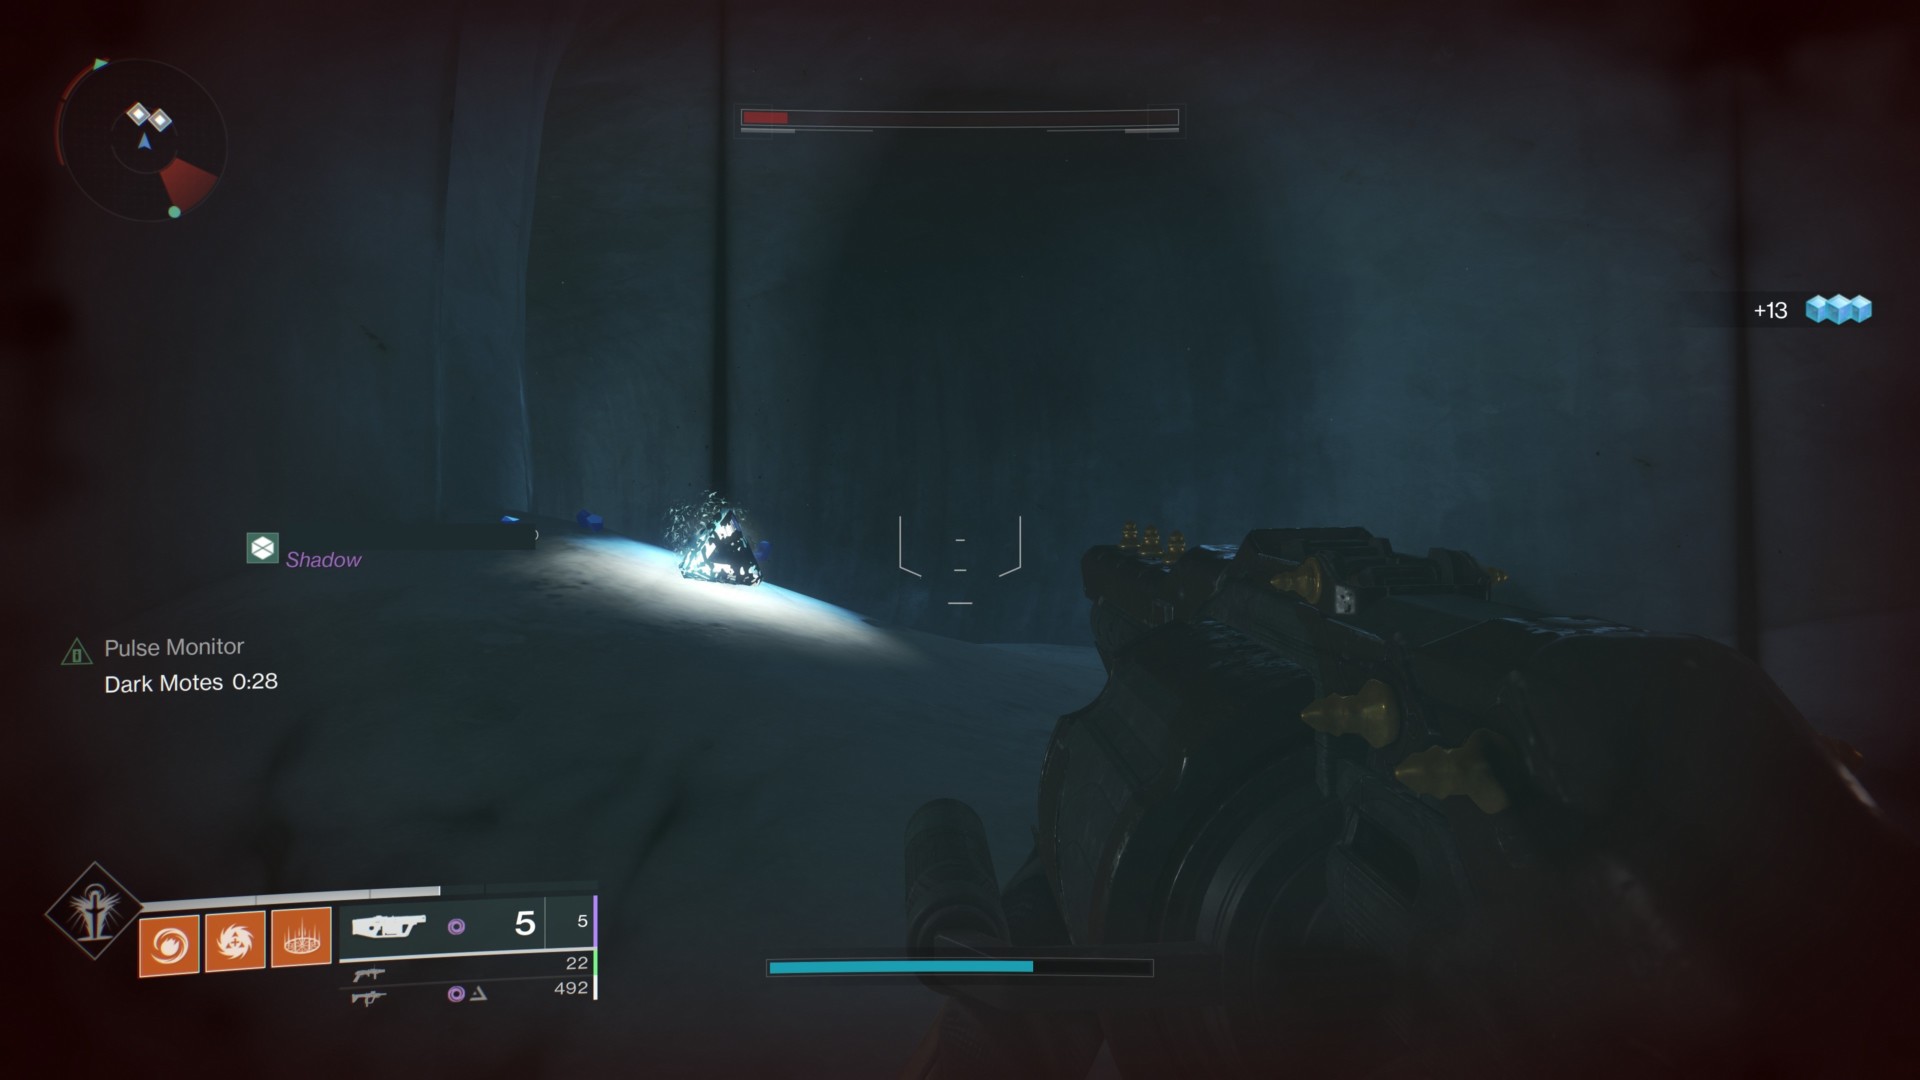
The color of these motes (light or dark) will depend on the status of the player that killed them at the time. You’ll notice this when you look at the edges of your screen (a darker hue means you’ll get dark motes, and a lighter hue means you’ll get light motes). In order to change the color of the motes that’ll drop, take note of where you’re standing on. Killing a Knight while standing in the shade will generate dark motes. Killing them while in a well-lit area will generate light motes.
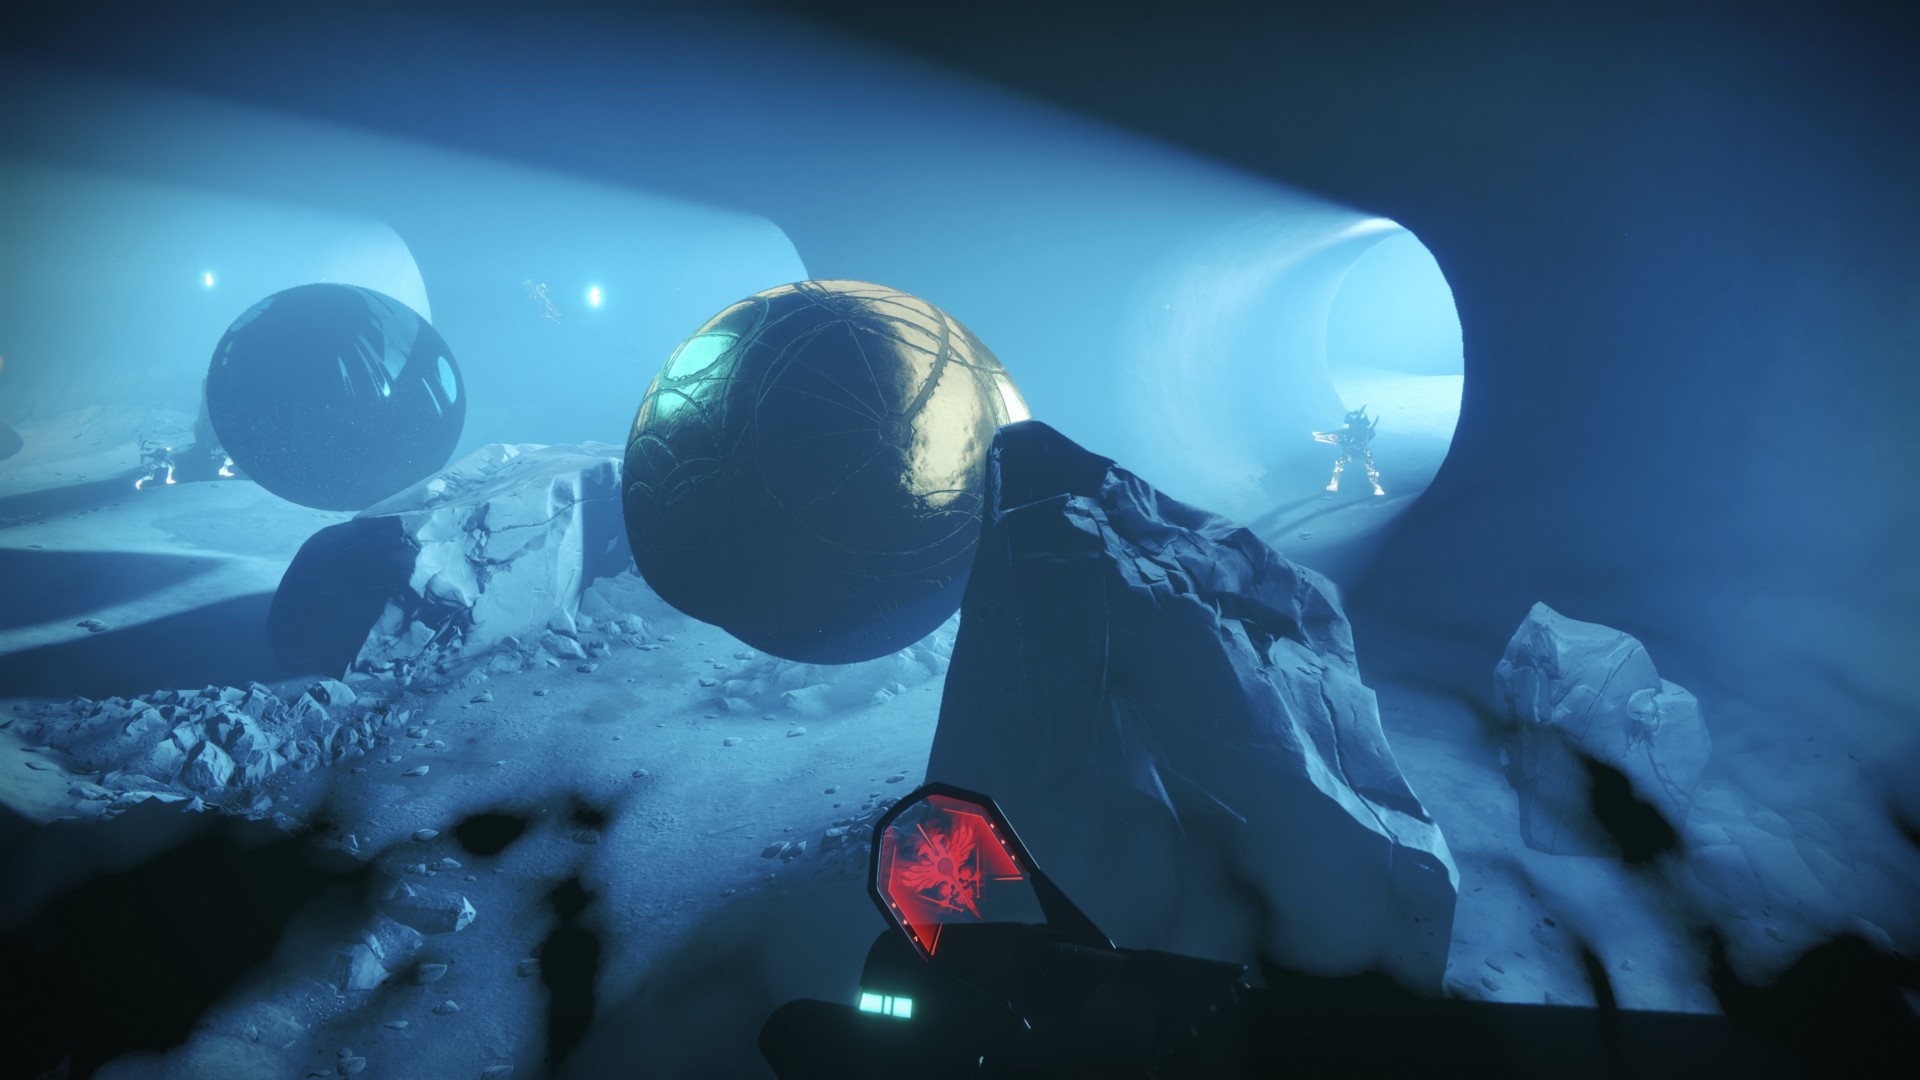
Here’s an example of a shaded area. Notice the shadow tendrils at the edge of the screen? Standing here when you kill a Knight will drop dark motes:
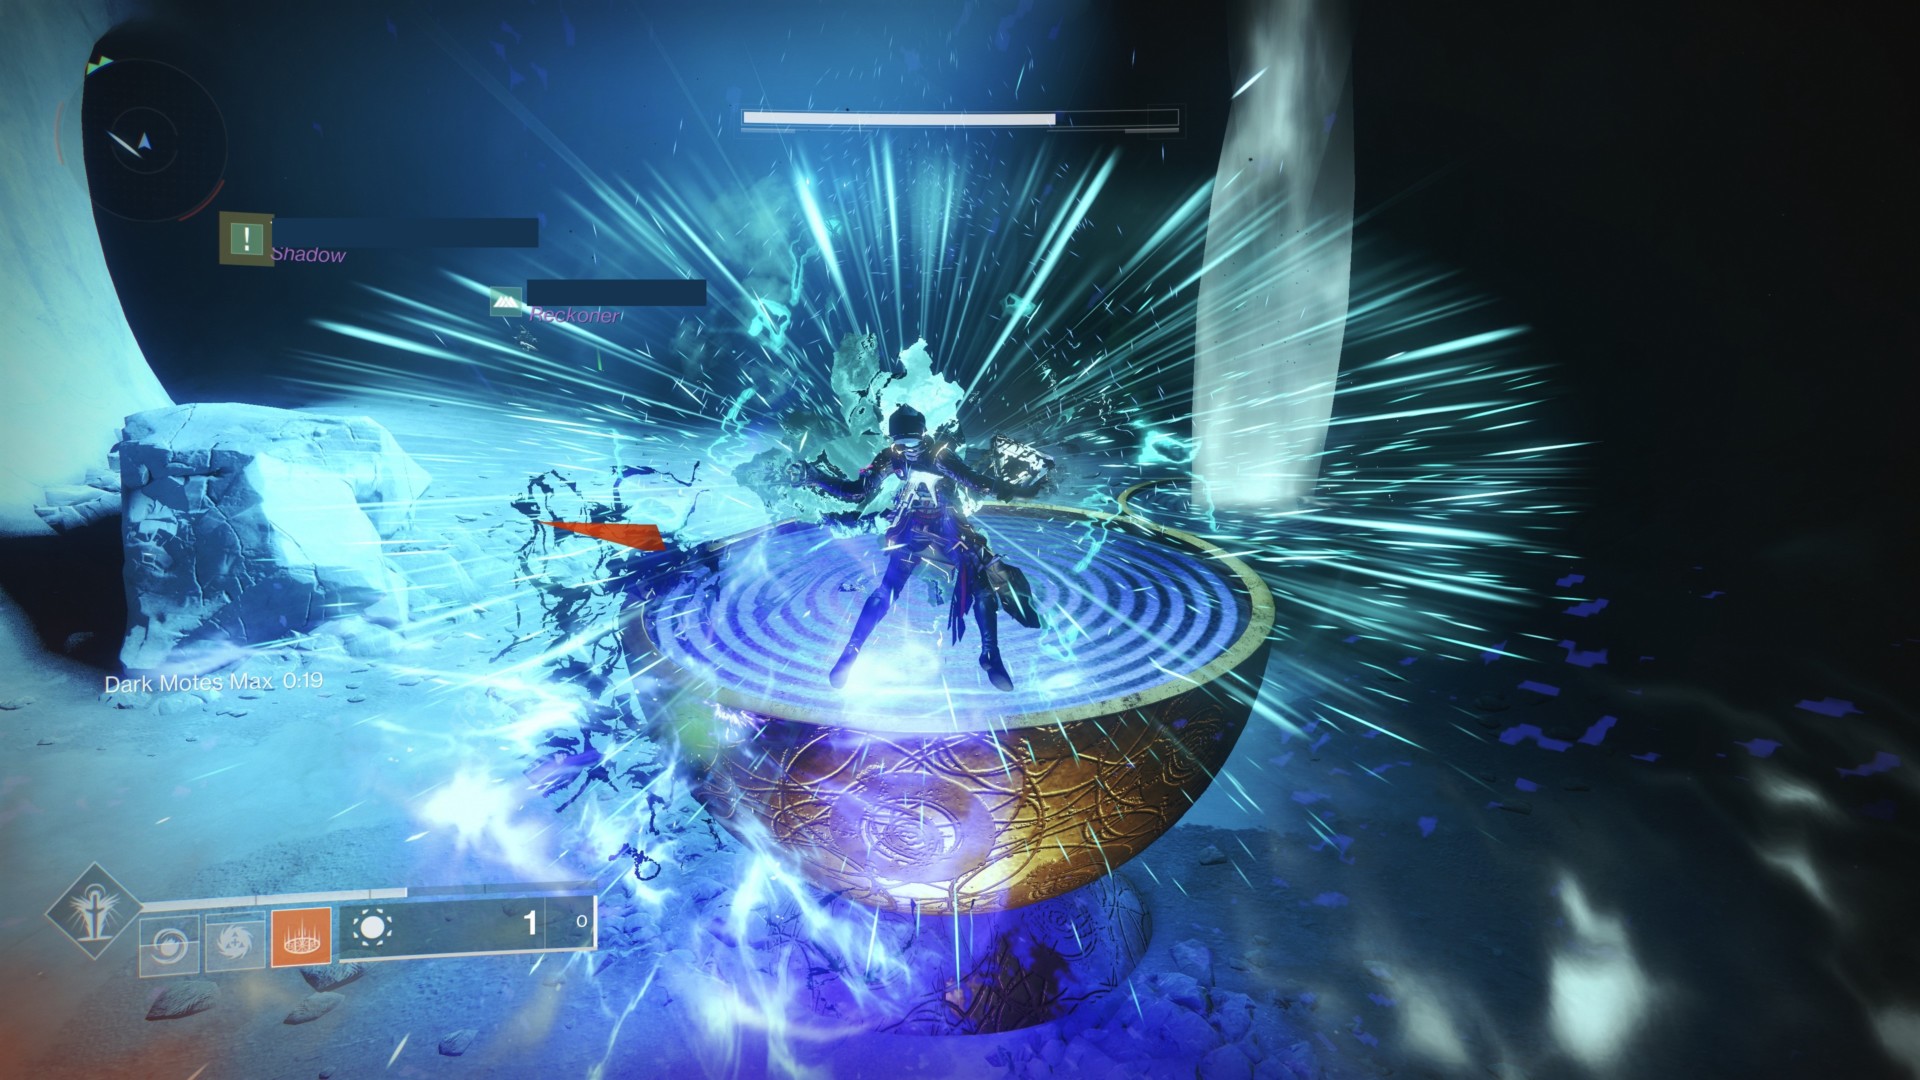
Next, here’s what a well-lit area looks like. Notice the glowing tendrils on your HUD? Standing here when you kill a Knight will drop light motes:
Keep doing this process in the next room to finish the encounter. With that done, we hope you remember your lessons because these mechanics will still be part of the next battles, including the Phalanx Echo boss fight.