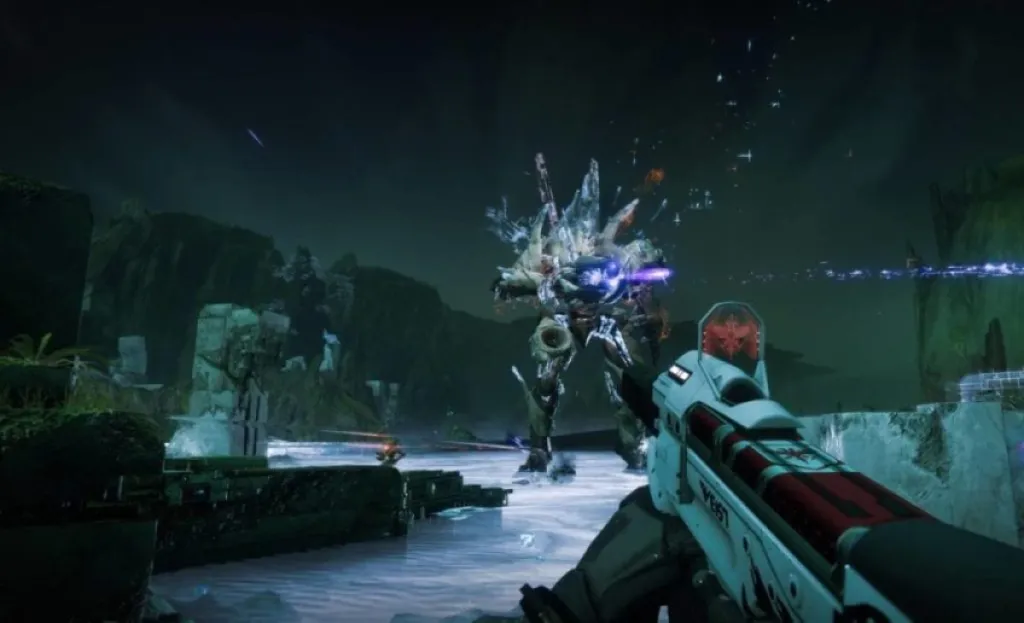
Garden of Salvation: Encounter 4 – Sanctified Mind, Sol Inherent
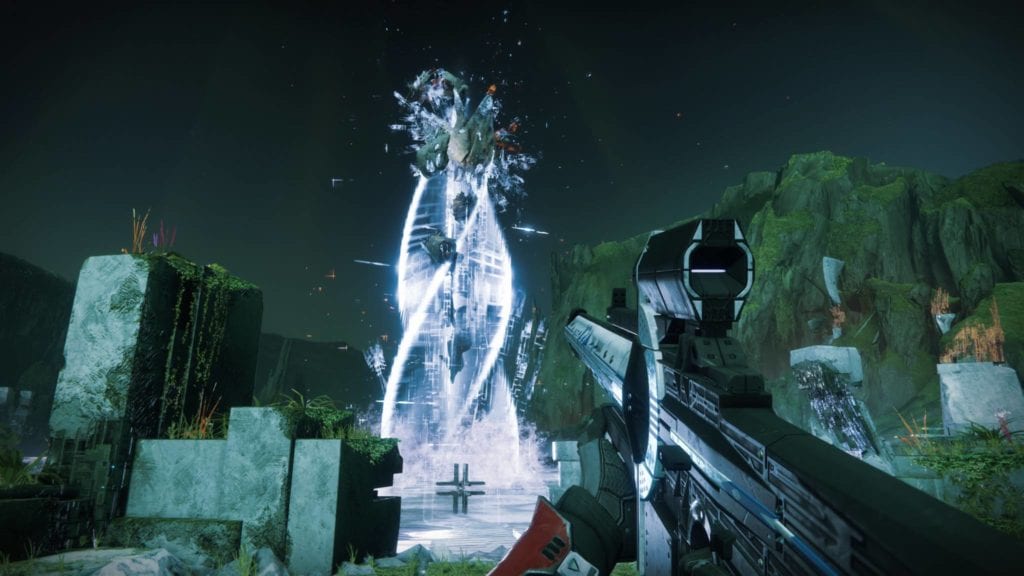
The final encounter in Destiny 2: Shadowkeep‘s Garden of Salvation raid is against a gigantic Vex known as the Sanctified Mind, Sol Inherent. This vegetarian Atheon wannabe only has a simple attack (a short barrage of void blasts), but it has a number of actions that will annoy you.
The goal in the Garden of Salvation’s final boss fight is to apply all the mechanics you’ve learned so far with a few new twists:
- sending teammates through a portal
- banking motes at the active conflux to gain the Enlightened buff
- killing shielded enemies while Enlightened
- preventing Vex from sacrificing themselves at a conflux
- destroying the Vex cyclopes that spawn
- defeating the Angelic hydras so you can use the conflux’s tether
- using the tether mechanic to connect a beam between teammates
- tethering the beam from the conflux to one of the tether boxes to rebuild a destroyed section of the floor
- tethering the beam from the conflux to the boss to break its immunity, letting you do the DPS phase
These can be a bit confusing at first, so we’ll walk you through each part of the fight.
Dividing the fireteam
Divide your fireteam into three groups or two players each:
- Team 1/portal 1 – These will be the first two players that’ll go inside the portal and clear mobs.
- Team 2/portal 2 – The second set of (two) players that’ll go through the portal immediately after the first team has made it out.
- Builders – The remaining two players in the fireteam will never go through the portals. They will stay in the boss fight area to clear mobs. Additionally, they’ll rebuild any sections of the floor that were destroyed by the boss.
Portal team roles: Two at a time/same portal strat
To spawn a portal, the team must shoot the highlighted body parts of the boss. Destroying the left leg will spawn the left-side portal (also known as the “light” side because the active conflux here will have a lighter, bluish hue). Destroying the right leg will spawn the right side portal (also known as the “dark” side because the active conflux here will have a darker, reddish hue).
Team 1 will make their way through the portal to clear mobs at the cliffside area. Mobs include Vex goblins, hobgoblins, minotaurs, and harpies. Each enemy drops motes and each player can only collect a maximum of 10 motes.
When all the enemies are dead and all the motes have been collected, team 1 will tell the others to “pull them back.” Teammates will then shoot the body part of the corresponding portal/side. This will automatically teleport team 1 back to the boss fight area.
Since players destroyed a body part, another portal to the same side has also opened. This means team 2 will need to go through the same portal on the same side. If team 1 went through the left side portal first, then team 2 will, obviously, also go through the left side as well.

Tip:
When you destroy a body part, a Vex cyclops will also appear for that corresponding side. For instance, shooting the left leg will spawn a cyclops on your left side. Sniping the cyclops immediately once it spawns is extremely important to prevent player deaths from eye blasts.
Why do we send two players through a portal each time?
That’s because the cliffside areas have a dozen or so mobs. You can get 15-18 motes each “run.”
But, since each player can only carry a maximum of 10 motes, you’ll need the extra person to pick up everything else that’s dropped. Plus, it helps to have a friend to back you up.
Why do we send the second team through portal on the same side?
The first reason is that each conflux needs 30 motes to be fully charged. Assuming team 1 picked up 16 motes and team 2 picked up 15, that’d mean they can bank at the same conflux to fully charge it already.
The second reason is to make the fight a lot easier. Since the Vex cyclops will spawn at the side of the portal that was opened, then opening the same portal will let you anticipate where they’d be. If you focus on the left side first, then, obviously, the only cyclopes you watch out for will always spawn on the left side.
Why don’t we just send one player through the left and right portals at the same time?
Because that’d be silly. That means two cyclopes will spawn, one on each side. It adds unnecessary pressure to a boss fight. I’ll also explain how the aforementioned “two at a time/same portal” strat helps you manage the next part a lot easier.
Banking motes, Enlightened buff, add control for shielded mobs
Let’s go back to the point where team 1 just picked up their motes and they’re now ready to get pulled back. So, their pals will shoot the body part to teleport them. Team 1 should now bank those motes in the active conflux for the corresponding side. Let’s say the players went through the left portal, that means they’ll bank at the left side conflux that’s active.
Once a player banks their motes, they gain the Enlightened buff which allows them to break the shields of the Vex goblins. The buff will last for 45 seconds, although some more shielded mobs may spawn after that.
Tip:
The trick here is for the second player to wait a while. You don’t need to bank your motes yet because you have half a minute or so to keep those motes active. If you delay banking motes as the second player, you can anticipate when the next wave of shielded mobs will spawn. When they’ve spawned, bank your motes and start breaking shields.
Tip:
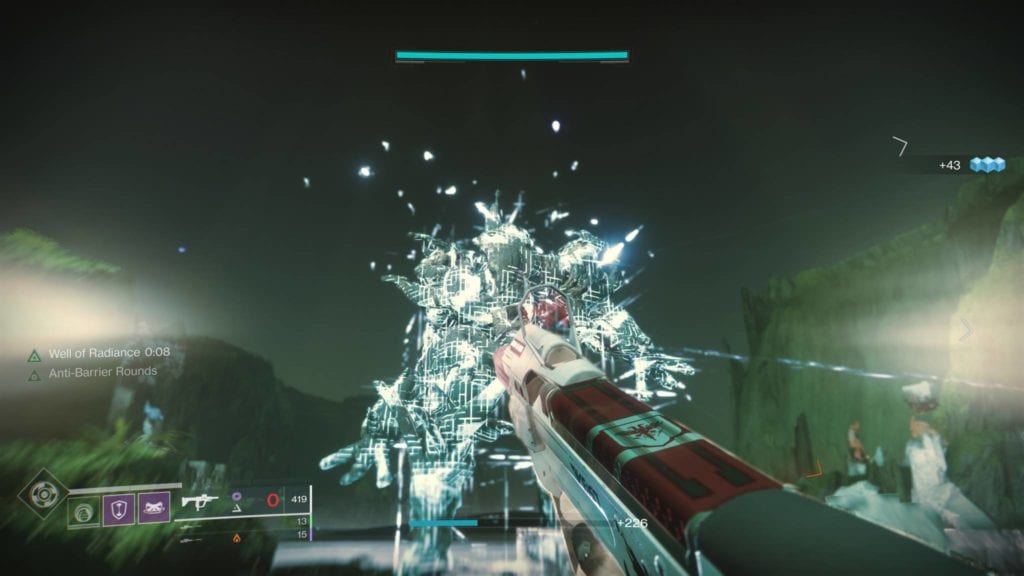
Since the second player for either team won’t be in a hurry to bank motes, they can just wait for the Vex cyclops that’ll spawn once they’re teleported. Snipe it and protect your teammates. In the screenshot below, you’ll see that I just got teleported back. My “portal partner” already jumped down to bank his motes. I stayed on the ledge to snipe the cyclops which would spawn at the left side (since we went through the left portal).
As for team 2, the moment team 1 is teleported back, it’s your job to book it towards the open portal. Go kill those mobs and grab those motes. Again, delay banking those motes so that the second player (this time from team 2) will have the Enlightened buff for the shielded goblins.
How do I know if a conflux has been fully charged?
Rather than looking all frayed as though it’s slowly dissipating, the conflux itself will have a keen shine and it will sparkle.
What happens if the Vex sacrifice themselves at one of the confluxes?
They’ll “eat” some of the motes that you already banked. This will lead to an additional portal run which might leave you pressed for time or cause a wipe. If four Vex goblins sacrifice themselves at the same portal, the team wipes as well.
Let’s say that the teams were sent through the left side portal first. Now, it’s time to do the same thing for the right side portal.
When you’ve cleared the Vex waves, team 1 should destroy the Sanctified Mind’s shoulder to open the right side portal. Both teams will repeat the same steps as above until you reach the beginning of the DPS phase. Oh, and make sure to watch out for that cyclops.
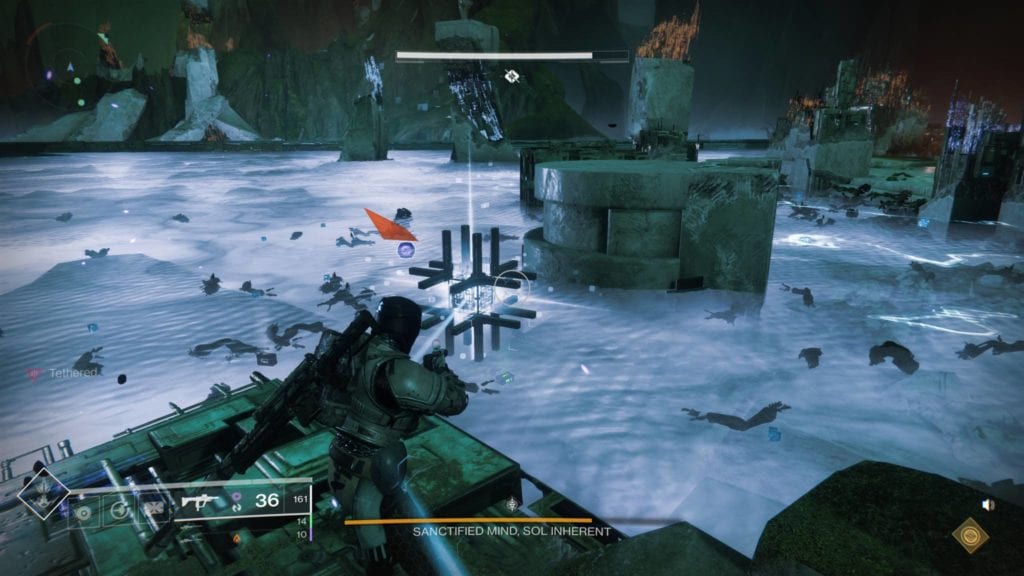
What do the Builders have to do?
Throughout the boss fight, the Sanctified Mind will destroy sections of the floor (you’ll notice this section surrounded by red sparks). Standing on a section just as it collapses will kill any player instantly. When that section’s gone, you’ll end up stepping on radiolaria fluid (Vex milk) that’ll slowly damage you while you’re in it. This is where builders come in.
The builder team can help support with add control, and maybe even take a few shots at the cyclopes or a portal that needs to be opened. However, they should also be on the lookout for collapsed sections because they’ll be able to rebuild these.
To do so, have one player shoot the tether box above the active conflux. The beam will connect to the nearest builder and then to that fella’s partner. The second builder has to move a bit closer to one of the tether boxes on the ground to connect the beam there. Further tether boxes may require a third player so just be sure to call it out if you need help.
Since being tethered will prevent you from using weapons or abilities, build only when there are a few seconds of downtime such as when mobs have been cleared.
Tip:
If you’ve lost a lot of sections already, try to bunny hop while moving through the area. If you barely dipped your feet in the Vex milk, you wouldn’t take damage.
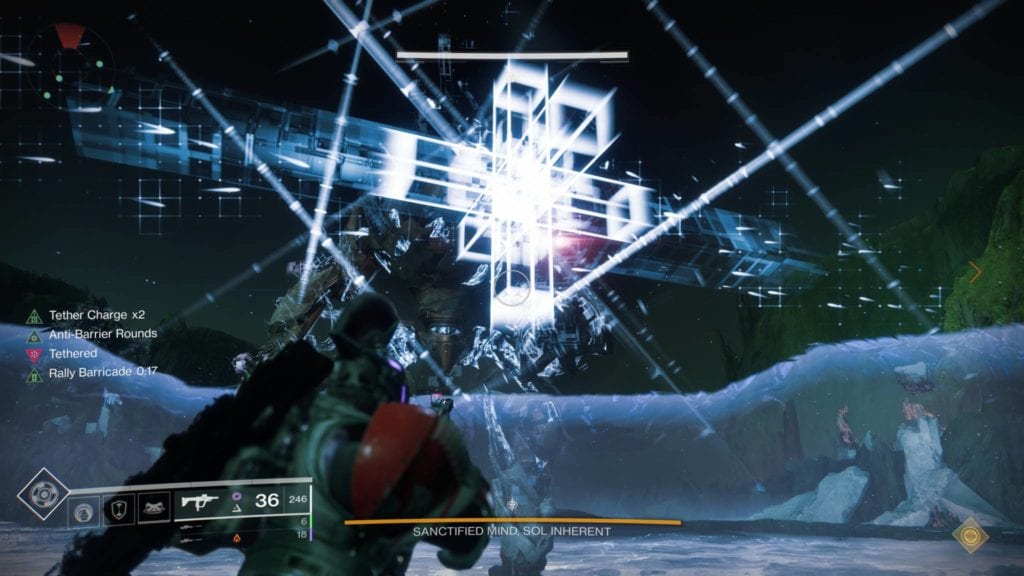
Sanctified Mind – Tether time and DPS phase
This is what you’ve been waiting for, actually being able to do damage to the boss. But, it won’t be quite straightforward.
When both the left and right side confluxes have been charged (or four sets of portals have been opened), the Sanctified Mind boss will summon additional Vex and another Angelic hydra. Take these out quickly.
At the same time, you’ll also see that it has a glowing cross symbol on its chest. The symbol will either be blue or red. You know which sides these colors correspond to because you’ve seen them throughout the fight. It’s now time to start the tether mechanic!
The tether mechanic is done by shooting the tether box above the active conflux. The beam will reach the nearest player, and then it can be connected to other players. You need three players to connect the beam from the conflux to the boss.
- Let’s say you got the light/blue symbol first. That’s for the left side to handle. You can get the team 1 players and one of the builders to do that.
- If you got the dark/red symbol first, then team 2 and the other builder can handle that.
- Whichever color the first symbol is, the second symbol (which follows a few seconds later) will be that of the opposite side.
Tip:
Alternatively, you can just have a Titan pop a barricade in front of the boss to mitigate damage. He’s the closest player to the boss and will be the final point of the tether. The other players will connect the beam from the conflux until it reaches the Titan
You can damage the Sanctified Mind even after breaking its cross symbol for the first time. Just be ready to start linking up for the second symbol that it’ll summon.
You want to drop your Well of Radiance near the center and the Titan bubble just behind that. Keep shooting its crit spot to do massive damage.
The Sanctified Mind will go back to its usual routine so you’ll have to repeat the same process as before. You have some extra breathing room here since the Sanctified Mind won’t summon mobs for roughly 20 seconds or so. This allows you to rebuild some extra platforms.
You’ve got four phases before the boss enrages and wipes you. Good luck, Guardian.
Loadout:
- The Recluse still remains the best energy weapon for this encounter due to the add-clearing capabilities. The Riskrunner isn’t too necessary especially if you’re already above the recommended power level for this fight.
- For your DPS weapons, you can go with Whisper or the Worm or Izanagi’s Burden.
- Alternatively, you can also pick the Wendigo GL-3. Also, the new kinetic sniper rifle, Tranquility, is really good. Wendigo already has auto-loading holster and, if your Tranquility also has the perk, then you can alternate between the two to pump out damage. These would be your alternatives assuming you don’t have the Whisper or Izanagi.
- The Divinity exotic trace rifle also applies a debuff to the boss, so you can use that once you’ve obtained it. You only need one teammate to use this to apply the debuff.
Classes:
Warlocks should use Well of Radiance. At least one Titan should have Weapons of Light. Hunters should run with Golden Gun with Celestial Nighthawk. If you only have one Hunter, it’s best that the player go with tether and Orpheus Rig to make extra orbs.
Divinity exotic quest
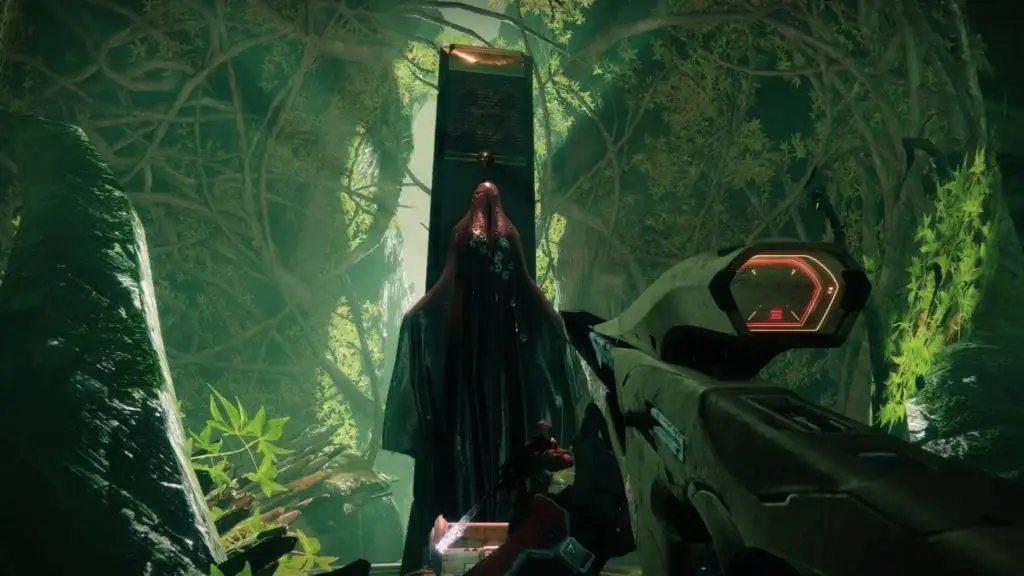
After you’ve taken out the Sanctified Mind, cross the radiolarian lake and jump down the opening. It should lead you inside a chamber with an omnious statue symbolizing the Darkness. The chest here is your Garden of Salvation raid loot, so congratulations. Also, if you were able to complete all six puzzles throughout the raid, a second chest will spawn containing your Divinity exotic trace rifle!
We hope this guide has helped you in completing Destiny 2: Shadowkeep‘s Garden of Salvation raid. It’s a little bit complicated, but you can definitely manage.
Destiny 2: Shadowkeep is available on Steam. For more information about everything you need to know, check out our guides and features hub.