You’ve made it. You’re at the final dungeon of Final Fantasy XIV: Endwalker (ignoring the post-MSQ ones, anyway). Naturally, this means there are big spoilers ahead in terms of screenshots and bosses, so if you haven’t yet unlocked the dungeon, then this Endwalker — The Dead Ends guide is not for you.
Turn away, ye who fear spoilers.
Alright, I’m assuming everyone present is queueing for the dungeon now. Much like Amaurot in Shadowbringers, this is a pretty rough dungeon. Mobs hit hard, random AoEs go off in trash pulls, and some of the bosses can be… problematic. But it’s a hell of a cool dungeon. Here’s how to make it through The Dead Ends in Final Fantasy XIV: Endwalker.
Endwalker — The Dead Ends guide
Caustic Grebuloff
Attacks
Blowing Wind — A message on screen will say “A southward wind begins to blow,” or something similar, with a visual wind cue. Pay attention to the direction.
Miasmata — Unavoidable AoE. After that, plague clouds will spawn, each of which will explode in a circle AoE. After the initial blast they will all move in the direction the wind was blowing, and explode over and over on their way. Stand in the direction the wind is blowing from to avoid all subsequent AoEs (if the wind is blowing southward, stand at the north end).
Cough Up — AoEs are placed at the feet of each party member, multiple times. Split up and try not to run into each other. As the AoEs finish, the party will be affected by…
Craven Companionship — Be near other party members when the Craven Companionship debuff ends.
Wave of Nausea — Donut-shaped AoE. Stand in Caustic Grebuloff’s hitbox to avoid.
Pox Flail — Tankbuster.
Blighted Water — Stack marker on one party member.
Befoulment — Targeted AoEs on each party member, so split up.
Strategy
Blowing Wind/Miasmata isn’t difficult to deal with — just stand in a place where the moving AoEs won’t hit you. Craven Companionship might cause a problem for people who haven’t seen it before and don’t read the debuff, because it looks a bit like a targeted AoE when you actually want to be right next to your party.
The potential problem here is when Caustic Grebuloff starts chaining things together. By the end of the fight you can expect Miasmata to be combined with Wave of Nausea, which lowers your safe spots and requires a bit of quick thinking. But this fight still isn’t really too tricky. And don’t worry, The Dead Ends gets a bit more interesting from here on out.
Peacekeeper
Attacks
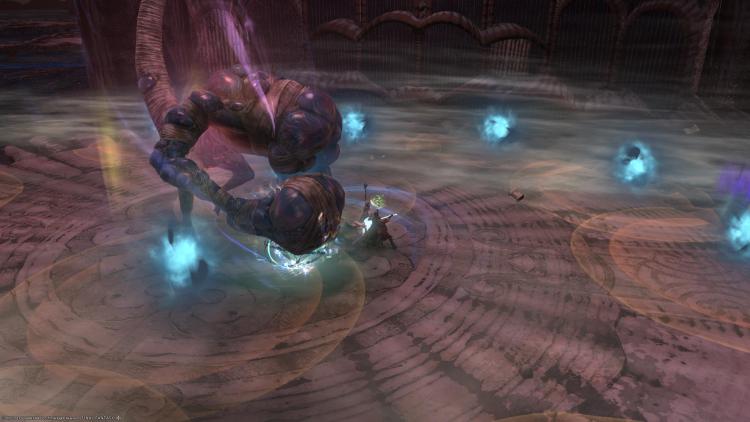
Decimation — Unavoidable AoE which also sets up a ring of fire around the arena.
Electromagnetic Repellent — Point-blank AoE on the boss which sets up a ring of electricity around the boss.
Disengage Hatch — The Peacekeeper sets up a ring of little drones around it (or recalls them after using them), which is followed by…
Order to Fire — The drones fire out line AoEs. Stand in between them to avoid, but away from your team because of…
Infantry Deterrent — Targeted AoE on each party member.
No Future — AoEs all around the arena. The usual rules of “wait for them to go off, and then move into the safe spots” apply.
Peacefire — Circle AoEs around the outside of the arena, which will rotate. Treat this as a standard rotating boss attack: move to avoid them as they go off.
Eclipsing Exhaust — Knockback from the boss in the center, plus AoEs around the outside. Stand close to the boss, in a position where you won’t be knocked back into the AoEs or the ring of fire.
Elimination — Line AoE tankbuster. Do not stand near the tank.
Strategy
Obviously, since we’re going through the end of worlds (well, the dead ends) we have to fight bloody Skynet. I’m going to be honest: I kinda hate this boss. As with most it’s not too bad when you break it down, but it’s a lot of movement and thus a lot of occasions for people to get hit by things.
The best advice is the obvious: “run away from the AoEs.” The other best advice is to stay away from your teammates because of Infantry Deterrent (the targeted AoEs). This is often used alongside things like No Future, and there will usually be four safe spots. Avoiding No Future takes priority, but if you can do this while not being your team then all the better.
Ra-La
Attacks
Warm Glow — Unavoidable AoE.
Pity — Tankbuster.
Prance — Ra-La leaps around the arena, leaving behind gigantic AoEs where it steps. Stand on the last place it steps (out of range of the other AoEs) and then move into a safe spot left by the other AoEs as soon as possible. There’s a very tight window on this.
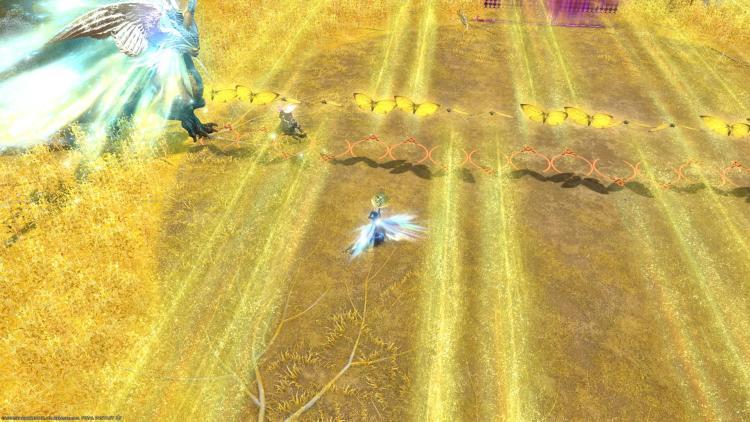
Lifesbreath — Ra-La leaps to one side of the arena and charges up a line AoE through the center. This leaves behind golden butterflies facing different sides of the arena: make sure you’re not standing the way they’re facing, as they’ll fire out line AoEs.
Benevolence — Stack AoE.
Loving Embrace — One of Ra-La’s wings will raise up and glow. It will then hit that side of the arena with an AoE. Stand on the side of the non-glowing wing to avoid.
Still Embrace — Targeted AoEs. Split from the party.
Strategy
After Skynet Peacekeeper, I actually found this boss a bit of a breather. Firstly, it’s just so pleasant. Creepy, but pleasant.
Be careful with Prance: the AoEs go off a couple of seconds after each other, which doesn’t give you long to move out of the last one into a safe spot. Likewise, it can be somewhat easy to miss the Loving Embrace visual cue, especially when it combines that with Lifesbreath to make large parts of the arena unsafe. Nonetheless, this isn’t a particularly tricky boss: it hits hard but there’s a lot less movement required than with Peacekeeper. If you made it through that, you shouldn’t have issues here.
With that, you’ve made it through our The Dead Ends guide and you’re ready to take on the final Trial of Endwalker, and technically the final boss of the plot arc that’s been running since Final Fantasy XIV 1.0. Check out our guide hub for more.

