Epic Games has introduced a new in-game currency for Fortnite Chapter 2 Season 5 which allows players to purchase and upgrade loot via NPC vendors. Therefore, it’s important for players to know how to gain as much of the new in-game currency as possible. There are many ways to earn golden bars, but safes offer the highest single yields of anything so far. Players that can manage to find a safe will be rewarded with 150 golden bars. In this guide, we’ll cover all six of the safe spawn locations in Fortnite that you can find scattered throughout the central region of the map.
The first thing to know about these safes is that the spawn rates are very low. Seeing as they are never guaranteed, it’s best to just look for them as you go about normal looting. However, the spawn locations are often very convenient, so knowing where to check is worthwhile.
If you find these fun to look for, you can find out where the safes spawn at all of the named locations on the Fortnite. Just head over to our Chapter 2 Season 5 guides and features hub and scroll down to the safe locations section. There are also plenty of other useful guides to help you along like walkthroughs on hidden secrets, detailed explanations on new gameplay mechanics like Quests and Bounties, and weekly challenges in Fortnite.

Every safe spawn location
There’s a total of six safe spawn locations spread throughout the desert in Fortnite. As these are all quite far apart, you’re not likely going to check all of these in single matches like we suggest in our other guides. It’s still good to know these though, because you’ll constantly traverse the center of the map. Many of these safe spawns are near NPCs too, so you’ll have plenty of opportunities to check. We will work from north to south in revealing each of the safe spawn locations in this guide.
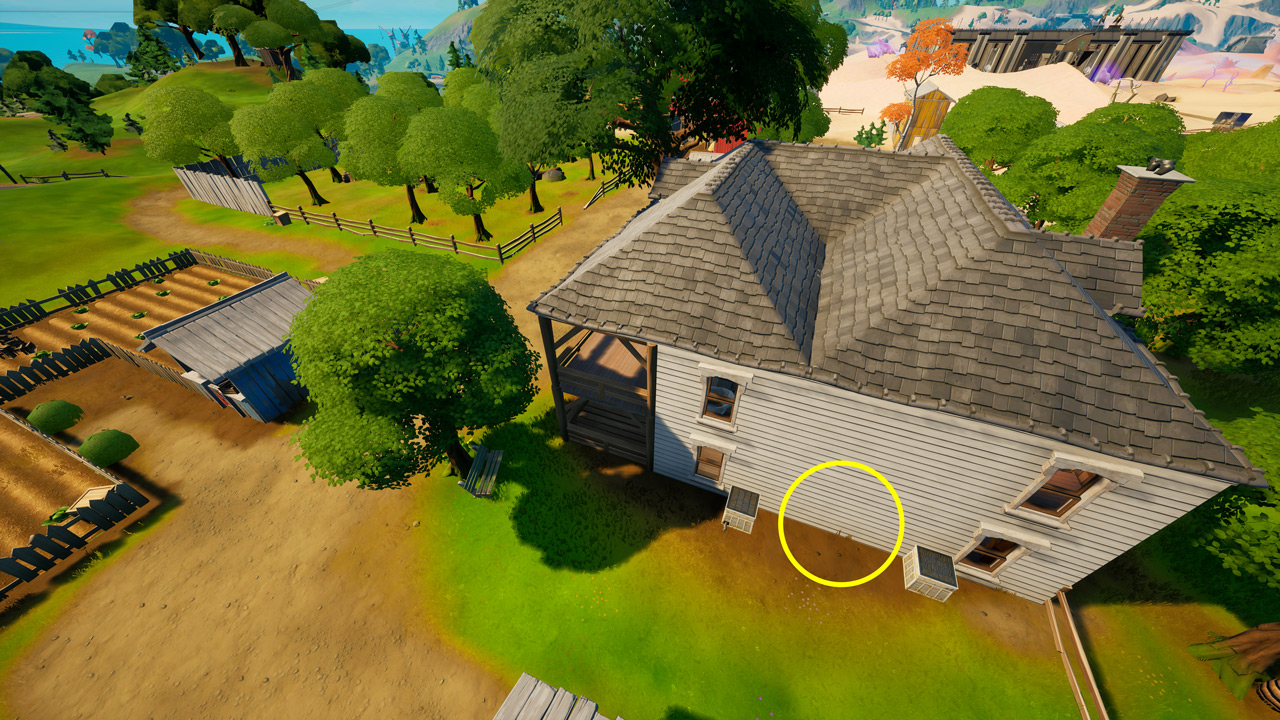
The Apple Orchard is technically not in the desert but this is where we’re starting. It contains a total of two safe spawns. The first one is located at the farmhouse on the north end of the location. If you go into the ground floor of the farmhouse and head to the back of the home, you will find a staircase. Just look underneath the staircase for a chance to find a safe. Alternately, you can break the wall from the back side of the house to access it. Just break the wall between the two metal air condensers.
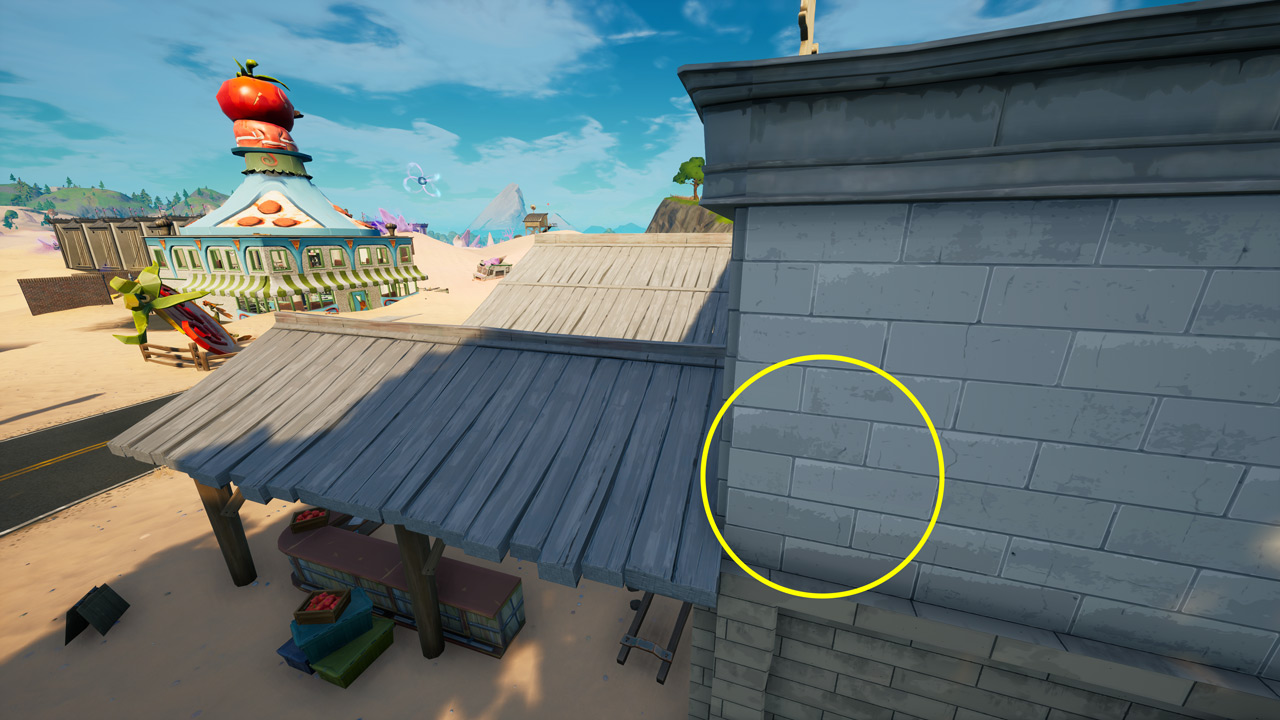
For the second safe spawn, you’ll need to travel south to the market store. It’s covered in sand this season, but you’ll find it just north of the new pizzeria. Just like the previous location, it’s easy to access this spawn from the outside. Break the second-floor wall on the east side of the building and you can find a safe spawn in a storage closet.
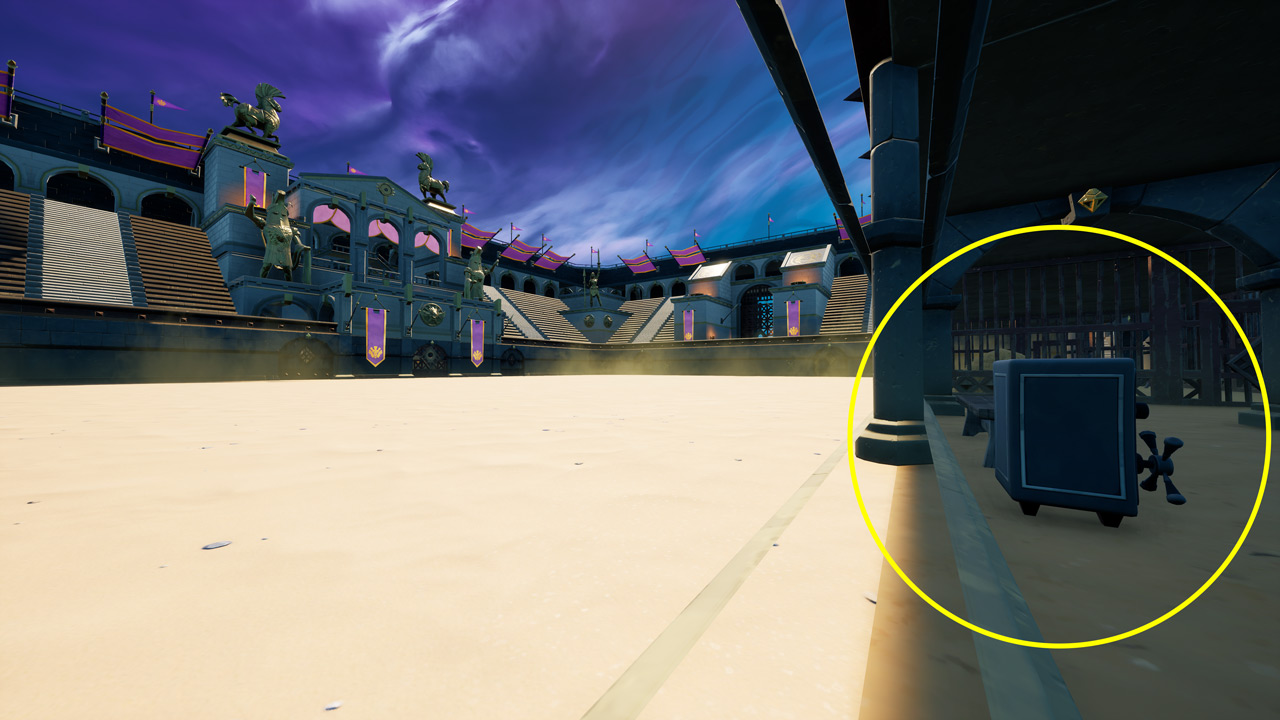
Next we’re off to Colossal Coliseum to check for the third safe spawn. This one is easy to access from the center gladiator pit, and it’s located in a holding area on the ground floor. Jump into the ring and break the east wall on the south side to open up the room. You can find the safe tucked up in the corner there.
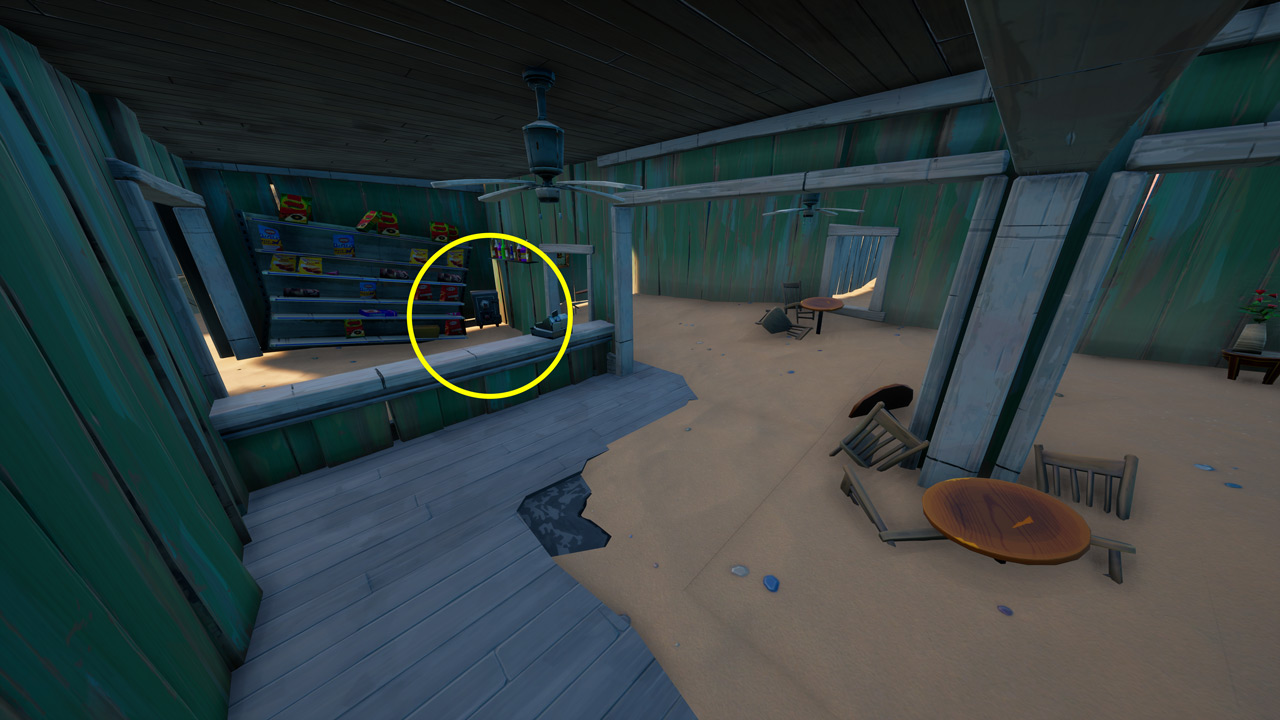
From there you can travel directly west to the old Risky Reels location. You should remember the main building on the east end of the location. There’s a small restaurant in the building on the ground floor. The safe spawn is in the corner behind the counter.
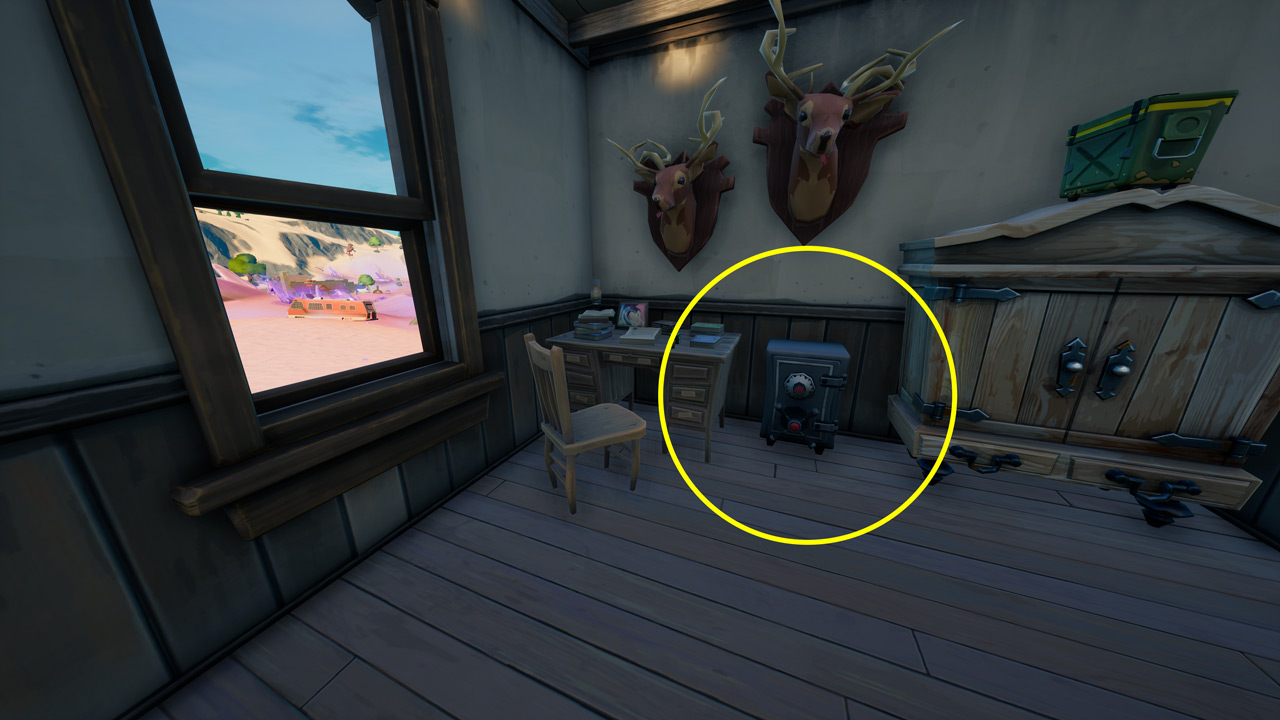
Now it’s back east again to the Sherriff’s Office. Technically, you could go here before Risky, but we’re going southwards in the guide for consistency. If you access the office from the east entrance, you’ll step right into the Deadfire NPC’s office. The safe spawns right there between some furniture.
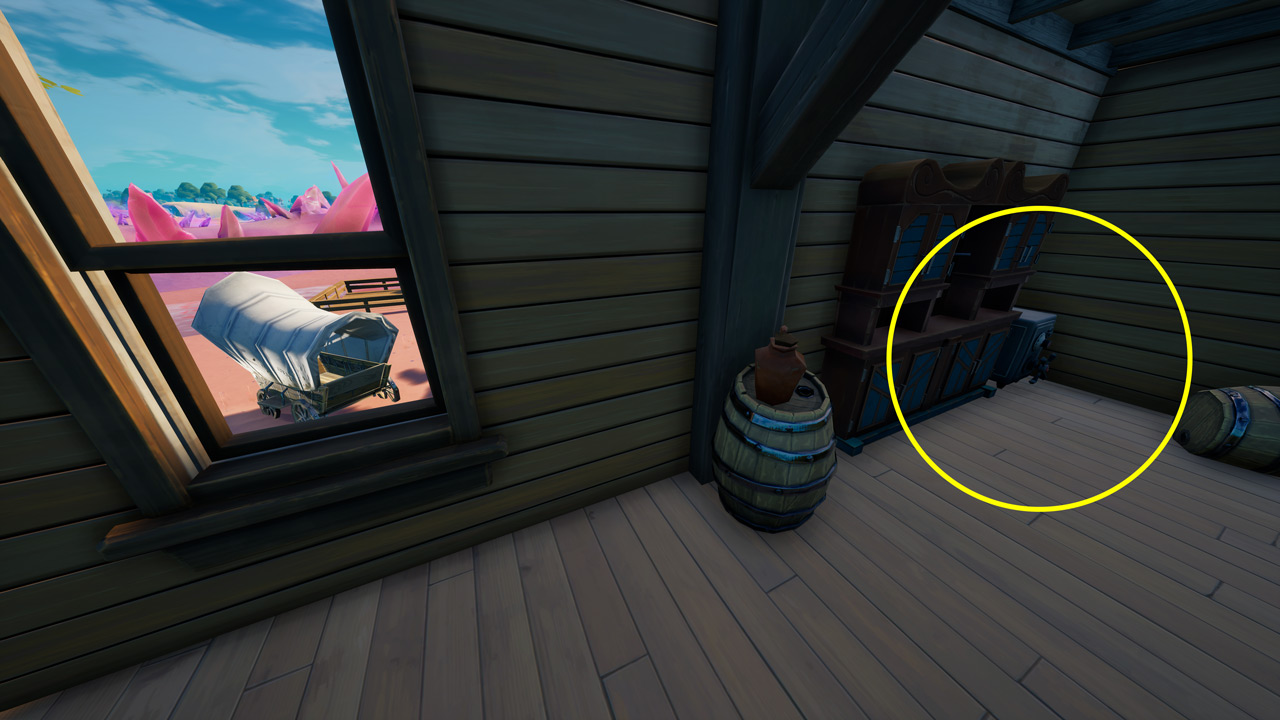
Now the moment I’ve been waiting for. “Head on down to the Butter Barn!” That’s literally what plays on the speakers at this location. The Butter Barn is south and slightly east of the Zero Point. A small river runs just north of it. You will find the safe spawn in the corner of the upstairs office on the west side of the building. Check the picture for a better point of reference.