Genshin Impact Labyrinth Warriors event guide – Basic mechanics in The Ominous Demesne
Let’s discuss the basics of the Labyrinth Warriors event and The Ominous Demesne in Genshin Impact.
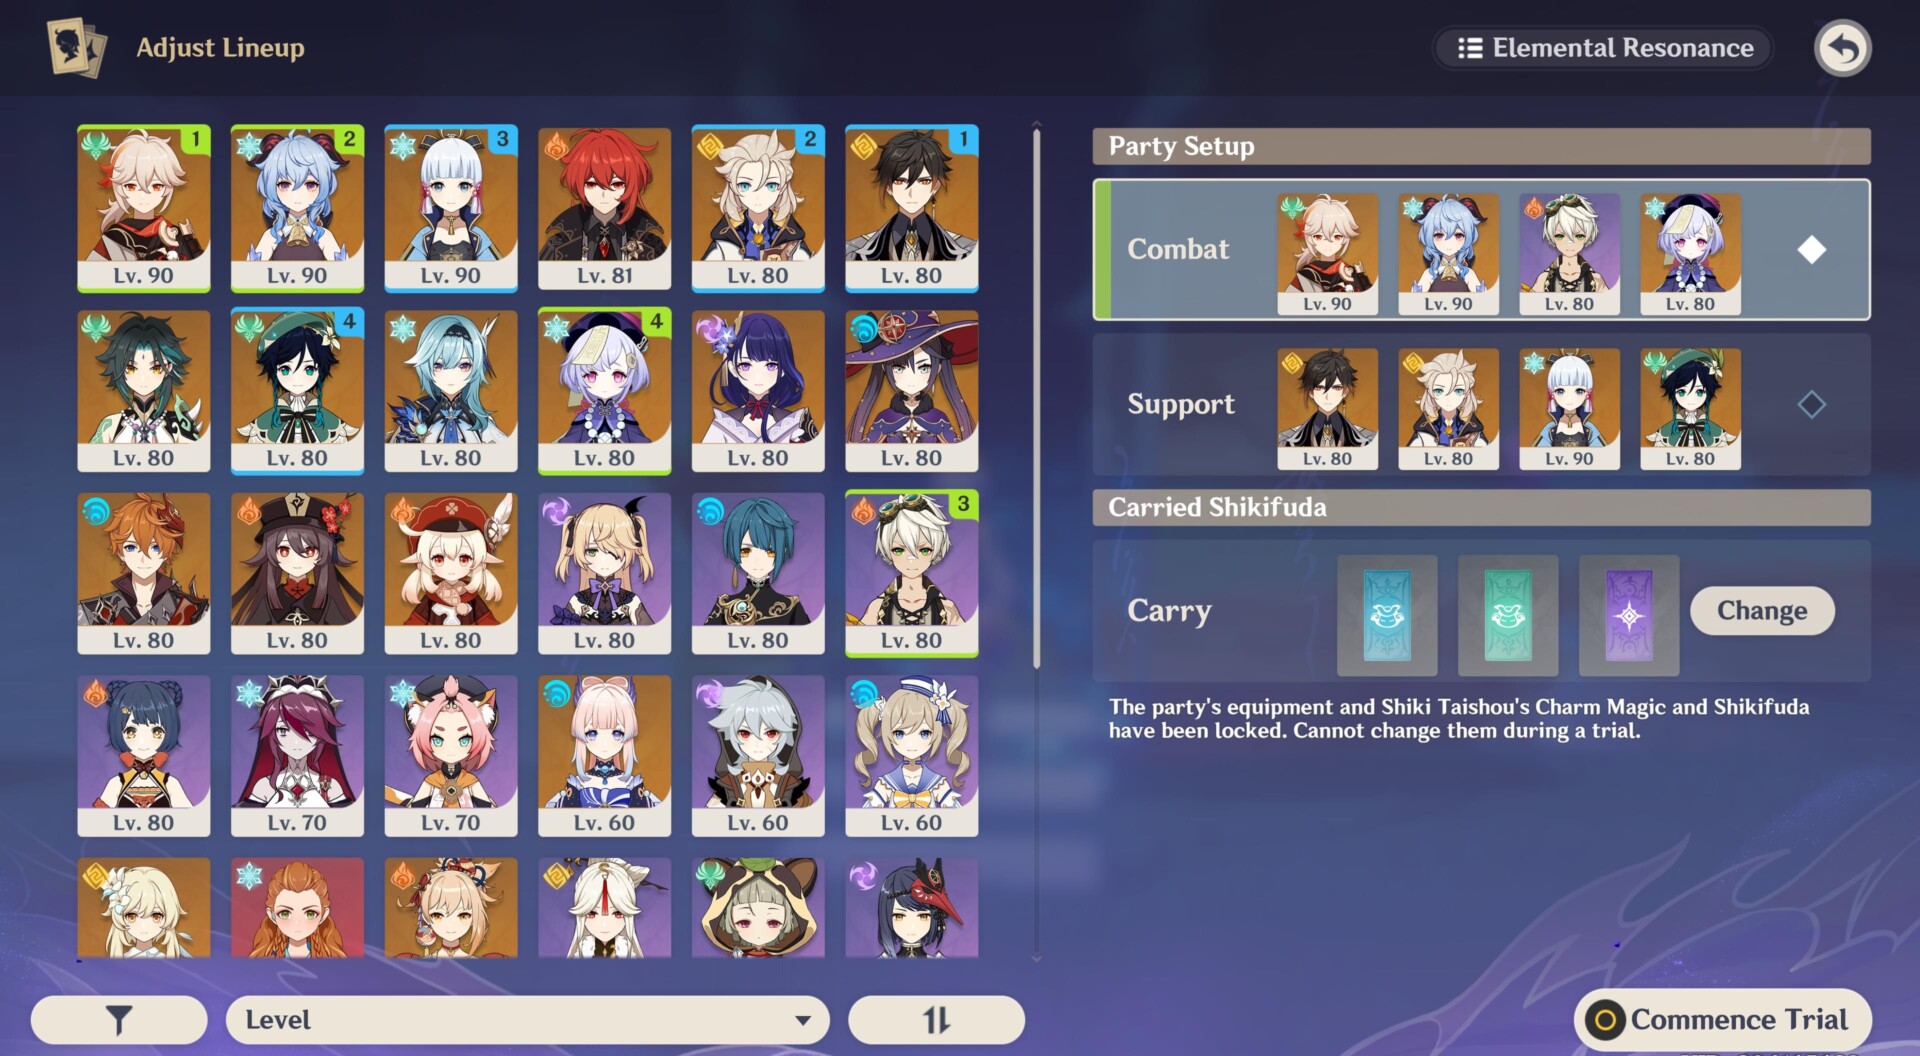
Combat and support teams
Go ahead and choose the characters who will be part of your teams:
- Combat team – You’ll use them predominantly in the domain.
- Support team – They are simply substitutes. The four that you pick here are allowed to replace those in the combat team if you interact with a Curative Emplacement (more on this later).
Note: Because the Labyrinth Warriors domain tends to be a lengthy slog, you’re better off bringing healers like Barbara or Qiqi. You can’t eat food, but you can use their skills to heal your characters as you explore the dungeon’s rooms.
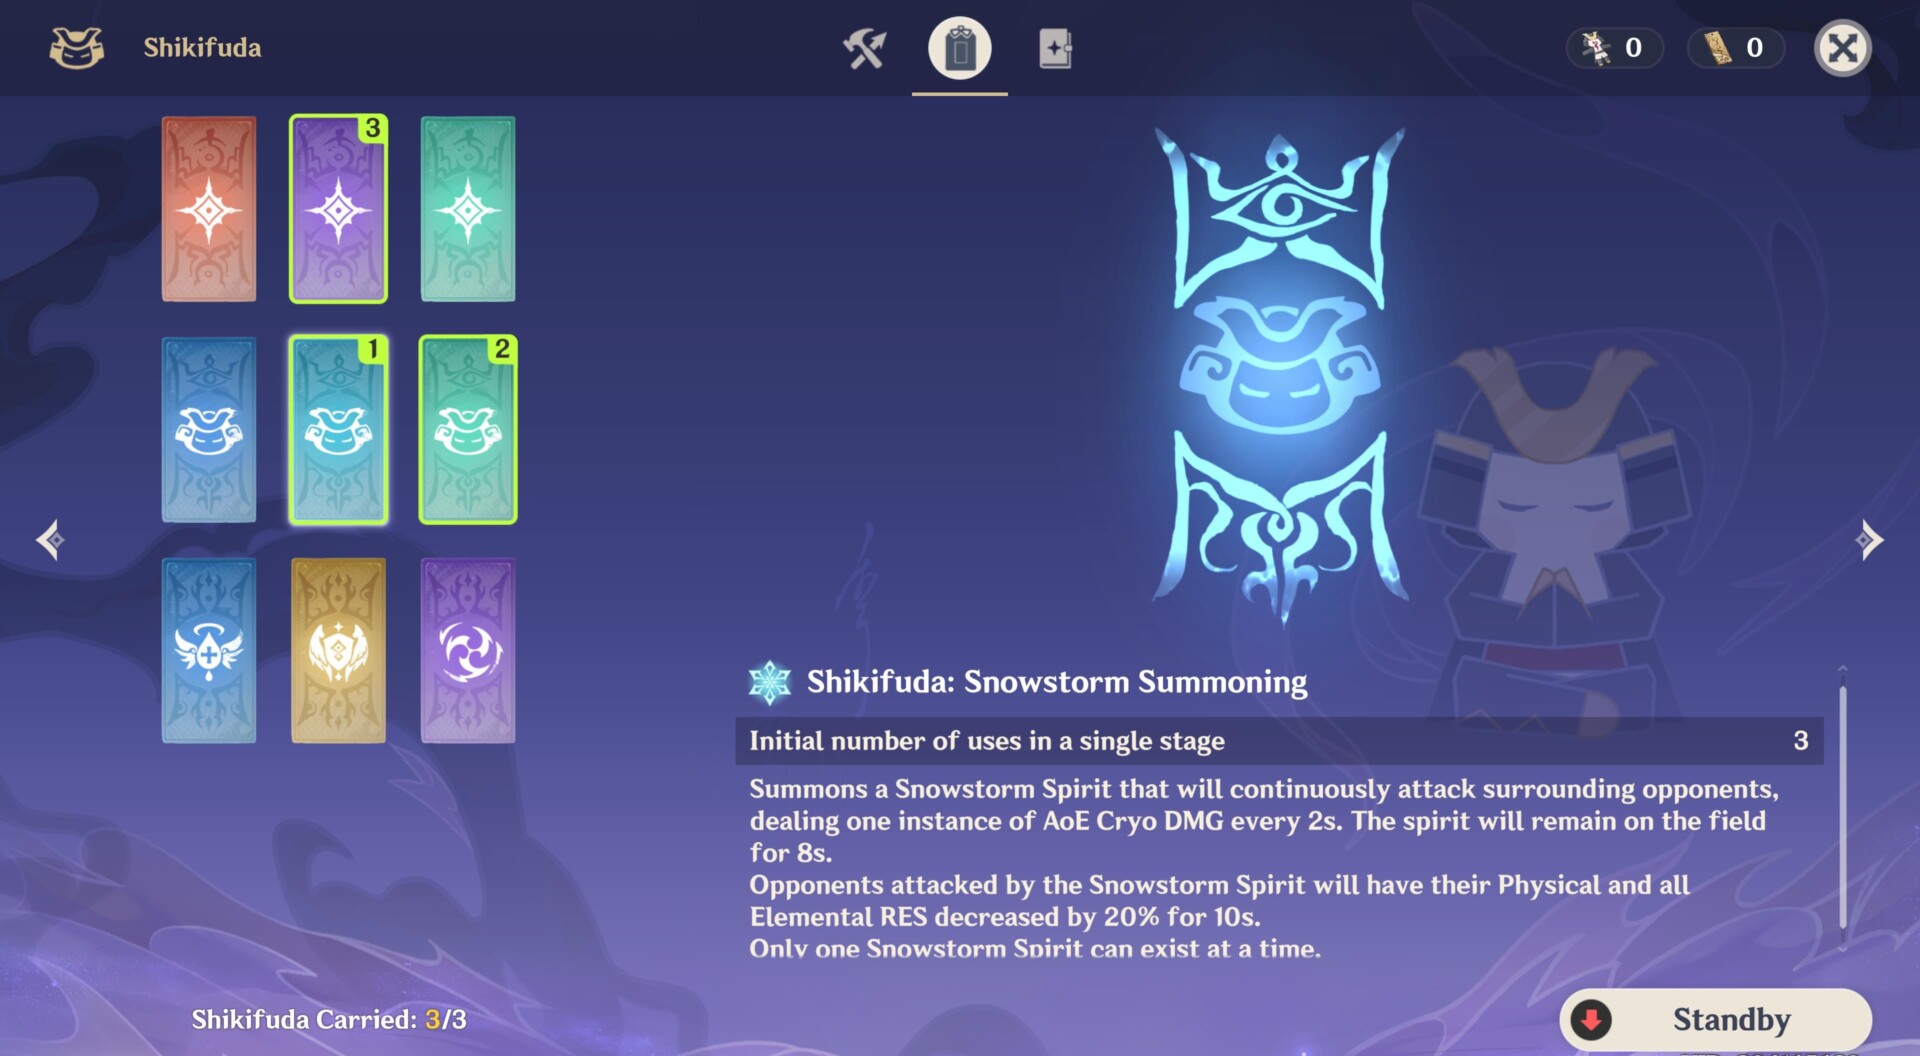
Shikifuda powers
You may choose up to three Shikifuda powers. These are abilities or procs with three charges, and they can be activated when you press the “T” key. Here are some recommendations:
- Flashing Lightning – Creates a lightning barrier that reduces elemental skill and elemental burst cooldown by 10%. All party members will regenerate four energy every three seconds.
- Strixwind Summoning – Creates a whirlwind that pulls enemies. If the duration ends or if it’s destroyed, the Strixwind Spirit causes an Anemo explosion.
- Snowstorm Summoning – Continuously deals AoE Cryo damage; also reduces the physical and elemental resistances of affected opponents by 10%.
- Seal of Fierce Flame – Creates a flame barrier that grants +60% increased damage dealt and +20% increased damage taken.
Dungeon layout and markers/symbols
You can open the dungeon’s map by pressing the “U” key. At the start, the icons in each room won’t be revealed until you enter that area. Here are a few things you want to remember:
- Arrayed Emplacement/Ferocious Emplacement (red sword) – These are regular encounters. You can choose the “Serious” or “Dire” option (the latter gives better charm/buff rewards).
- Charm Emplacement (question mark) – You can interact with these to choose charms/buffs as well (you won’t fight hostiles).
- Charms – Charms are basically buffs that appear as modifiers/cards when you complete encounters. Some will boost your elemental or normal/charged damage capabilities. Others may increase or refresh the number of times that you can use Shikifuda Powers. Likewise, there are those that affect the environment, such as nullifying any damage you take from explosive barrels.

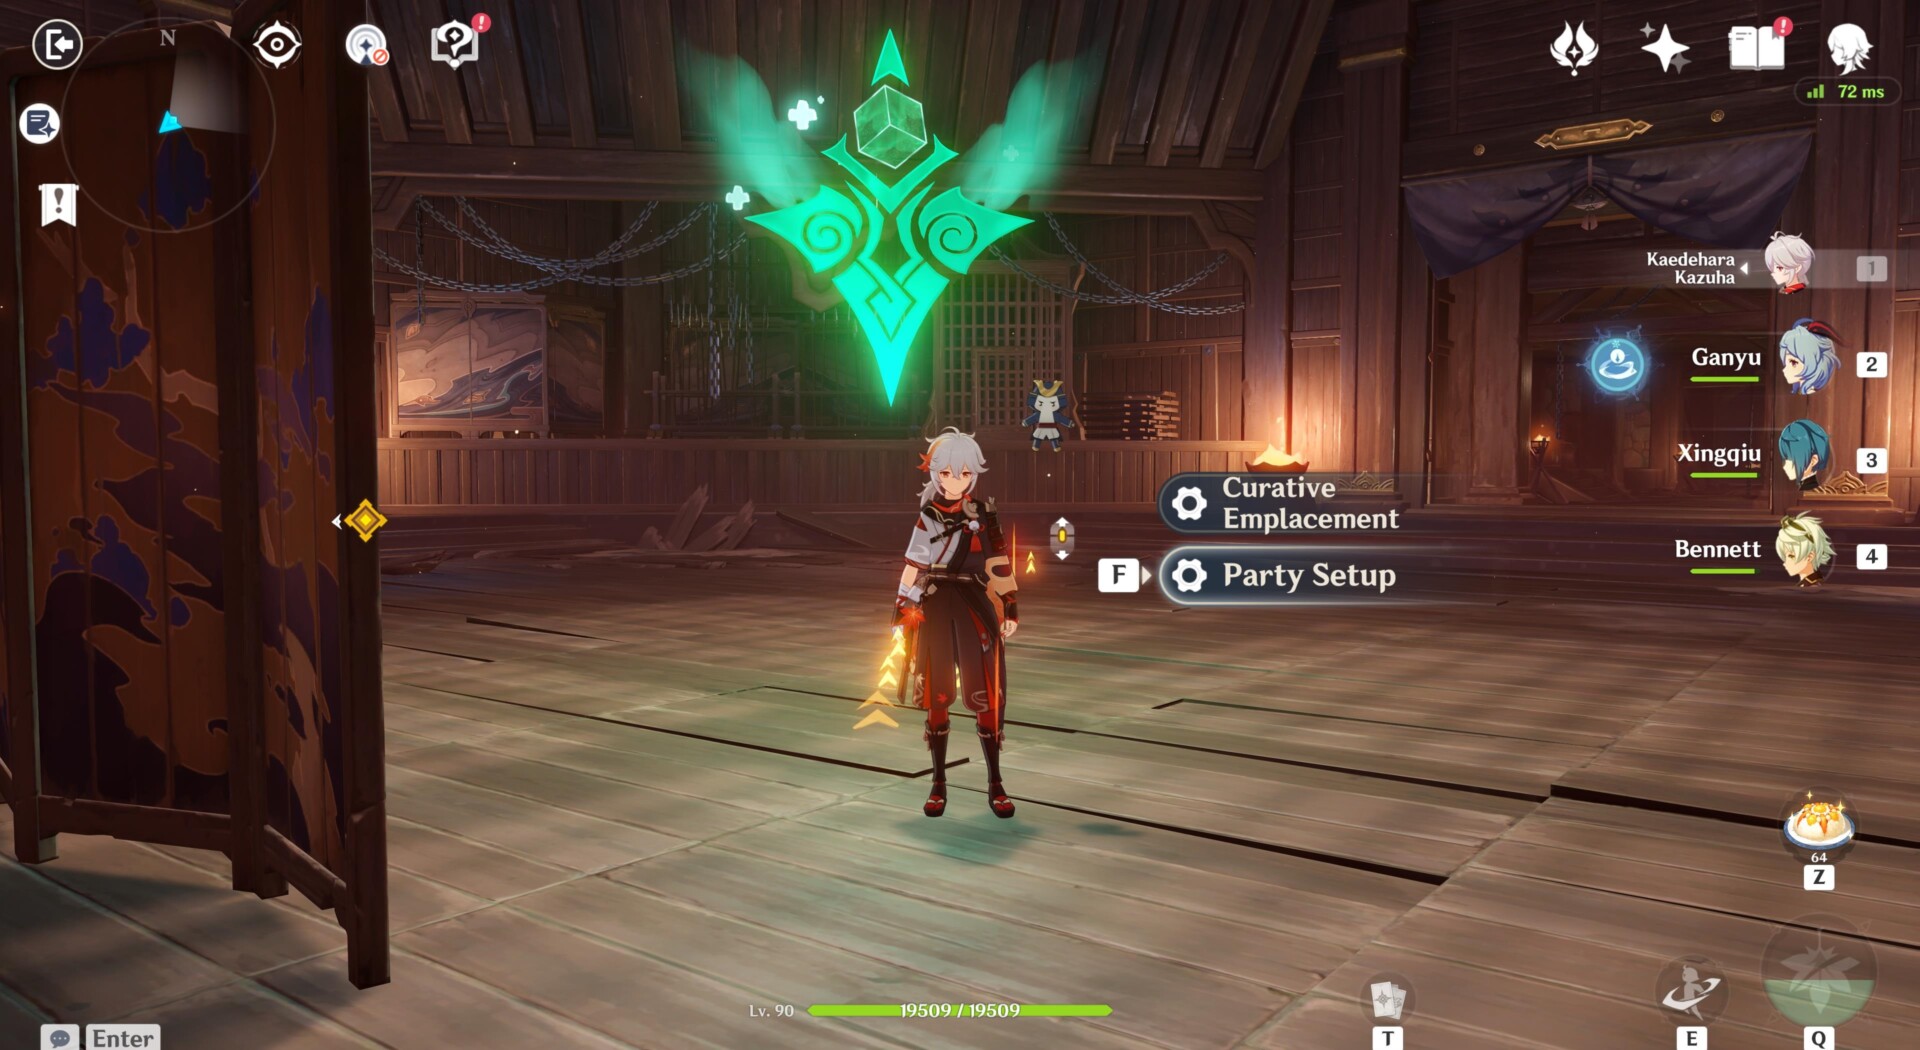
- Curative Emplacement (green wings) – This has two functions:
- Fully heal your party.
- Change your party’s setup (in case you want to replace someone with a support/substitute).
- Cursed Seal (black smoke) – From time to time, you might see black smoke on the floor. If you step on this, a character would be afflicted with a curse. For example, Corrosion will prevent a character from getting healed or revived while you’re on the current floor.
- Chests and other objects – You’ll find several chests here, and rooms with Exquisite Chests even grant decent loot like Hero’s Wit booklets. In various nooks and crannies, you might also see the investigate button. This allows you to pick up different kinds of stuff, including Damage Replicas (more on this in the next section of our guide).
Dungeon enemies and bosses
The Labyrinth Warriors event in Genshin Impact has lots of enemies on each dungeon floor. As mentioned earlier, these encounters are triggered if you interact with the red sword markers. These are also seen when you first click on the domain/trial name to see the mobs that are present.
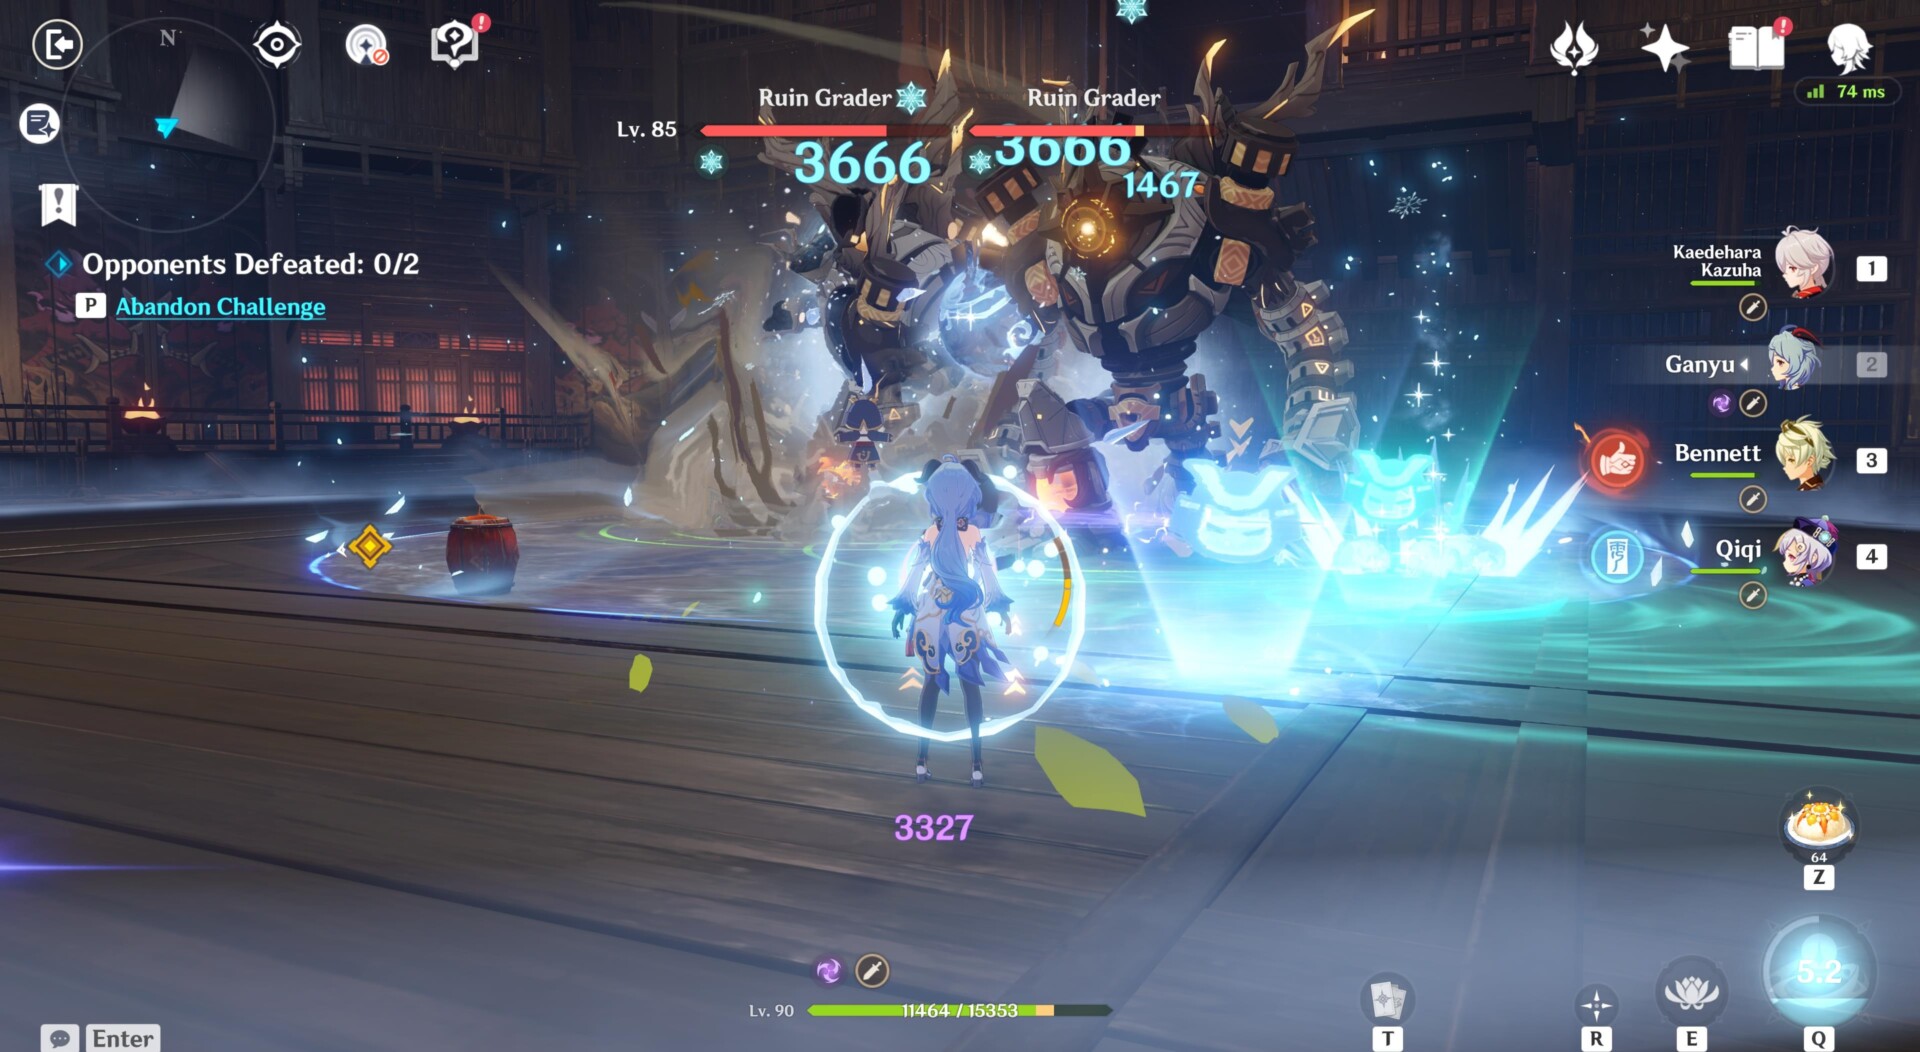
As for the boss, The Ominous Demesne has you facing off against Ruin Graders. As you go through the hallways and rooms, you’ll eventually reach the area where you can do battle with them:
- Floor 1 – Ruin Cruiser mobs act as attendants that buff the Ruin Grader’s resistances. They also provide healing.
- Floor 2 – You’ll fight a couple of Ruin Graders simultaneously. They can heal a lot within 10 seconds if their HP falls below 30%.
After clearing the first floor in The Ominous Demesne, a portal will appear. If you go through it, you’ll do the same process for the second floor (i.e., check rooms, open chests, battle mobs, and fight the boss). Once you clear the second floor, the portal will take you back outside. Anyway, let’s go to the next part of our Genshin Impact Labyrinth Warriors guide to discuss the challenge tasks and rewards.