
A couple of early-game missions in Icarus — Livewire Terrain Scan and Kill List Extermination — take place in temperate regions of the planet. Eventually, though, you’ll have to venture forth into a frozen landscape. Here’s our Icarus guide to help you with the Icestorm Expedition Prospect mission, including the Device Component locations and Disrupter activation.
Note: For more information, check out our Icarus guides and features hub.
Icarus: Icestorm Expedition Prospect Mission Guide – Device Component Locations and Disrupter Activation
Before you start the Icestorm Expedition mission in Icarus, make sure that you’ve earned more XP to reach level 20. Ideally, you’ll want to do this once you’re able to craft the Fur Armor Set. You can also learn a few other tips in our Arctic Biome survival guide.
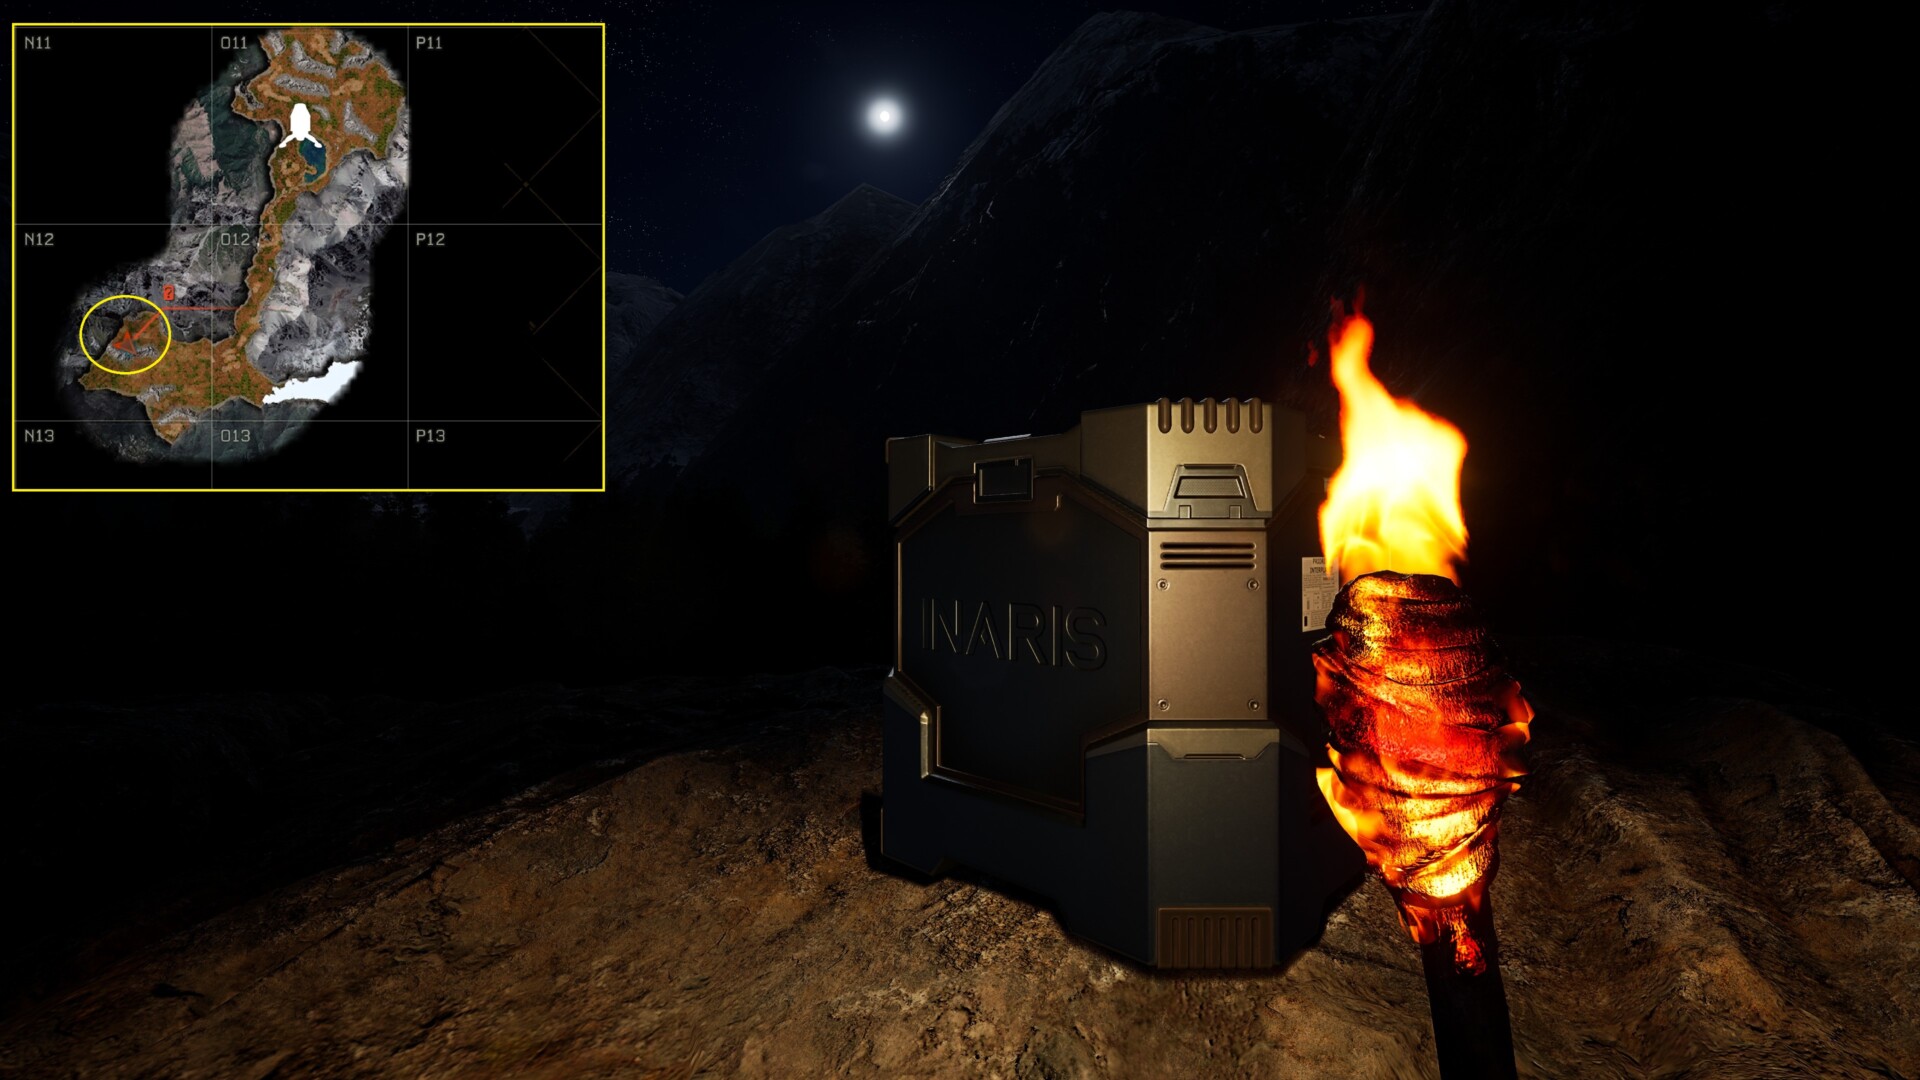
Device Component Location #1
Our initial goal in the Icestorm Expedition mission in Icarus is to find the three Device Components. The first one is southwest of the dropship (N12). You’ll pass through a ravine filled with trees, and you’ll see a ridge off to the side. Open the large container and pick up the quest item that’s inside.
The Southern Glacier
After getting the first component, make sure you’re fully prepared. Although you’re currently in a temperate region, you’ll soon head to the frozen wasteland and ravine of the Southern Glacier. Try to bring extra food and oxygen since they’ll be harder to replenish in this area. However, you can melt ice to turn it into water. Likewise, you can use your pickaxe to hollow out large rock formations, acting as makeshift shelters. If you bring a bedroll, you could even turn it into a mobile spawn point in case your character dies.
Lastly, watch out for polar bears. They’re extremely dangerous and, even though the Icestorm Expedition mission in Icarus occurs early in the game, these enemies are actually 30 to 40 levels higher. If you’ve unlocked the Solo tree talent called Very, Very Quiet, you can try to sneak past these beasts.

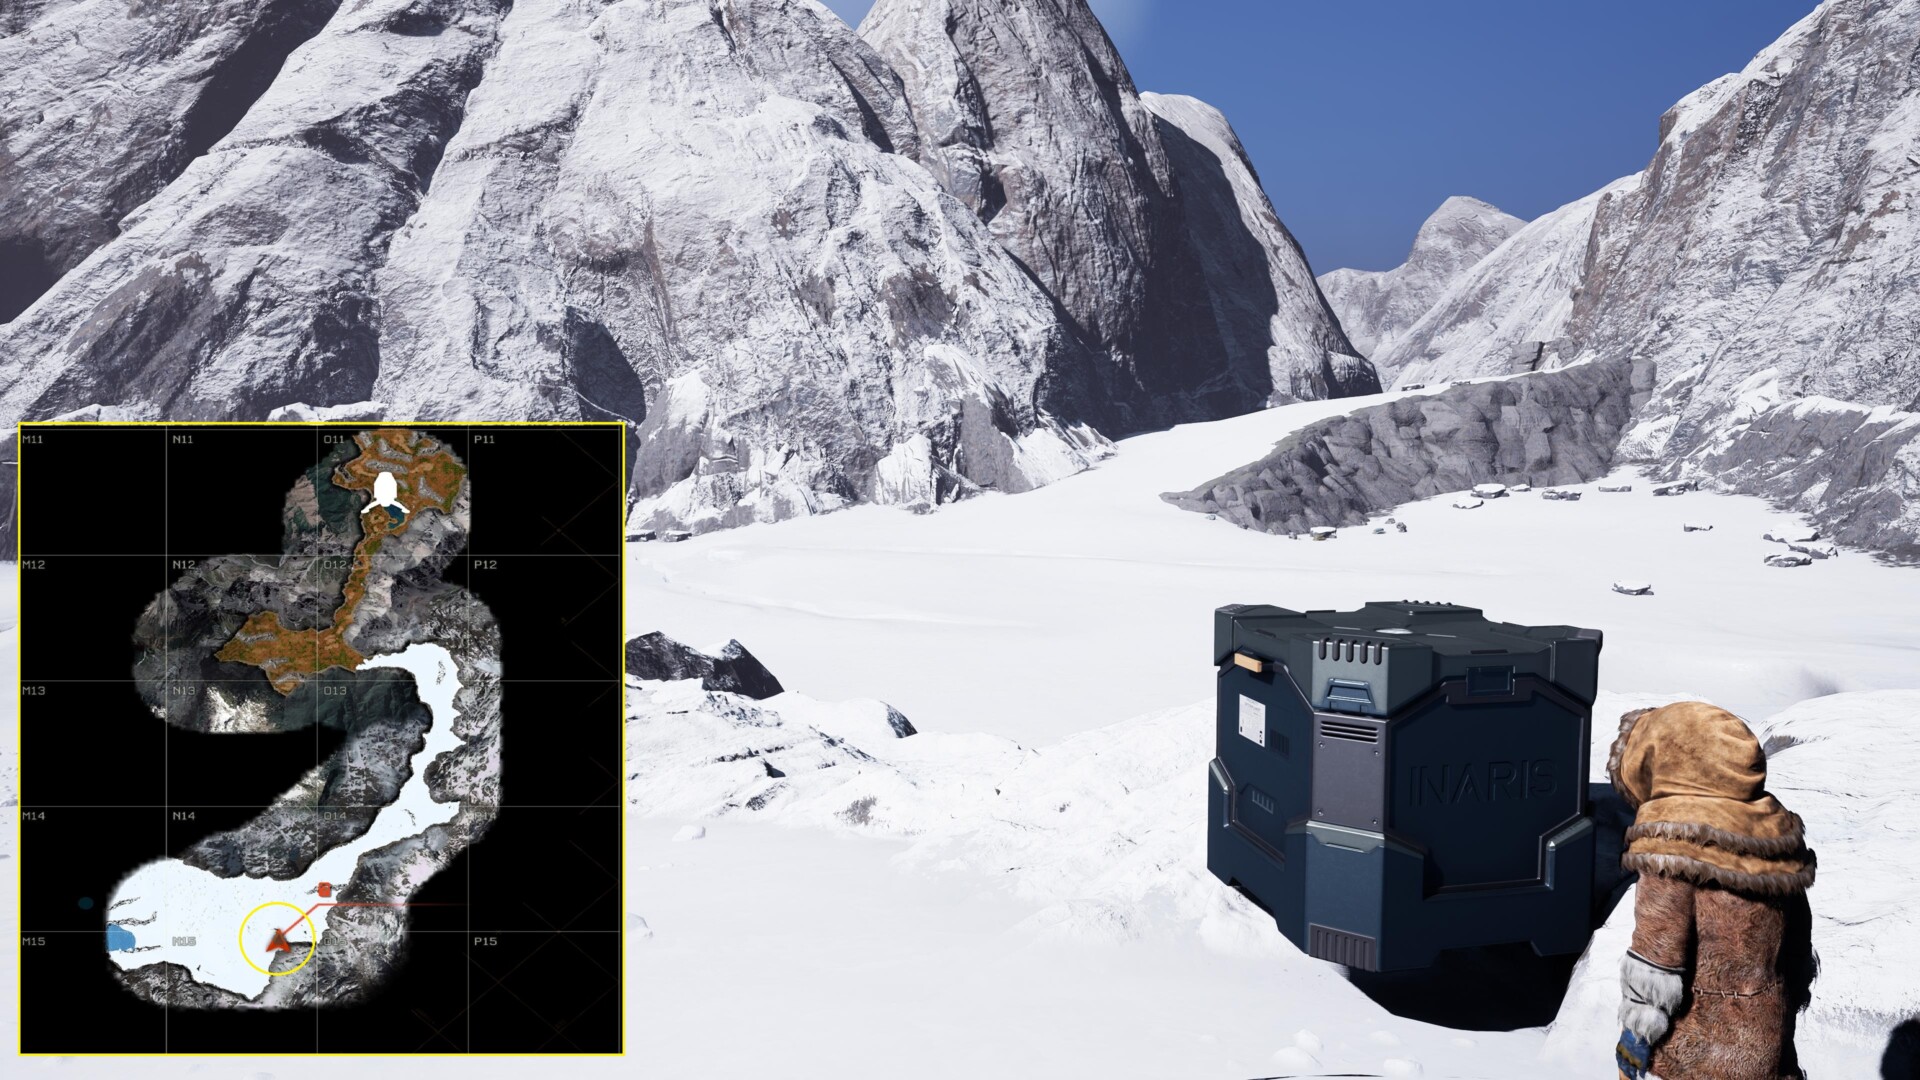
Device Component Location #2
The second Device Component can be found on a ridge to your left upon exiting the ravine (N14/15).
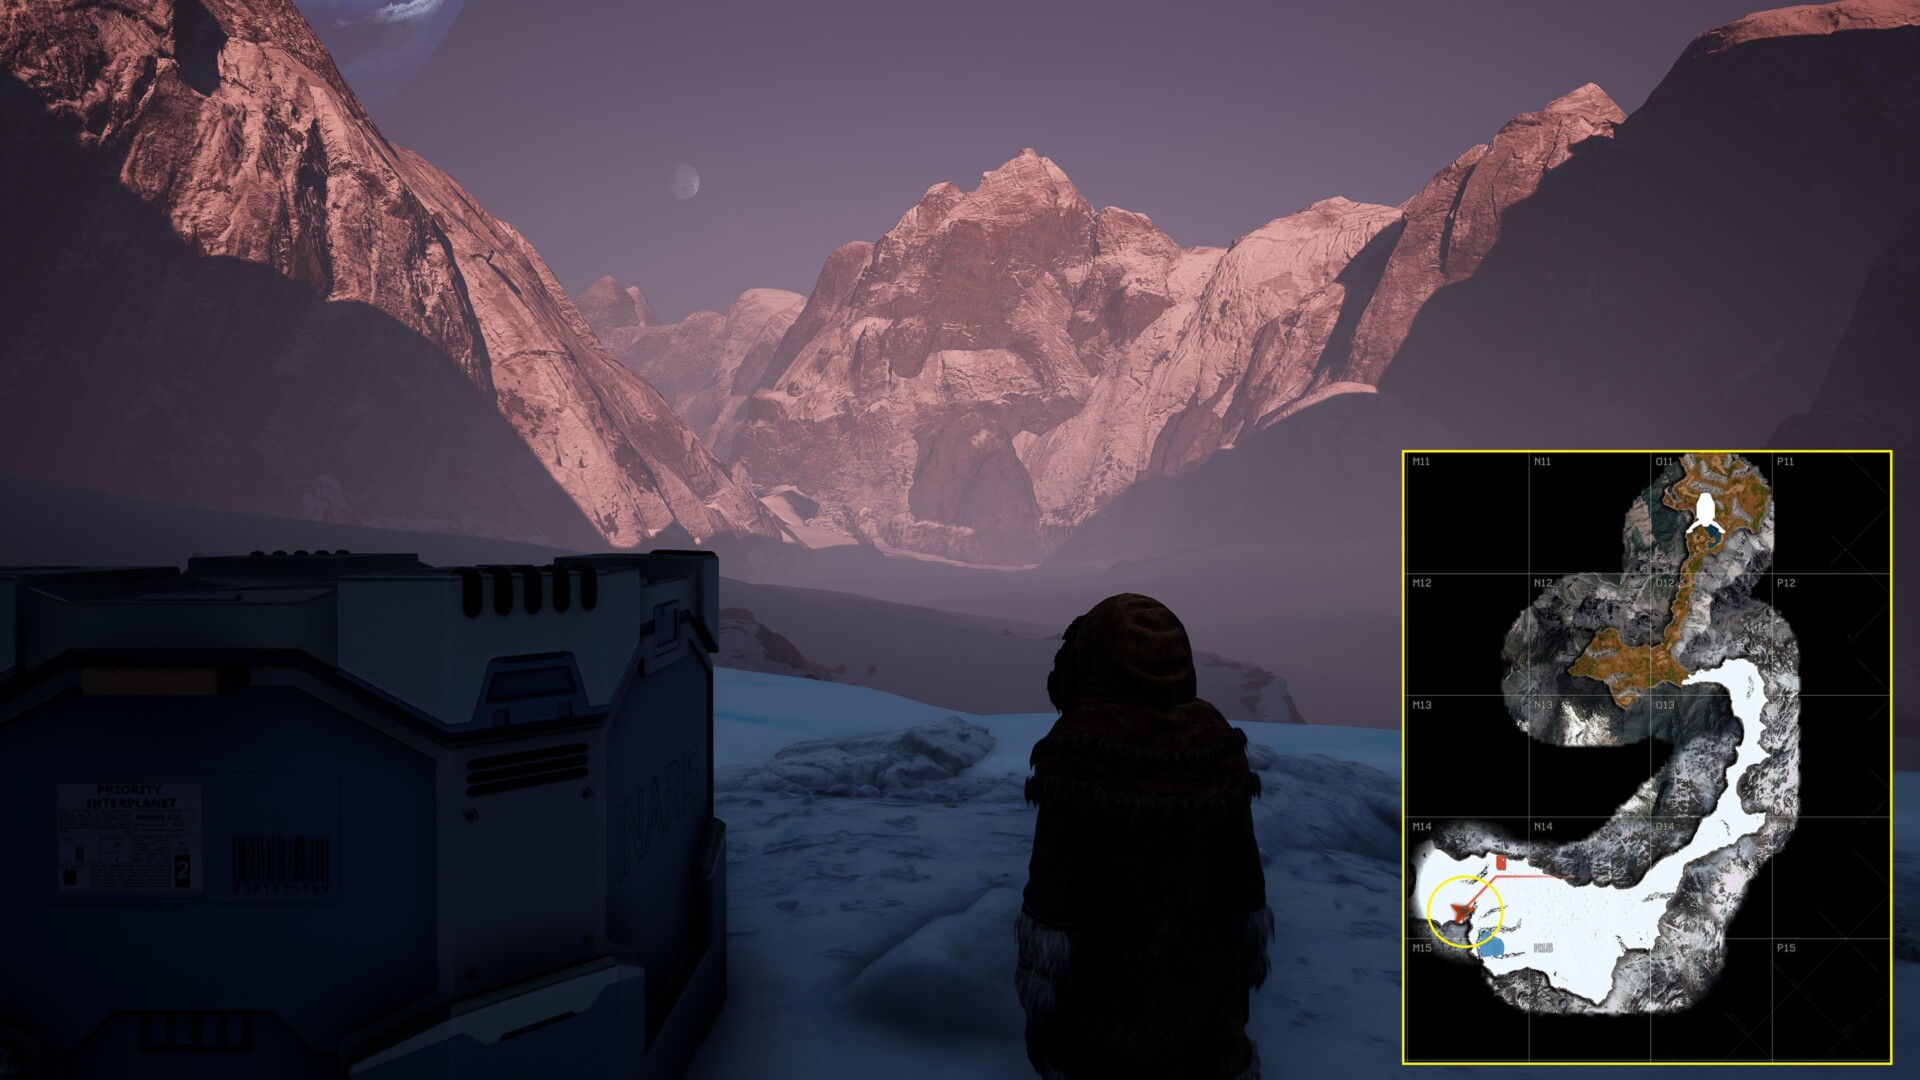
Device Component Location #3
The third and final Device Component is directly west of your position (M14). You should see a blue circle denoting a frozen lake, which means you’re near the spot.
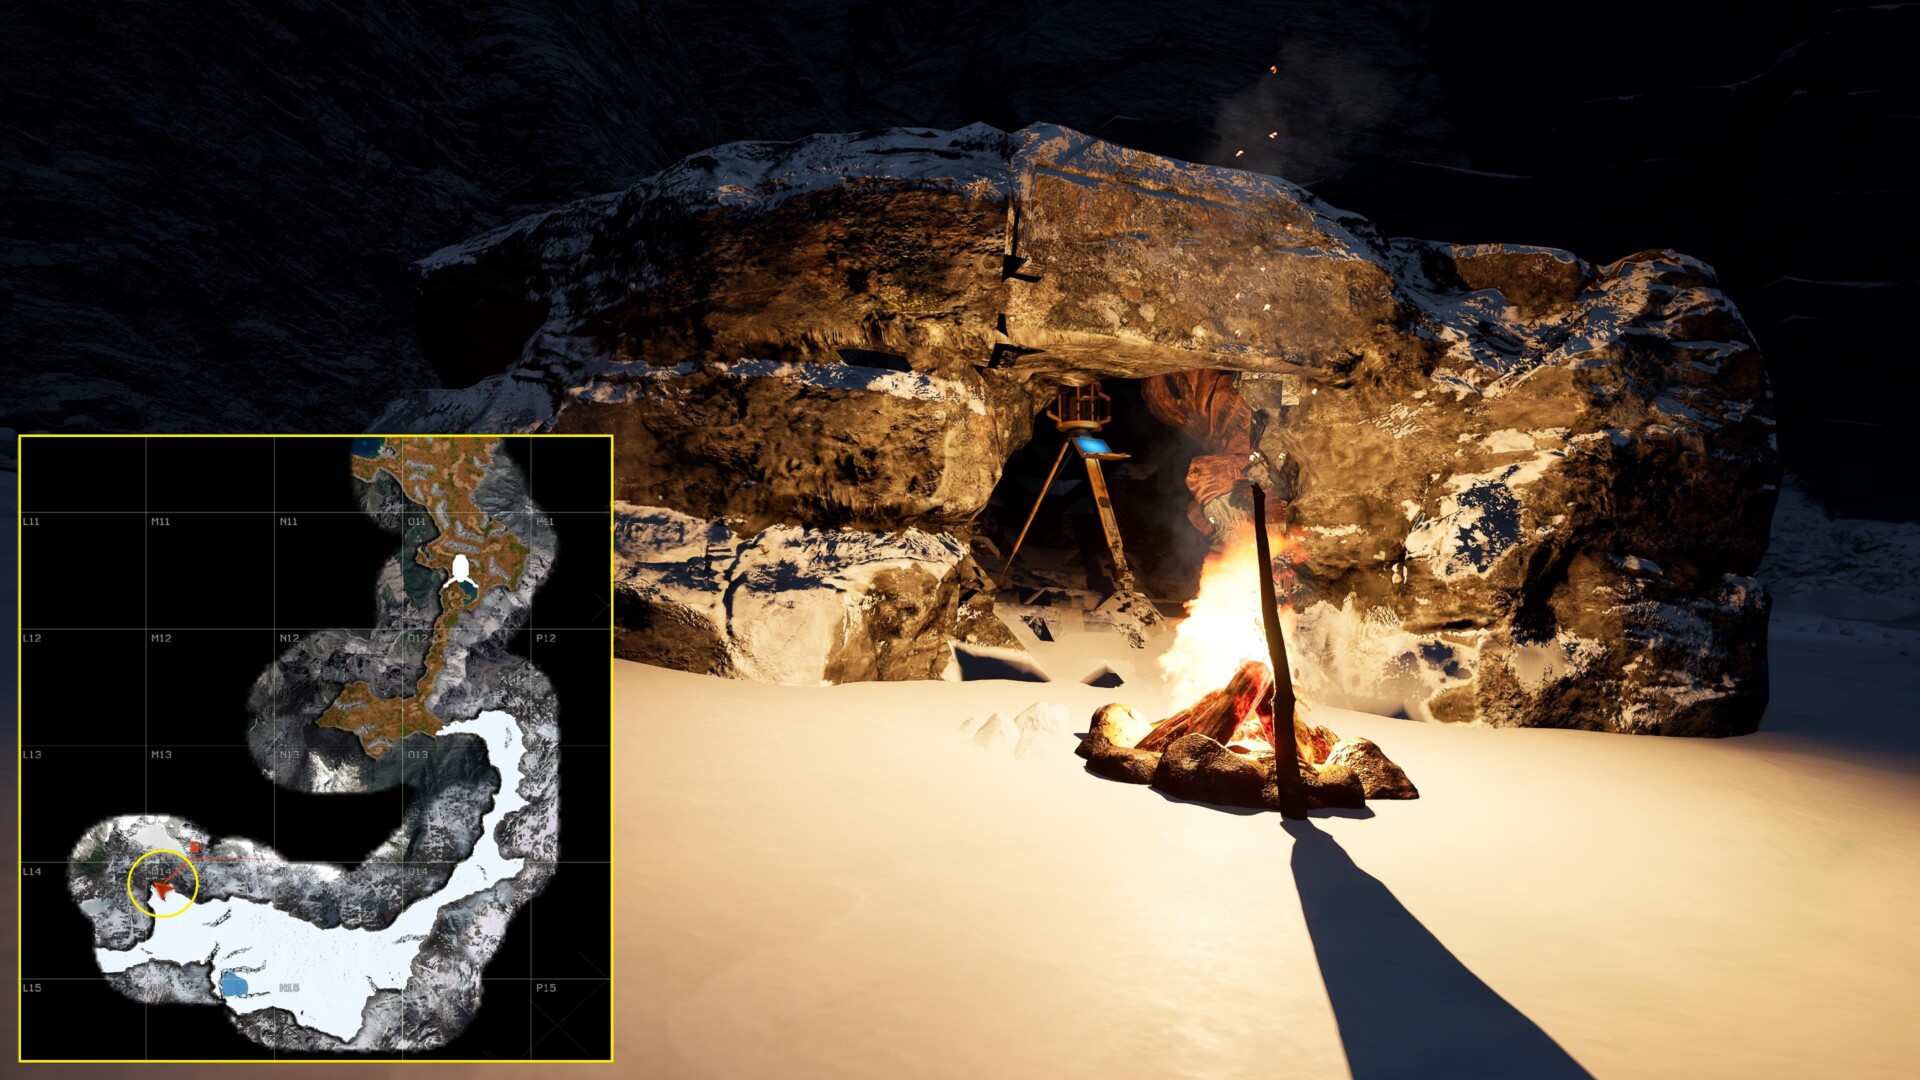
Activate the Disrupter
Now that you have all three Device Components, open your crafting tab. You’ll be able to create the Acoustic Cavitation Cannon. To activate the Disrupter in the Icestorm Expedition mission in Icarus, you’ll need to find a sheltered location. It’s useless to build wooden structures here because the snowstorm will destroy your fixtures, but you can enter the cave north of M14. Stay at the entrance until the snowstorm abates and beware of the cave worms deep within.
Sadly, even though caves are considered shelters, the Disrupter won’t work while you’re inside. Instead, you can look for a nearby rock formation. Hollow it out with a pickaxe and place the Disrupter inside. Press “E” to activate it and wait until it reaches 100%. You may also place a Campfire and crawl inside the cramped space to wait for the process to finish. When you’re done, return to the dropship to complete your run.
Note: There seems to be a bug that prevents people from obtaining currency rewards if they’re playing offline.
Icarus is available via Steam. For more information, check out our guides and features hub.