After completing the Icestorm Expedition mission in Icarus, you’ll unlock Searchlight Scan. As the name implies, the objectives are similar to an earlier Prospect called Livewire Terrain Scan. However, there are new challenges to consider given that we’re heading to a colder landscape. Here’s our Icarus guide to help you with the Searchlight Scan mission, including the radar and scan locations.
Note: For more information, check out our Icarus guides and features hub.
Icarus: Searchlight Scan Prospect Mission Guide – The Radar and Scan Locations
Before you start the Searchlight Scan mission in Icarus, make sure that you’ve earned more XP to reach at least level 20. Ideally, you’ll want to do this once you’re able to craft the Fur Armor Set to improve your cold resistance. You can also learn a few other tips in our Arctic Biome survival guide.
As for the location, you’ll actually head back to where you did Icestorm Expedition. As such, you’ll want to use the initial dropship area as your staging point, gathering materials and crafting anything you need for survival.
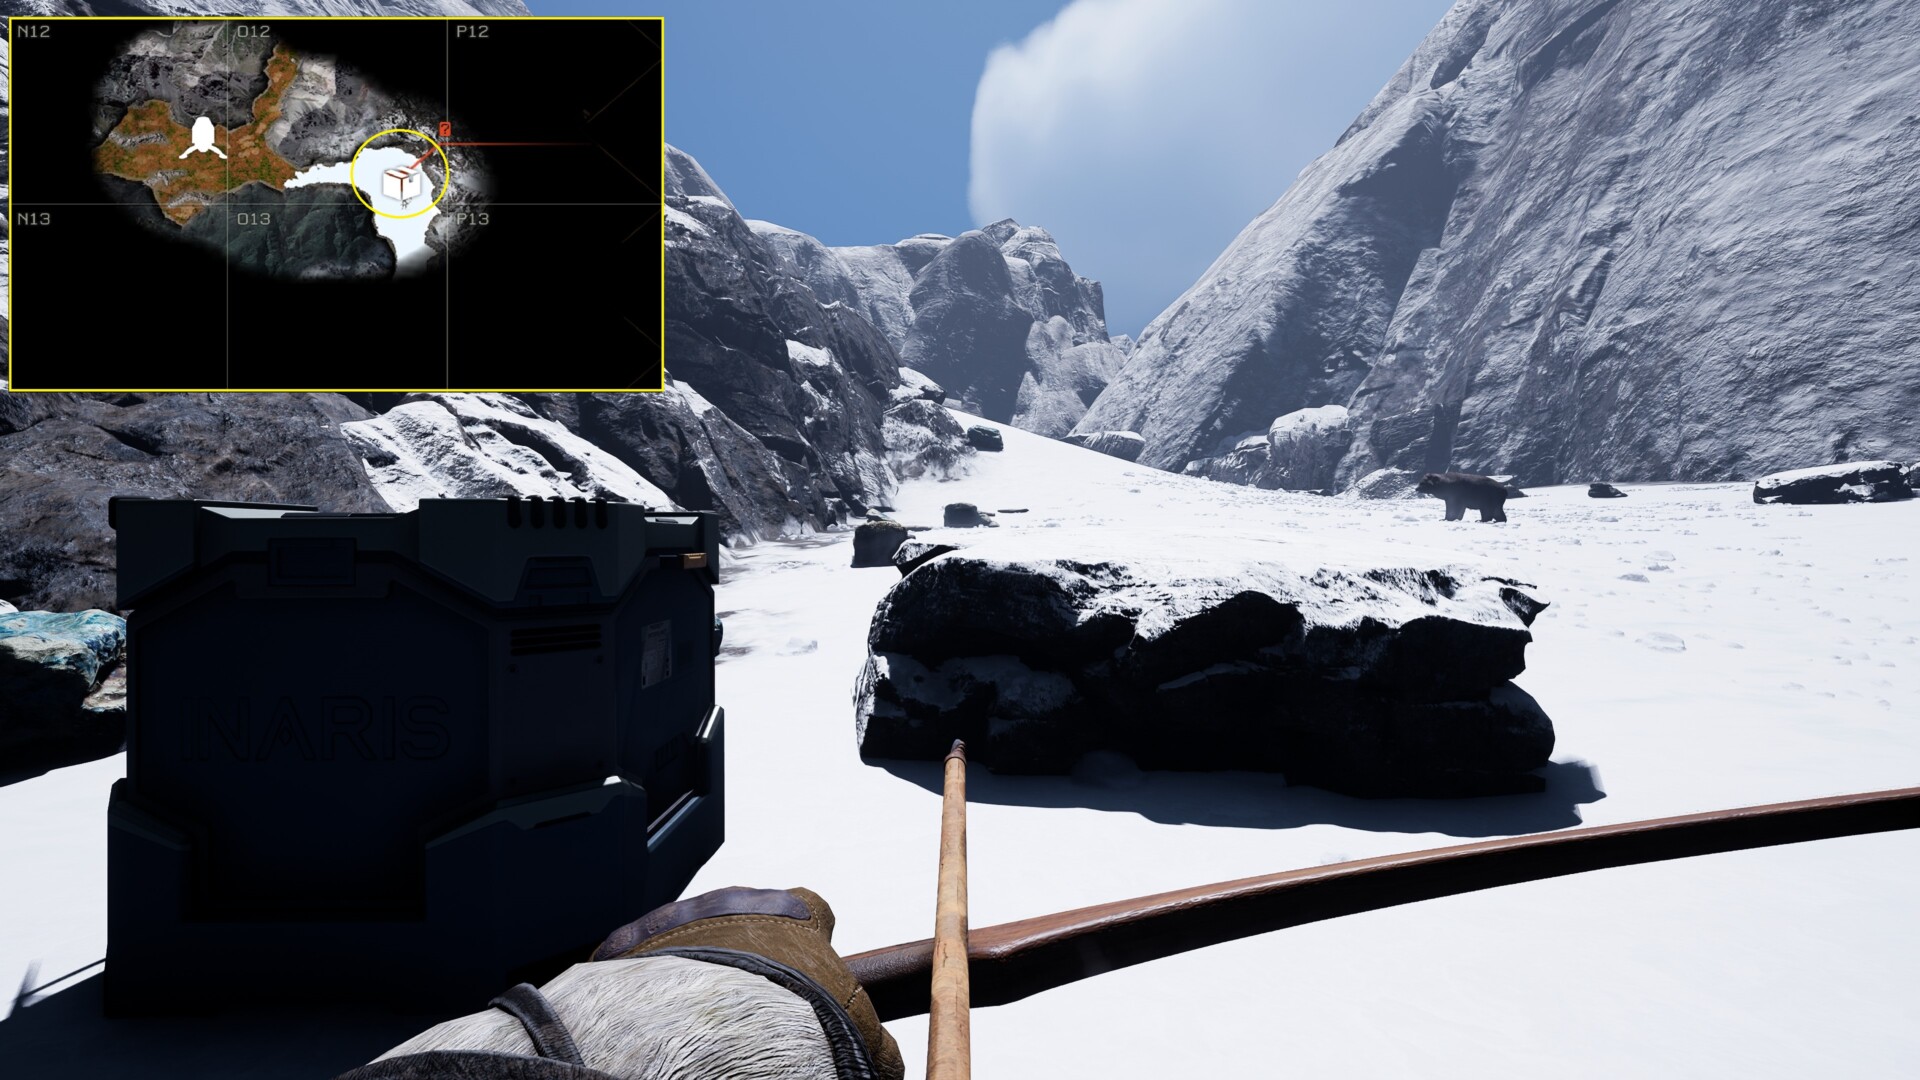
Radar Location
When you’re ready, you can head to the ravine that takes you to the Southern Glacier. The container is found next to a ridge (O12/13). Open it and take the radar (it’ll be bound to your “G” key). Be forewarned that there are grizzly bears and polar bears roaming around.
Anyway, the next steps might sound familiar to you already:
- Go to each scan location and press “G” to select the radar. “Snap” it on the device.
- Activate the device with “E” and move away from it.
- Stay stealthed because wild animals — at a significantly higher level compared to your character — will spawn once progress reaches 50%. You can take out the animals when necessary, or sneak past them. You might want to obtain the Very, Very Quiet perk to improve your chances while sneaking around. It’s from the Solo talent tree so it only works if you’re not in a party.
- Reactivate the radar and wait until it reaches 100%.
- Hold “F” to pick up the radar and go to the next scan location.
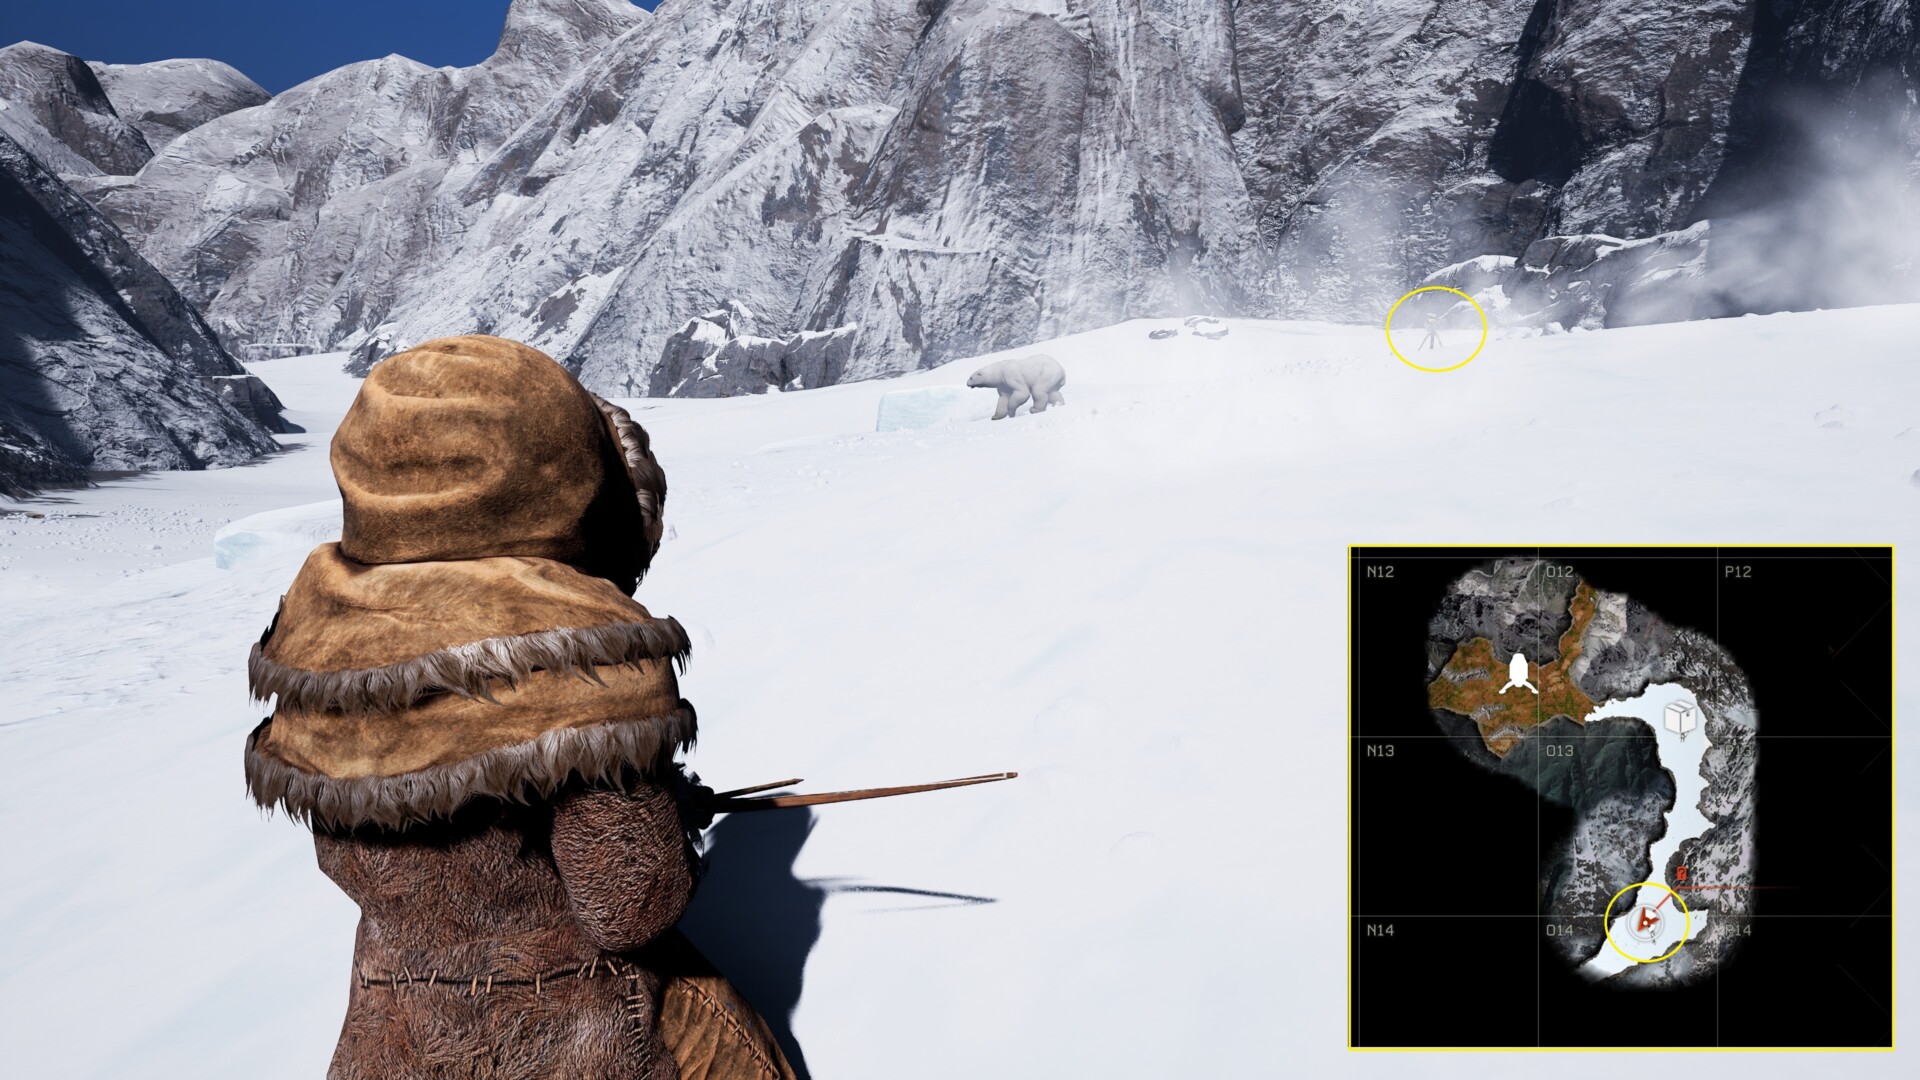
Scan Location #1
Continue south along the valley to find the first scan location (O14). A polar bear will spawn here, so just try to stay out of its line of sight. Reactivate the radar once it moves away.
Scan Location #2
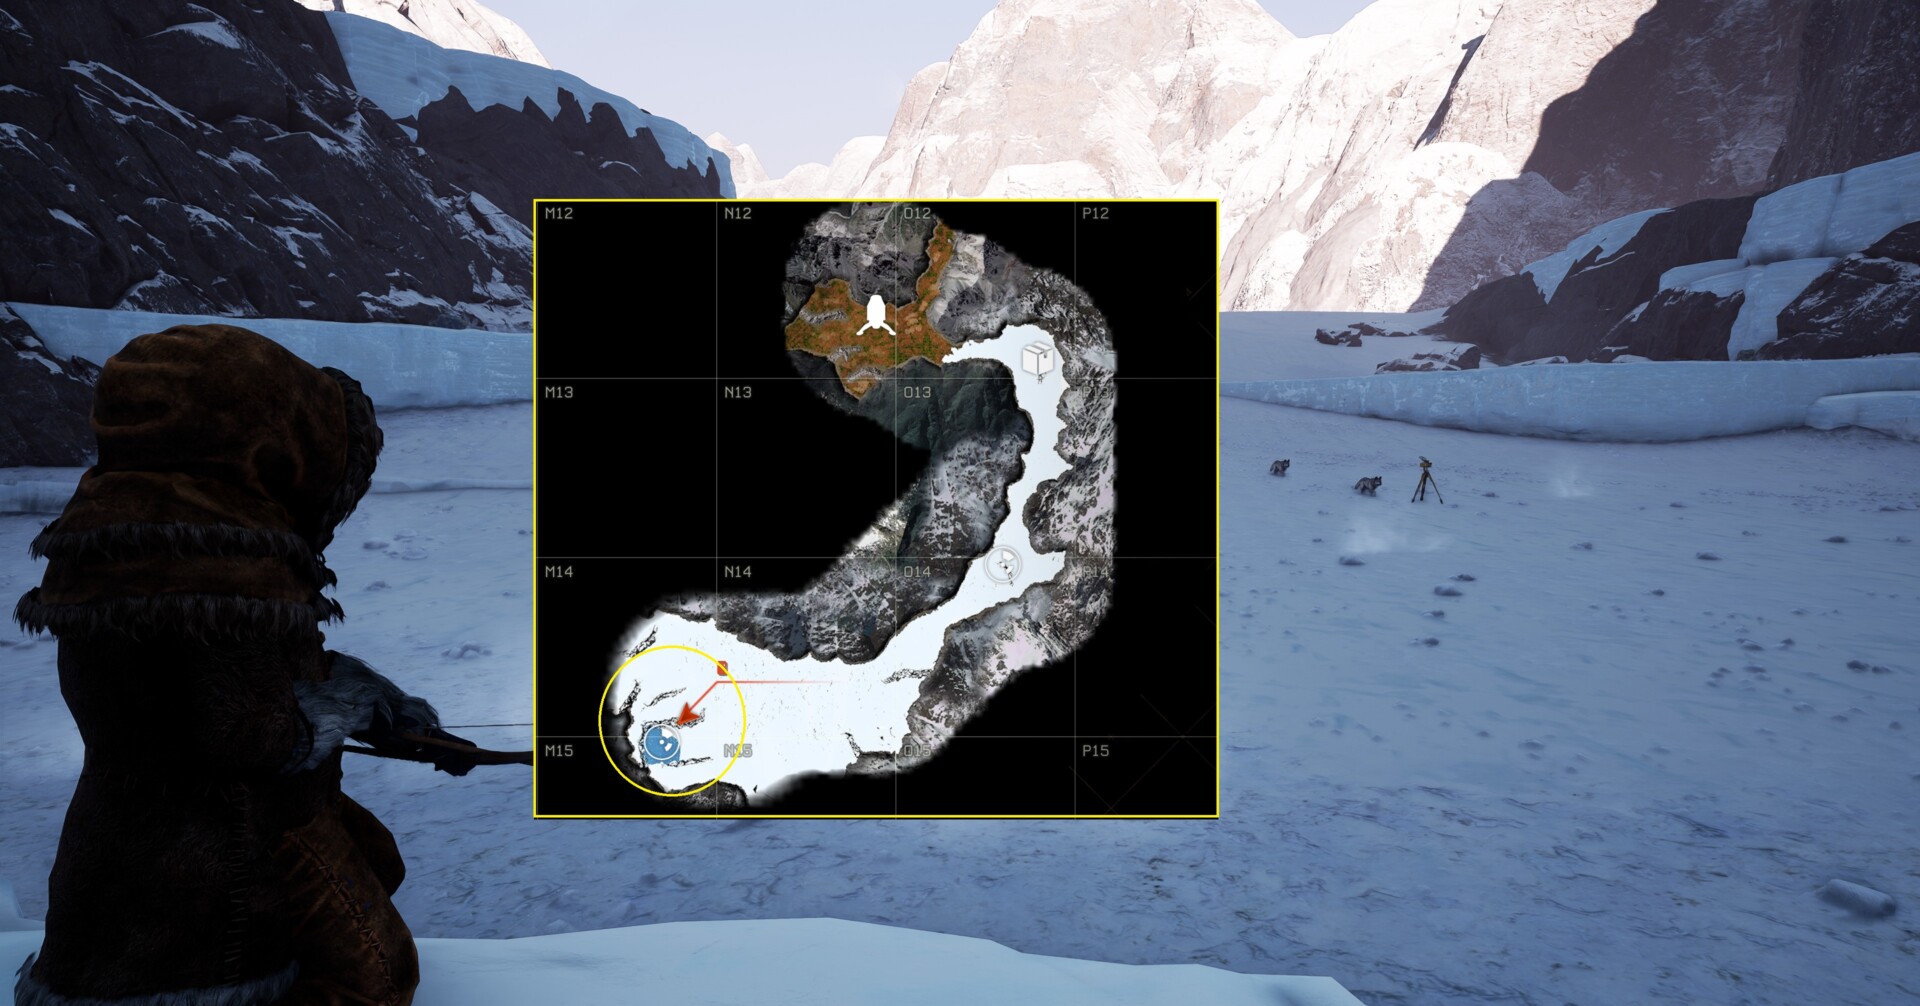
The next scan location for the Searchlight Scan mission in Icarus is at the frozen lake (M14/15). There are some ledges that you can hop on after interacting with the device. After a while, two wolves will appear. They won’t be able to reach you if you’re on the ledges, so feel free to snipe them with your bow.
Scan Location #3
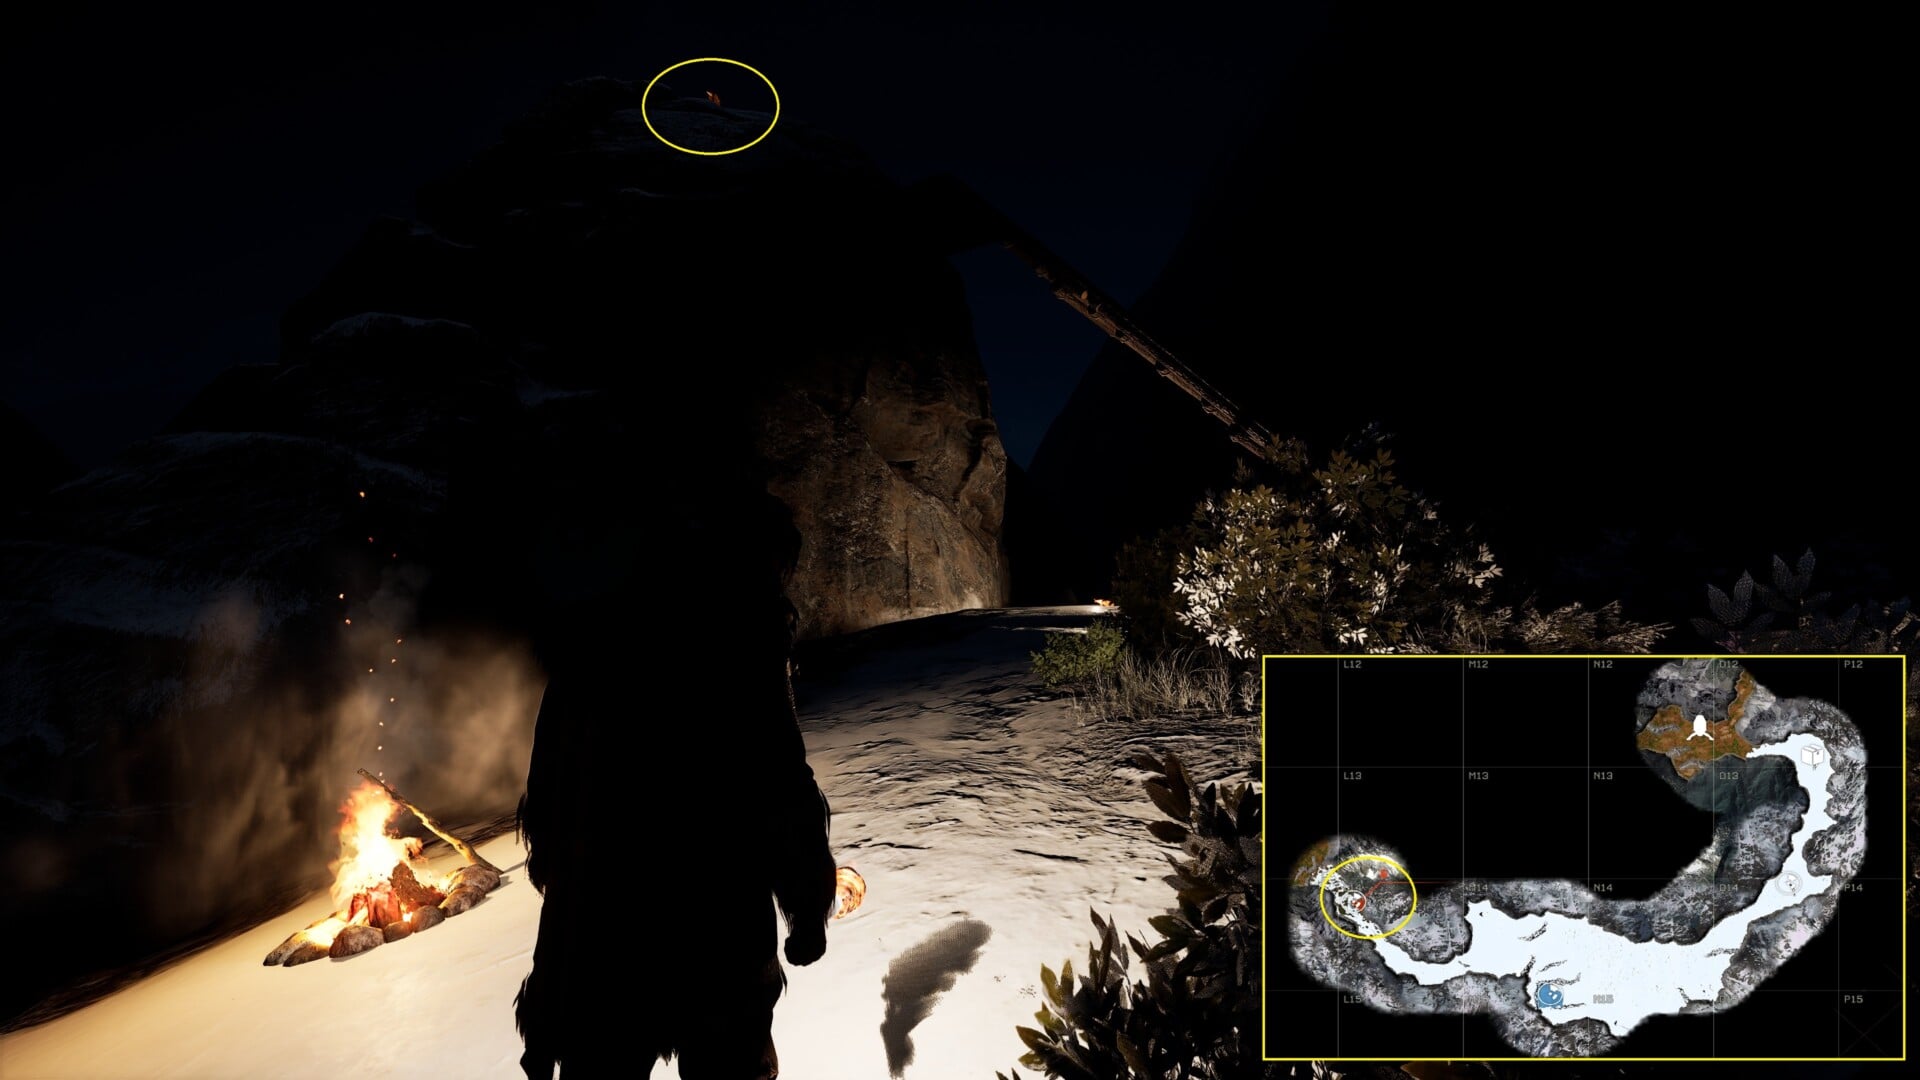
The last scan location is at the end of the canyon once you get to the temperate zone. It’s on top of a rocky crag. You can use wooden ramps to reach it. In a short while, a snow leopard will appear. More often than not, it won’t be able to get up to where you are, so just snipe it.
When you’re done, pick up the radar and return to the dropship. You can go back the way you came (braving polar bears and snowstorms). Alternatively, you can take the long way around (north along the base of the mountain and south once you see the ravine). It’s a long trek, but you’re in a forested/temperate region that’s not as dangerous.
Note 1: There’s a bug that prevents people from obtaining currency rewards if they’re playing offline.
Note 2: Speaking of rewards, completing Searchlight Scan unlocks Deep Vein Extraction. This is where you can farm Exotics.
Icarus is available via Steam. For more information, check out our guides and features hub.