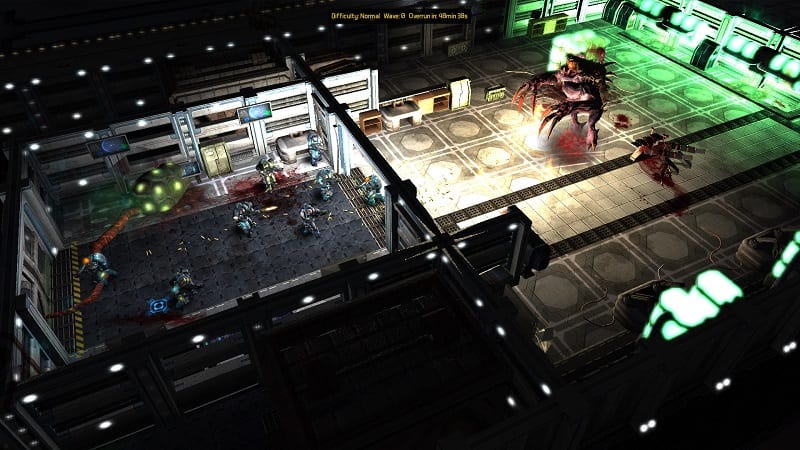
The Red Solstice Guide and Tips
Ironward’s The Red Solstice is still currently in Early Access and the game is constantly being tweaked, so when new players join it can be a little daunting – especially when playing with more experienced Marines. This is a quickie guide with a few tips to get new players acquainted with the action. First things first. Sort […]

Ironward’s The Red Solstice is still currently in Early Access and the game is constantly being tweaked, so when new players join it can be a little daunting – especially when playing with more experienced Marines. This is a quickie guide with a few tips to get new players acquainted with the action.
First things first. Sort out exactly what each key does, there’s a lot of options on the bottom UI so knowing the hotkeys is important.
- Q – Switch between primary and secondary weapons.
- C – Change weapons modes for a weapon.
- E – Autofire on and off
- G – Detonate your placed explosive
- F – Chuck a flare on your cursor position to light up an area.
- X – Drop ammo
- U – Show objects you can interact with.
- F11/F12 switch the UI on and off.
- Right click to pick up
- SHIFT and target enemy to show % to hit.
- ESC brings up the map.
- F2 issues the “follow me” command.
- Y to sprint.
- N unlock camera.
Inventory is collected in six slots in the bottom UI, and these need to be clicked to activate them. Make sure you left click or they’re likely to just drop on the ground. There are also inventory key shortcuts which are activated by holding down control and using keys QWEASD. These keys are in the same grid layout as the inventory UI so it’s kind of logical but a little tricky to get used to.
If you have a follower, command him to stick with you by clicking left CTRL and then clicking on your character. Again, this is a little fiddly when you start out.
While having auto-aim activated is the easiest way to run around shooting stuff, it’s not the best way to play. It can waste ammo and it’s less accurate. Also watch out for splash damage from your fire, it can take out the other players. If the explosion is big enough you can waste your whole team if they’re close. You will not be popular.
Be careful when shooting and try not to use auto-aim in the dark, it’s not accurate and you’ll miss targets and waste ammo. Auto-aim also slows you down so keep that in mind and start playing the game without it activated so using it doesn’t become a habit.
Once you’ve played the prologue you’ll know all about that turrets. Activating these is simple enough by right clicking them, but they take quite a while to come alive. In this situation you could switch the auto-aim feature on if under attack to make life easier. It’s one of the few times you should have auto-fire active. Also use the turrets to take out large enemies by kiting them around the turret. This saves ammo and they die quicker.
The dark is your enemy so if you see a terminal to activate power, turn it on. Lights will activate which means better accuracy and visibility.
To see how accurate the shot you’re about to take is going to be you can also hold down the SHIFT key when targeting, which brings up a red crosshair with % to hit stats. This can be useful when taking a shot from range.
Right click to drop inventory items for others to use and make sure you have items equipped. You can make good use of or boost you in some way.
Make friends while playing and heal others that are in trouble by clicking your medkit and selecting them as the target.
Search the lockers and rubble dotted around the map. These will contain everything from explosives to medkits. There are three different types of lockers, Basic, Average and Quality with the loot type dependent on the locker grade. With limited inventory space only take what you need or can use later.The Red Solstice can be a little overwhelming and experienced players like to succeed when you’re on their team. If you’re new and join a game, follow instructions and waypoints and stick with the experienced players because you’ll learn a lot fast. If you die before the end of the third wave then you need more practice. However, do stay in the game even when you die. Use the TAB key to cycle through players in spectator mode and this way you’ll learn the tactics and mission goals for the next game.
TRS does have classes and it’s ultimately best to settle on the one you’re most comfortable with, but I suggest you start with Assault for the simple reason he can heal himself. It’s also probably the most versatile class and is great for beginners.
Once you’ve levelled up and are starting to understand the game mechanics, such as learning that it’s essential to play as a team, then there are plenty more classes to experiment with. Just get the basics down first and keep playing solo to learn the maps, classes, skills, and items. Real life team mates will thank you for it later in multiplayer.
The Red Solstice feels like a simple game but it’s more complex than it first appears with all kinds of modules and load-outs possible for each class. The trick is to stick with it and you’ll feel rewarded. It also has a tendency to keep you wanting more which is a good sign considering the short time it’s been available on Steam for testing.
