Exploring the Factory Level
Once you reach the Factory Level in Wasteland 3: The Battle of Steeltown, you’ll have a chat with Karl Ludlow.
Karl Ludlow
Ludlow can’t open the facility’s door, so he asks you to build a War-Bot for him. You’ll have to look for three terminals to complete the legs, chassis, and weapons system. Don’t forget to check the northwest and southwest corners in the plaza. There are some traps here (Explosives 5 to 7), and a few chests with Disruption items.
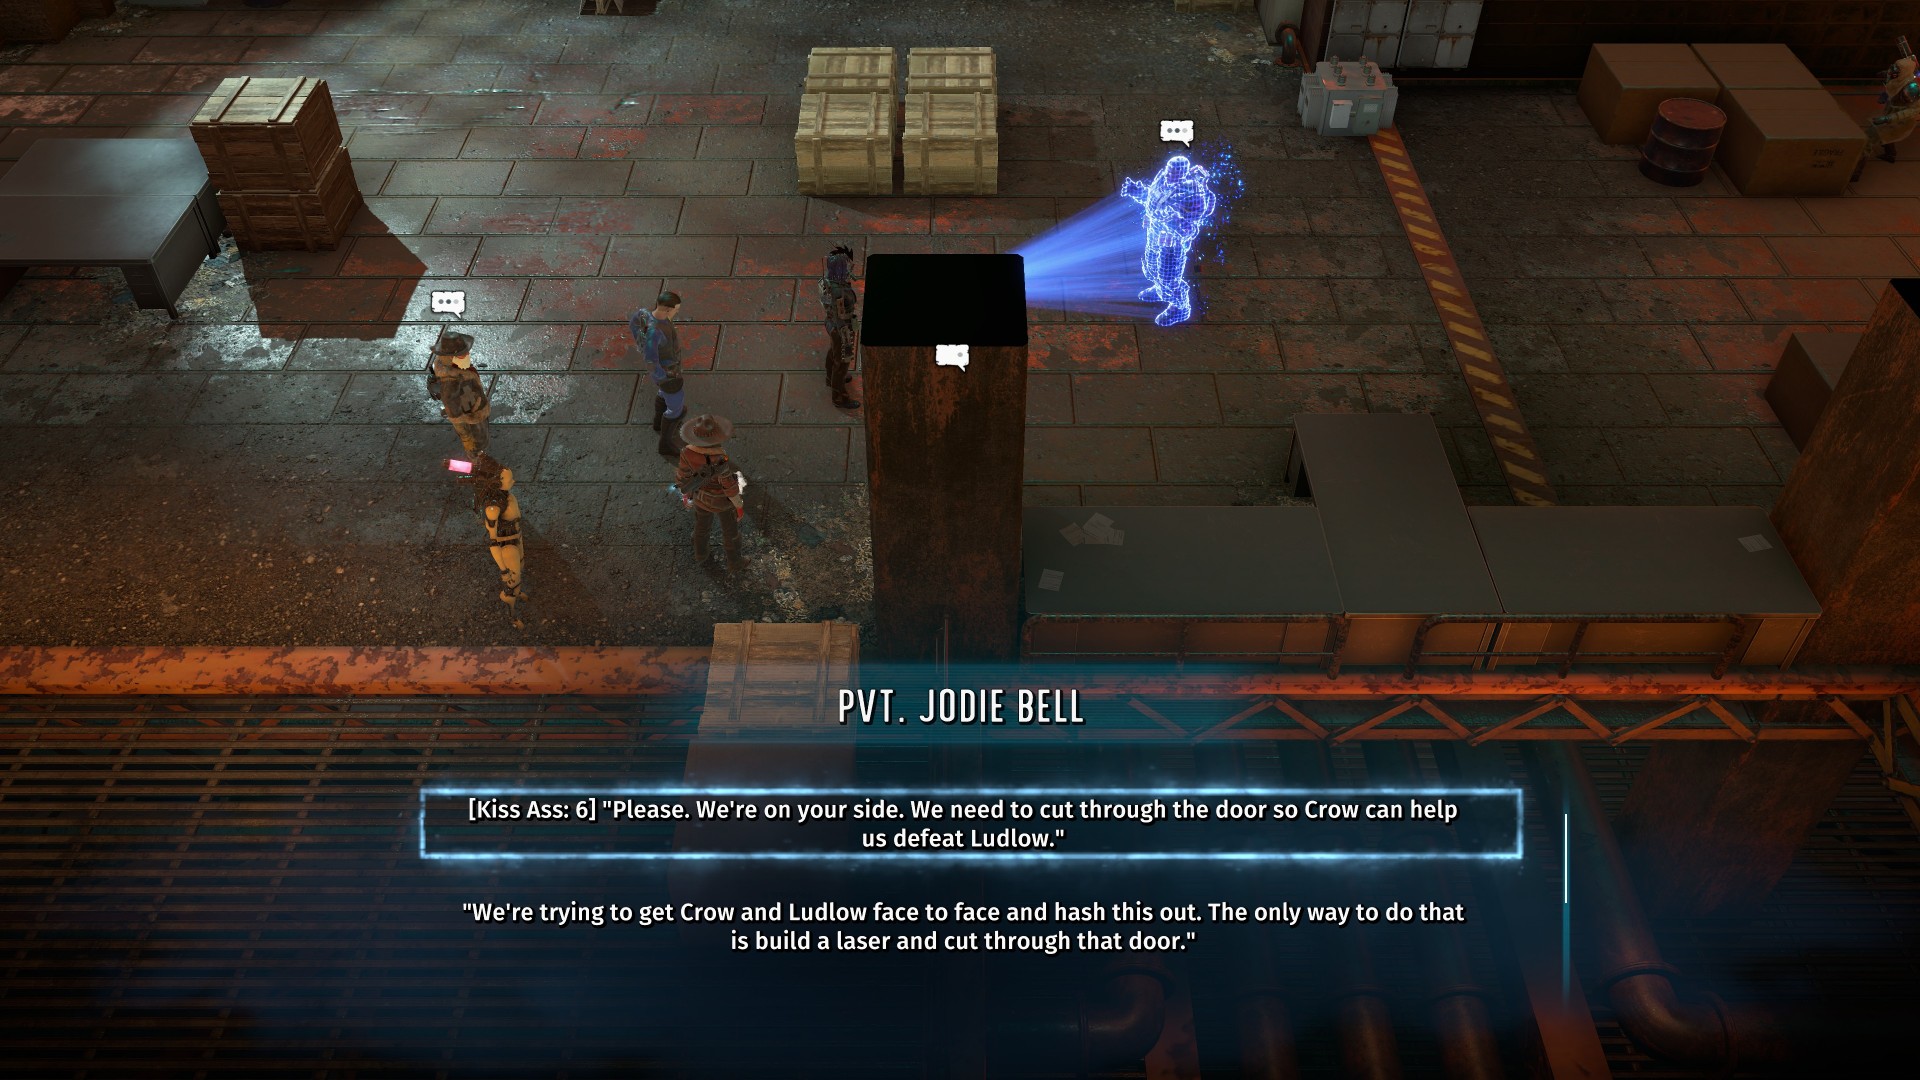
If you go to the eastern section, you’ll find one of Ludlow’s Dog-Bots getting ready to attack some workers. Two Kiss Ass 6 dialogue options will prevent a fight, and you can convince the workers that you’re on their side.
Note: There’s a box nearby with a “Message to Luis.” It’s from the wife of the NPC waiting at the refugee area outside Steeltown’s gates.
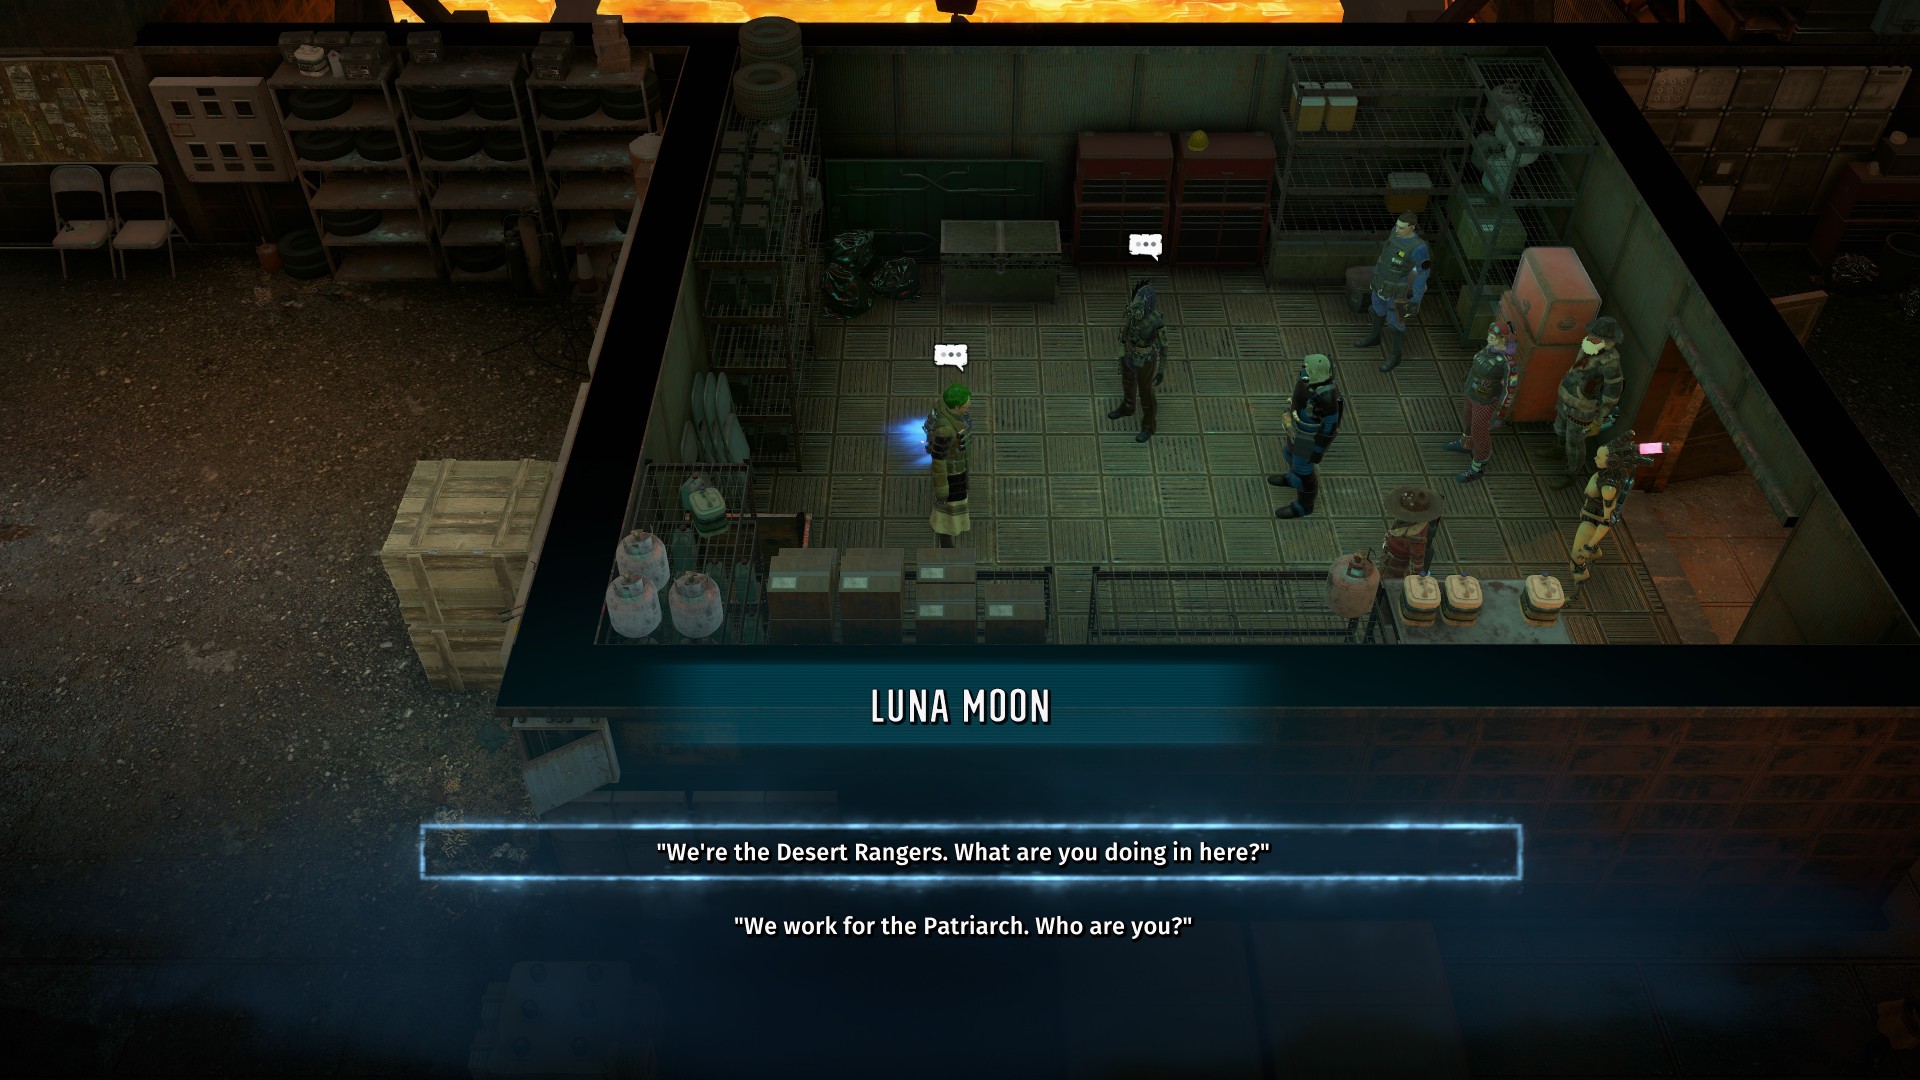
Luna Moon
There’s a small building here (Lockpicking/Explosives 6) that has a character named Luna Moon. She’ll just ask you if the coast is clear. She’s actually part of a minor task that doesn’t appear as a sidequest. It involves looking for two Fraternization Forms. One is in the large factory room (which we’ll get to in a while), and the other is found in the spire area of Steeltown (which we won’t reach until we’re almost done with this DLC’s campaign).
The gist is that Luna Moon is Serena Ash’s girlfriend (the vendor in the Admin Level). There’s also a dude in the Steeltown Gates area who has a crush on her, apparently. Still, I’m not sure if there’s an actual conclusion to these tasks. To be clear, by the time I found the second Fraternization Form in the Steeltown Spire area, Luna was no longer in this room in the Factory Level.
War-Bot Legs and Keith
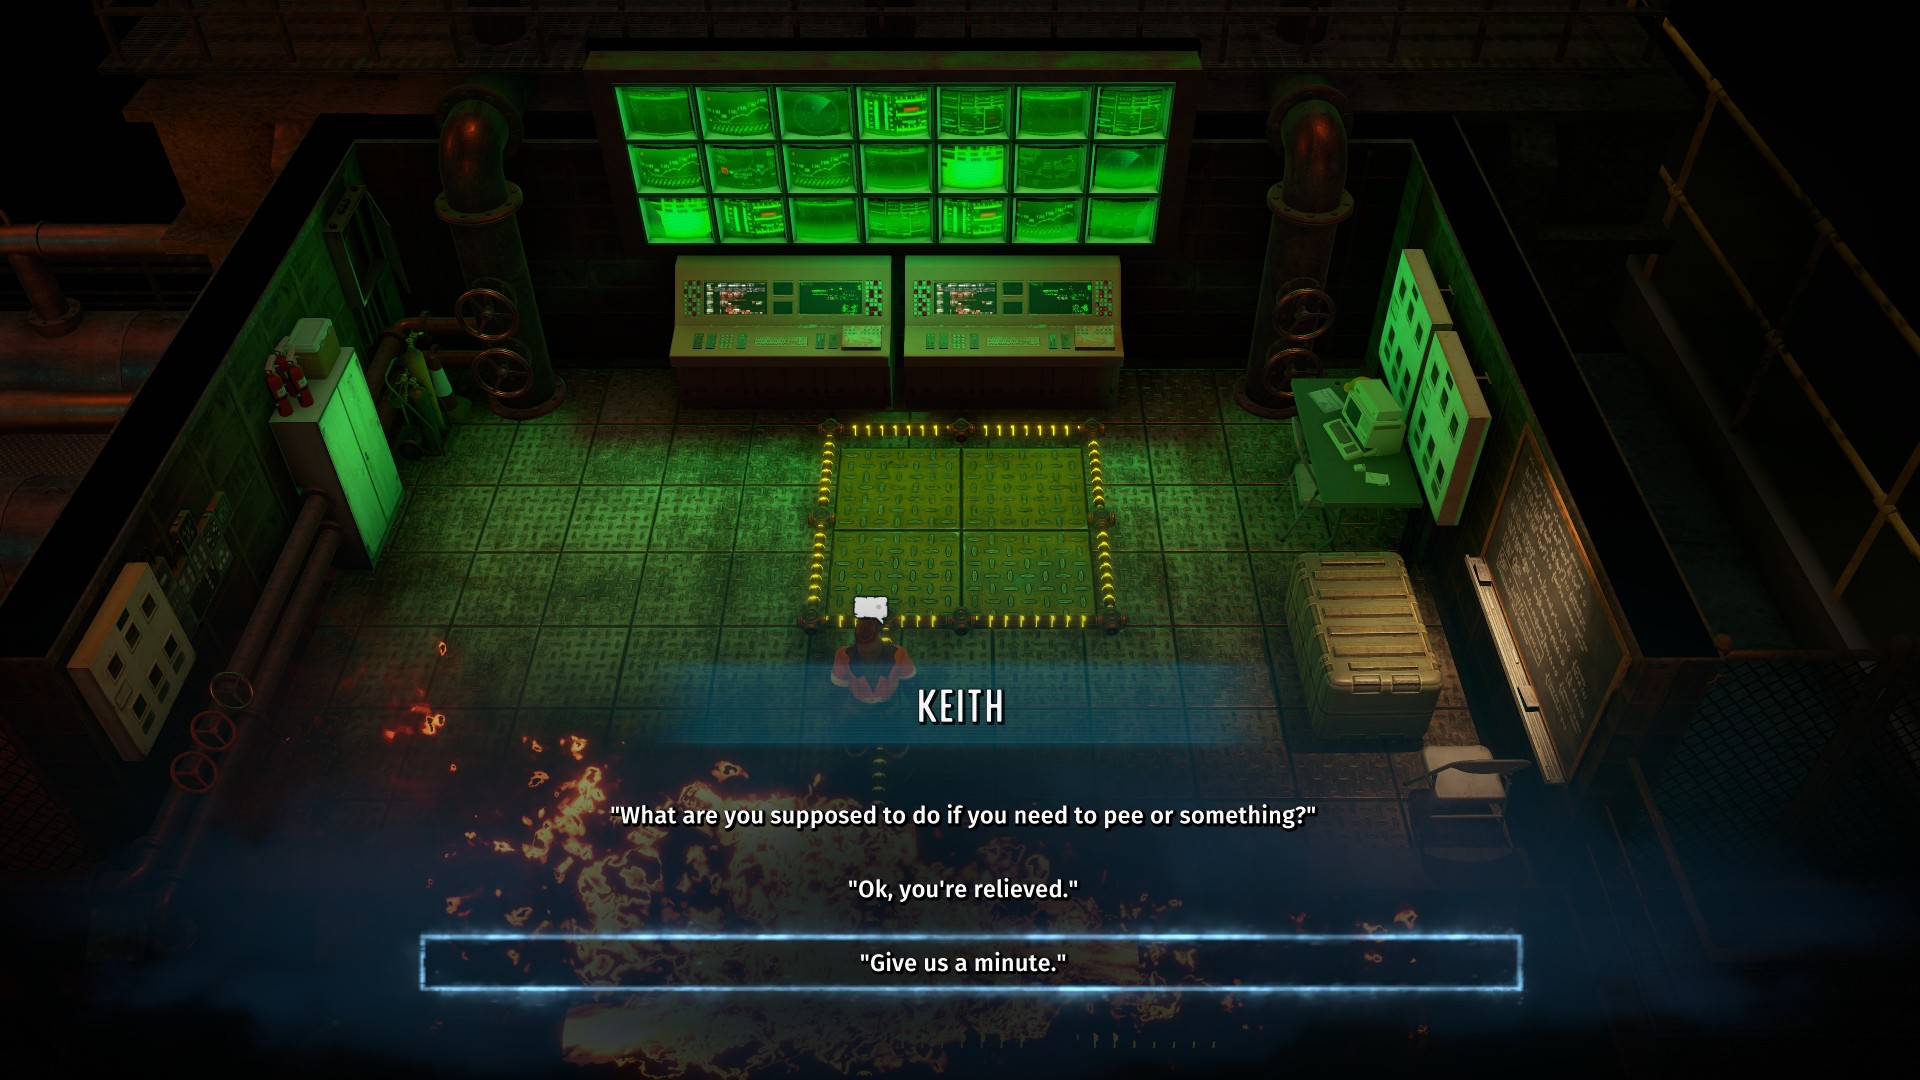
Follow the walkway north to find a terminal. This lets you construct the War-Bot’s legs. There’s also a nearby doorway (Lockpicking 6). Inside, you’ll meet an NPC named Keith. He’s sitting on a plate since getting off of it will make the pipes spew flames.
Keith will ask you to take his place temporarily since he needs to pee and clock out. You can also open the nearby locker to obtain Disruption weapons, 4x Tellurium, and a cassette outlining Ludlow’s abuses.
Note: Keith is part of the “Working Stiff” sidequest. If you did the first two tasks (i.e., fixing the pipes/nuts in the Admin Level), your next objective is to cover for him. However, it’s also possible to talk to Keith even without doing the previous tasks. If this happens, the sidequest will bug out since Keith never clocks out, and Oluwademilade won’t acknowledge that you helped him out.
War-Bot Torso
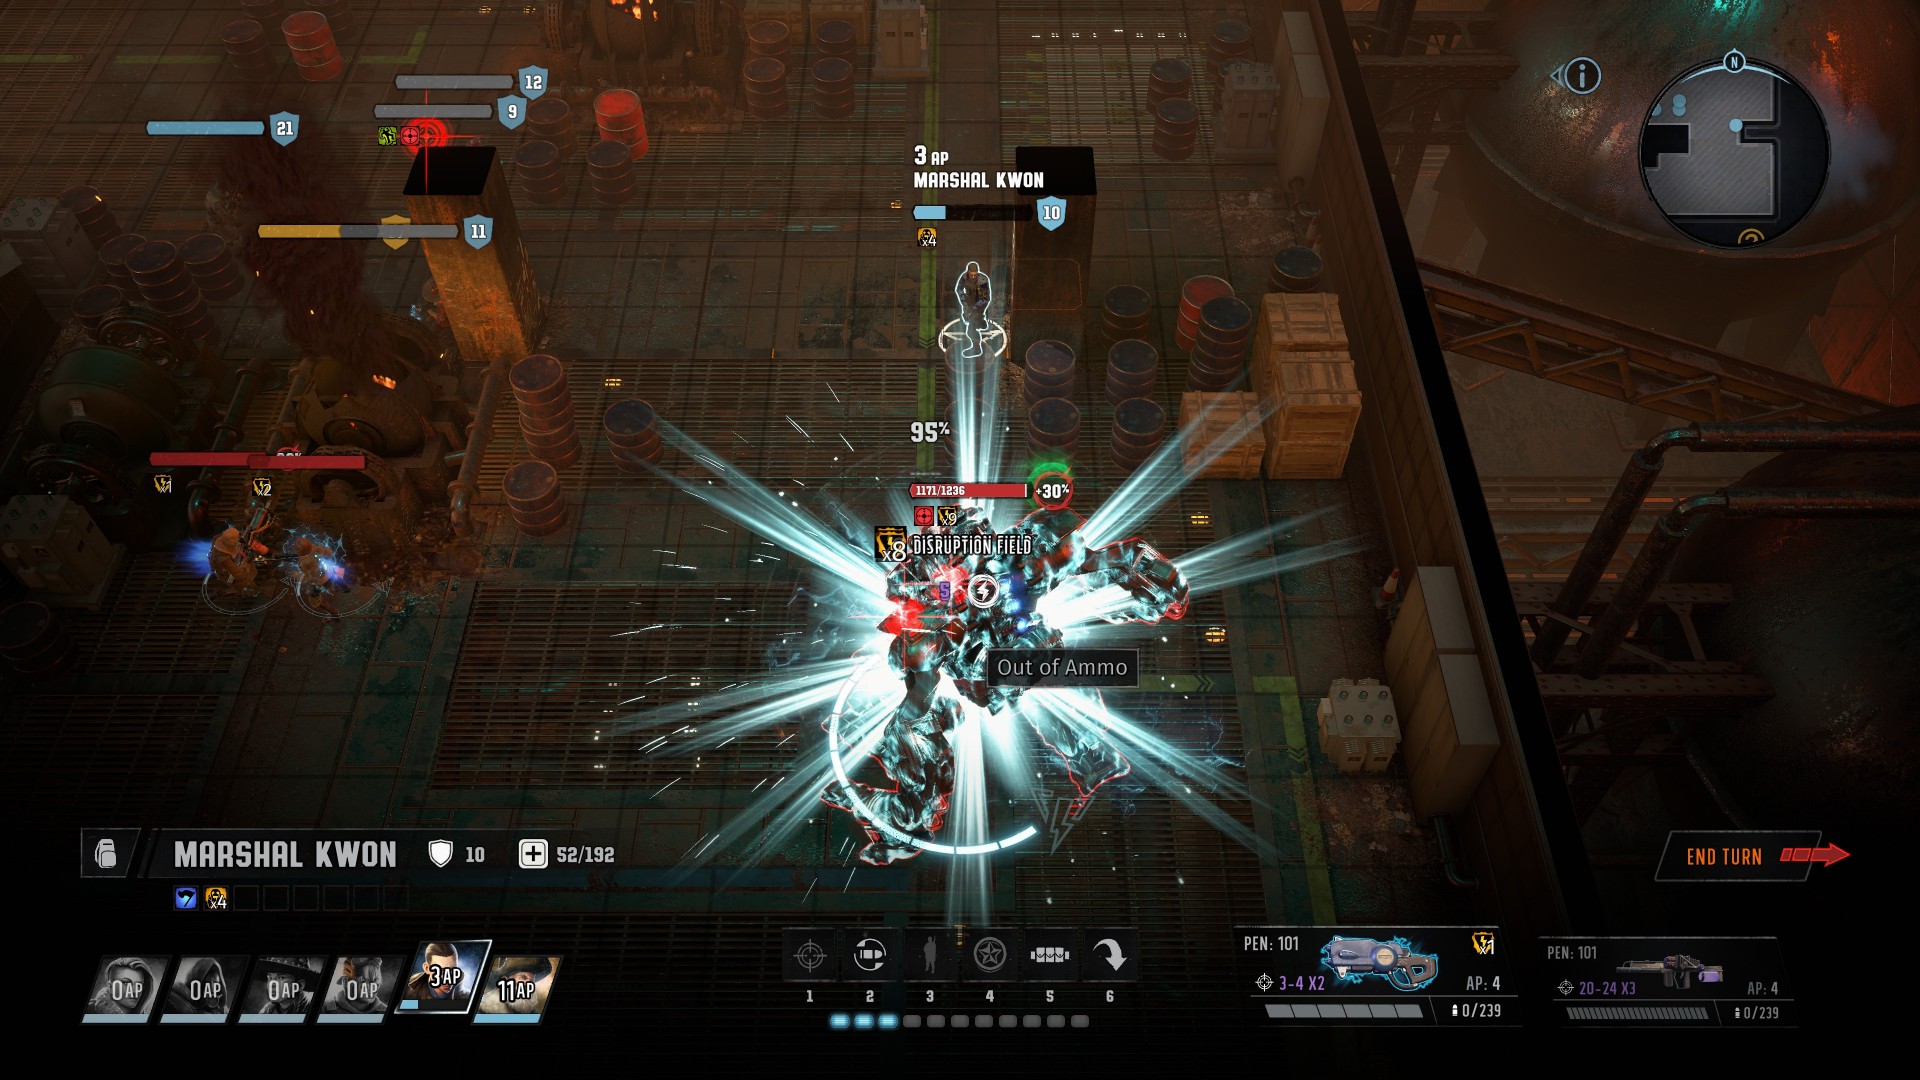
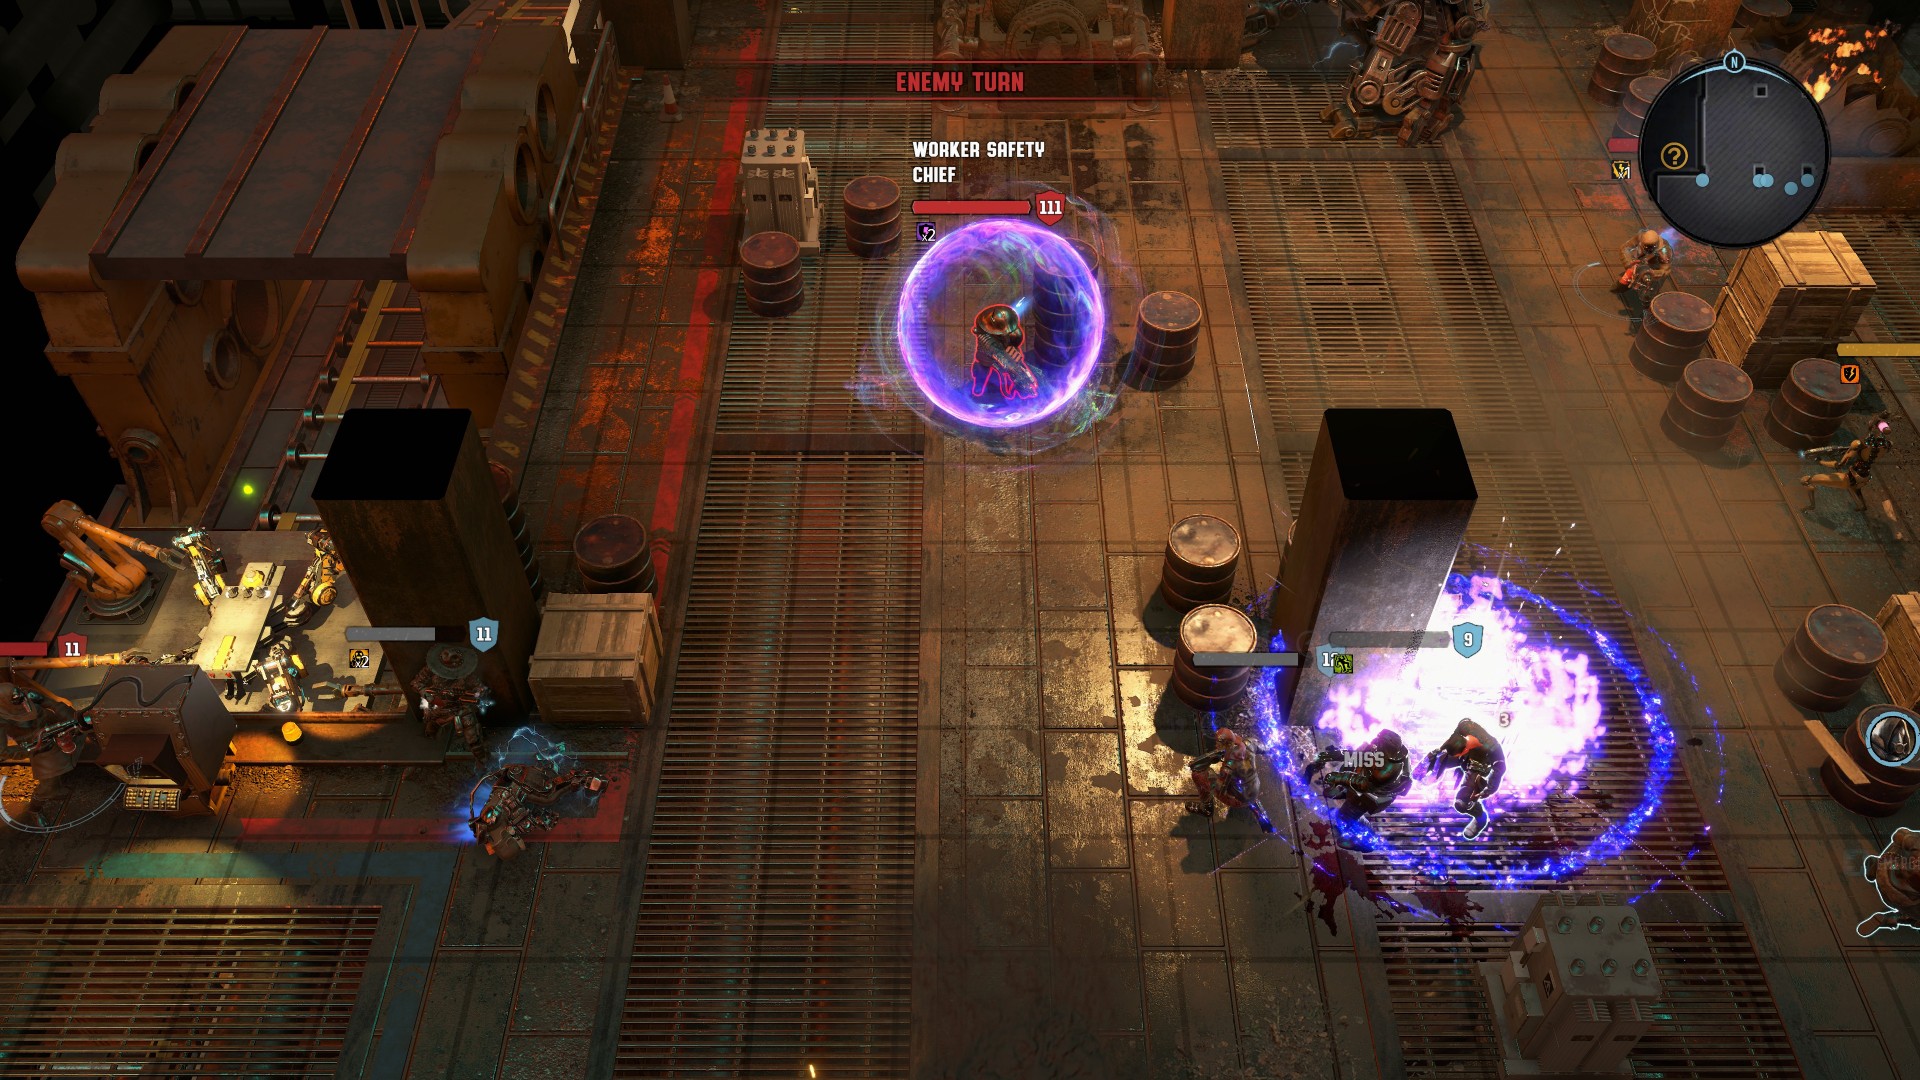
Go back to the previous area and head south. There are workers here who’ll turn hostile once they spot you, but you can use Hard Ass 6 to make some of them leave. There’s a mech, too, that’ll use the “Lock On” ability which makes it dash straight for a target on its next turn. If you use your Disruption weapons, you can get past this fight through non-lethal means. Heck, even the person piloting the mech would get knocked out.
Anyway, interact with the terminal to build the War-Bot Torso.
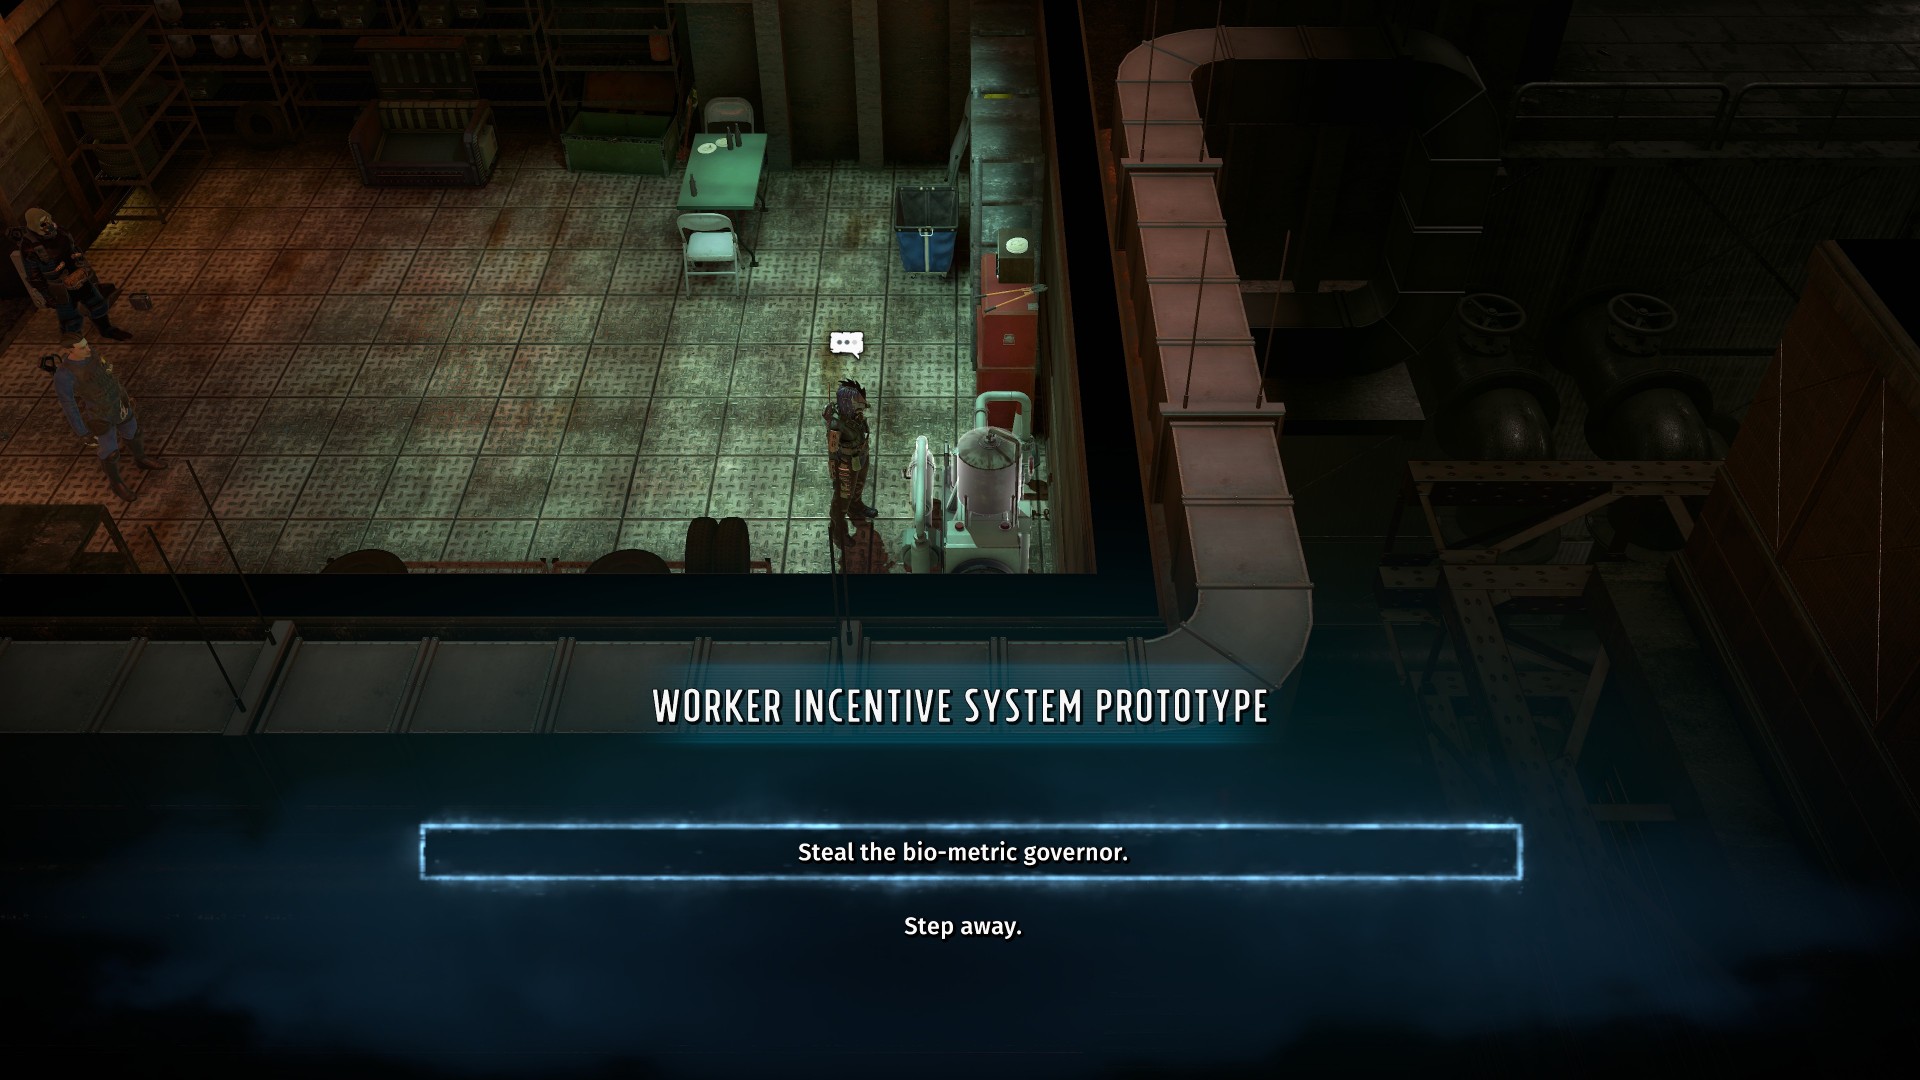
War-Bot Laser and Bio-Metric Governor
Go through the nearby door to find a locked room (Lockpicking 9). It has a Cryo Exo Leg Armor. There are also more workers and mechs here, but you can get the jump on them. This battle also showcases the elemental shield mechanic in Wasteland 3: The Battle of Steeltown, making some targets beefier unless you use the correct element to bring down their shields.
Interact with the terminal to attach the War-Bot’s laser system.
Before you leave this area to go back to Ludlow, you can check out one of the side doors (Lockpicking 9/Nerd Stuff 7). Inside, you’ll find the Worker’s Incentive Prototype, 4x Tellurium, and the bio-metric governor needed by BF and/or Enrico in the Admin Level.
Note: If you want to follow Enrico’s advice, you’ll need to take this item and steal the other one in the EEG machine in the Admin Level.
Anyway, let’s go back to Ludlow. There’s going to be a major decision to make followed by a huge battle. We’ll discuss these in the next part of our guide.