Congratulations! If you’ve found this page, you’ve managed to successfully spell “Anamnesis Anyder,” which has given my spellchecker an Anamnesis Aneurysm. Or I suppose you clicked a link in a Final Fantasy XIV dungeon guides thing or something. But I feel I should give you props anyway.
Anamnesis Anyder is a required story dungeon added in patch 5.2 of Final Fantasy XIV: Shadowbringers, and while it’s not the trickiest, it does indeed have some tricks. In this guide, I’m going to tell you how to force your way through.
There’s not much to say about the trash mobs in Anamnesis Anyder. I’d recommend against doing huge pulls after the second boss, if only because Diviners need to be bursted down quickly to prevent them from summoning more adds… but if your healer is on top of their game and is above the bare minimum item level, you should manage okay even if you pull another group of trash into the Diviners. Just try not to pull both groups of Diviners at the same time. That, I think, is tank-induced suicide.
So let’s talk bosses. I’m not going to cover every single attack as if you’ve gotten this far, you know to get out of AoE markers or get into stack markers, so it’s just the ones you really need to know about. With that disclaimer out of the way…
Unknown
It really is called Unknown. I’m not ignorant, I promise.
Attacks:
Fetid Fang – Tankbuster. Mitigate as usual.
Inscrutability – Unavoidable party AoE with an undispellable Bleed. Heal through it.
Luminous Ray – A line attack targeted at a player, but without any markers. If you see this ability pop (or if Unknown turns to look at someone and a big orb starts glowing in front of its mouth), get out of the way.
Ectoplasmic Ray – Stack marker on a player. This seems to be used when the second Unknown appears, which is often just as Scrutiny pops for the first time.
Scrutiny – This is Unknown’s “main” ability. Glowing orbs appear around the arena, with very visible AoEs. There are three safe spots, and an arrow will spin around Unknown. It’ll slow to a halt, then tick forward a few more times and blast the spot it’s pointing out. You’ve got two options if you’re in that safe spot: stand still and eat it (and probably enrage your healer), or – if you realize where it’s going to land, by paying attention to where it first slows down – you have just enough time to get to another safe spot. Just don’t get caught in-between multiple orbs or you’ll likely die, and definitely enrage your healer.
I swear Scrutiny isn’t as hard to avoid as it looks.
Strategy:
The first boss, Unknown, is the simplest of the lot. There’s honestly not a huge amount to watch out for barring Scrutiny. Just bear in mind that once it’s lost a bit of health, a second Unknown will appear. This complicates matters somewhat, and killing one powers up the other, but that shouldn’t be a problem for any group. Burn down one and then focus on the other. Just be watchful for Luminous Ray, especially from the one you’re not targeting.
Kyklops
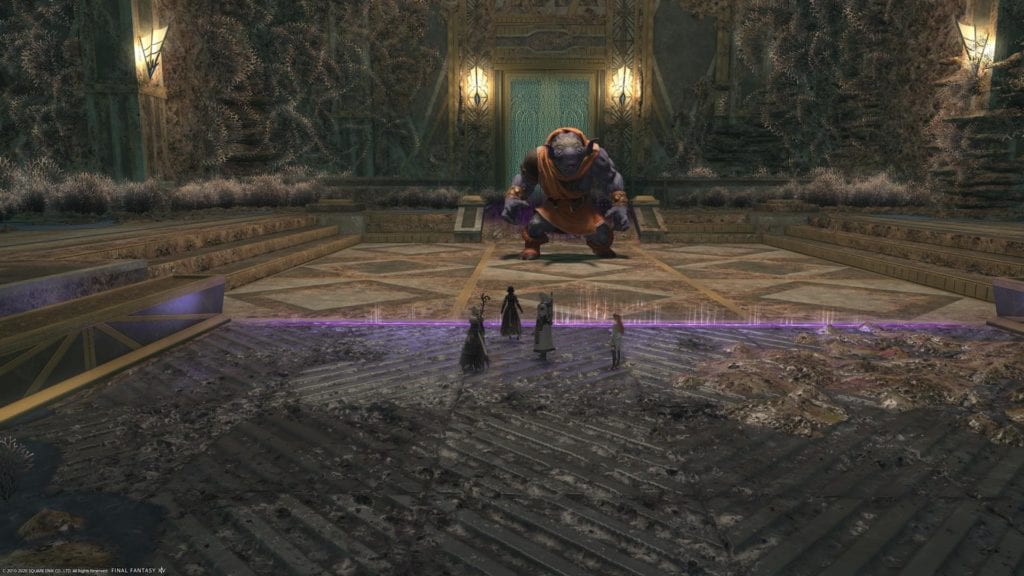
You kinda know what you’re in for the instant you see that this is a cyclops.
Attacks:
2000 Mina Swing – An AoE centered on the boss that will strike most of the arena. Move far away to avoid this.
2000 Mina Swipe – A frontal cone AoE. Move to the sides or rear of the boss to avoid.
Eye of the Cyclone – The opposite of 2000 Mina Swing. This is an AoE that strikes the arena except for the area around the boss. Get in close to dodge this.
The Final Verse – Unavoidable attack that hits the entire party for heavy damage.
Raging Glower – The boss will turn to face a party member and blast a line attack at them. Again, don’t be standing in front of the boss when he turns.
Terrible Hammer/Terrible Sword – Every “square” on the arena will be marked with either a sword icon or a hammer icon. Tiles marked with whatever icon he casts first will be hit a short time later, with the second icon following soon after. Stand on the tiles he marks second, and then move to the other tiles after the first hit lands.
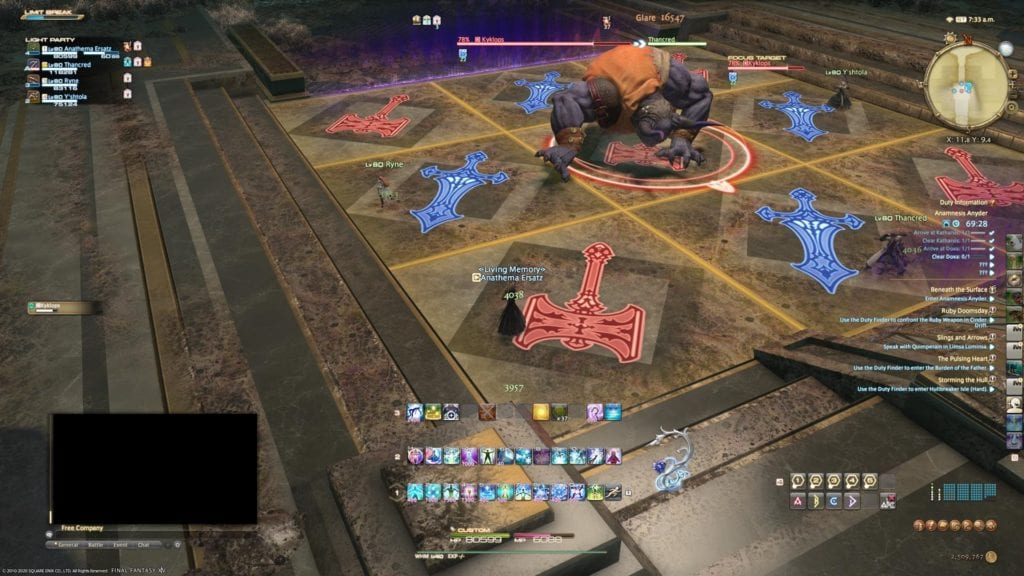
Remember which tile is cast first, and remember the different between Swing and Swipe, and you’ve got Kyklops down.
Strategy:
The second boss of Anamnesis Anyder, Kyklops, is very similar to most other cyclopean bosses in Final Fantasy XIV: a lot of untelegraphed AoE attacks. One thing to be wary of here is that all of his attacks hit like a spectacularly large truck, so Not Getting Hit is of even more importance than usual. As his attacks are untelegraphed, this means remembering things.
Eye of the Cyclone isn’t too hard to remember, but remembering that Swing is the move that requires you to move far away from the boss matters. The only other complicated thing here is that that, during the Terrible Hammer/Terrible Sword cast, Kyklops will follow up with another ability. This might be a stack mechanic, or it may be Eye of the Cyclone or 2000 Mina Swing. Move as needed, and then get back to a safe tile (the tile marked by a sword or a hammer, whichever one he cast second). Then get ready to move to the alternate tile and get back to the fight.
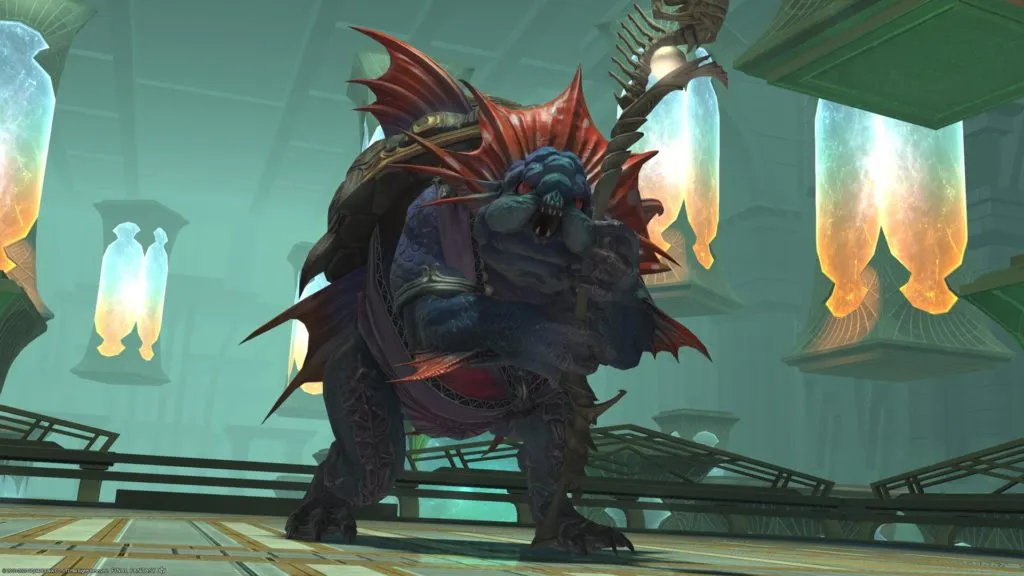
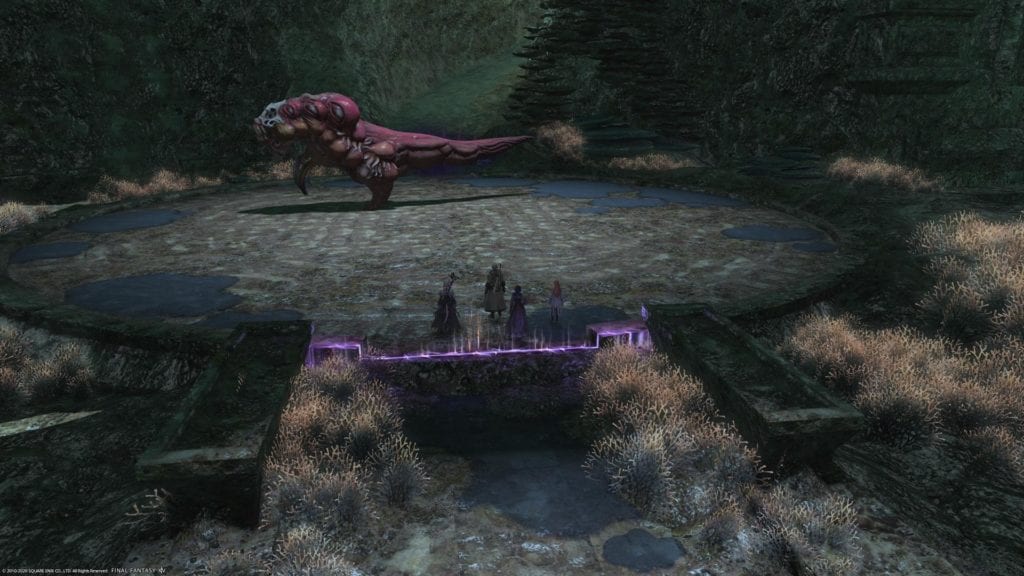
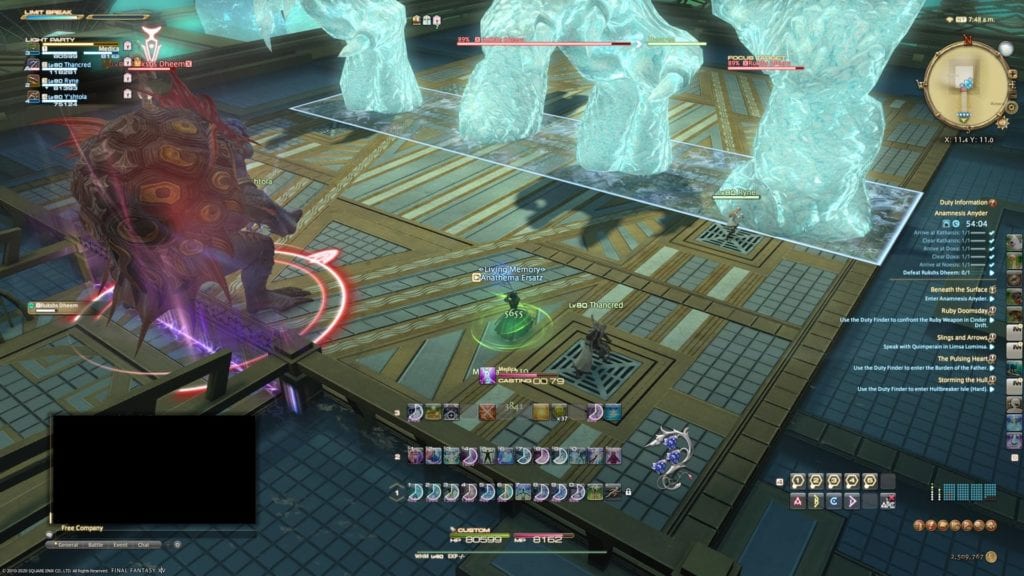
Rukshs Dheem

I was going to say the fishbone staff seems creepy, but honestly, I think I could rock a staff with a human skull on it.
Attacks:
Bonebreaker – Tankbuster.
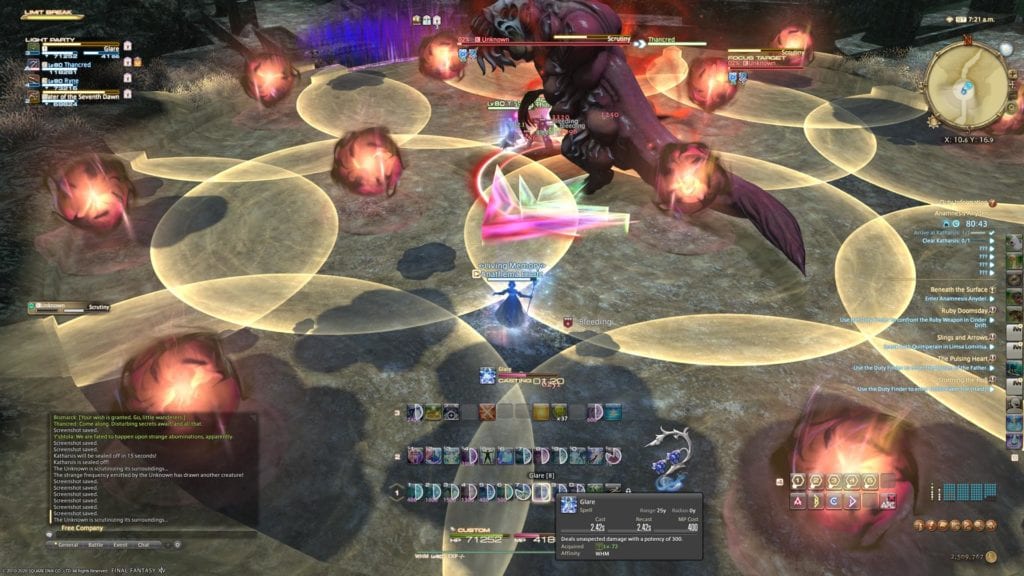
Seabed Ceremony – An unavoidable AoE that causes a blue damage zone (which inflicts Dropsy) to appear in the arena.
Depth Grip – This follows Seabed Ceremony and makes giant water hands rise from the damage zone. There are a few possible permutations of this:
If the zone is across the center of the arena, four hands will spawn, two facing in each direction. Stand next to one that isn’t facing you. Beware: Two party members will be marked with an AoE. They’ll need to position themselves so they don’t hit the rest of the party, while also dodging the hands.
If there are zones running along the edges of the arena, keep an eye out for which hands spawn first. There’s a safe spot farthest from where the first hand spawns. Once the first load of hands slam down, immediately run to the opposite end to dodge the second wave set.
Finally, hands will appear when all eight grates are bubbling. Wait for them to appear, then stand on a grate that isn’t going to get hit by a hand.
Rising Tide – An AoE attack at cardinal directions from the boss, used after the Depth Grip that runs across the center.
Command Current – Numerous directional AoEs from the center of the arena. Just stand in a safe zone.
The hands strike in the direction they’re facing, like they’re going to slap downwards. Don’t stand in front of them.
Strategy:
The third and final boss of Anamnesis Anyder is… a giant fish/turtle lady. Fair enough. This one’s mostly a case of dodging a lot of AoEs, but there are one or two other fun little quirks.
If you remember Sastasha from the early days of Final Fantasy XIV, you might remember the bubbling grates. These make a reappearance here, but this time you simply need to stand on the grates when they pop up. Failure to stand on all of them causes adds to appear, which should be cleared out immediately as they make the boss invincible. But this can be avoided by, y’know, making sure each party member stands on a grate.
The one time this gets tricky is when all eight grates in the arena start bubbling. Four of them will be hit with the Depth Grip hands, so make sure to stand on the others: The hands will kill the adds that spawn from the ones they’re covering.

The hands on the right are going to hit first, so the safe spot is where I’m standing. Once the last hand on the right splashes down, run straight down the middle to the far end of the arena to avoid the second wave of hands.
And that’s pretty much your lot in Anamnesis Anyder. A lot of AoEs to avoid, but once you get the gist of how the hands work, Rukshs Dheem should go down fairly easily. Once the turtle is flailing on her back, you can enjoy the continuation of the Final Fantasy XIV: Shadowbringers storyline – and hopefully some new gear, too.
For more Final Fantasy XIV guides, check out our regularly updated guide hub with tactics for all sorts of dungeons, raids, and trials added since Shadowbringers launched.


Published: Feb 24, 2020 06:30 pm