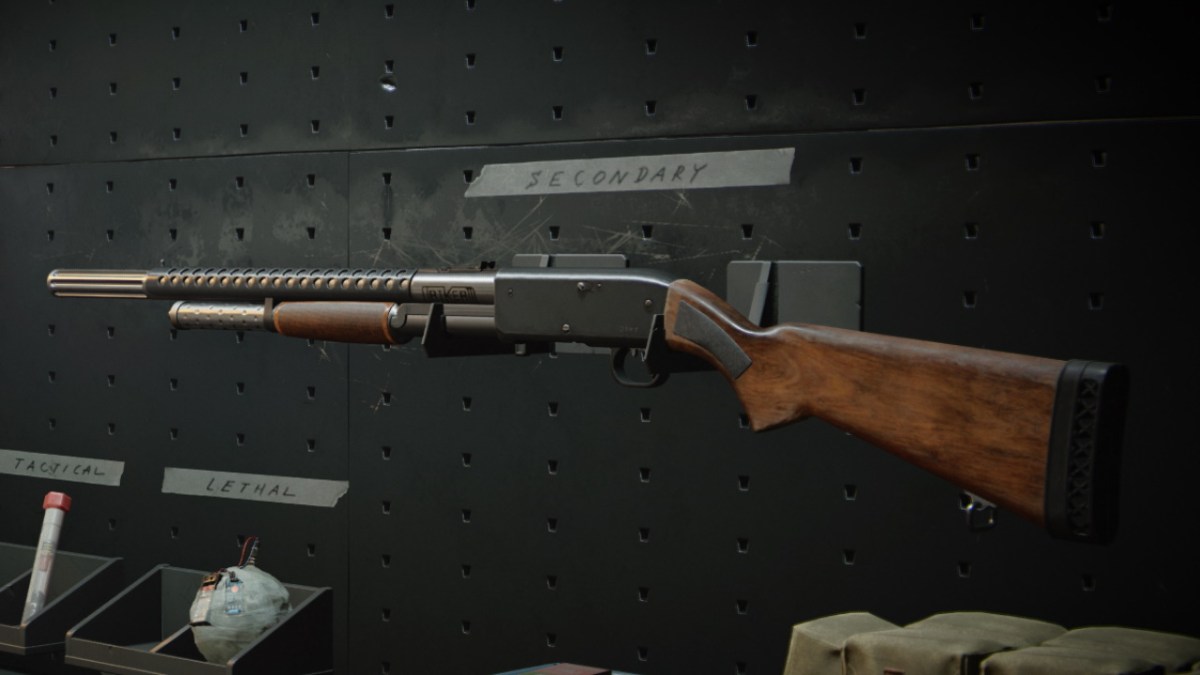
Call of Duty: Black Ops Cold War shotguns like the Hauer 77 have taken the back seat. This year’s installment has them once again act as secondaries, just like they were on Modern Warfare 2. Due to this, they’ve been significantly reworked and are now less forgiving and slightly underpowered compared to their Modern Warfare counterparts. Despite this, you can still make them work — it’s just going to require some effort.
Most players who try out the Hauer 77 will likely want to drop it from their loadout immediately. Frankly, without attachments, this shotgun is very poor. Its one-shot kill range is roughly three meters. And with a fire rate of just 66 rounds per minute, you’ll likely be dead before you get a second shot off. However, the Hauer does drastically improve once you have grinded to its max weapon level.
Hauer 77 Perk Greed build
- Barrel: 25.2″ Task Force
- Body: Steady Aim Laser
- Magazine: Stanag 8 Rnd Tube
- Handle: Serpent Wrap
- Stock: Marathon Stock
- Wildcard: Perk Greed
Perk Greed is the optimal wild card here since the Hauer doesn’t have eight good attachments. It’s already a secondary, so Law Breaker makes no sense, and Danger Close is terrible. How to use these perk slots is up to preference, but I’d highly recommend both Ninja and Ghost. Keeping yourself hidden is important with shotguns, as it lets you close the gap on the enemy team.
There are a lot of ways to build the Hauer 77 in Black Ops Cold War, but every optimal build has one attachment in common. The 25.2″ Task Force barrel is a must-have for getting the most out of the Hauer 77. When equipped, the Hauer gains an effective one-shot kill range of 10m. Whilst this still pales in comparison to the shotguns of Modern Warfare, it makes the Hauer devastating in close quarters. Just be aware that this barrel decreases your two-shot kill range down to 15m. I think the trade-off is worthwhile though, as the Hauer’s two-shot time to kill of 909 ms isn’t competitive anyway.
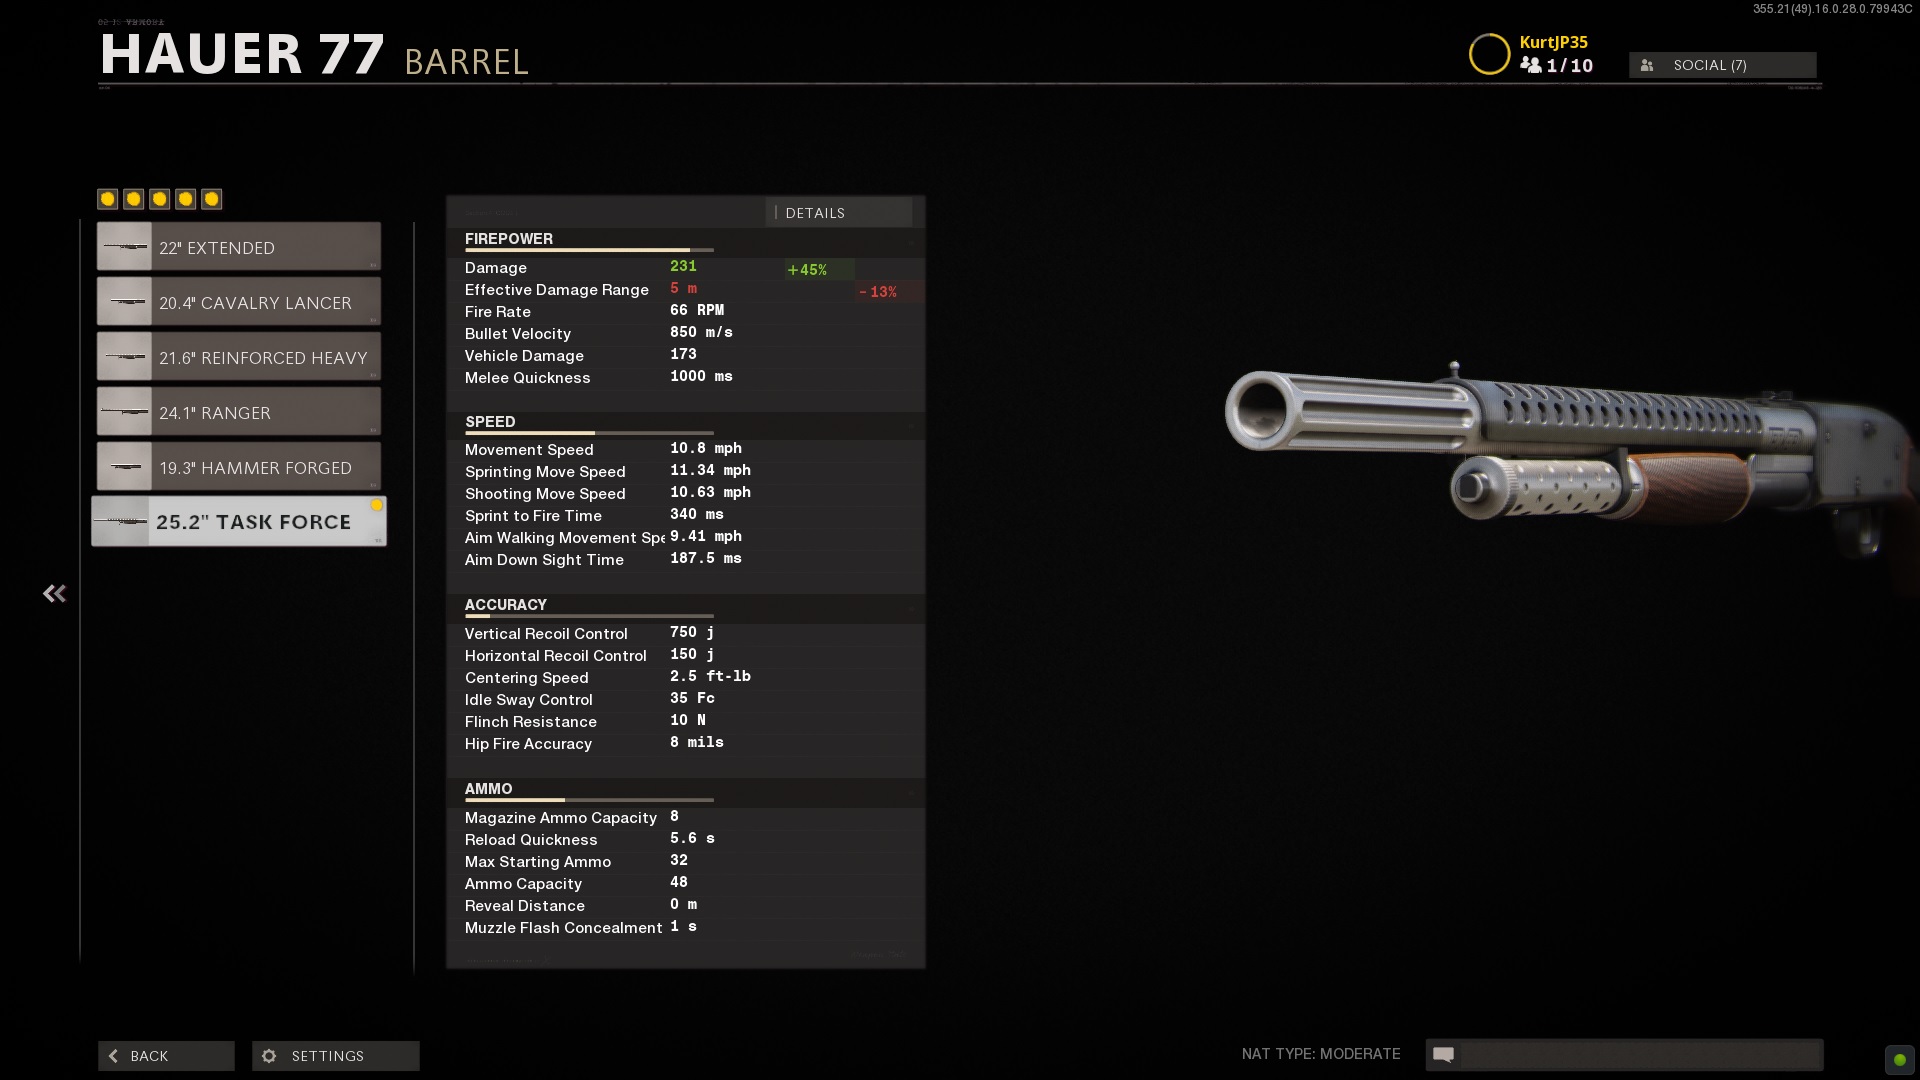
Although most of the in-game stats are useful and accurate, do not pay any attention to the supposed effective damage range. I have no idea what this stat refers to, but it’s not its one-shot kill range.
Either the Steady Aim Laser or SWAT 5Mw Laser are both decent options for your body attachment. Personally, I opt for the former as I don’t like the aim down sights time penalty given by the 5mW Laser. However, if you’re more likely to use hip fire, feel free to try out the 5mW Laser instead.
There’s no reason to not use the Stanag 8 Rnd Tube. It lets you fire more shells before having to reload, and has no significant downsides. As for my handle attachment, I am once again going to prioritize aim down sight time and opt for the Serpent Wrap. If you’re going to hip fire, consider using the Dropshot Wrap instead. It isn’t overly important, but, since it has no downsides, it’s a safe alternative for all play styles.
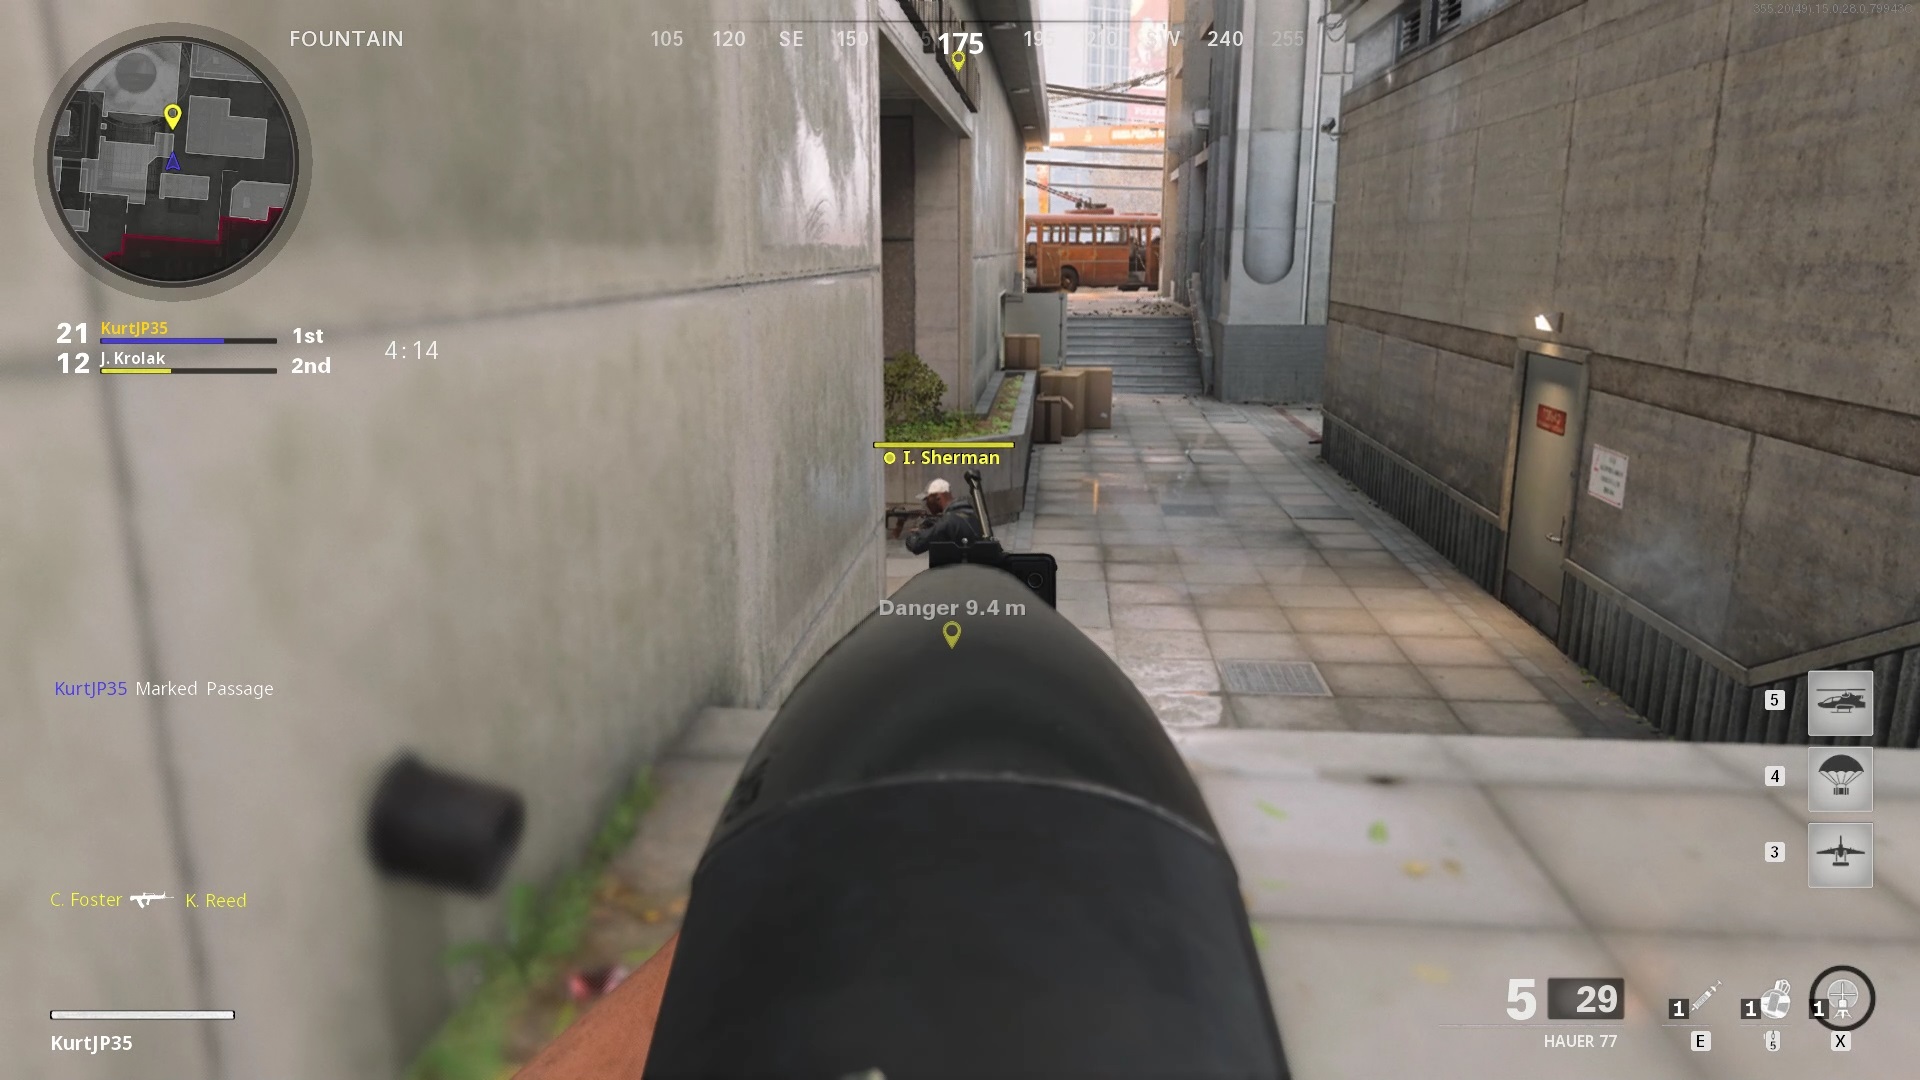
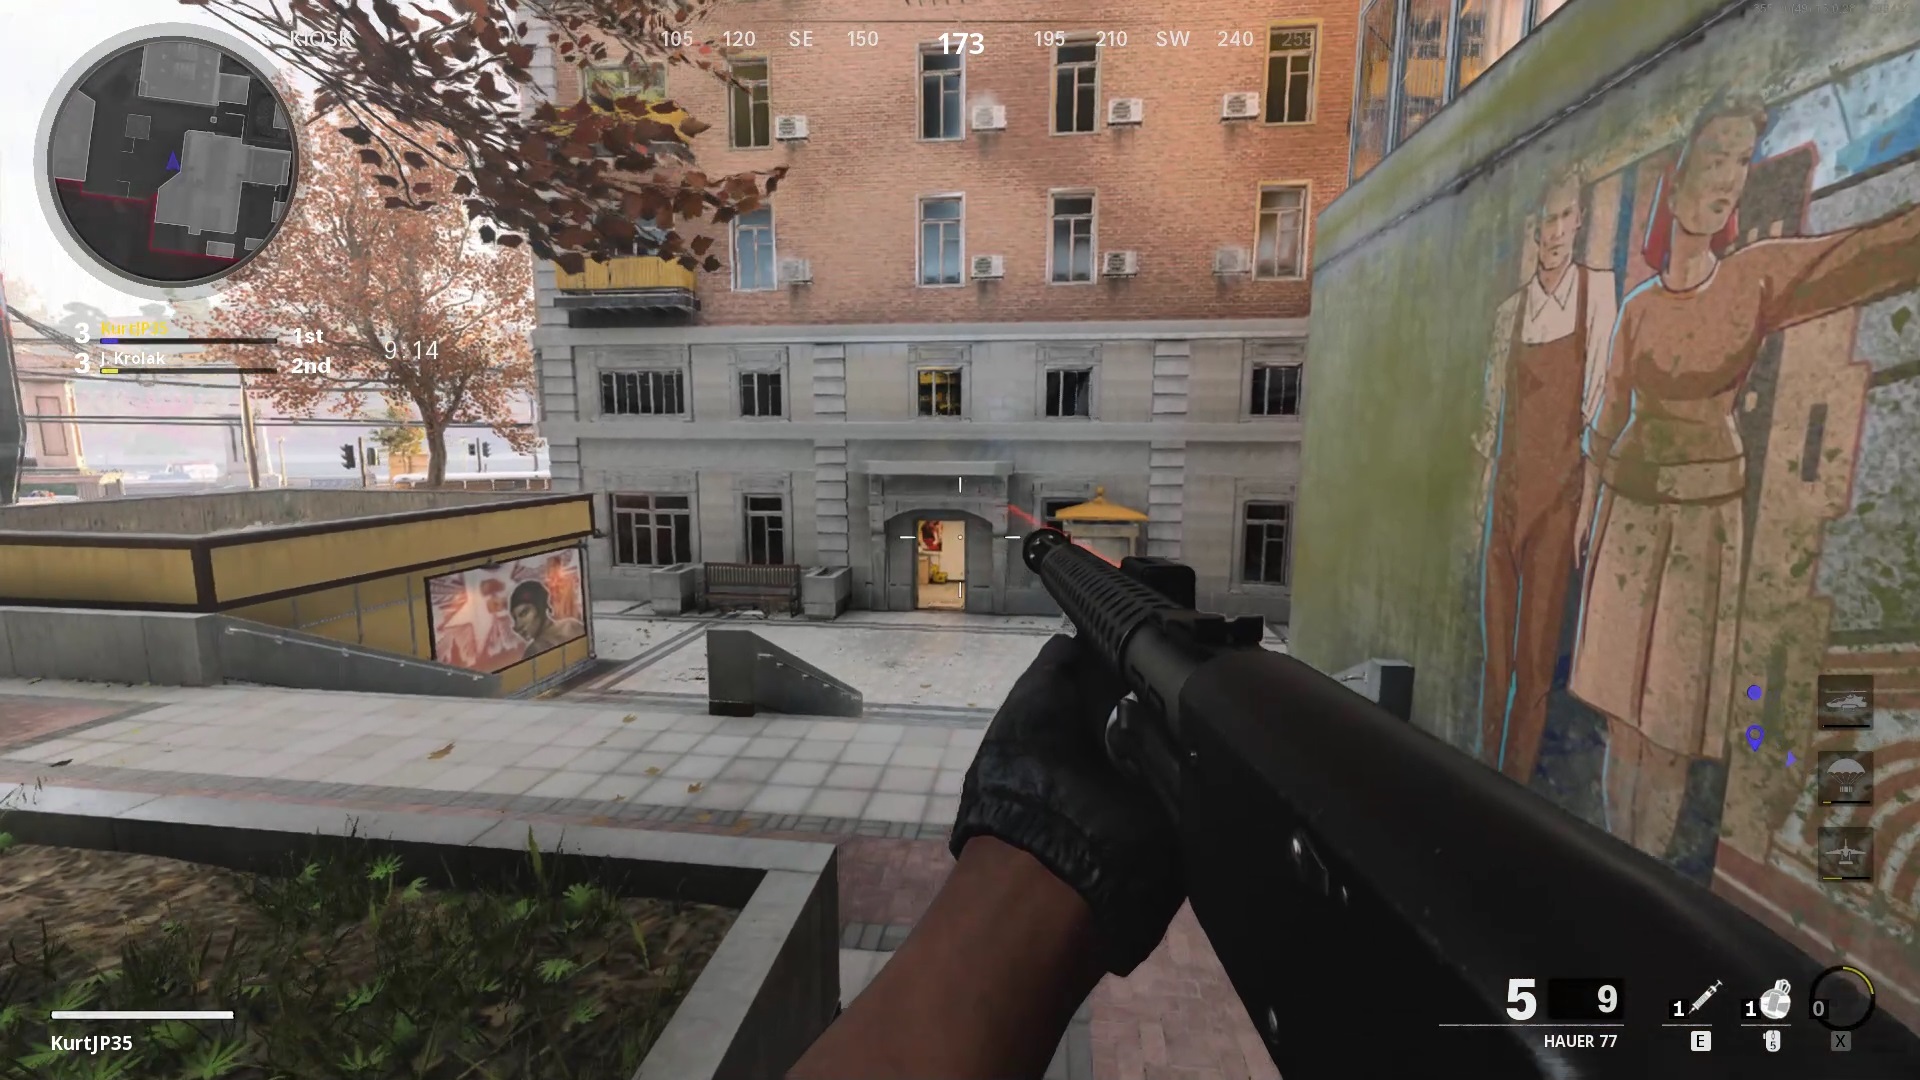
For visual reference, this is about what you can expect this Hauer 77’s one-shot kill range to be. It’s not extraordinary, but it is better than it looks in practice.
Finally, I find the Marathon Stock very nice for playing aggressively. This stock provides a ton of useful pros, but most noticeable is the 5% improvement to sprint speed. Being able to get around the map faster is vital in Black Ops Cold War. Needless to say, the sprint to fire buff is also nice for outgunning people up close. However, this does come with a hip-fire accuracy penalty. If that matters to you, go ahead and use the Shotgun Stock instead.
As an extra tip, I have some advice for those struggling with visibility. I know that it’s been a common problem for players on larger monitors and TVs. Both the Tiger Team Spotlight and Mounted Flashlight bodies give something the game calls ‘reveal distance.’ In practice, this makes it so that up to a certain range any enemies on your screen will appear with a circle above their heads. This can help spot people sitting in any dark corners or head glitches. A decent yet niche option for those who need it.
For more Call of Duty: Black Ops Cold War tips and guides, be sure to check out our guides and features hub.