EndwalkerThe second dungeon you’ll encounter as you stroll through Final Fantasy XIV: Endwalker isn’t quite as nasty as the first, but nonetheless, here’s our Tower of Babil guide.
In terms of trash mobs there’s nothing too much to write home about here. If you want to do gargantuan pulls, then the only room you need to be careful of is the last one. There are a whole lot of mobs that hit hard, plus some environmental AoEs.
As ever, while I’m not going to spoil any “story” in here, I will be naming all bosses and showing screenshots. So if you’re not this far in the game yet, beware: spoilers await.
Endwalker — Tower of Babil guide
Barnabas
Attacks:
Ground and Pound — Barnabas faces a party member and charges up a line AoE. Don’t stand in the direction he’s facing.
Dynamic Scrapline — Barnabas charges up a circle AoE around himself with a polarity charge. Note the polarity charge you have in comparison to his: equal polarities push each other away, while opposites attract. As the ring outside the arena also hurts, you want to stand as far away from him as is safely possible if you have a different polarity (as you’ll be pulled towards him) or as close to the AoE as possible if yours is the same.
Shocking Force — Stack AoE. Group up and heal.
Dynamic Pound — A line AoE through the center of the arena, with a polarity. As with Dynamic Scrapline, you want to stand as close as possible to the line if you have a matching polarity, or as far away as possible if yours is different. (Bear in mind it’s a circular arena, so you probably want to be close to the center too.)
Thundercall — Barnabas moves to the center of the arena and summons four electrical orbs.
Rolling Scrapline — Barnabas charges up a circle AoE around himself. The orbs will detonate with AoEs of roughly the same size as Rolling Scrapline, at the same time as it goes off. Stand in between the orbs to avoid.
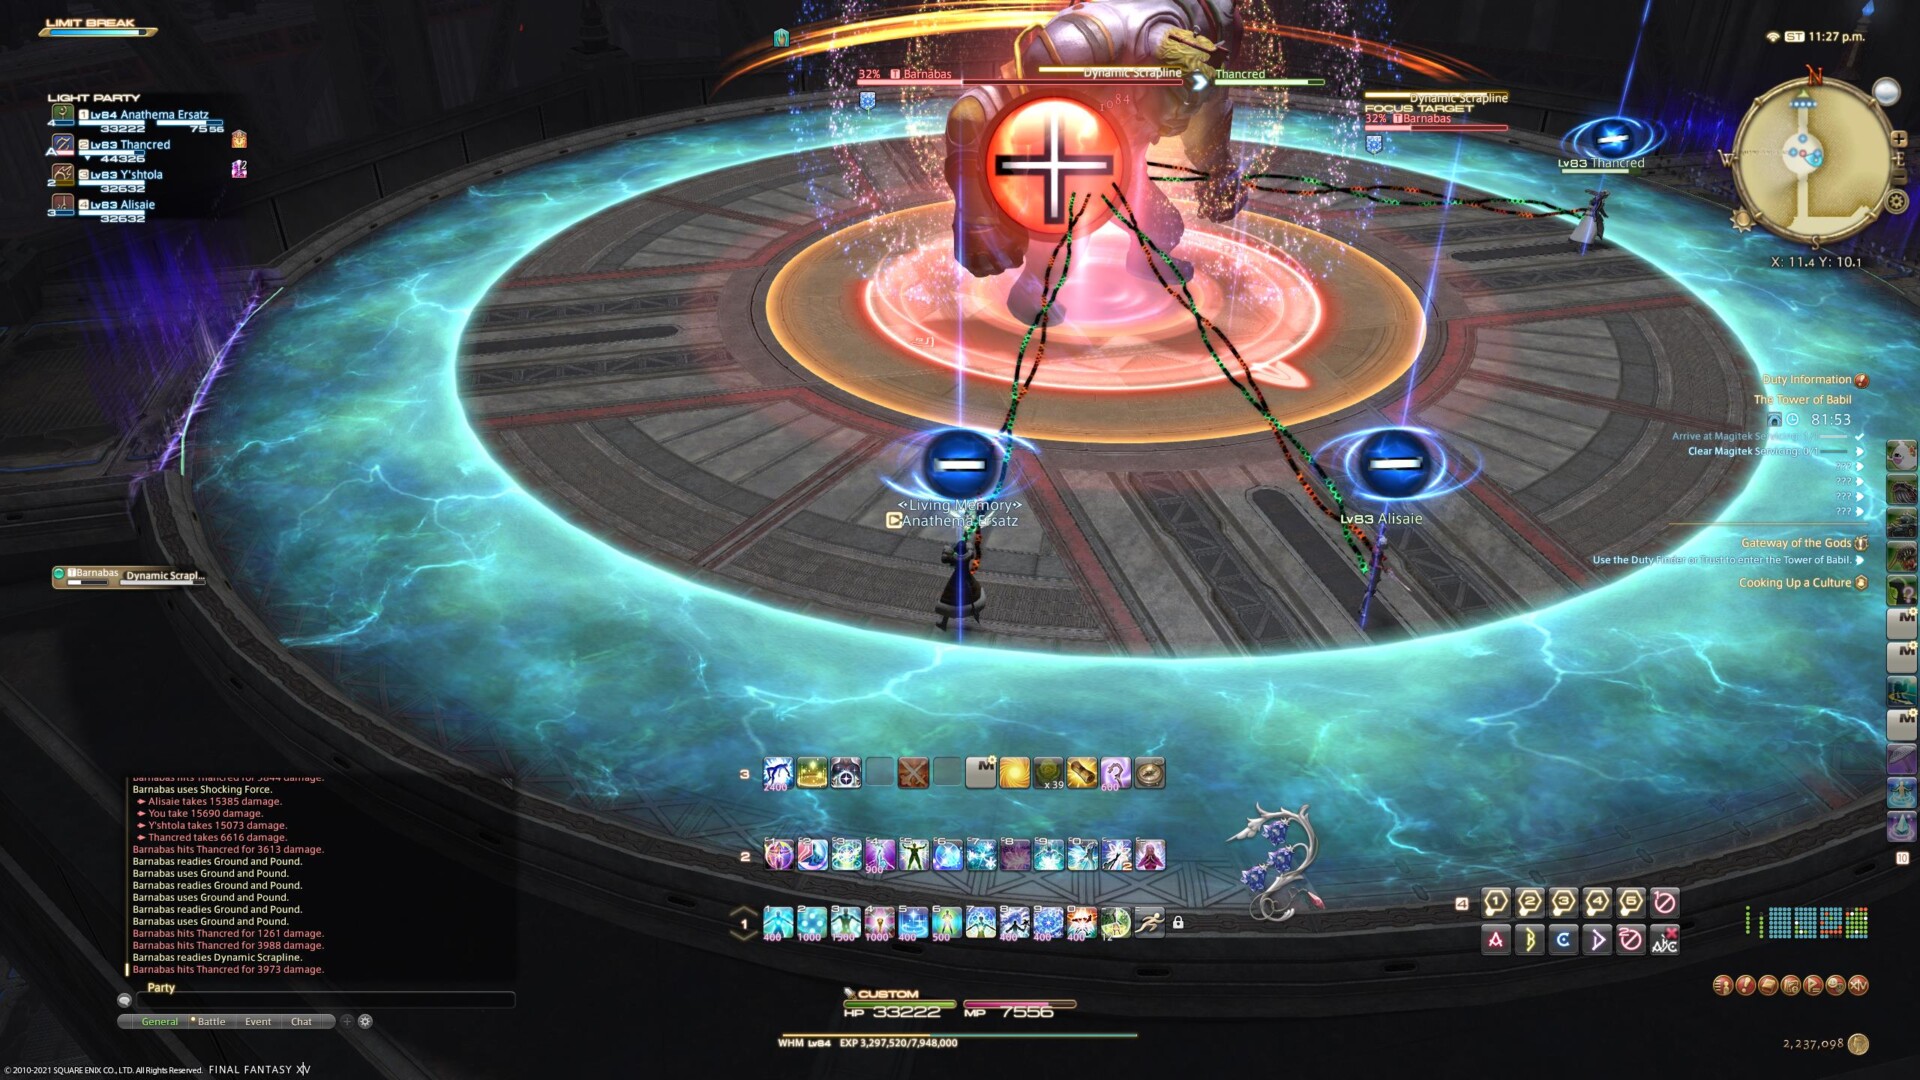
If the polarity matches, stand next to his AoE. If it doesn’t, stand away from it. You’ll be pushed or pulled accordingly.
Strategy:
After the relative cruelty of the Tower of Zot, the first few bosses of the Tower of Babil are a bit of a breather. Barnabas only really has one mechanic, and that’s the polarity stuff. The only thing you really need to remember is that if your polarity matches his, you want to stand close to his AoE; if it doesn’t, then stand away from it. That’s… well, that’s honestly it. He’s a really, really simple boss. Endwalker, please.
Lugae
Attacks:
Thermal Suppression — Unavoidable AoE. Heal through.
Magitek Missile — Large circle AoEs are targeted on two party members. Move out of them.
Magitek Ray — Lugae turns to face a party member and charges up a line AoE. Move out of the way.
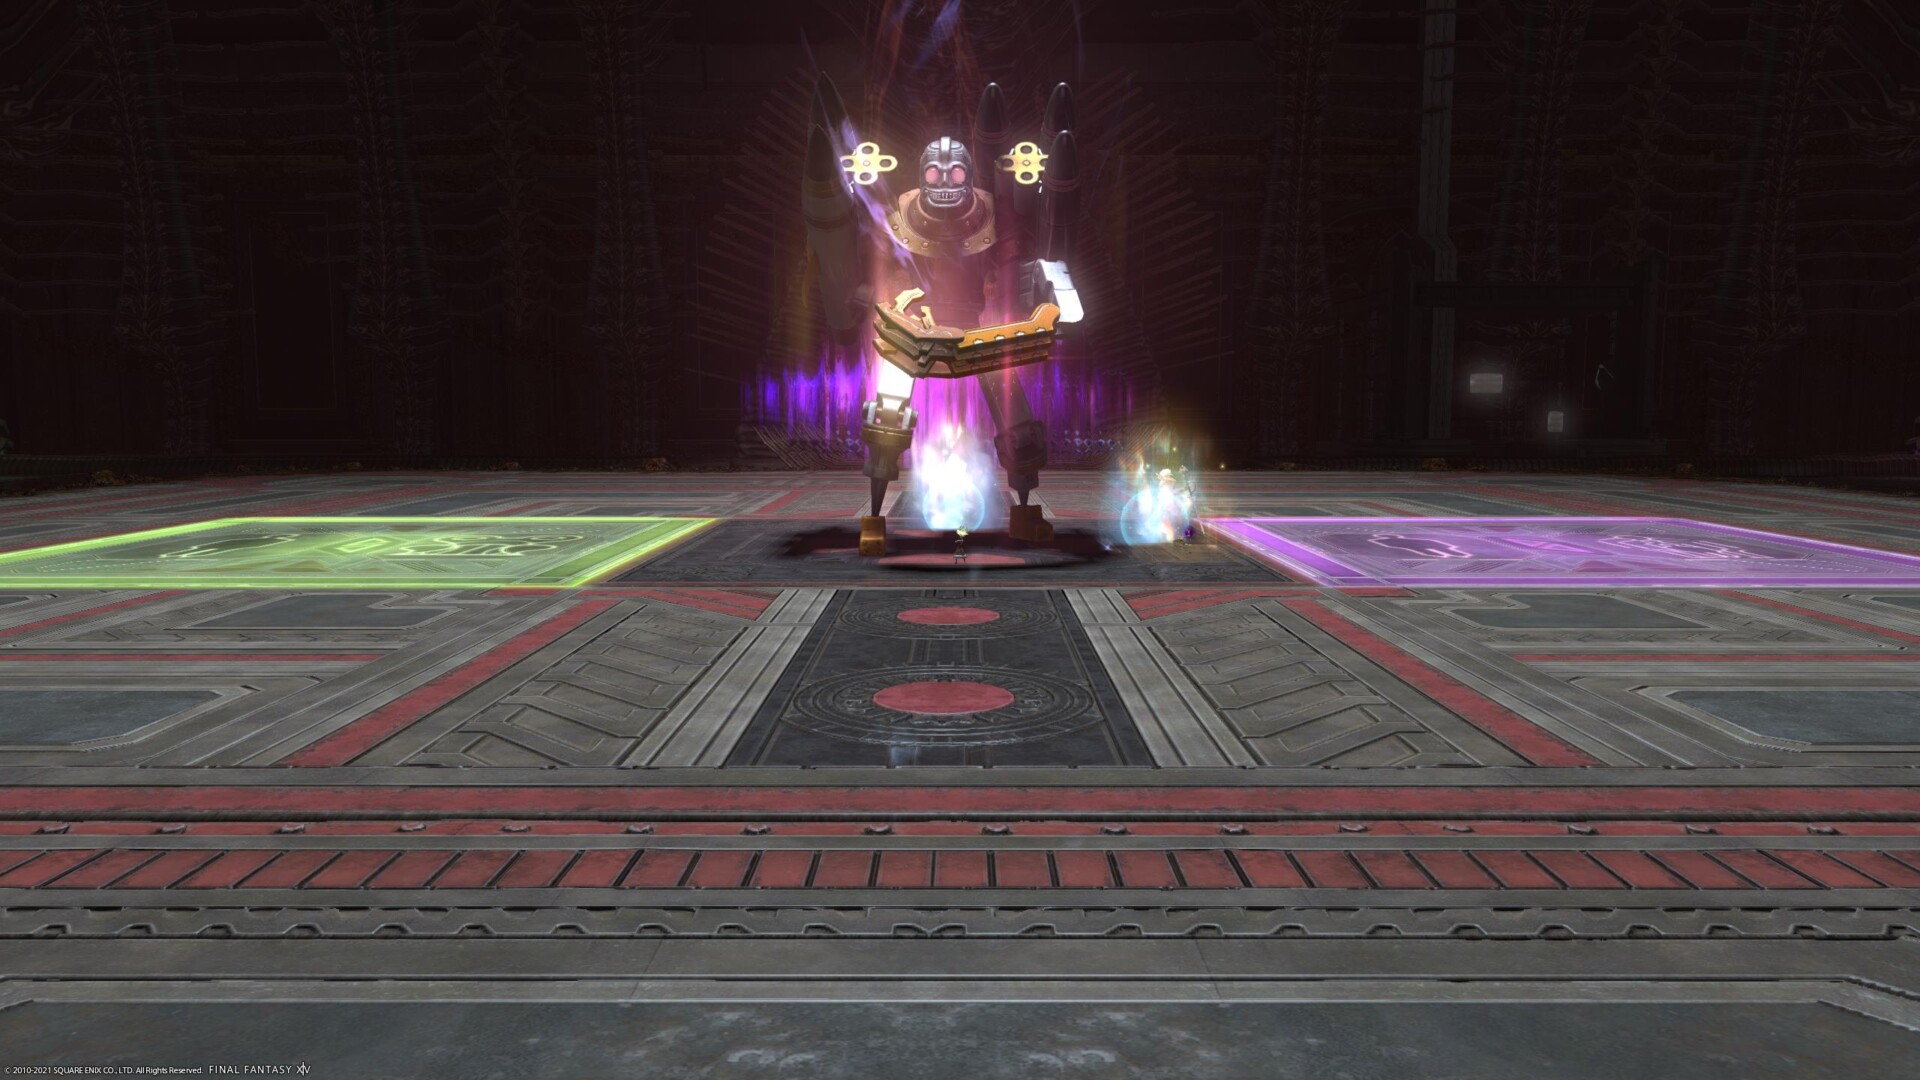
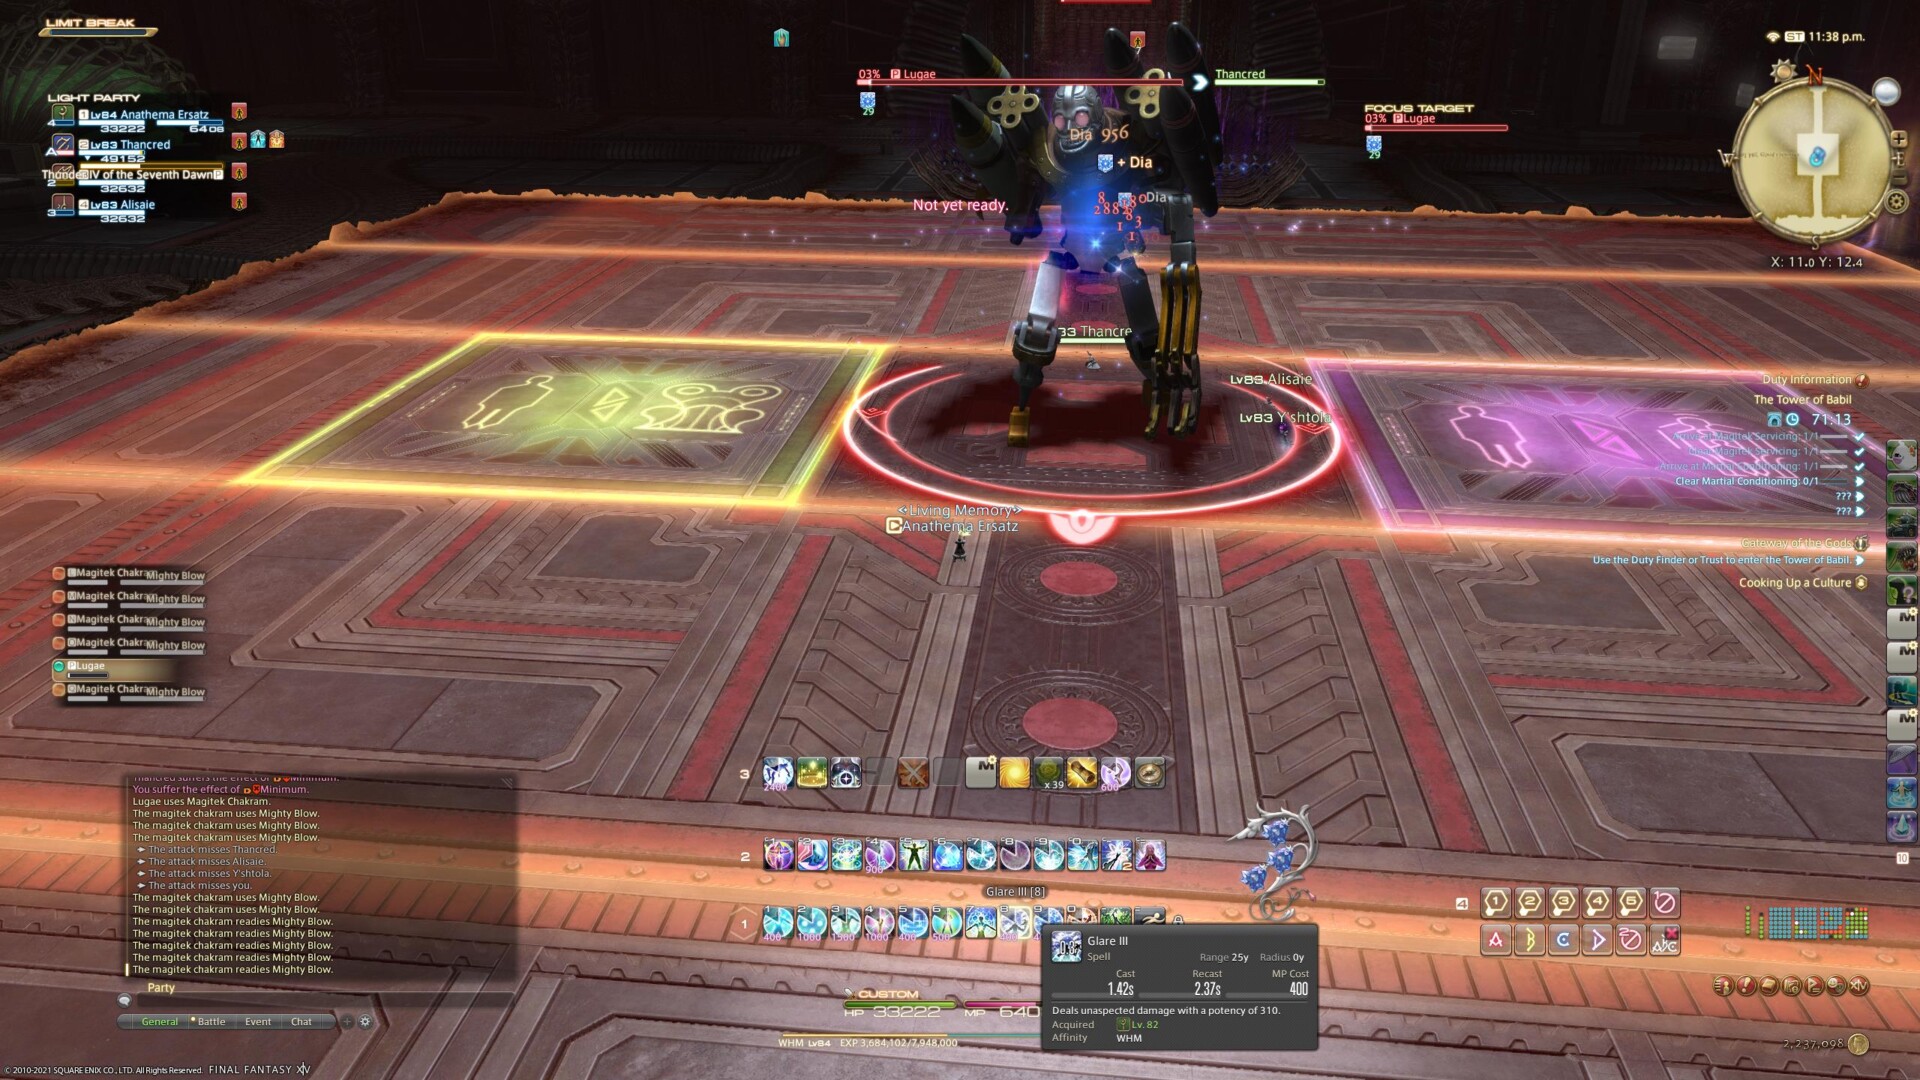
Magitek Chakram — Whirling chakrams appear on two edges of the arena, and the two panels on the floor light up. Stand on the purple one (marked with a person shrinking); you’ll be afflicted with Minimum for 20 seconds and the chakrams will sail over you.
Magitek Explosive — Lugae spawns three gigantic bombs in the arena. These have Bomberman rules: they’ll explode in cross-shaped AoEs that go the length and breadth of the arena. Stand somewhere that’s not perpendicular to any of the bombs.
Downpour — Lugae… makes the entire arena underwater and that gives us a Breathless debuff and massively slows us, despite all the underwater stuff we’ve done? Well, either way, move onto the glowing green square (marked with a toad) to turn into a toad for 20 seconds. You can’t attack in this form but it removes Heavy and Breathless, and lets you avoid the slew of Magitek Missiles he’ll fling out while Downpour is active.
Yes, even Lalafells need to move onto the purple tile to avoid Magitek Chakram.
Strategy:
As with Barnabas, Lugae is a breather boss (no pun intended with Downpour’s debuff). The AoEs and attacks are easy to avoid and heal through, and the only real “mechanic” is standing in the correct tile. For Chakram, stand on the purple tile to shrink. For Downpour, stand on the green tile to turn into a toad. Once you’ve stood on the tile you can safely move off it, although I’m not sure what happens if you move onto the tile again or if you move onto the other. Either way, there’s nothing much to this, and even without this Endwalker Tower of Babil guide, Lugae should go down without hassle.
Anima

Well, shit.
Attacks:
Lunar Nail — Lunar Nails will appear around the arena.
Phantom Pain — Any Nails that form a square will create an AoE in that square. Stand in any “square” where there’s no Lunar Nail in the corner to avoid this.
Mega Graviton — Unavoidable AoE. Heal through. This will also spawn four mega-graviton orbs in the corners, which come into play shortly…
Pater Patriae — A line AoE, either down the center of the arena or targeted at a party member. Don’t stand in it.
Aetherial Pull — You’ll be tethered to one of the mega-graviton orbs just before Pater Patriae goes off. Move a certain distance away from the orb to remain safe (it’ll change shape when you’re far enough away) or you’ll be pulled into the orbs and have a very bad time. You should have enough time to do this after Pater Patriae goes off.
Boundless Pain — All party members are pulled to the center of the arena, and Anima starts blasting constant AoEs. These start small and gradually grow to encompass nearly the entire arena. As soon as the Boundless Pain cast finishes and you’re pulled in, run towards one of the corners of the arena (preferably one near Anima so you can continue hitting it). If you’re too slow to move you’ll keep taking damage from Boundless Pain as you’re running and potentially die.
Erupting Pain — Each party member is targeted with an AoE. Split apart from each other and then heal through.
Imperatum —Anima drags you into Anima’s Dimension and the fight shifts to phase two.
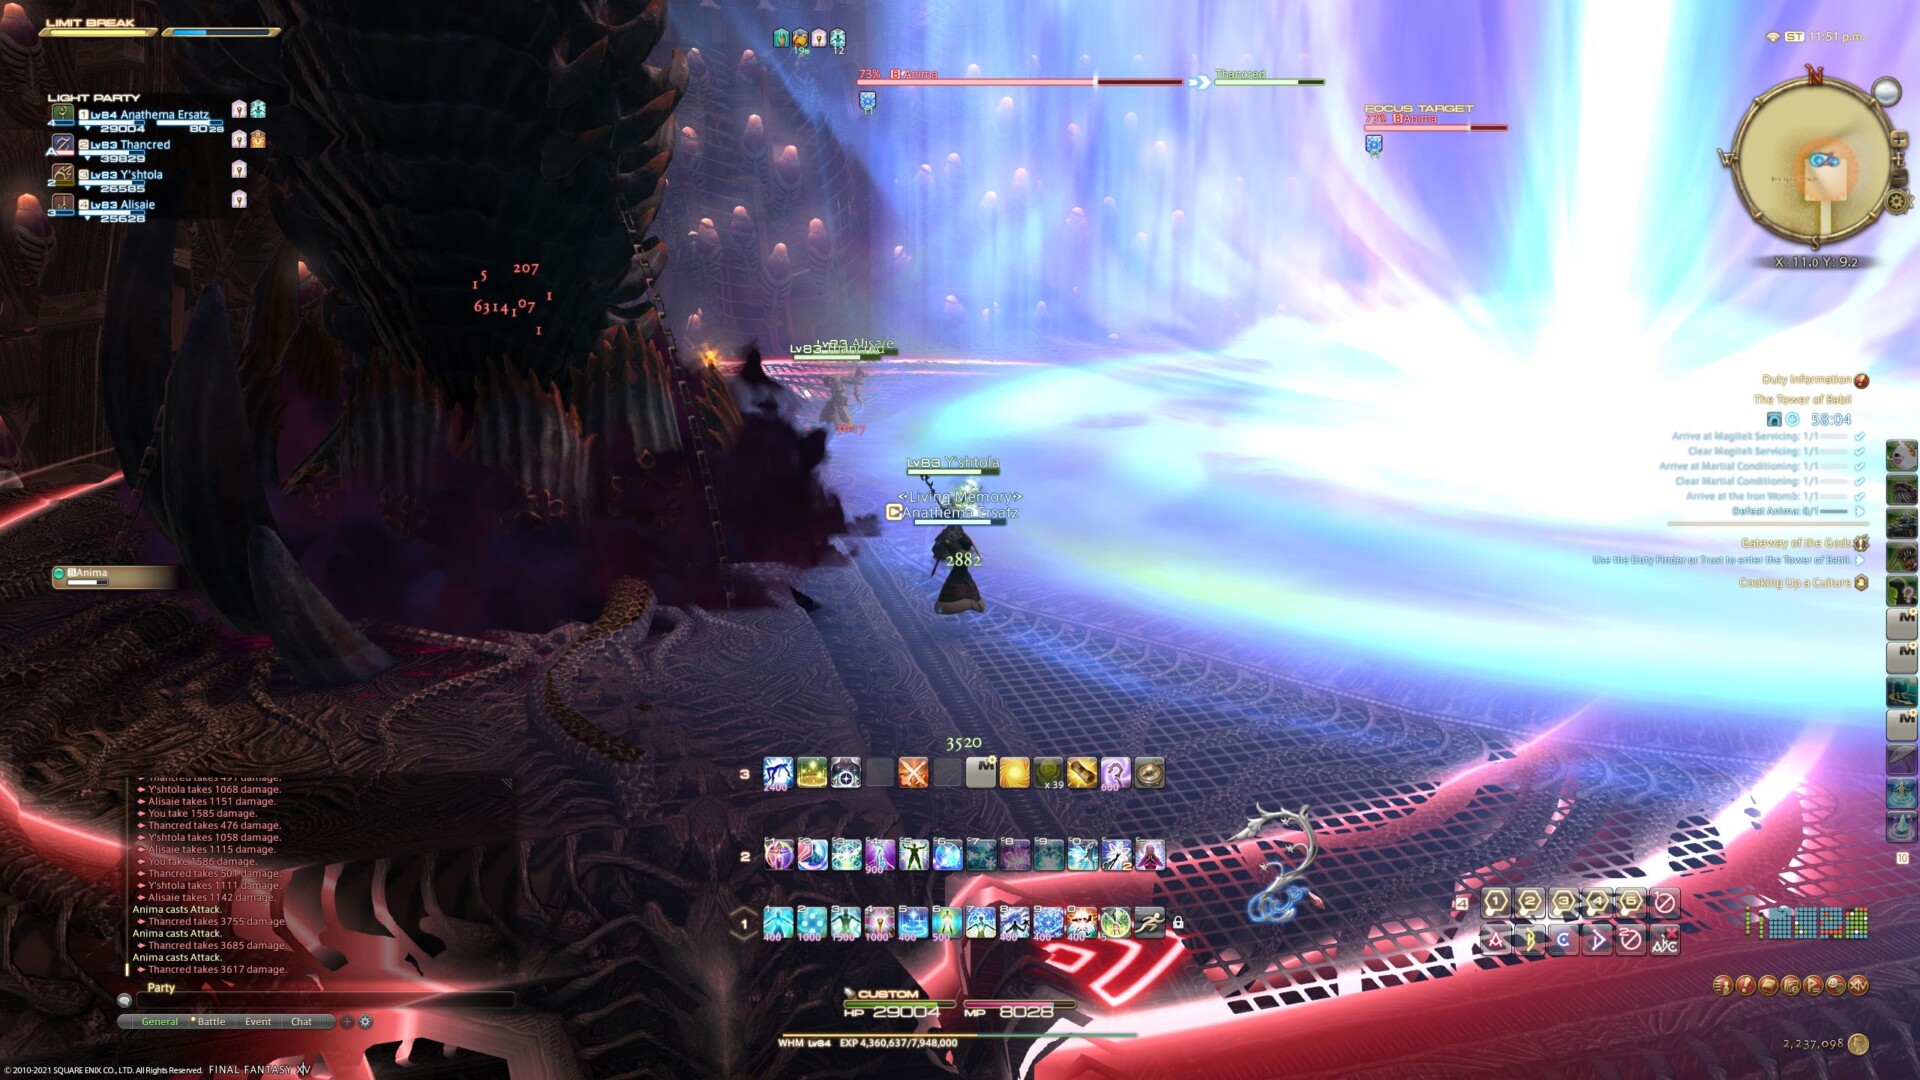
Boundless Pain only hits the center of the arena at the start, but as the cast continues it envelops close to the entire battlefield.
Obliviating Claw (1) — Anima summons claws at both sides of the arena which will blast out as line AoEs. Pay attention to which side spawns first, and stand in a gap between them to avoid the first set of AoEs. Then move into a gap between the remaining side to avoid the second set.
Obliviating Claw (2) — Two party members are marked with the tracking AoE marker. Run away and keep running to avoid the AoEs that will erupt in your wake. Also, try not to run into the party.
Oblivion — When you defeat Anima in Anima’s Dimension (or presumably when the Chaos gauge maxes out), Anima will do repeated unavoidable AoEs. Heal through them. As long as you killed Anima before the gauge hit 100, you should be fine. You’ll then return to the “real” Anima.
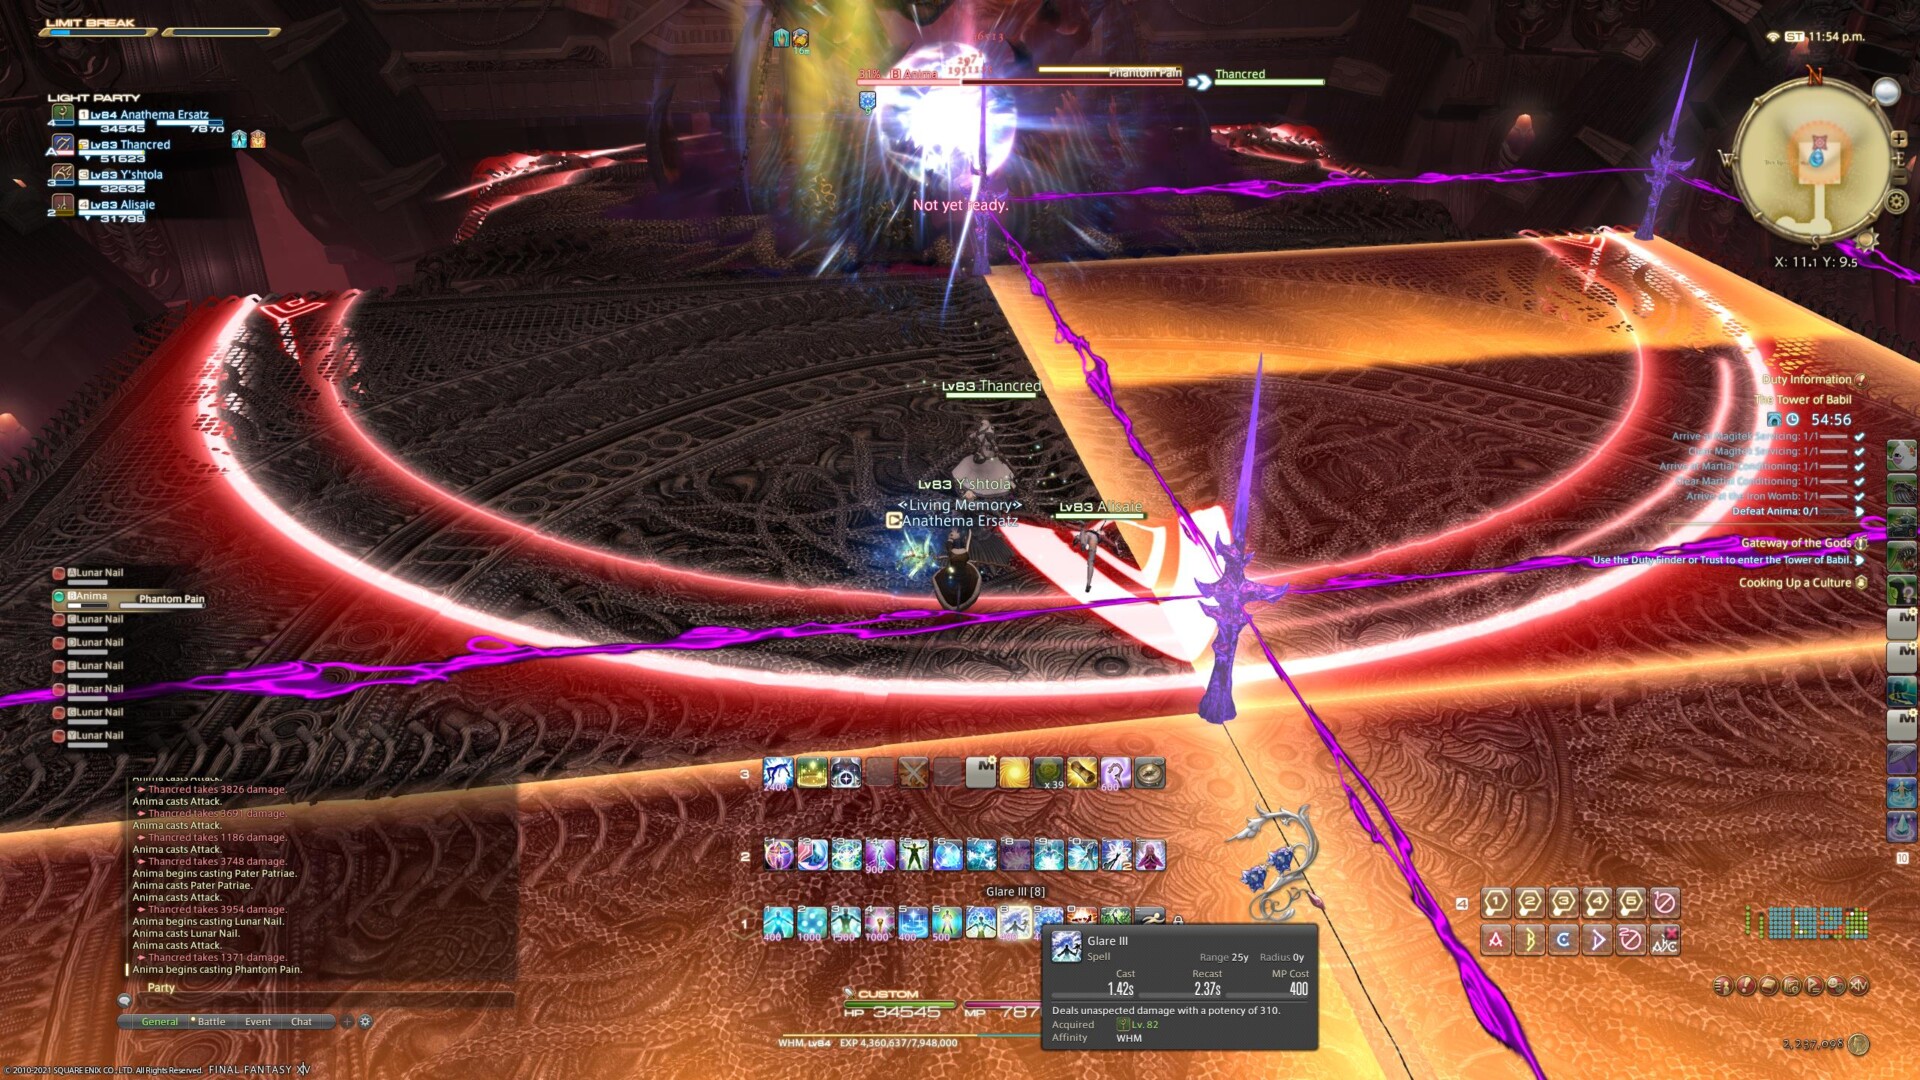
Phantom Pain’s later casts will hit all but one “square” of the arena, but it’s still simple enough: just move to the corner which doesn’t have a Lunar Nail in it.
Strategy:
Anima’s easily the most complex boss in Endwalker‘s Tower of Babil, but let’s face it: that’s not saying much. Still, there are a few things to bear in mind here. The basic thrust of the fight is that you’ll fight Anima until it casts Boundless Pain (or hits around 70% health — it’s hard to tell) at which point you’ll transition to Anima’s Dimension for the second phase. You’re against the clock here and need to kill it before the Chaos gauge fills, but you likely won’t even notice the timer. Once that Anima is dead, you’re returned from Anima’s Dimension to finish the fight.
There are only three attacks that are likely to cause issues. For Lunar Nail/Phantom Pain, the shorthand is just to move to a corner where there isn’t a Lunar Nail. For Boundless Pain, start running as soon as you’re pulled into the middle: with luck, you should only get hit by the initial (big) blast and maybe one or two of the smaller ones. If you’re too slow, pop Sprint, because the constant AoEs will likely come close to killing anyone that’s not a tank.

If I’m honest, I didn’t even notice the Chaos gauge until finishing this section of the fight.
Finally, Obliviating Claw (2) in Anima’s Dimension. The easiest way I’ve found to dodge this is just to move a corner and then run horizontally across the arena. If you’re too slow, double-back, or meander then this will likely kill you. Obviously, though, you probably shouldn’t run into your party.
With Anima down you’ve finished the dungeon, and so it’s about time to end this guide. Don’t worry: there’s a lot more to come in Final Fantasy XIV: Endwalker, and not everything is quite so simple as the Tower of Babil.