Ninety-five percent of Blasphemous 2 is a straightforward game about combat against brutally powerful bosses and enemies, but that last five percent is made up of arcane systems and puzzles that largely defy earthly logic. A great example of this is the Resonance system. Briefly mentioned when you’re introduced to Statues for the first time, Resonances are never brought up again or properly explained, leaving them a mystery for many players. This is unfortunate given how powerful they can be when harnessed, and how they can propel your favorite builds to new heights. Just how do Resonances work in Blasphemous 2? Keep reading to find out.
How to make use of Resonances in Blasphemous 2
Simply put, Resonances are passive buffs that are applied to your character when you equip two Statues of particular types next to each other on your Altarpiece of Favours. Assuming you’ve unlocked all the available Statue slots, you’ll have eight slots in total, split up into four clearly defined pairs, which gives room for four different active Resonances at once. There are two types of Resonances: Basic Resonances, which simply require you to match up two Statues in the same category, and Advanced Resonances, which require two specific Statues of different categories. We’ll cover Basic Resonances first.
Basic Resonances
-
- Screenshots by PC Invasion
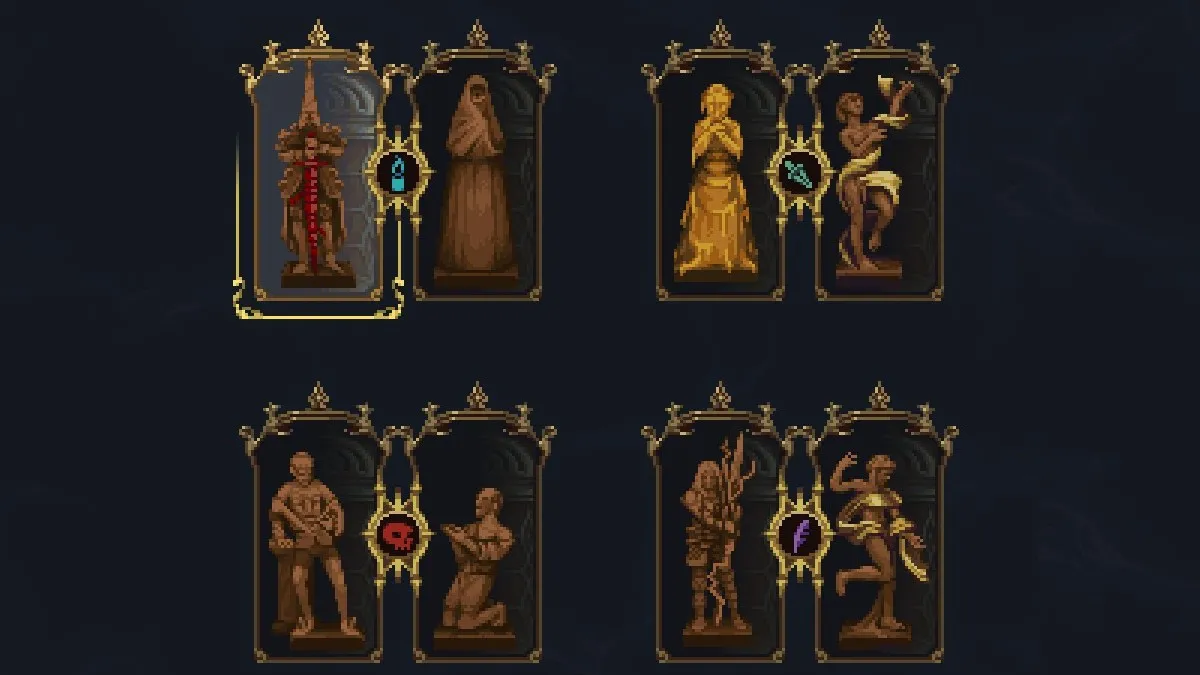
There are five categories of Statue in Blasphemous 2, and understanding them is key to understanding Basic Resonances. These categories are as follows:
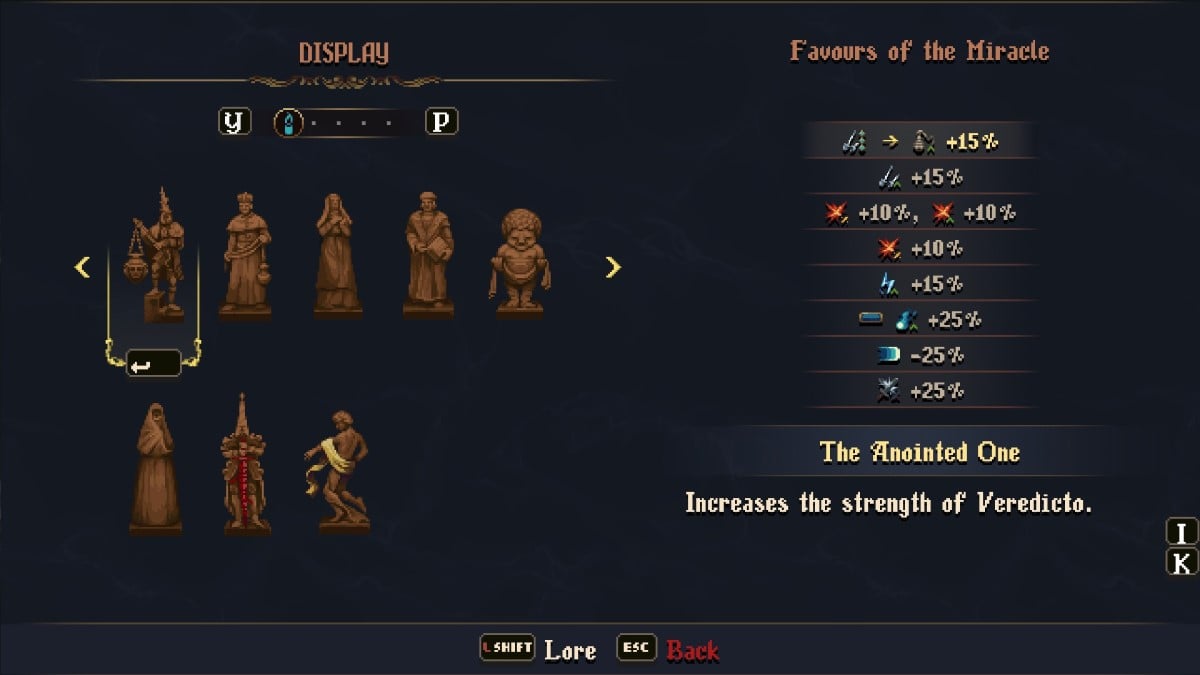
- Blue Candle – Contains Statues that provide benefits to the Veredicto and related buffs.
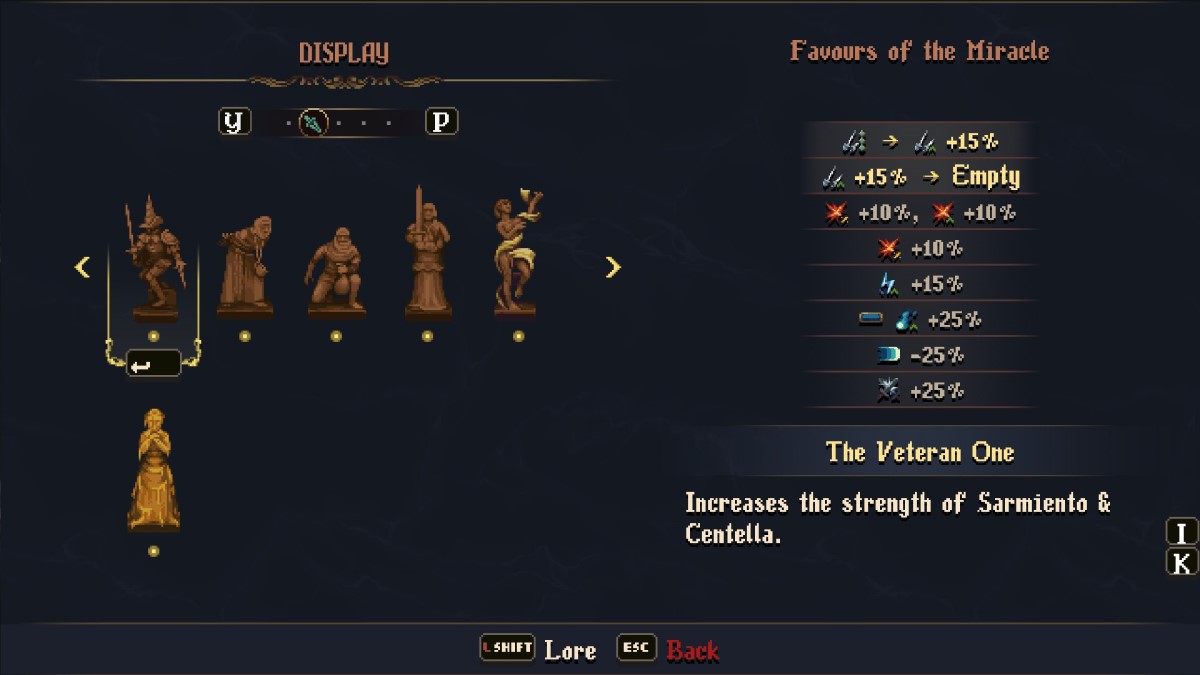
- Green Sword – Contains Statues that provide benefits to Sarmiento and Centella and related buffs.
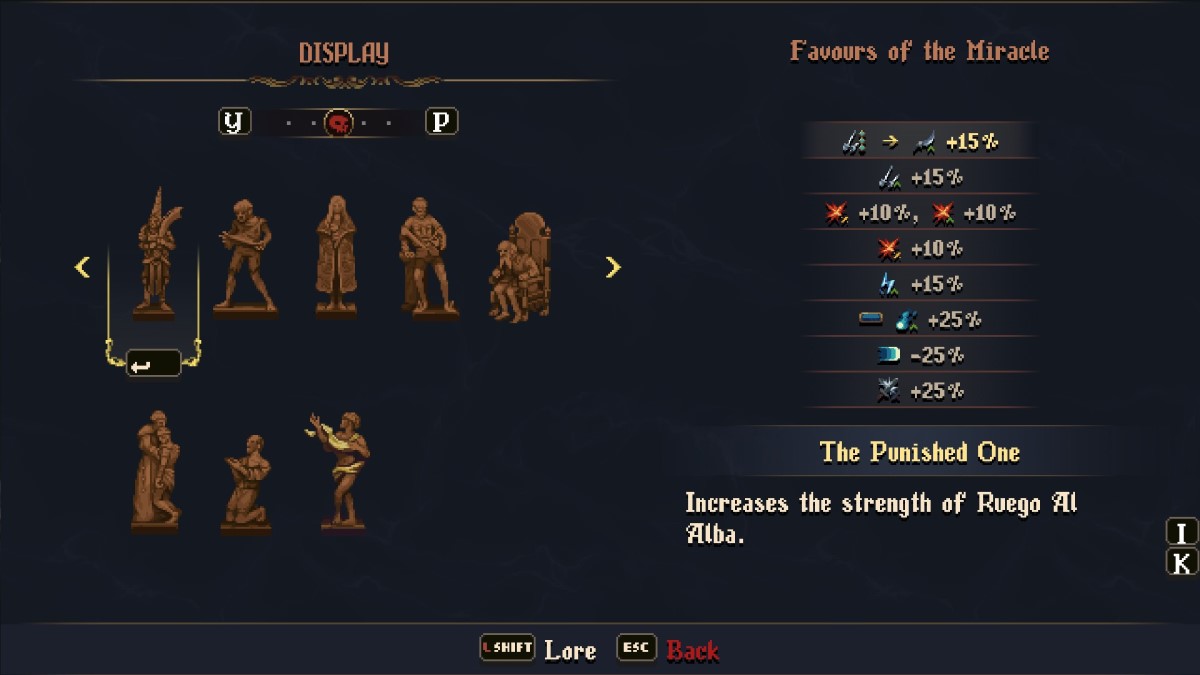
- Red Skull – Contains Statues that provide benefits to the Ruego Al Alba and related buffs.
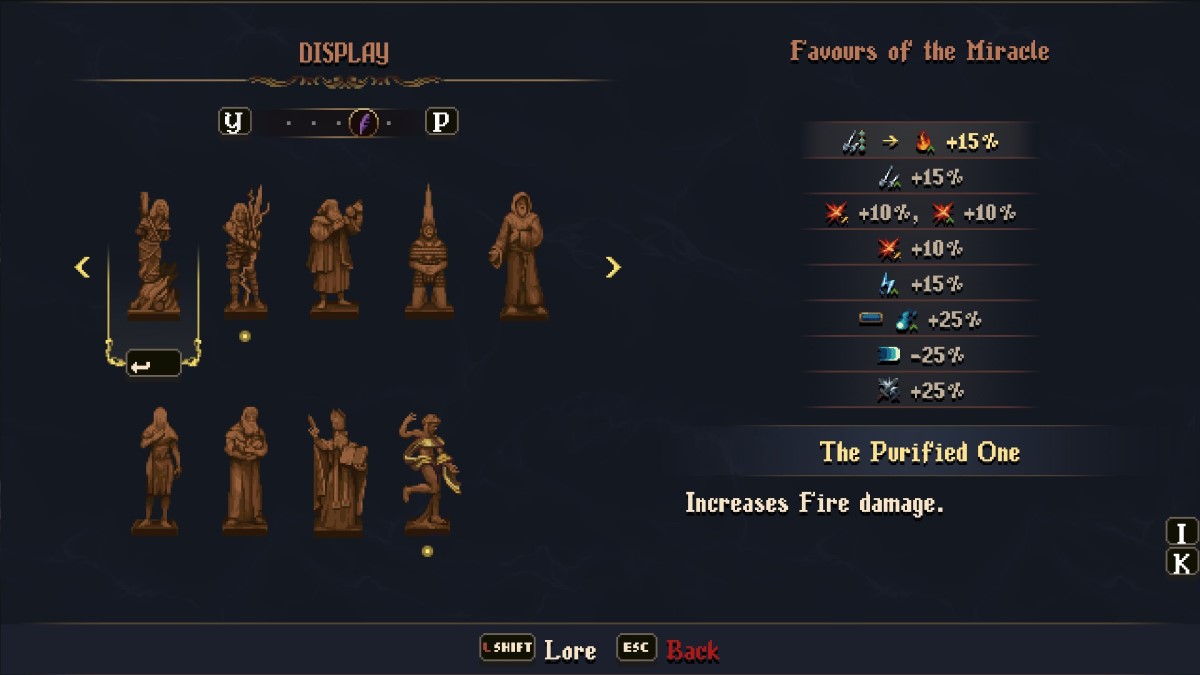
- Purple Feather – Contains Statues that provide benefits to elemental damage and related buffs.
- Gray Orb – Contains Statues that provide miscellaneous benefits, mostly centered around Guilt.
Screenshot by PC Invasion
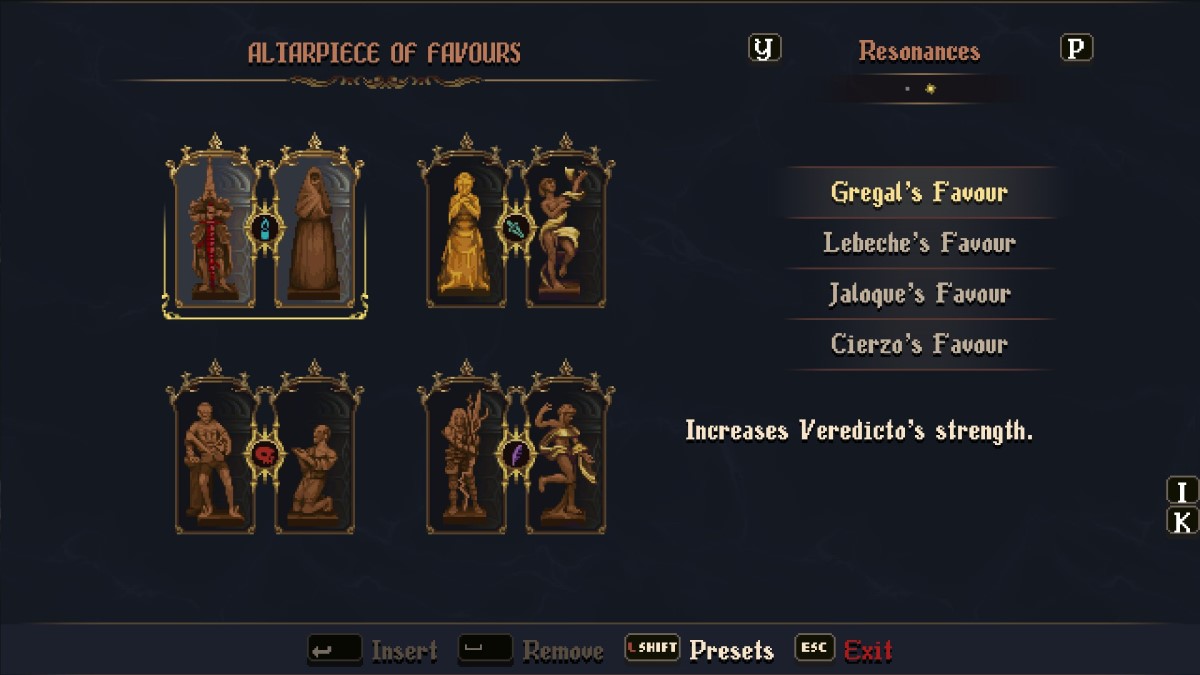
You can tell which category a given Statue belongs to by looking at the scroll bar above the Statue selection when choosing one to fill a slot. For every category except Gray Orb, there’s an associated Basic Resonance, which can be activated by equipping two Statues from that category next to each other in a pair. The available Basic Resonances are as follows:
- Gregal’s Favour – Increases Veredicto’s strength. Activated by pairing up two Statues from the Blue Candle category.
- Lebeche’s Favour – Increases Sarmiento and Centella’s strength. Activated by pairing up two Statues from the Green Sword category.
- Jaloque’s Favour – Increases Ruego Al Alba’s strength. Activated by pairing up two Statues from the Red Skull category.
- Cierzo’s Favour – Increases any source of elemental damage. Activated by pairing up two Statues from the Purple Feather category.
As you can see, equipping two Statues from the same category next to each other provides a nice boost to the damage type already supported by Statues in that category, making it easy to put together dedicated builds. You can also have multiple instances of the same Resonance at once. For example, if you equip all six of the Green Sword Statues across three different pairs, you’ll receive three instances of Lebeche’s Favour, which will increase the damage dealt by Sarmiento and Centella three times.
Advanced Resonances
Screenshot by PC Invasion
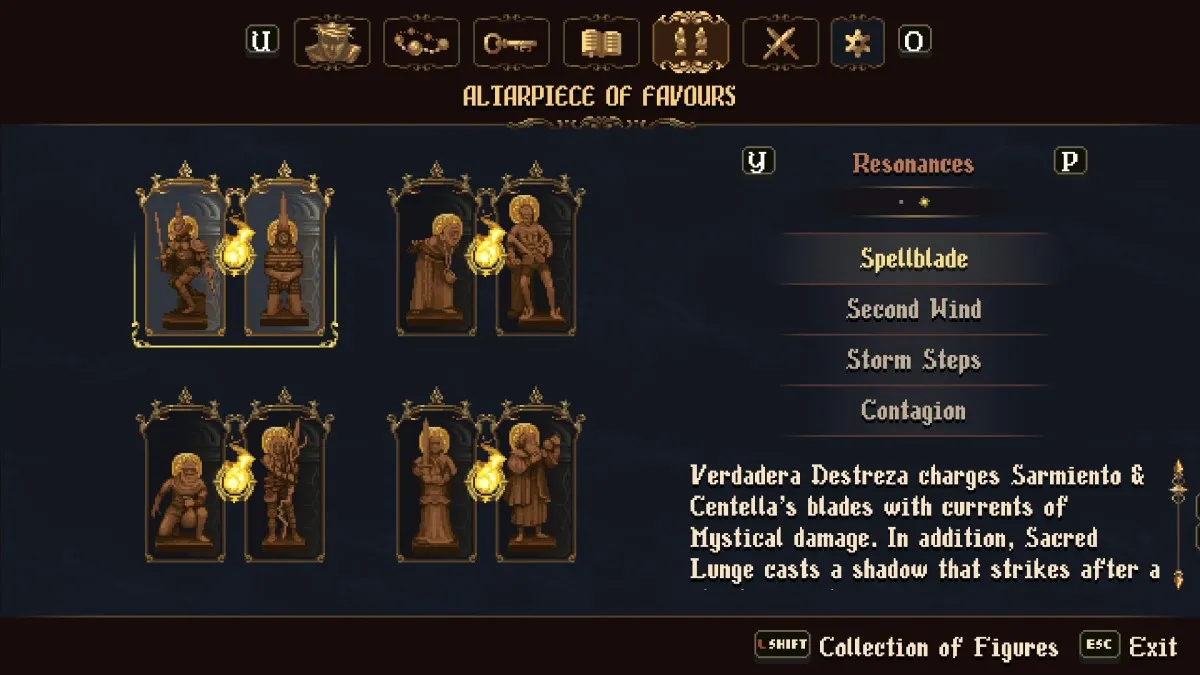
As mentioned above, Advanced Resonances are more powerful passive bonuses activated by pairing up two specific Statues from different categories. While trickier to access, these Resonances can be game-changing, with many adding bonus effects to your skills, changing the elemental damage dealt by your attacks, or providing extra boosts when using Bile Flasks, among other things. Here’s a full list of the available Advanced Resonances, their effects, and the Statues you need to combine to activate them:
| Name | Effect | Statue 1 | Statue 2 |
| Deflagration | Boosts some of Veredicto’s hits, creating bursts of Fire when activated. | The Anointed One | The Purified One |
| Venomous Resin | Replaces Veredicto’s embers with toxic incense, causing its blows to create clouds of Miasma. | The Anointed One | The Alchemist |
| Purging Bronze | Inflames Veredicto with dark fire born of Guilt itself. Increases damage depending on accumulated Guilt. | The Anointed One | The Confessor |
| Burning Faith | Reduces Fervour consumption to zero by keeping Veredicto in an Active state. | The Thurifer | The Selfless Father |
| Stormrage | Sarmiento and Centella’s strikes can create chain lightning bolts that damage nearby enemies. | The Veteran One | The Tempest |
| Spellblade | Verdadera Destreza charges Sarmiento and Centella’s blades with currents of Mystical damage. In addition, Sacred Lunge casts a shadow that strikes after a short moment. | The Veteran One | The Guide |
| Purging Silver | A dark storm born of Guilt itself sweeps across the silver. Increases the damage of Sarmiento and Centella’s lightning bolts depending on the amount of Guilt accumulated. | The Veteran One | The Confessor |
| Second Wind | Drinking a Bile Flask regenerates all Verdadera Destreza markers. | The Pilgrim | Nacimiento |
| Endless Wrath | Killing an enemy during Blood Pact renews its duration. | The Partisan | The Demented One |
| Galvanic Plead | Blood Pact imbues the blade of Ruego Al Alba with lightning. | The Punished One | The Tempest |
| Rosary of Torment | Reaper Rosary launches a cutting wave that deals Mystical damage. | The Punished One | The Guide |
| Purging Steel | A dark force born of one’s own Guilt runs through Ruego Al Alba. Increases the Mystical damage of Blood Pact depending on the Guilt accumulated. | The Punished One | The Confessor |
| Storm Steps | Dodge creates lightning bolts, which damage nearby enemies. | The Pillager | The Tempest |
| Briar and Thorn | When dodging, a barrier of thorns is invoked, damaging and piercing through enemies. | The Pillager | The Alchemist |
| Contagion | Blocking an attack creates a whirlpool of Miasma that damages nearby enemies. | The Partisan | The Alchemist |
| Slaughter | Executing an enemy halts the passage of time for a few seconds. | The Ecstatic Novice | Viridiana |
| Alchemical Time | Drinking a Bile Flask halts the passage of time for a few seconds. | The Ecstatic Novice | Nacimiento |
| Liquid Faith | Drinking a Bile Flask regenerates a good amount of Fervour. | The Scribe | Nacimiento |
| Thorned Retort | Creates a barrier of thorns when struck, inflicting Miasma damage. | Trifon | The Alchemist |
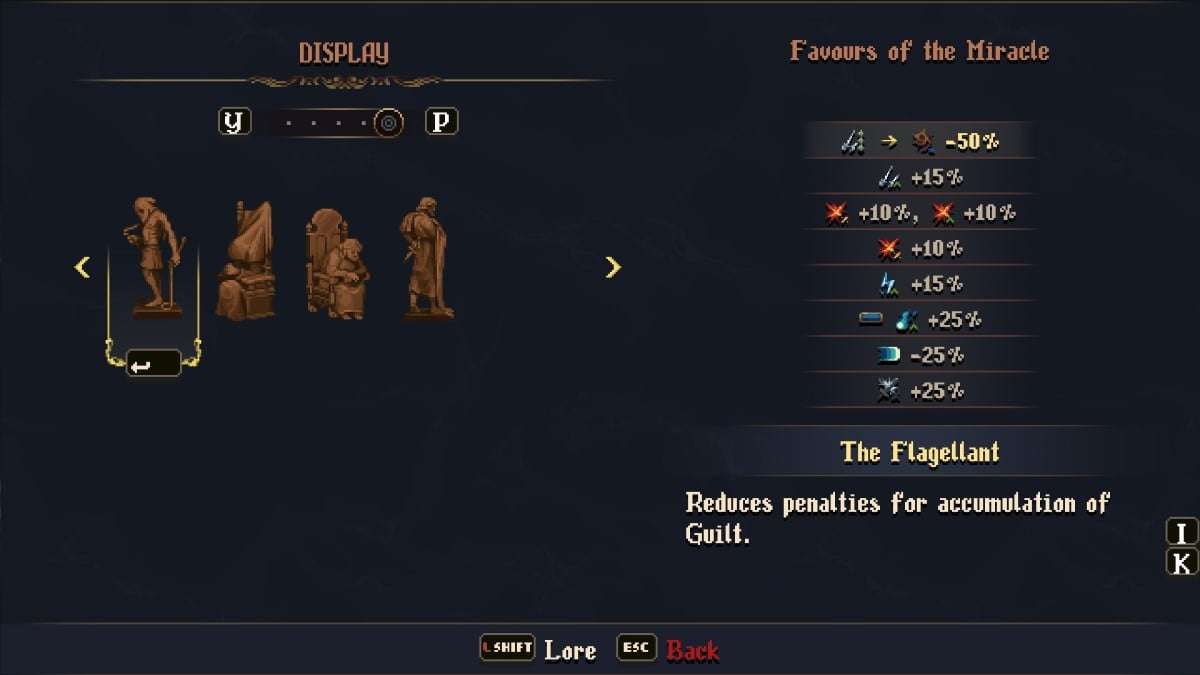
| Orison Apocrypha | Intones occult versions of certain prayers, which should never again be uttered. | The Woman of the Stolen Face | The Flagellant |
Since Advanced Resonances are so powerful and build-defining, you’ll likely want to use as many of them as possible during your playthrough. Don’t forget about Basic Resonances though: particularly early on, when your pool of available Statues is limited, they can provide a nice little boost to your weapon of choice.
So there you have it: a full guide on how Resonances work in Blasphemous 2. It’s not the easiest system to wrap your head around, but once you do, you’ll have access to some excellent passive bonuses that can be the difference between victory and defeat in the game’s tough boss fights and cramped combat gauntlets.