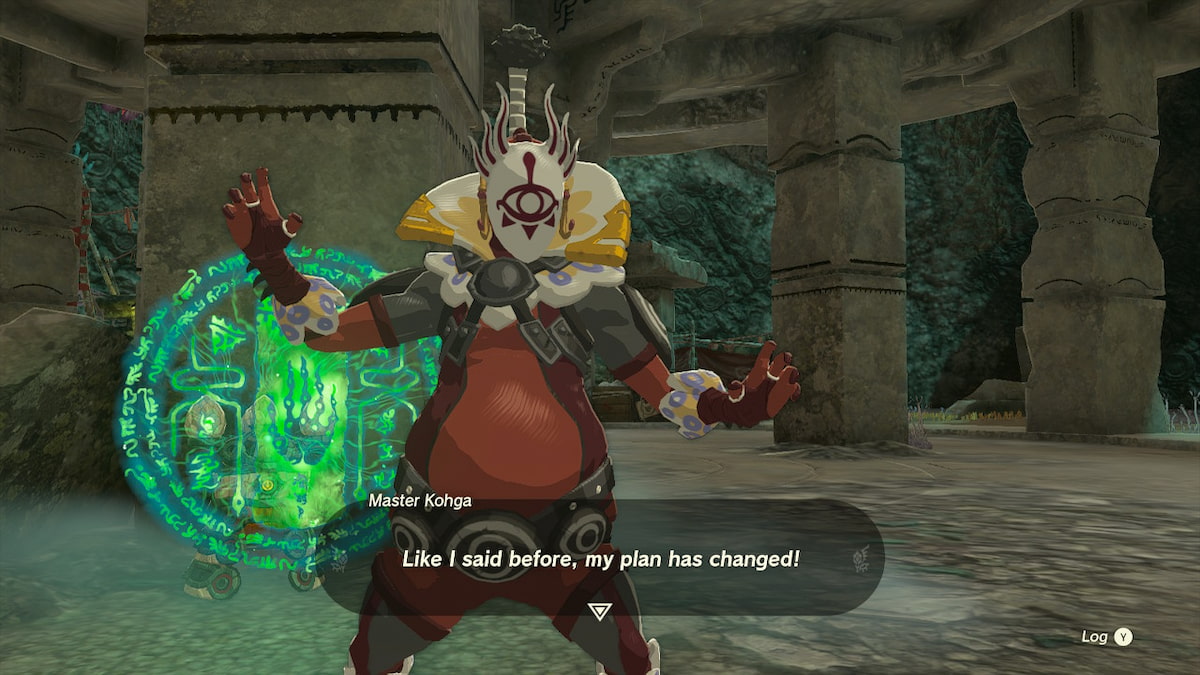
After foiling Master Kohga twice in The Legend of Zelda: Tears of the Kingdom, he will announce his intention to steal more crystallized charges for his master plan at the Abandoned Lanayru Mine. You can reach this location in the Depths right underneath Zora’s Domain on the surface, and it’s possible to do so well before this third encounter with Kohga. But once he arrives there as part of his extensive questline, you can find him once again trying and failing to activate one of the Steward Constructs for his own nefarious purposes. After interacting with Kohga, he will challenge you to yet another battle, which this guide will cover the strategies for.
Tips for fighting Master Kohga
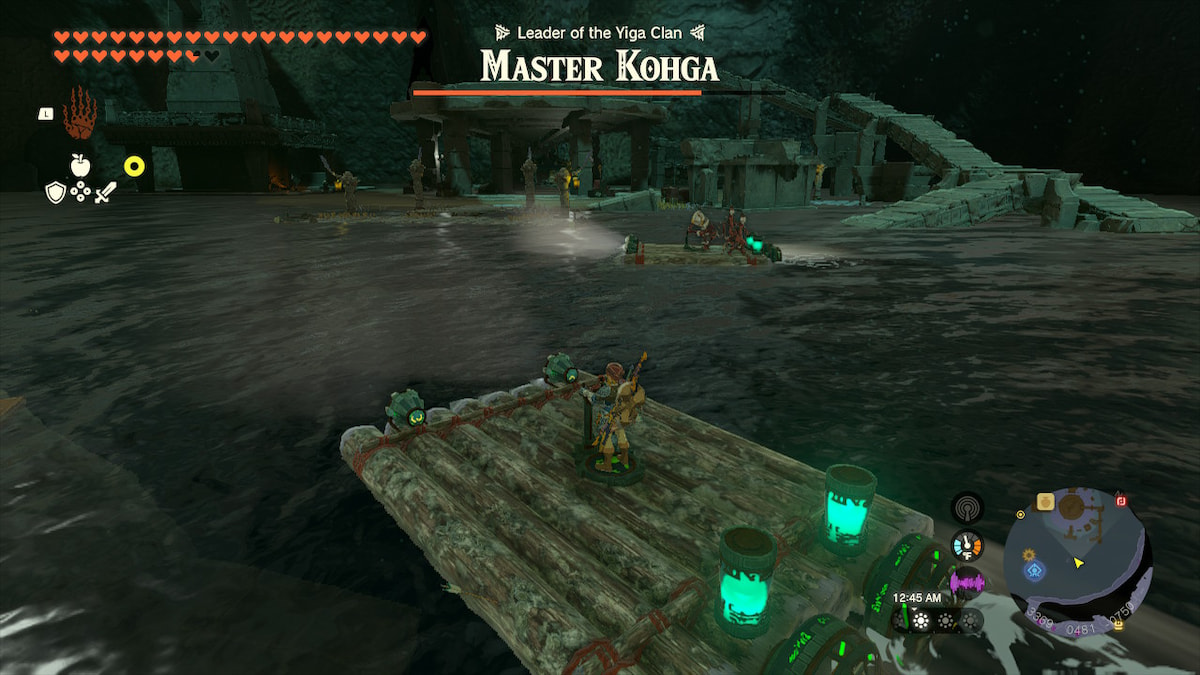
Kohga’s pattern
All of the fights with Kohga are comedic in their own ways, but this one is arguably the goofiest of them all. Kohga spends the encounter aimlessly driving around on a raft in the lake surrounding the mine, encouraging you to give chase in a raft of your own. As you follow him, two Yiga archers will back Kohga up on his raft and try to pelt you with arrows.
General strategies
Much like in the other Kohga fights, firing your own arrows to stun him will prove quite useful here. Doing this will even cause the Yiga archers to vanish temporarily as you wail on him, so you don’t even need to prioritize them. You do, however, need to account for distance when landing your shot. Whether you fire a regular arrow, one with a homing eyeball, or one with a wing that lets it travel farther, you will want to position your raft at least somewhat close to him so that you have enough time to make it to his raft and land plenty of hits on him before he teleports away.
Letting go of the steering stick before firing at Kohga works okay even if it leaves you a bit vulnerable to the Yiga archers, but leaping off the steering stick with the jump button will help even more. Doing this will make it easier to trigger bullet time and land several headshots on Kohga before moving in for melee hits. If you prefer to save up on arrows, though, you can simply intercept Kohga on your raft and leap from yours right over to his. Both Kohga and the archers will panic once you do this, letting you attack with impunity.
Interestingly, when Kohga teleports away after damaging him, he will leave behind his raft in favor of a new one, allowing you to hijack it and continue the chase. Notably, though, Kohga’s rafts move much slower than the rafts found on the mine’s shore, so I usually preferred to just stick to those.
Second phase
At half health, Kohga will surround himself with barriers on all sides, leaving him completely immune to arrows from a distance. He will, however, intermittently stop, remove his barriers, and materialize an orb projectile to toss at you. This, of course, leaves him open once again to your arrows, but I preferred to wait until he threw the orb so that I could send it right back at him with Recall, stunning him without any cost to my arrow count or bow durability. Once again, make sure that you are relatively close to Kohga when you do this. Alternatively, you can still use the aforementioned intercepting strategy against him, as he will disable his shields in the midst of his panic.
With Kohga now bested for a third time, he promises to have his final showdown with you in the Abandoned Hebra Mine below Rito Village. The chasm leading to this mine is one of the more well-hidden chasms in Tears of the Kingdom, but fortunately, speaking to Josha at Lookout Landing will hint at its location so you can finally go and defeat Master Kohga for good.
Screenshot via PC Invasion