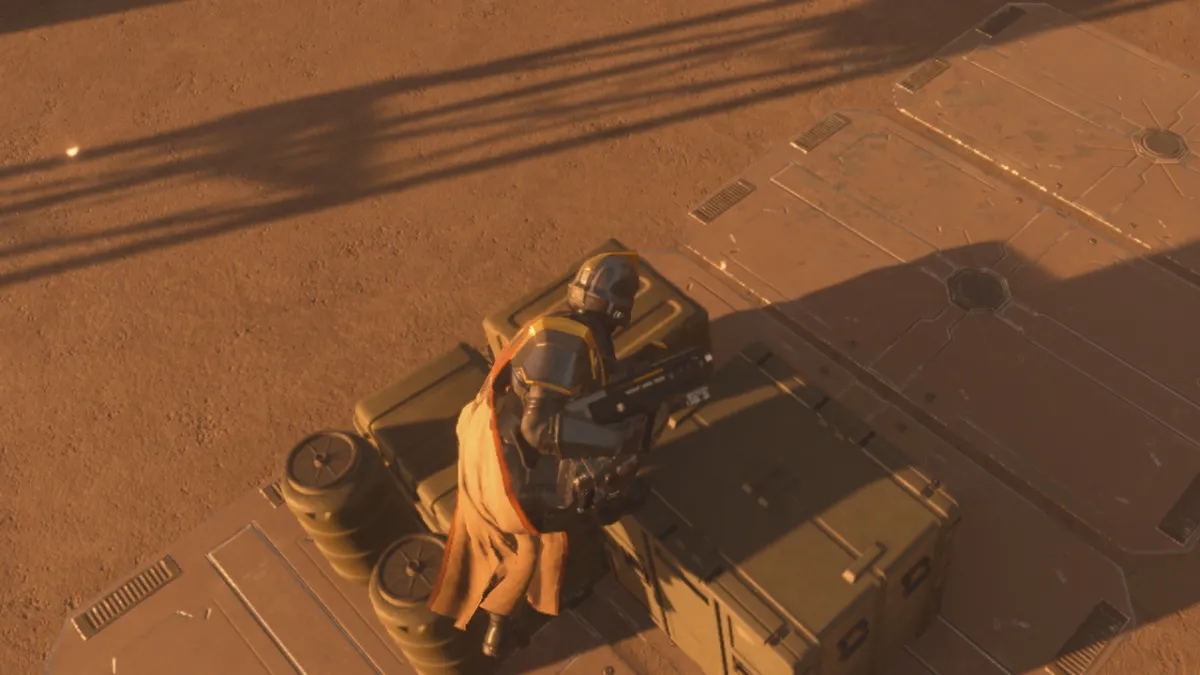
Redfall, the newest title from Arkane Austin, is pretty different from the studio’s other titles. It lets you explore an open world and take things at your own pace. But as it usually goes in open-world titles, you probably don’t want to constantly walk back and forth around the place. Luckily, there are plenty of fast travel markers you can find to make traversing the map a little easier. Here’s a quick guide to finding all the fast travel markers in Redfall‘s first area.
Redfall: How to find each fast travel marker
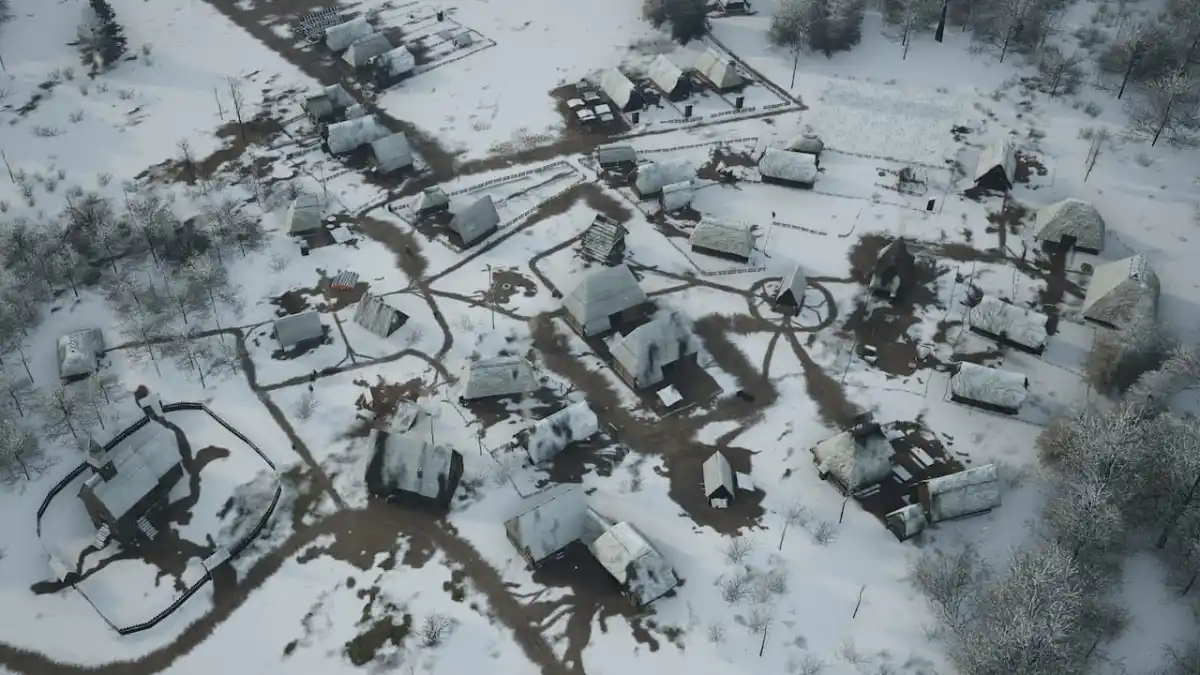
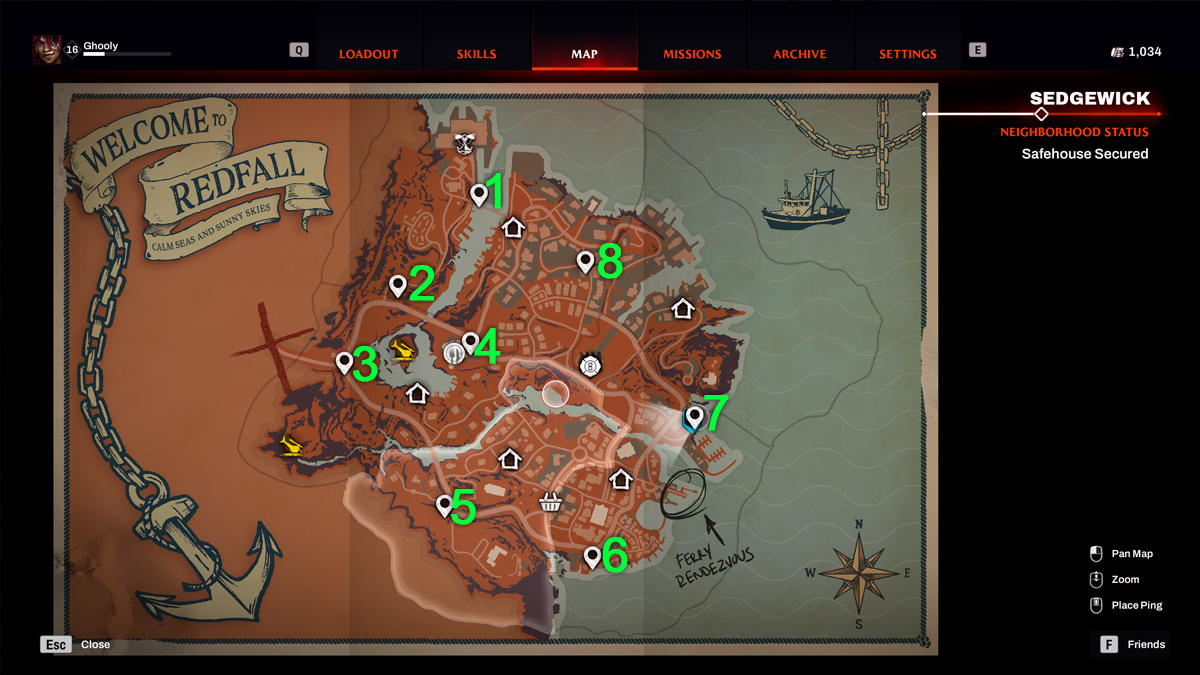
The first area of Redfall has a total of eight fast travel markers dotted around the place. You can also use Safehouses like the ones found in Basswood and Shadetree Heights to fast travel. But it’s worth grabbing them all anyway since it’s so quick to do. Check out the map below for a quick rundown of each fast travel marker location. This will also be the order in which we’ll go through each one.
Screenshot by PC Invasion
Fast travel marker #1
Screenshot by PC Invasion
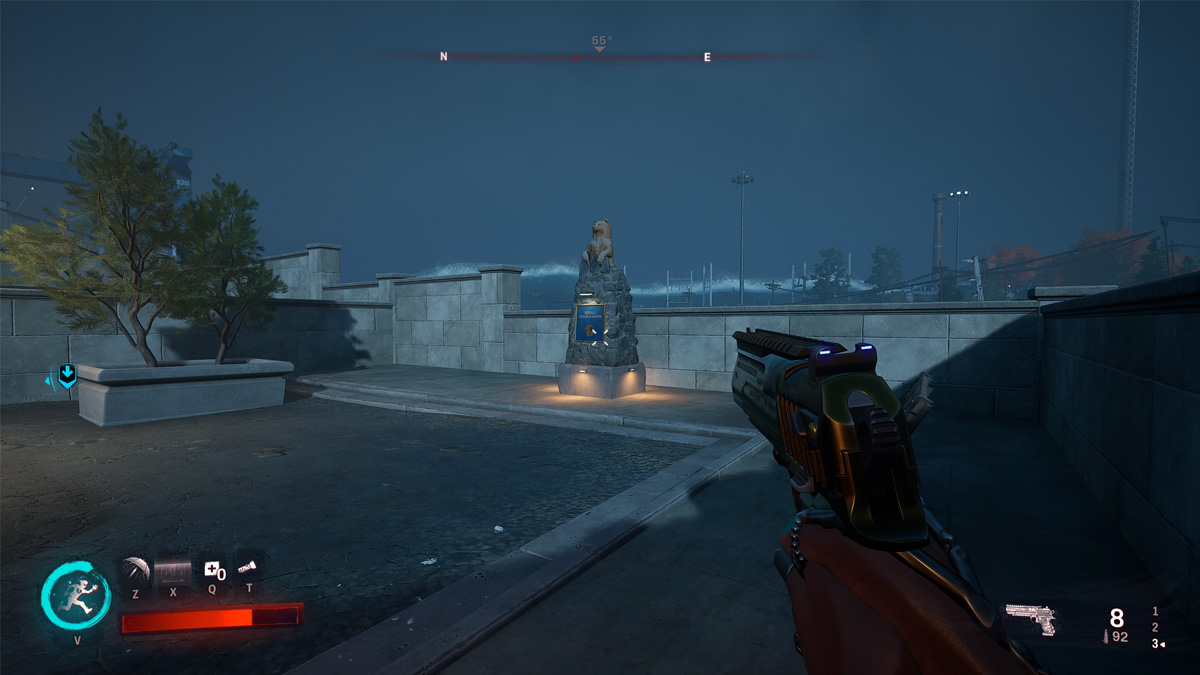
The first fast travel marker in Redfall is located towards the northern end of the map. It’s along the road to Samuelson’s Shipyard and right next to the bridge that connects to the other side of Basswood. You’ll likely grab it when the main quest takes you through this area.
Fast travel marker #2
Screenshot by PC Invasion
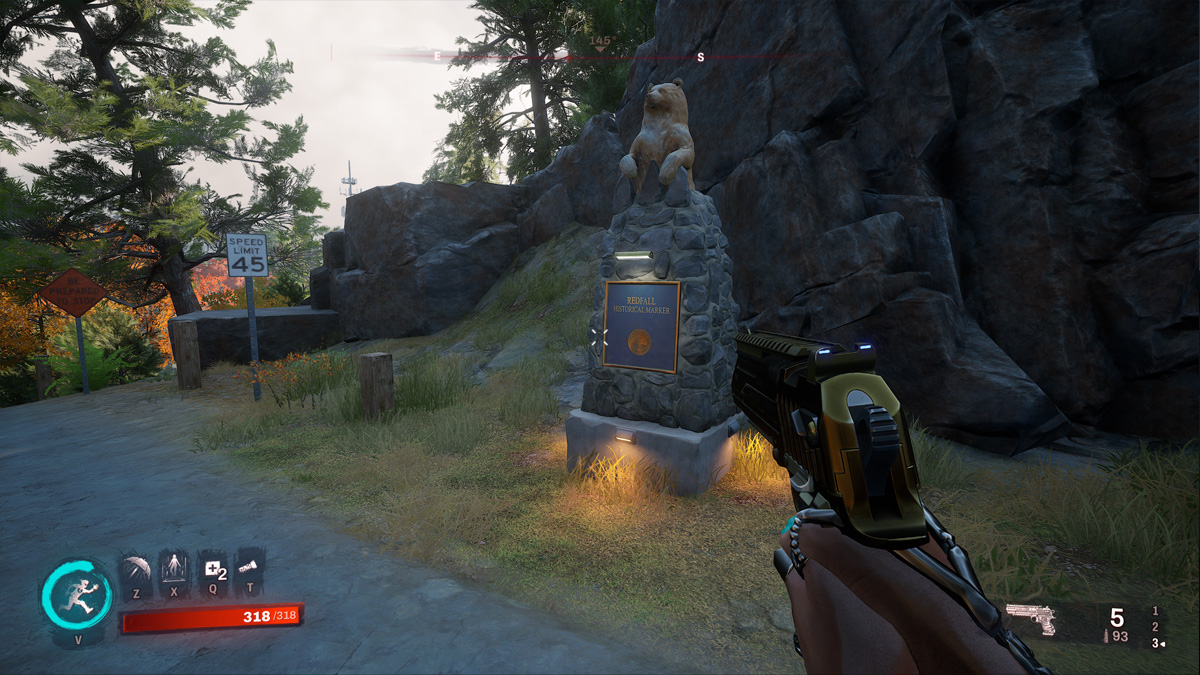
Our next fast travel marker is just to the south of the one next to Samuelson’s Shipyard. Just head to the point marked on the map above and head down the road. The marker is located along the rock wall and next to the speed limit sign.
Fast travel marker #3

Screenshot by PC Invasion
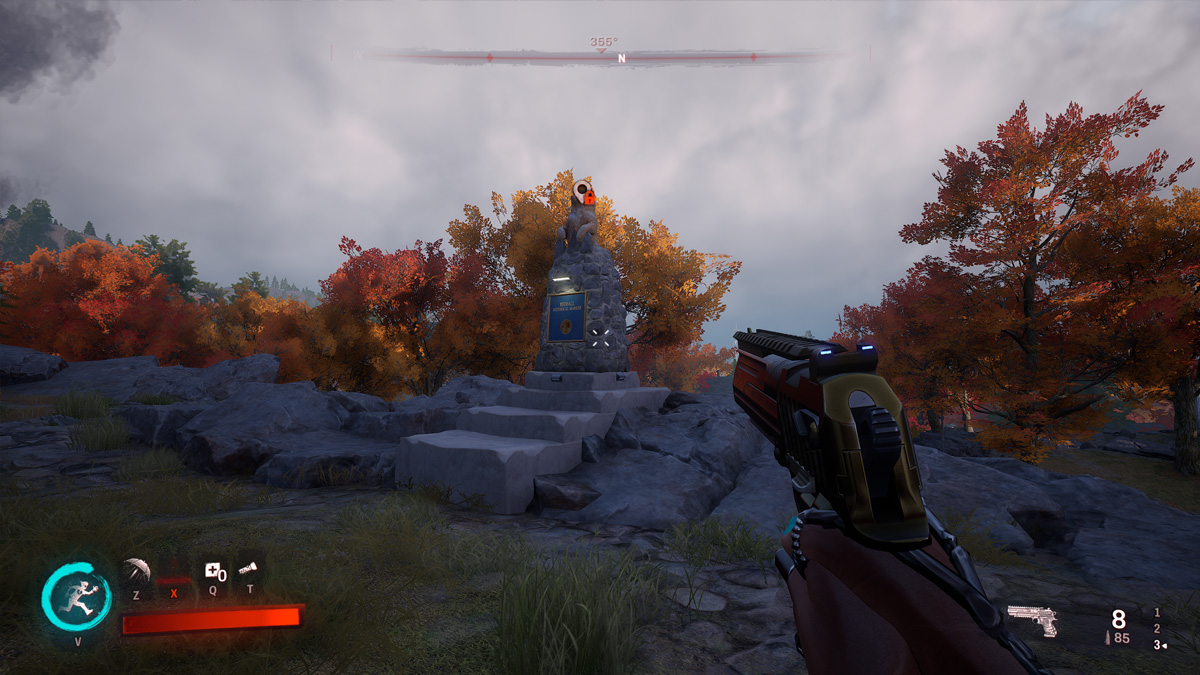
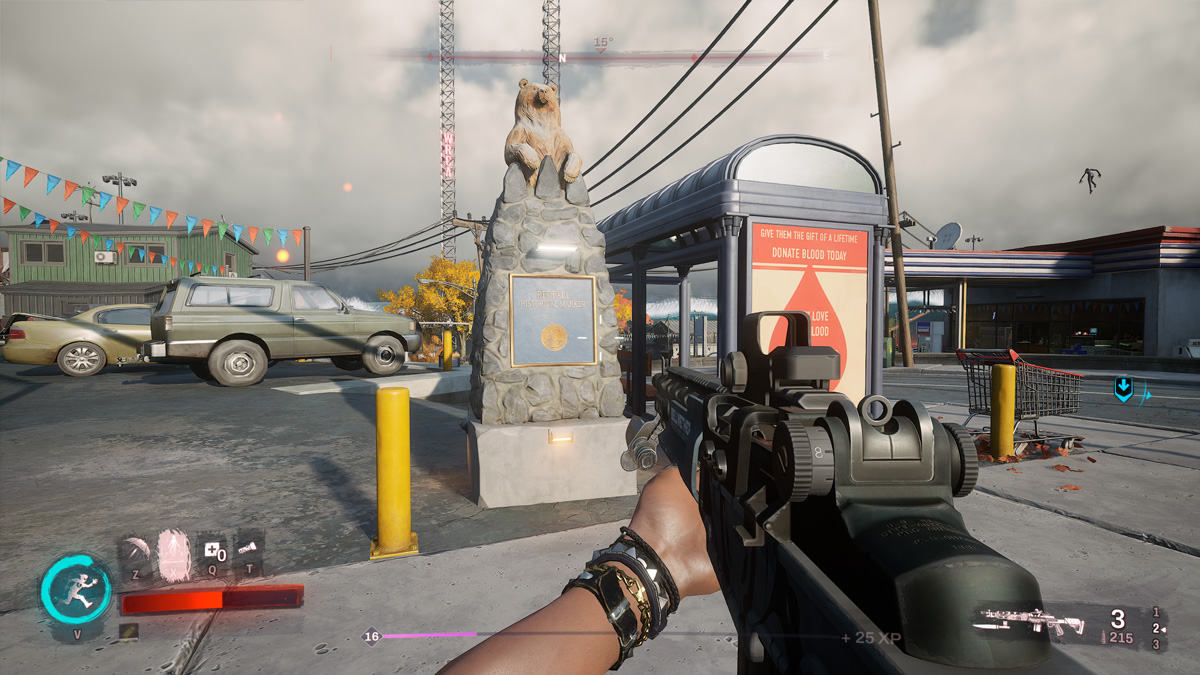
The third marker is very close to the fourth, almost pointlessly so but let’s grab it anyway. Continue heading south down the road, and you’ll eventually see an ominous tunnel down the way. The fast travel marker is located up the road from this tunnel and close to the gas station nearby.
Fast travel marker #4
Screenshot by PC Invasion
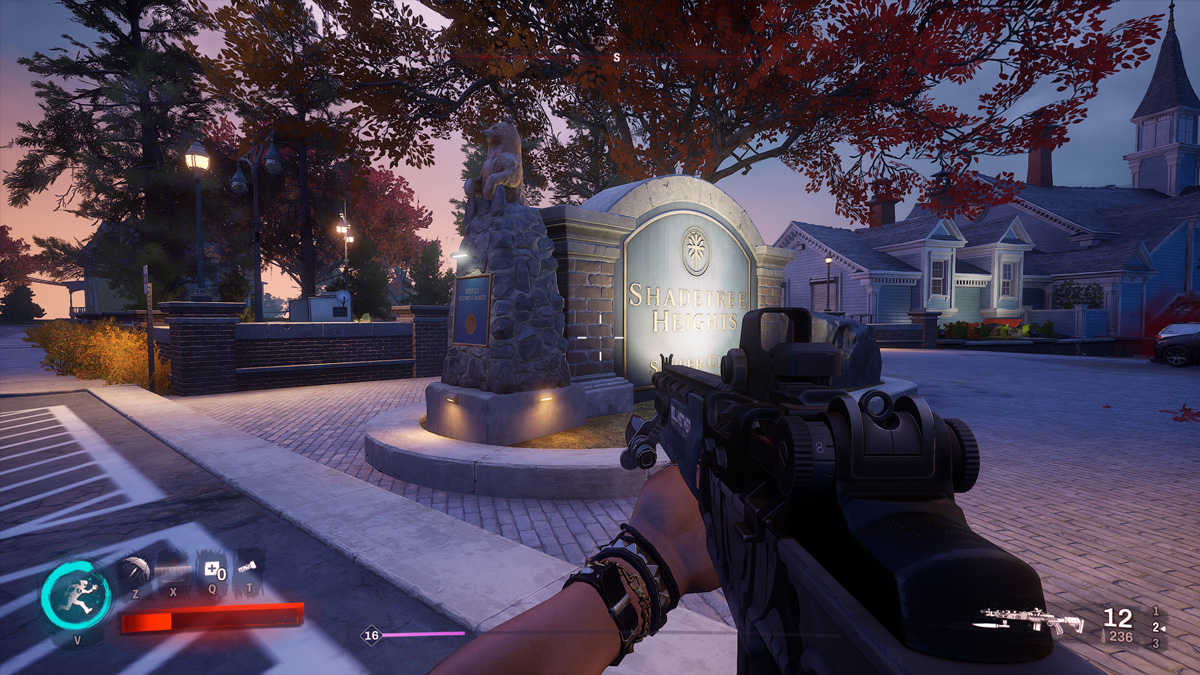
Yet again, this marker is weirdly close to the second one. First, fast travel back to the second marker, and then head east down the road. If you keep heading in that direction you’ll see the fast travel marker right next to the Shadetree Heights sign.
Fast travel marker #5
Screenshot by PC Invasion
The fifth fast travel point in Redfall is located on a small hill overlooking Sedgewick. Frankly I didn’t use this marker much on my playthrough, but for completionist’s sake let’s grab it too. Use the third fast travel marker and follow the road down to the south. Eventually you’ll come across a 4-way intersection, with the Addison Estate marker located up on the hill.
Fast travel marker #6

Screenshot by PC Invasion
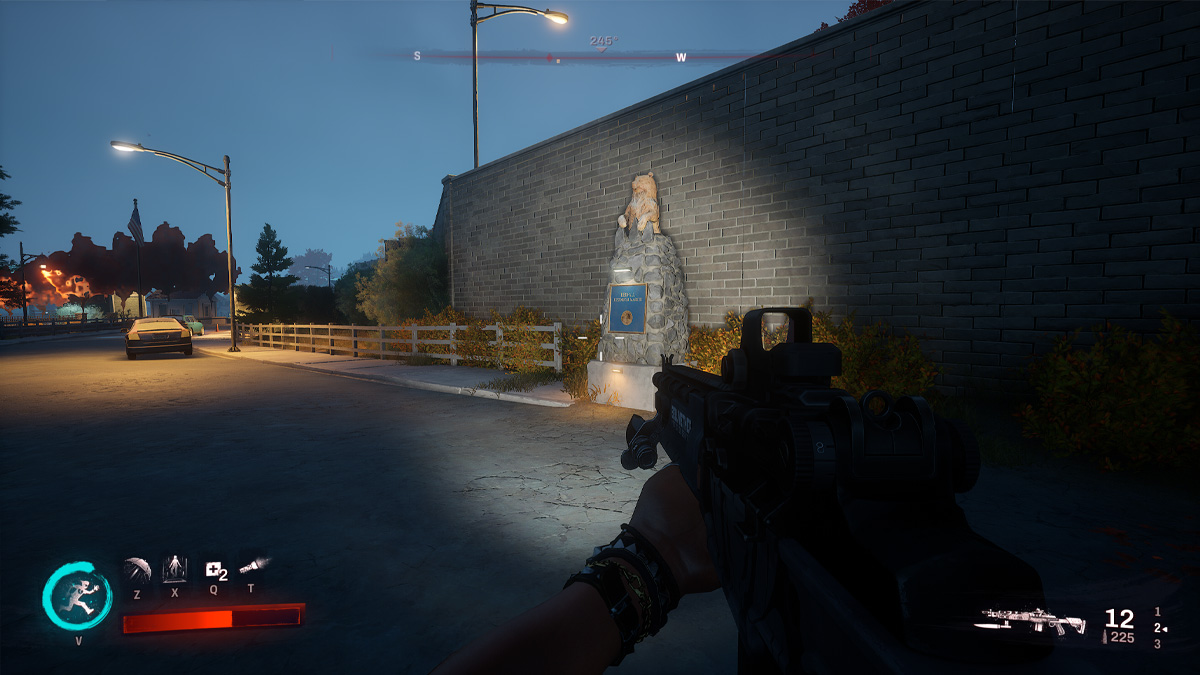
Old Town’s fast travel point is located to the east of the Addison’s Estate marker. Simply head east along the road, and you’ll eventually see the frozen wall of water overlooking the Blue Oyster Club building. The fast travel marker is located just in front of this location.
Fast travel marker #7
Screenshot by PC Invasion
To get Redfall‘s seventh fast travel point, head north from the sixth marker and keep heading along the road until you eventually find a car park. The fast travel marker is located next to a wall behind the car park, so run across it and jump over.
Fast travel marker #8
Screenshot by PC Invasion
Our final marker is located to the northwest, so follow the road in that direction. Once you reach a turning, head right and keep going until you see the marker next to a bus stop on the corner. After this, you will have access to all eight fast travel markers in Redfall‘s first area. This is something you’ll want to do pretty soon after starting the game. The main quests will take you all over the map, and having a handy way to around the place will make everything much easier.