Like a Dragon: Infinite Wealth presents players with a sprawling environment, populated by characters with numerous agendas. Some of them are just there for a good time, and this guide outlines the locations where you can find every Honk-Honk character in Like a Dragon: Infinite Wealth.
Like a Dragon: Infinite Wealth – All about that Hawaii Honk-Honk
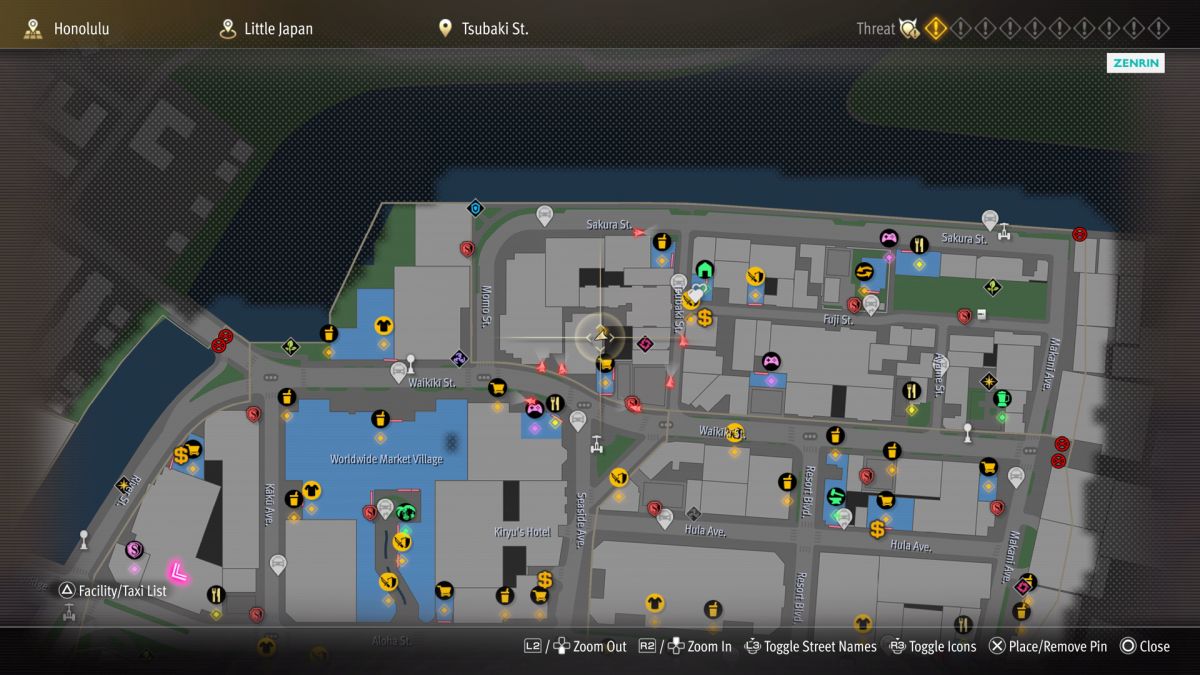
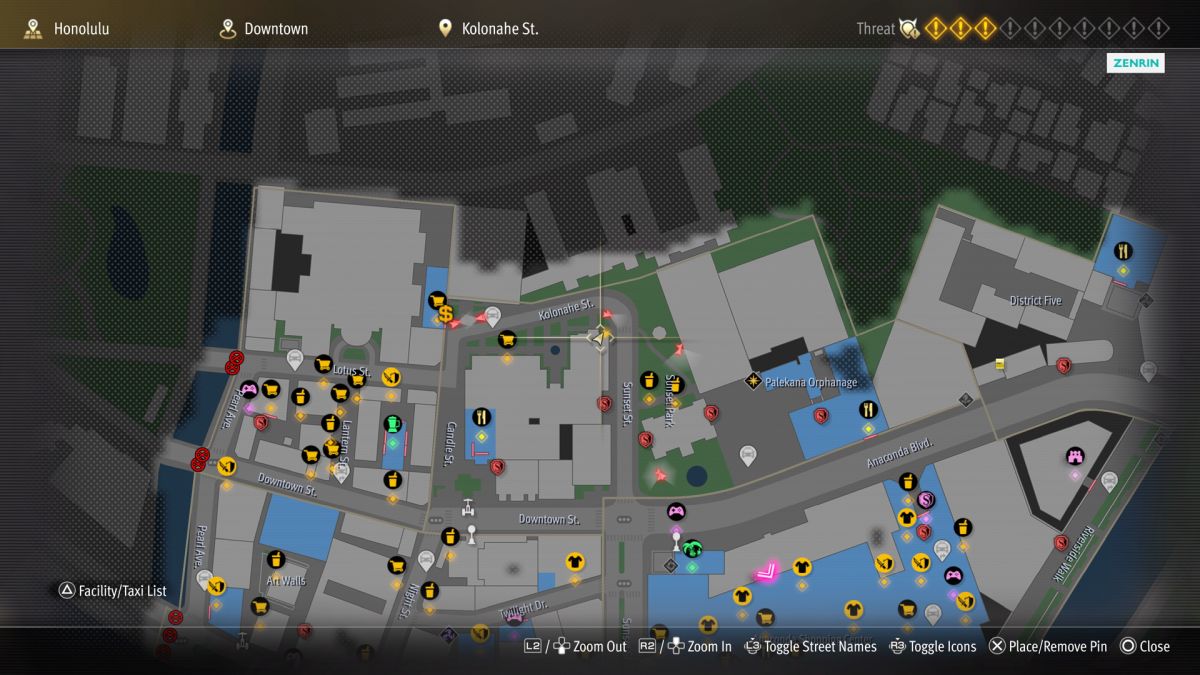
Nine characters in Hawaii offer Honk-Honk services in exchange for money. You should take advantage of each opportunity. Kasuga receives a huge boost to various facets of his personality each time. There are nine such individuals spread throughout Hawaii, and their pricing varies. Below, we’re sharing the location of each qualifying individual with two screens. The first one shows a view of the map. The second one offers the view you should see upon approach.
Once you find and pay all nine Honk-Honk characters, you can visit all of them again. As long as you have the money, they’ll offer their services a second time. This makes it easier to max Kasuga’s personality traits. Until you have found the characters at each location, they will tell you they need a break before they can offer their services again. You can keep a checklist of the ones you have already met, or check the details in-game under Personality Challenges. While viewing that entry, request more data and a list will appear to show who you have found so far. The second time around, you’ll need to keep your own record.
Honk-Honk Woman ($100)
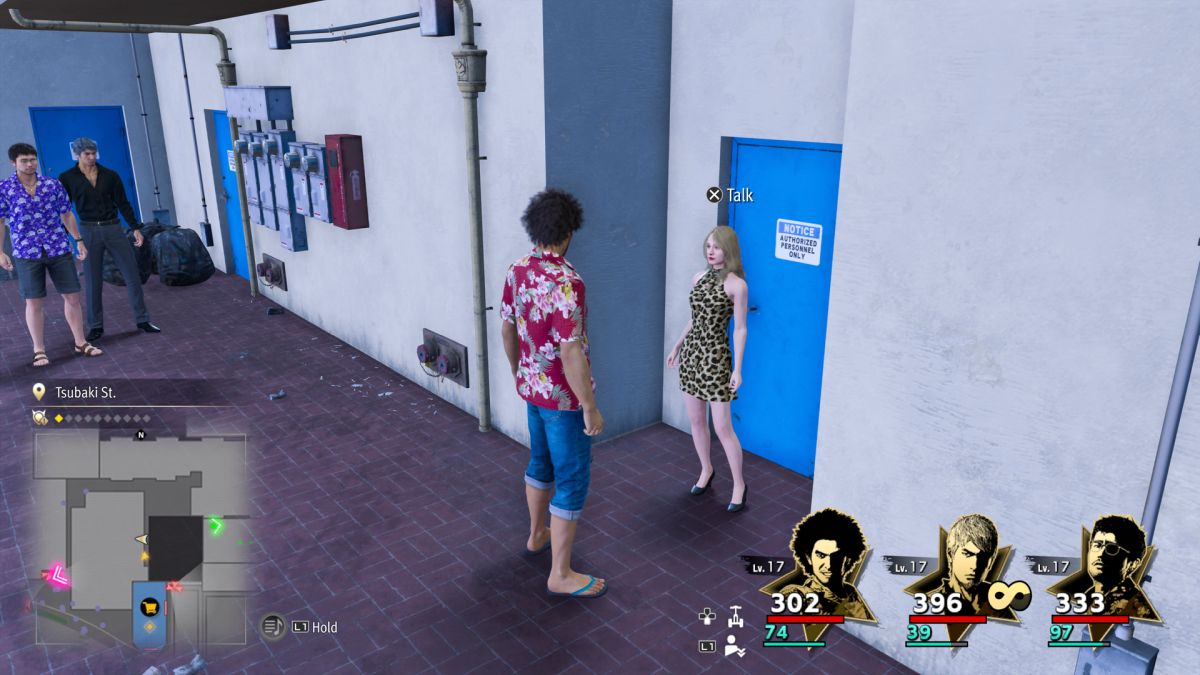
This one is in an early area that I find easy to overlook. A short distance southwest from the Revolve Bar homebase location, along Tsubaki St., head west through the garage next to either side of the lettering on the wall advertising The Mongoose Motel. At the back of the garage, you access an enclosed courtyard. Cross to the diagonal left to reach a short alleyway. Proceed along that alley to find Honk-Honk Woman standing in a recess along the wall on the alley’s right side.
Ms. Honk-Honk ($300)

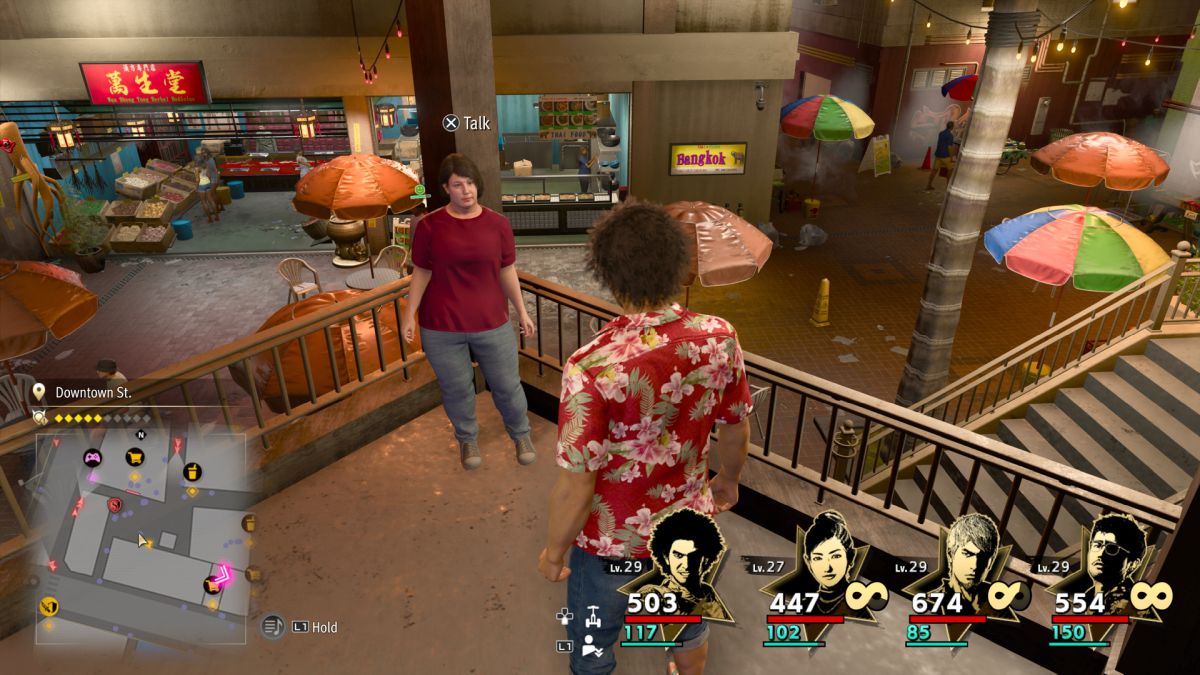
This is the last of the Honk-Honk characters I found. I overlooked her many times. She’s waiting on a balcony in Chinatown, which is the area northwest of the Golden Grace Greengrocer fast travel location. Along the south side of that open courtyard, look for stairs you can ascend to a higher balcony against the wall. Follow that balcony to find the woman standing on a more open ledge with a railing.
Honk-Honk Nomad ($300)
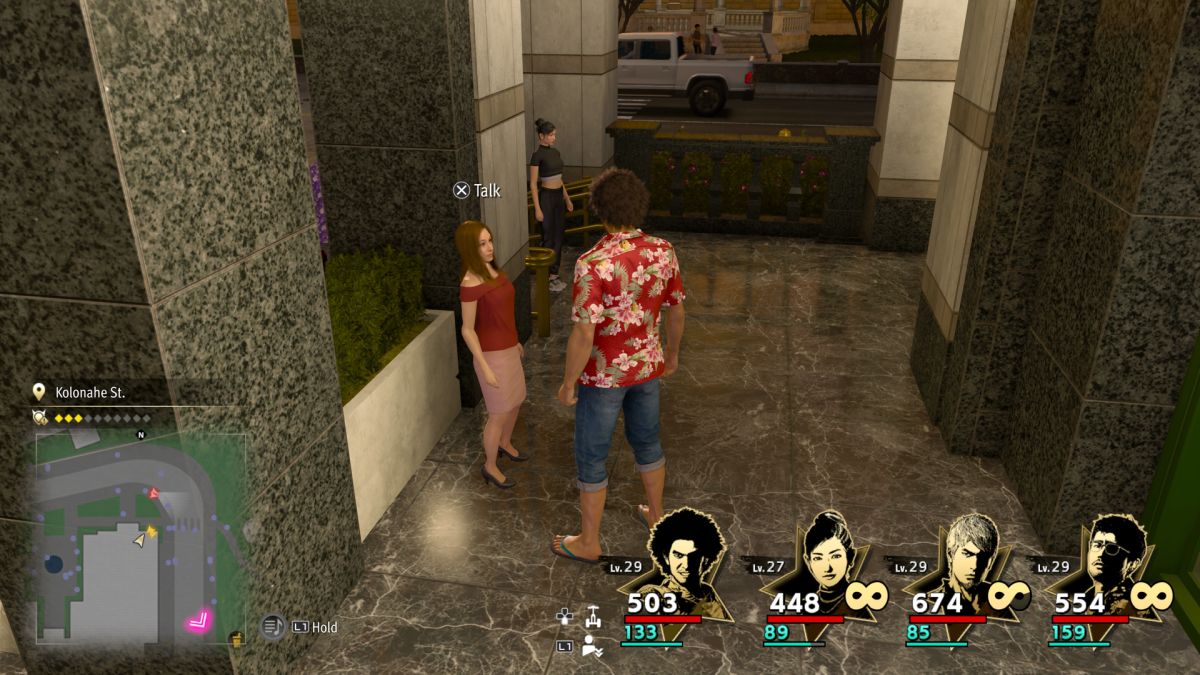
You’ll find the Honk-Honk nomad on Kolonahe St. near the north central part of the Downtown district. It’s not far east of that street’s fast travel location. She’s standing against the building, beneath its awning, with nearby Sunset St. traffic off to her left.
Honk-Honk Surfer ($500)
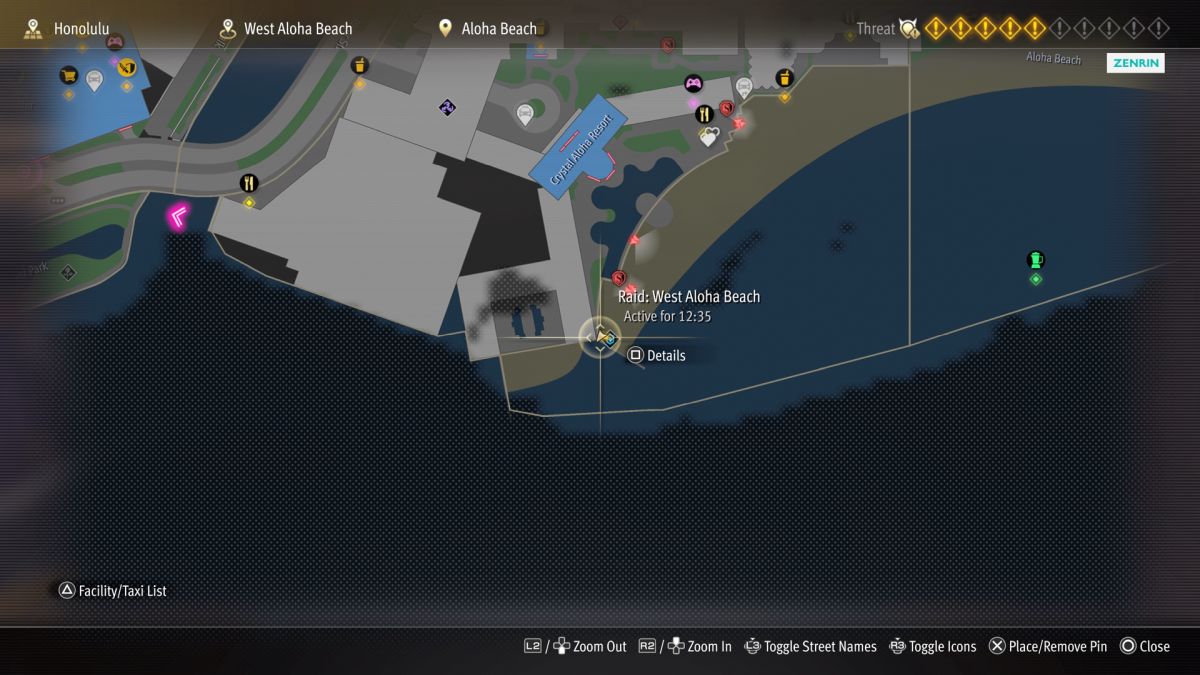
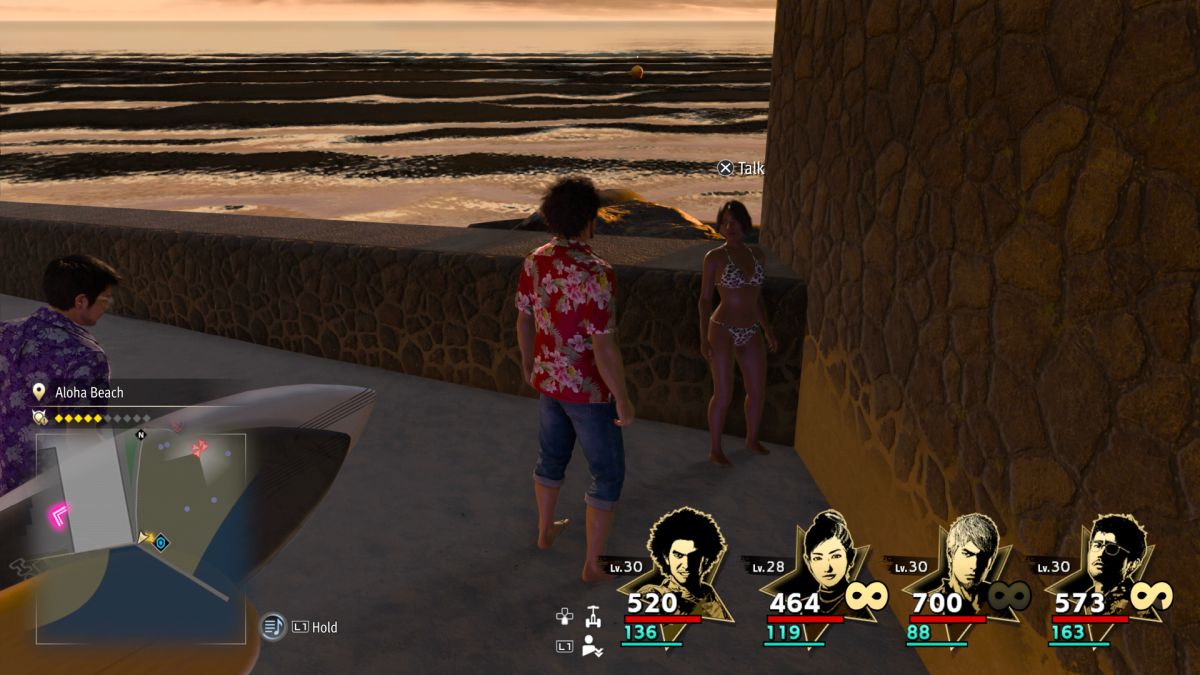
Travel along Aloha Beach, to its southwest corner. She’s standing against the building, with the waves in the background. The Crystal Aloha Resort is to her north, but you can only reach her by the beach.
Honk-Honk Waitress ($500)
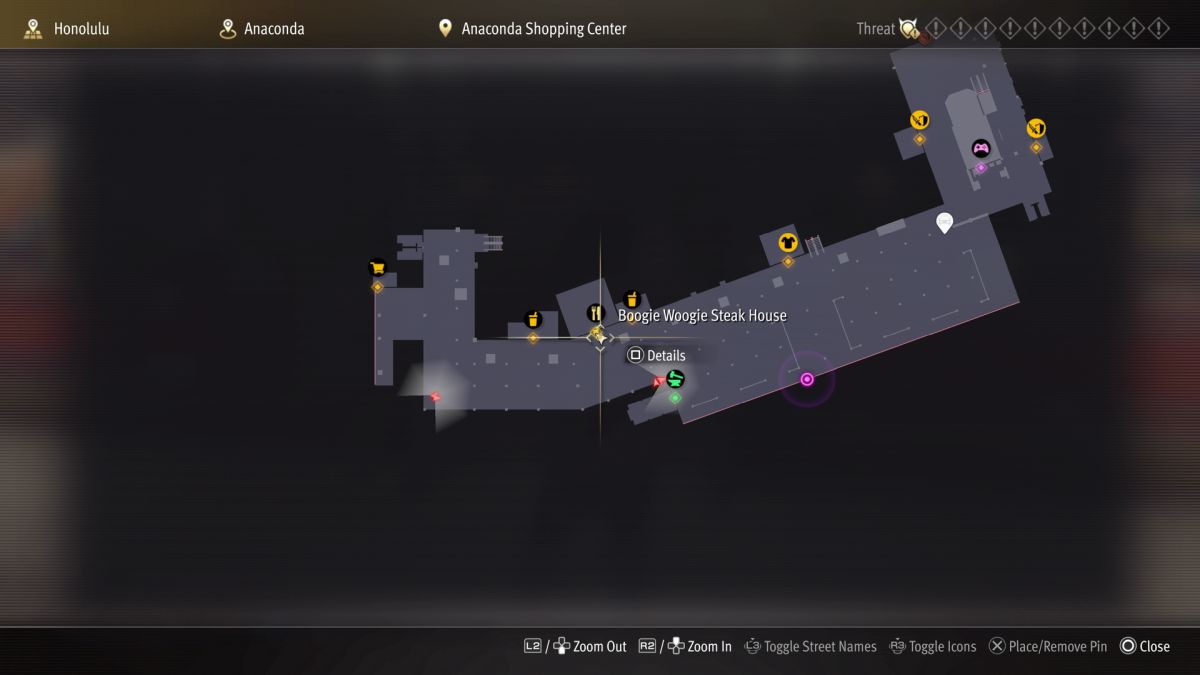
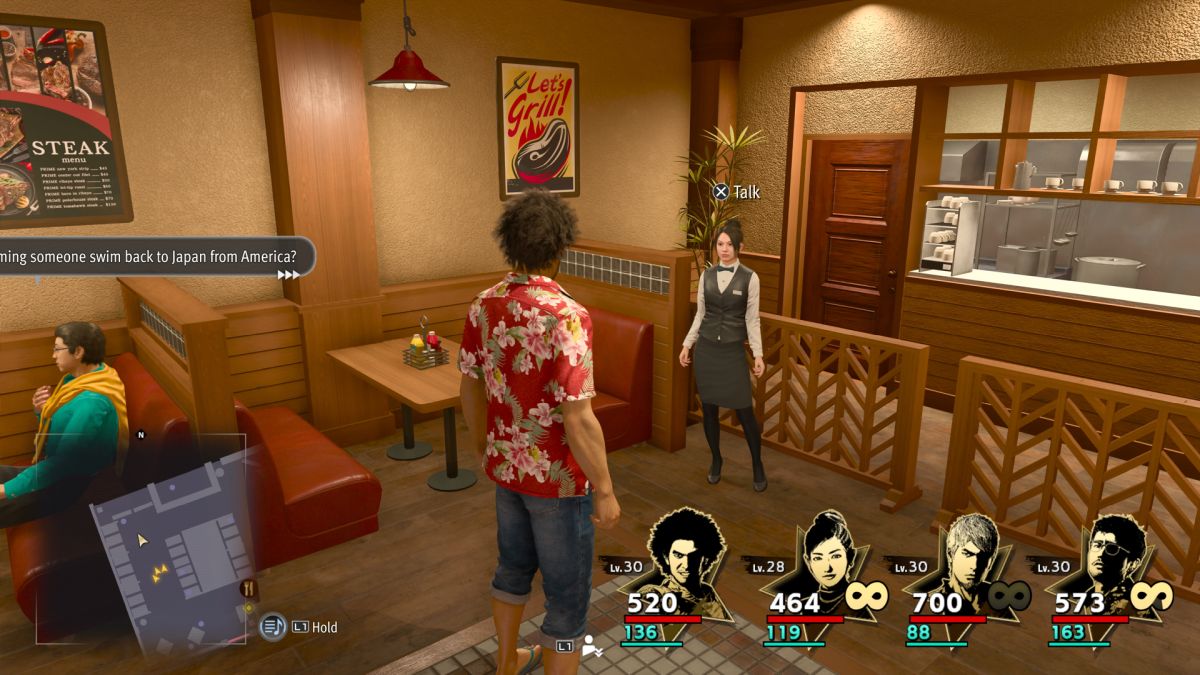
In the Anaconda Shopping Center, check on the first floor to find the Boogie Woogie Steak House. When you head inside, make your way to the back corner, near the kitchen.
Honk-Honk Boy ($500)
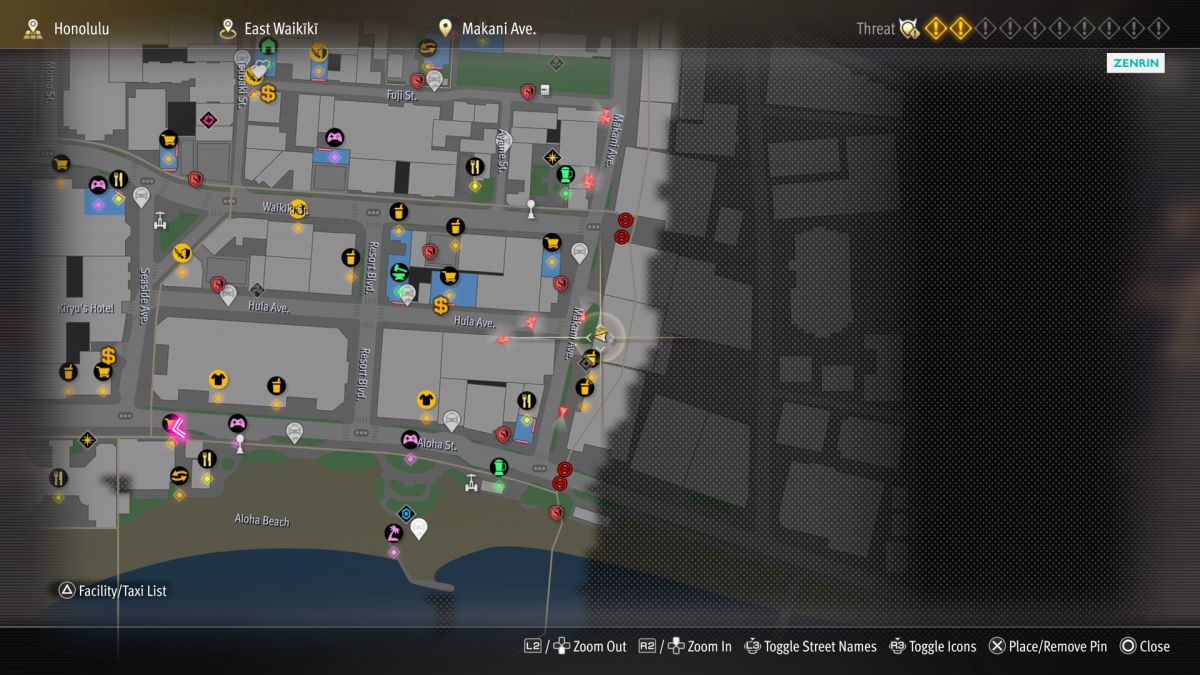
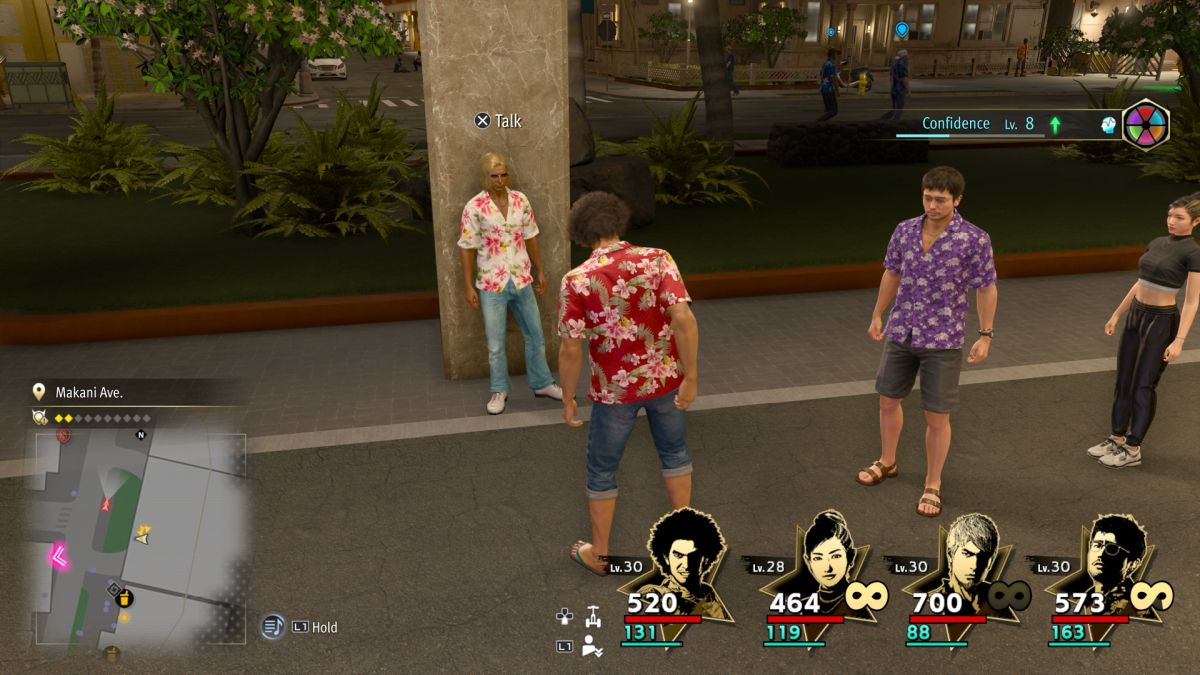
Makani Ave. runs along the eastern side of the map. You’ll find the Honk-Honk Boy standing beneath an awning on its east side, not far northeast of the Oahu Burger and only a short distance due north from Mama Masala’s.
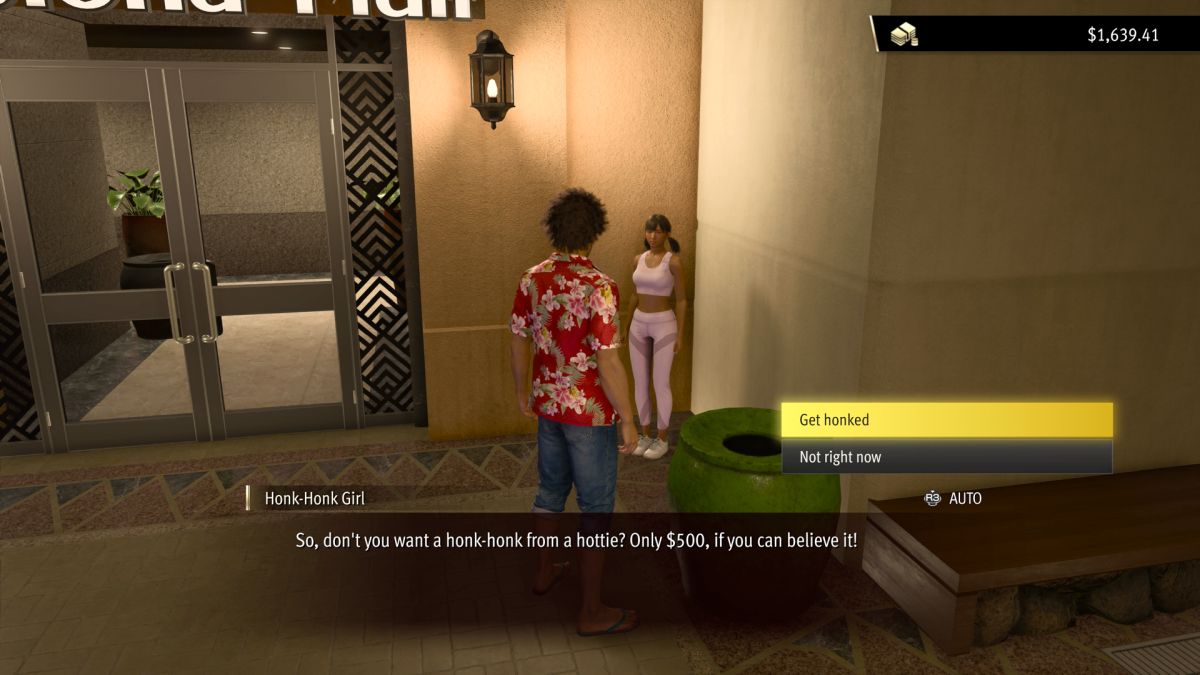
Honk-Honk Girl ($500)
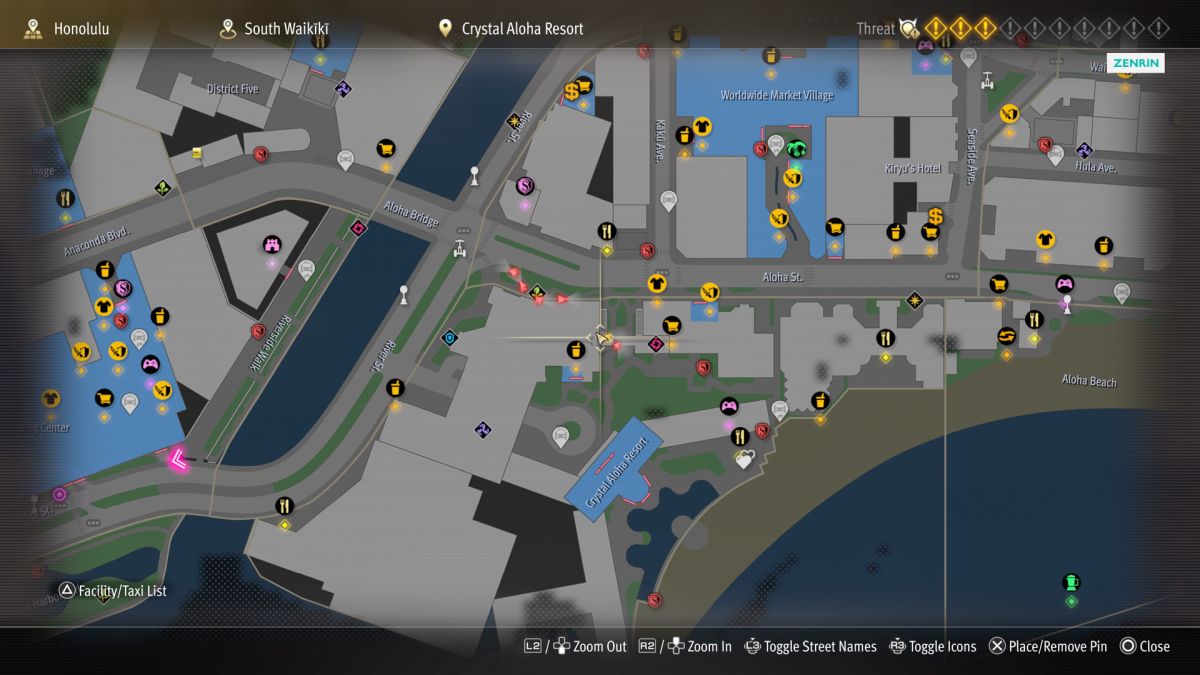
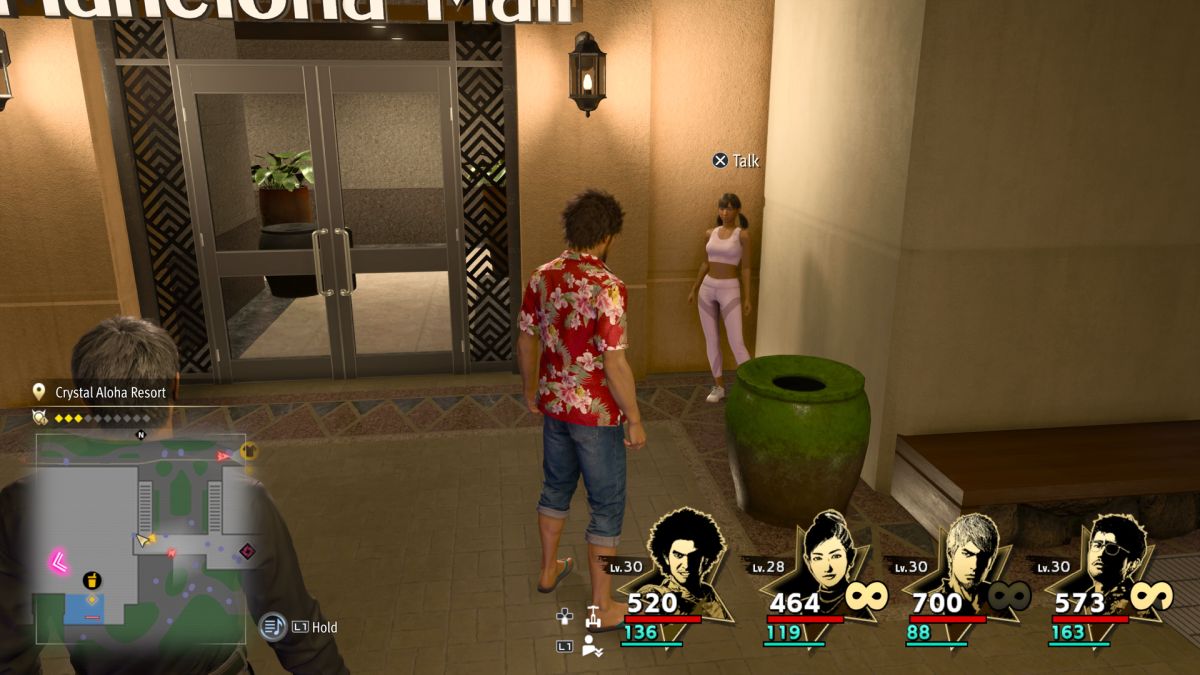
Make your way to the Crystal Aloha Resort. It’s the large property adjacent to the west end of Aloha Beach. Near the resort’s northwest side, there’s an outdoor plaza area. Stairs ascend to an upper balcony. Check along one end of the balcony, near Dean & Deluca building, to find the Honk-Honk Girl.
Honk-Honk Concierge ($1,000)
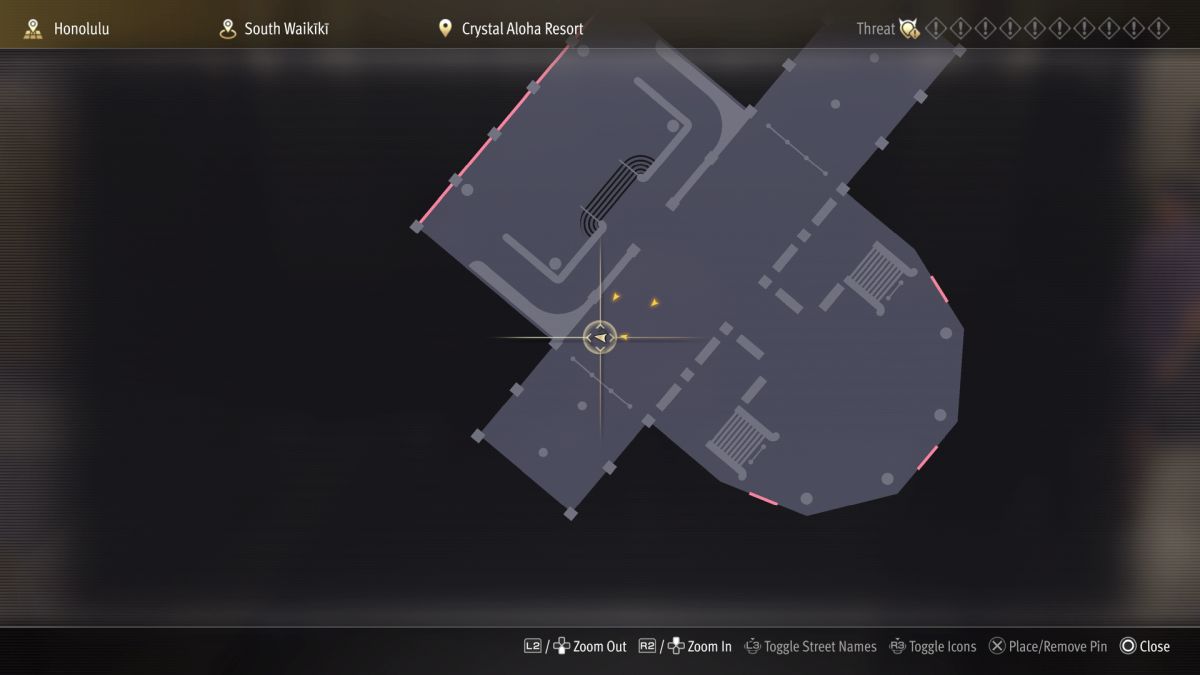

Enter Crystal Aloha Resort through its main front entrance (not the side facing the beach). Head up the steps and veer left to find the concierge waiting in a corner. He’s easy to spot.
Itamae ($1,000)
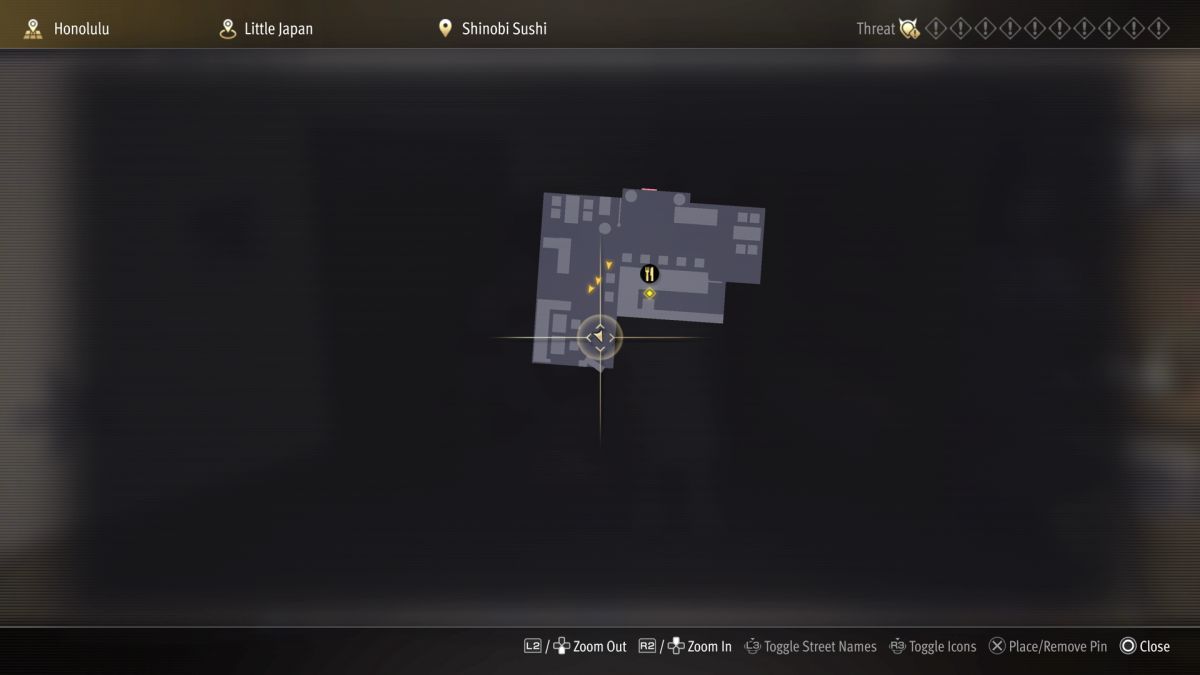
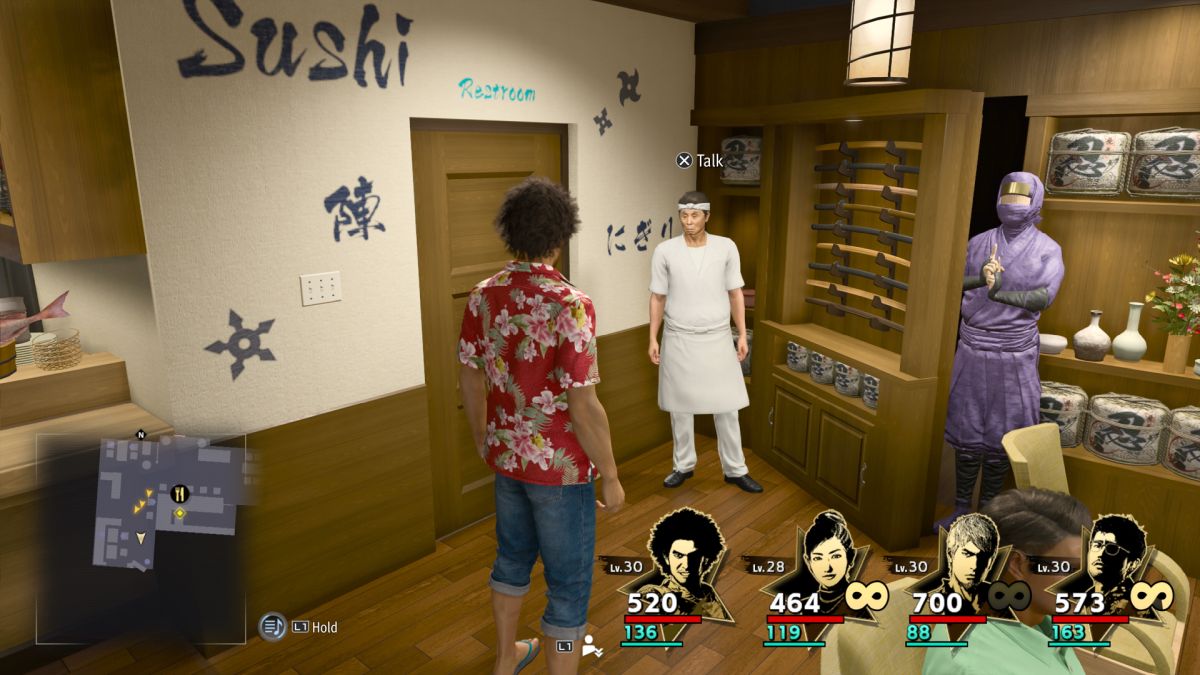
Near the northeast edge of the map, along Sakura St., you can find Shinobi Sushi. It is a restaurant, as the name implies. Enter and head to the back corner to find a chef standing near the restroom. That man is Itamae.
Near the very start of the campaign, the combined $4,700 it costs to get honked by every character feels like a lot. As you progress, it doesn’t feel nearly as bad. As your personality improves, it is also easier to survive tougher encounters that yield better rewards.
Like a Dragon: Infinite Wealth – A little more Honk-Honk in Japan
Later in your adventure, you will spend a lot of time in two neighborhoods in Japan: Yokohama and Kamurocho. Between the two neighborhoods, there are an additional five Honk-Honk providers to locate. Their locations are indicated below, with accompanying screenshots.
Honk-Honk Lady (50,000 yen)
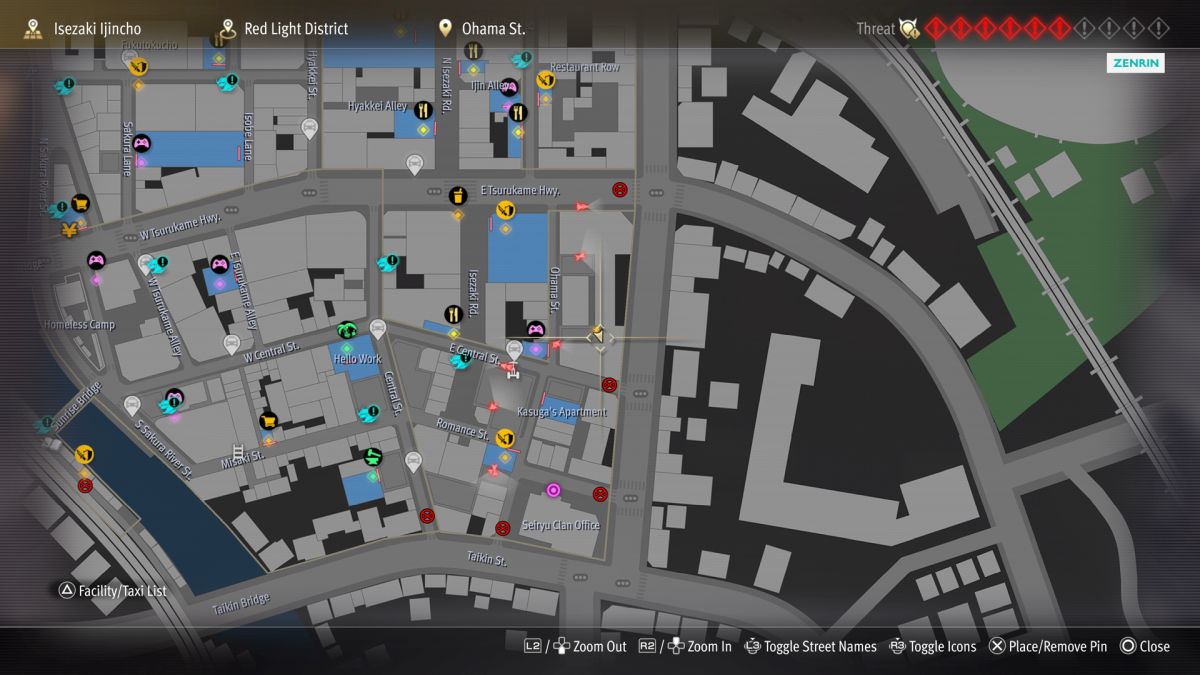
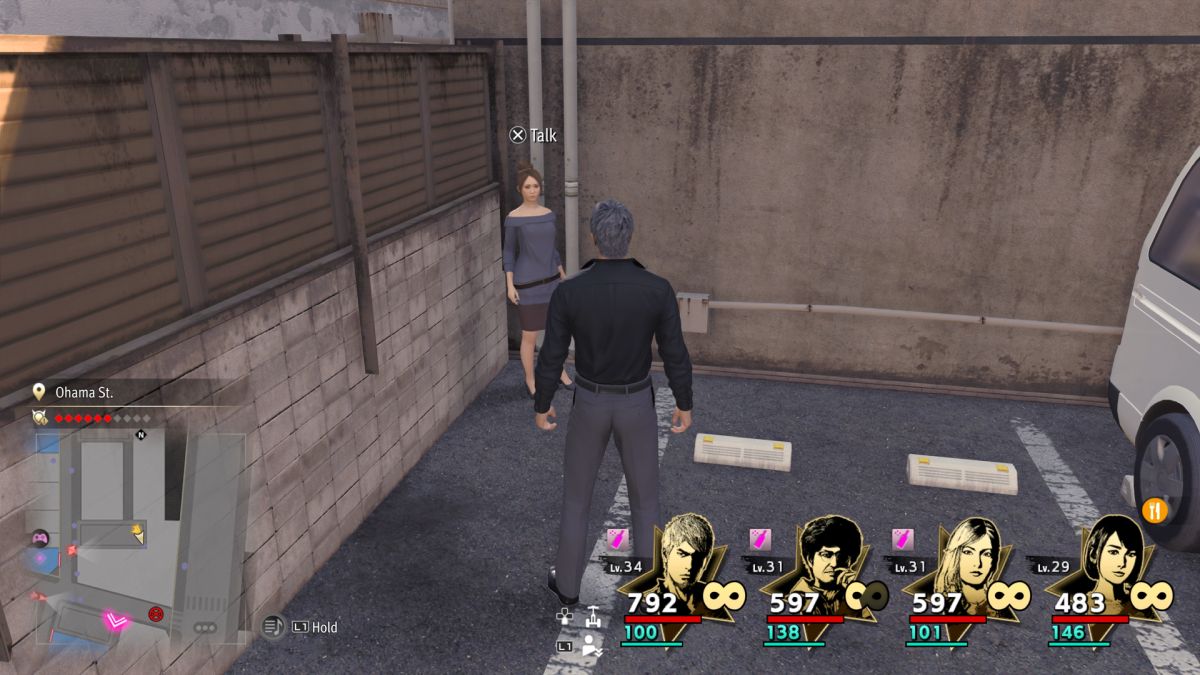
In Isezaki Ijincho, head to the Red Light District, near the map’s lower right portion. Along Ohama St. there is a back alleyway. The Honk-Honk Lady waits in the southeastern corner of that alley.
Honk-Honk Girl (10,000 yen)
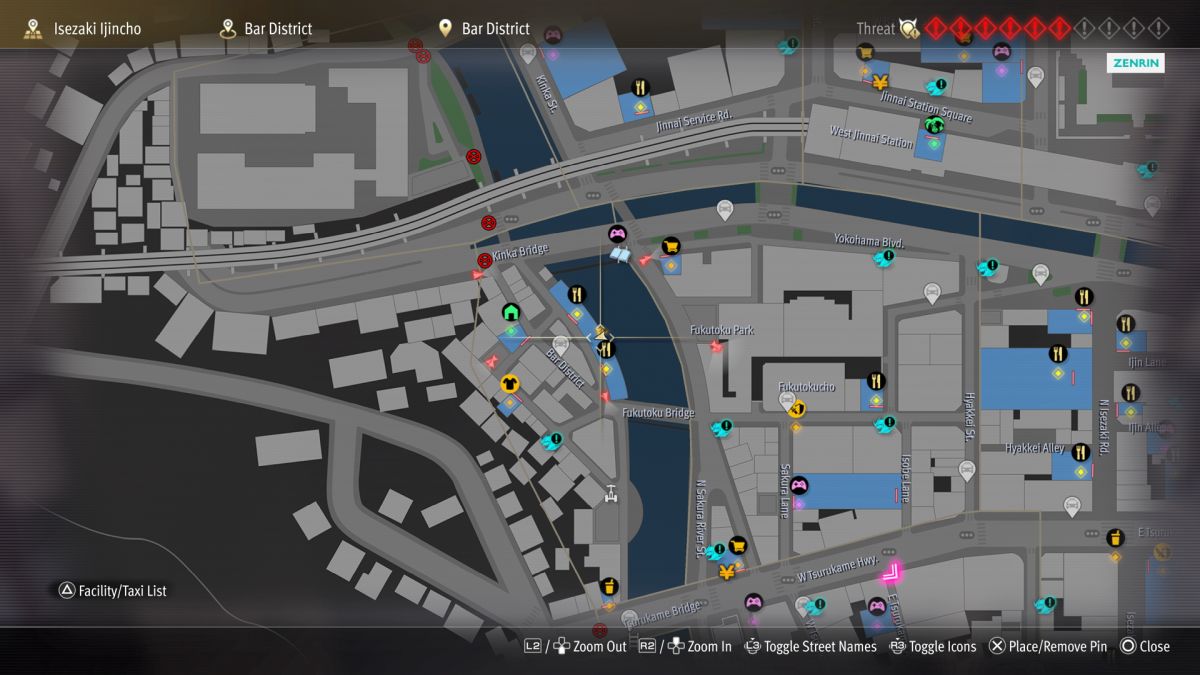
While in Isezaki Ijincho, visit the Bar District. It’s located along the map’s lower left side. On the right side of the district, facing the river, you’ll find an upper balcony. It is indicated on the map as a blue series of business establishments. Head along that balcony to meet the Honk-Honk Girl.
Honk-Honk Man (100,000 yen)

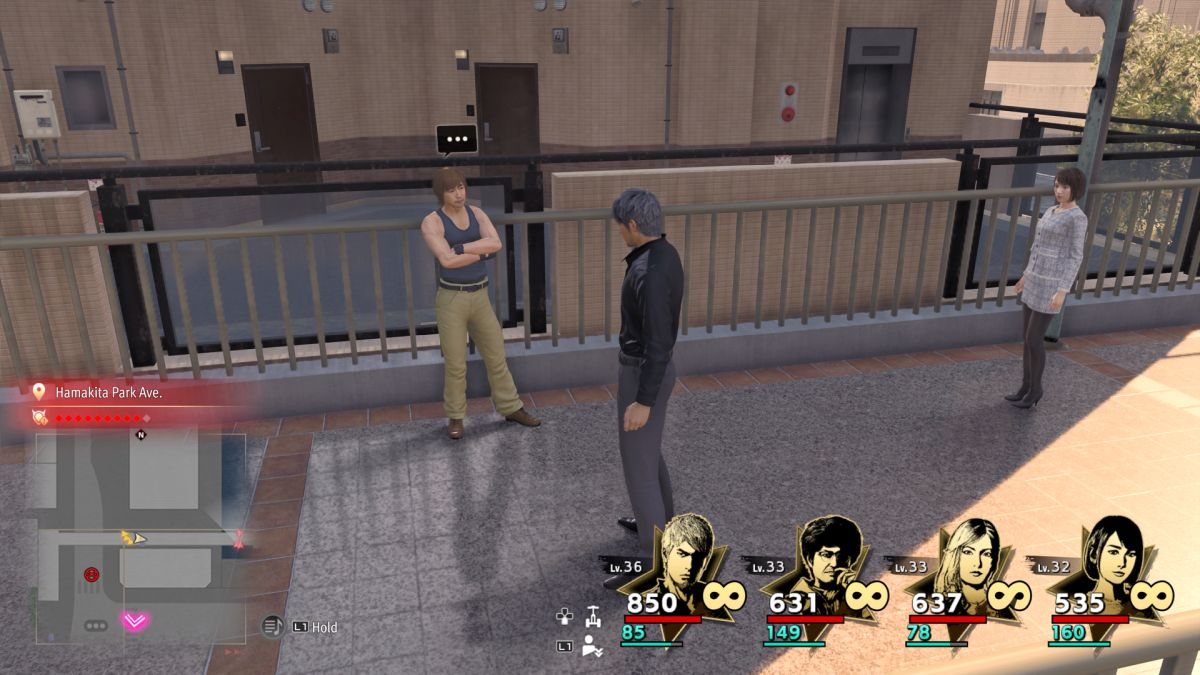
This gentleman appears near the west end of the overpass located on the western edge of Hamakita park Ave. The overpass near the park’s left corner on the map has two points of entry: east and west. You can approach from either side, but I recommend approaching from the west because you can reach the Honk-Honk Man without dealing with a high-level enemy mob.
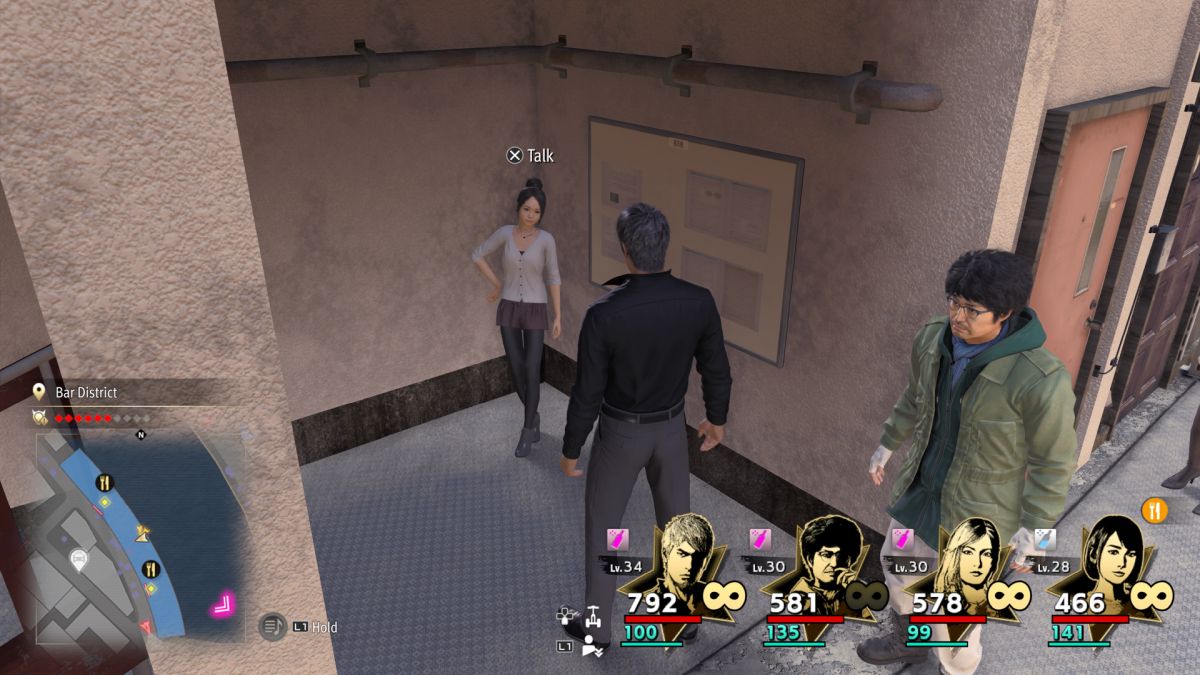
Honk-Honk Granny (50,000 yen)
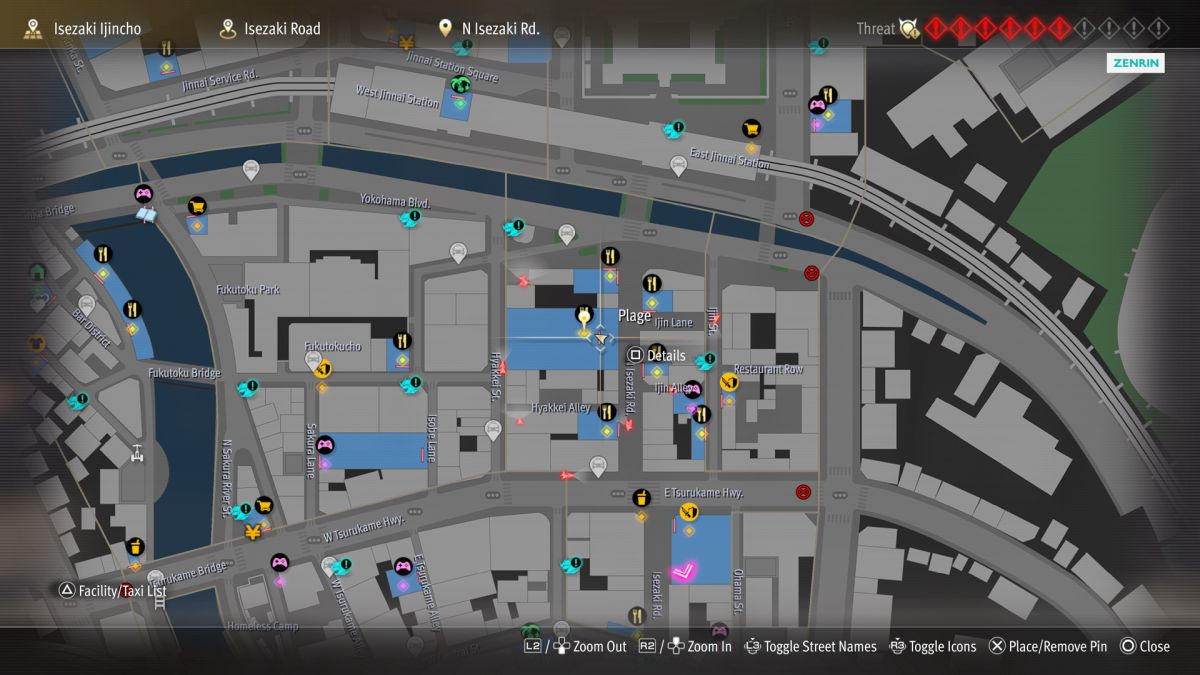
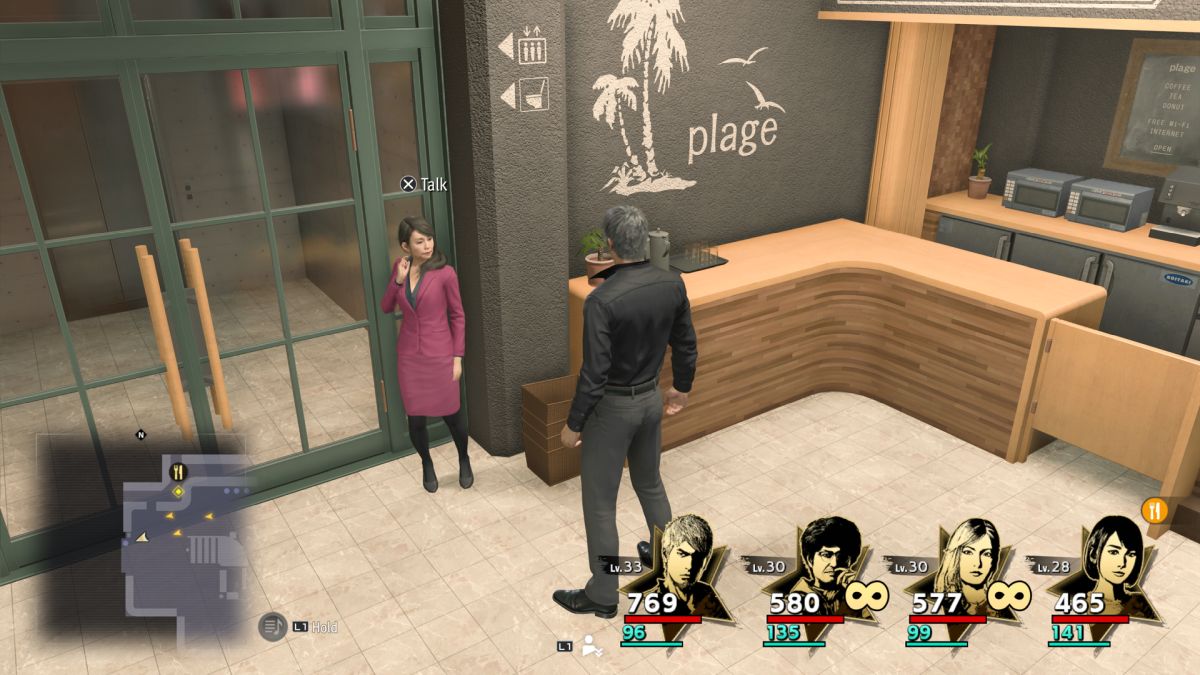
There are numerous restaurants in Isezaki Ijincho. You are looking for the Plage. It waits near the northeast quarter of the map’s southern half. Inside the building’s main lobby, you’ll meet the granny. She doesn’t look especially elderly if you ask me.
Honk-Honk Princess (30,000 yen)
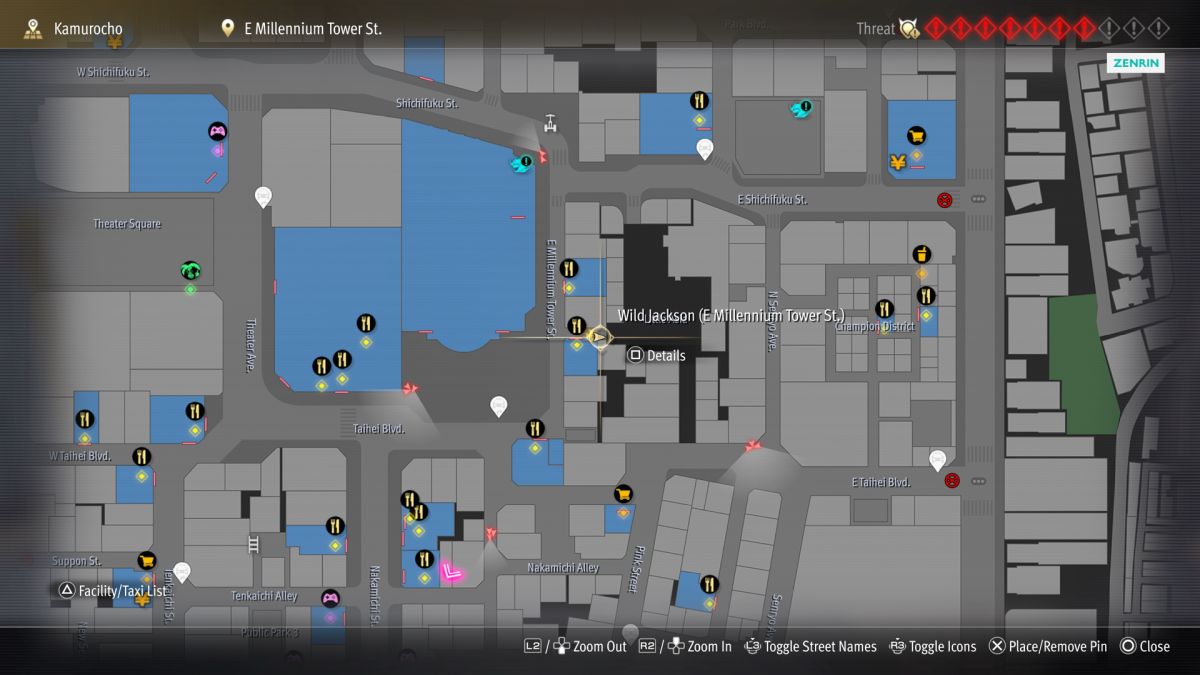
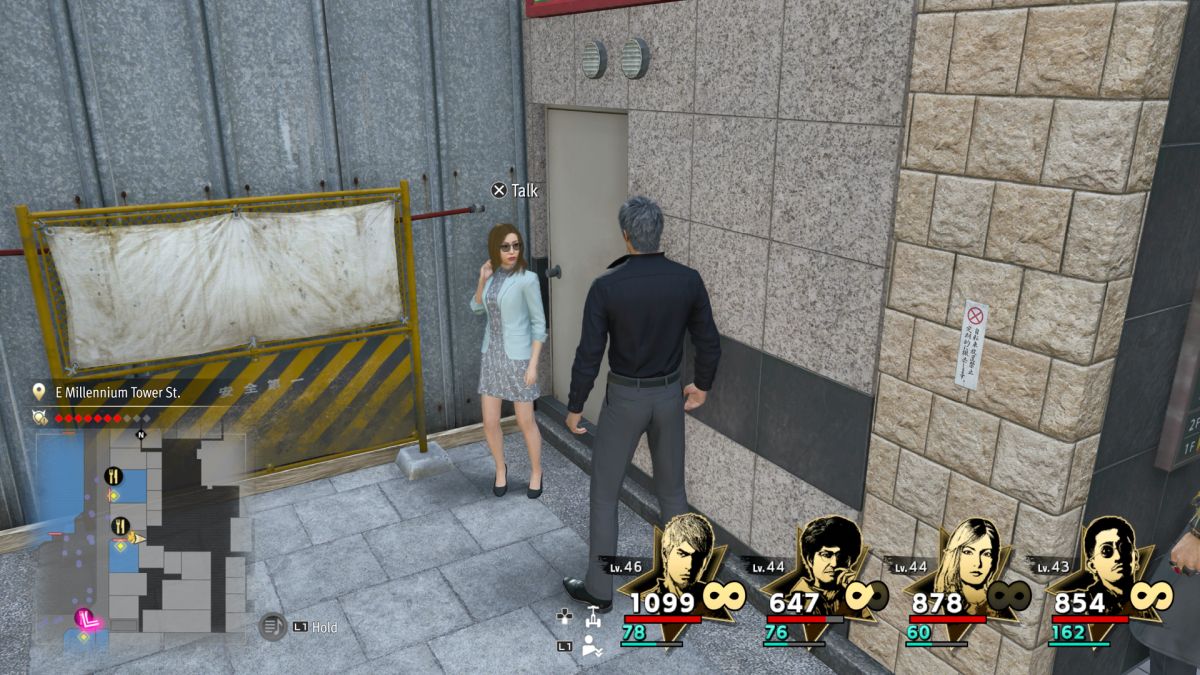
Travel to Kamurocho and find the Wild Jackson restaurant. The restaurant is just to the east of the large lot on the south side of the Millennium Tower. Check the nearby alley, just to the south of the restaurant, to meet with the Honk-Honk Princess. Since you’re already side-questing, might as well familiarize yourself with all the trophies and achievements Infinite Wealth has to offer.