You participate in a huge variety of tours in Like a Dragon: Infinite Wealth. One recurring event is the Photo Rally, which lets you snap pictures in weird locations for big prizes. Here is our guide listing all Little Japan Photo Rally locations in Like a Dragon: Infinite Wealth.
Like a Dragon: Infinite Wealth – All Little Japan Photo Rally locations
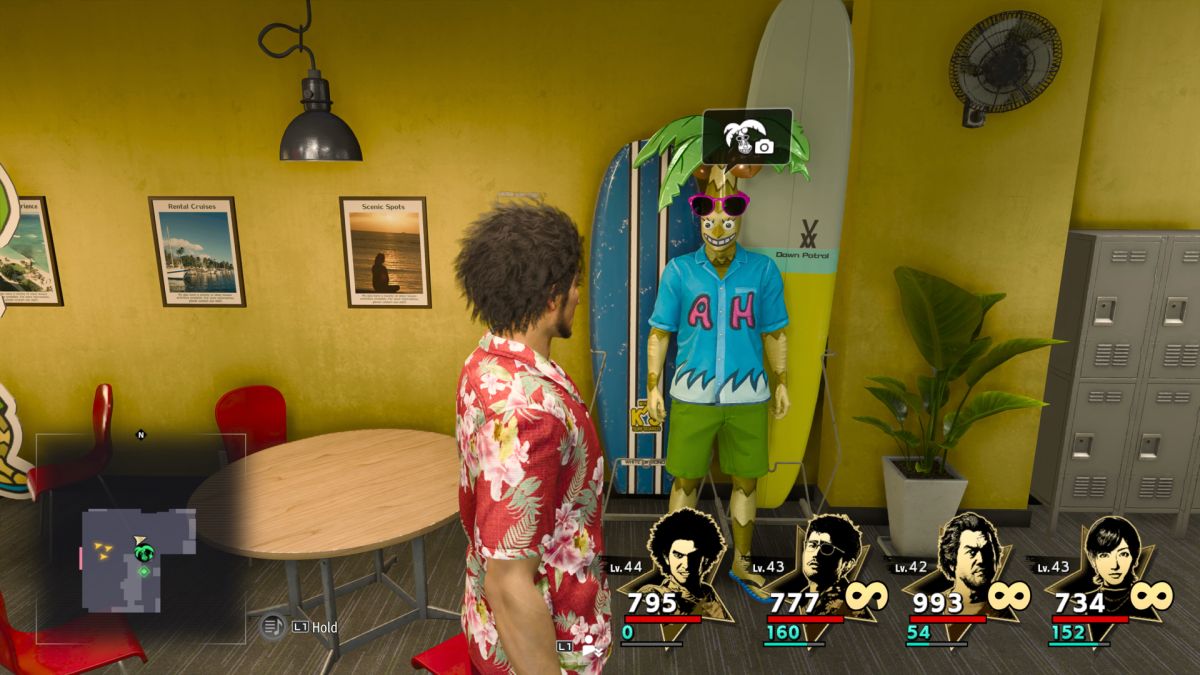
You meet the proprietors at Alo-Happy Tours early in the campaign. The main branch, at the Waikiki location, is part of the Worldwide Market Village. You are promised rewards if you snap photos of memorable places within the various districts. There are 15 locations to document in Little Japan.
Below, we’re listing all 15 locations. For each location, we’ll provide some brief written directions. We’re also including map screenshots, plus screenshots showing your characters standing near the target. Locations are listed in the order they are presented.
1. Kametaro
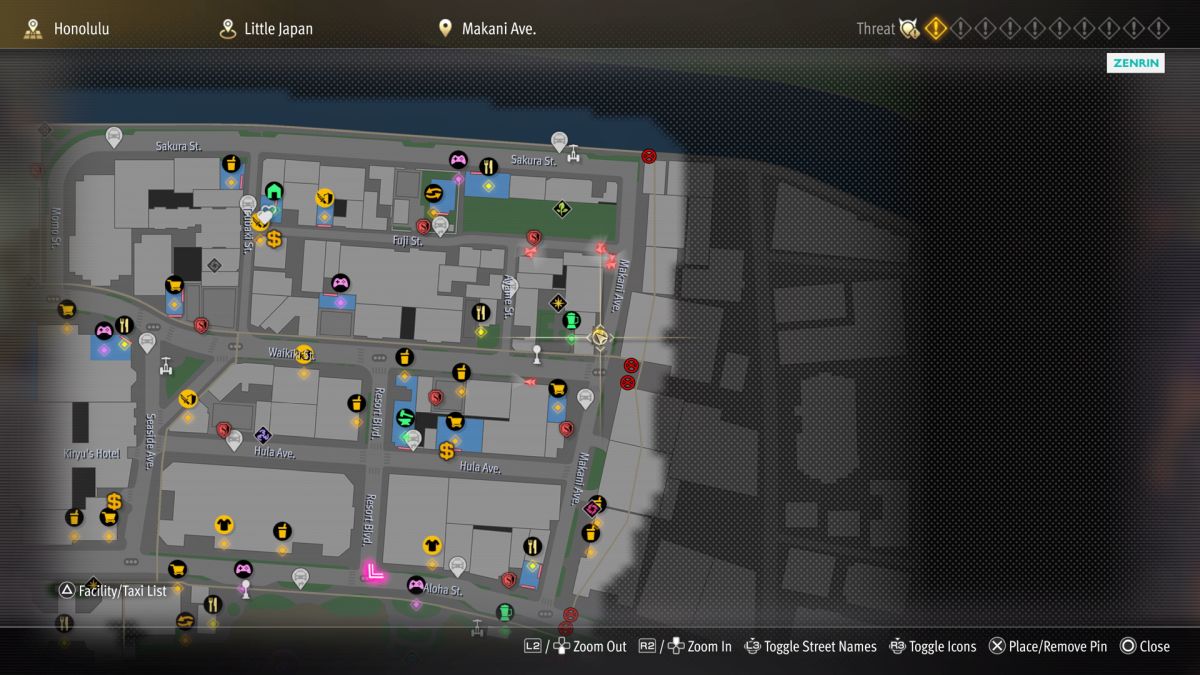
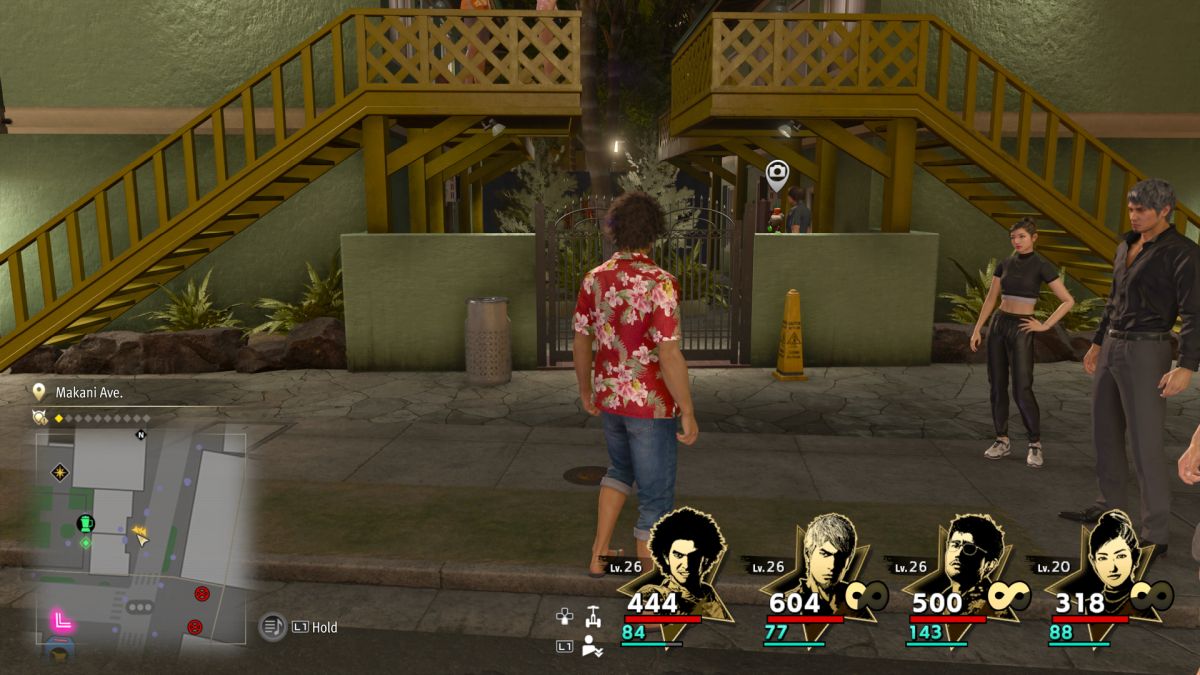
Head to Makani Ave., which runs vertically along the map’s eastern side. From the fast travel point, travel a short distance north and watch for some turquoise apartments to your left. Some of them have yellow steps that rise and meet on a second level. The Kametaro you need to photograph rests on a wall beneath the upper balconies.
2. Ukelele Boy and Ukulele Girl
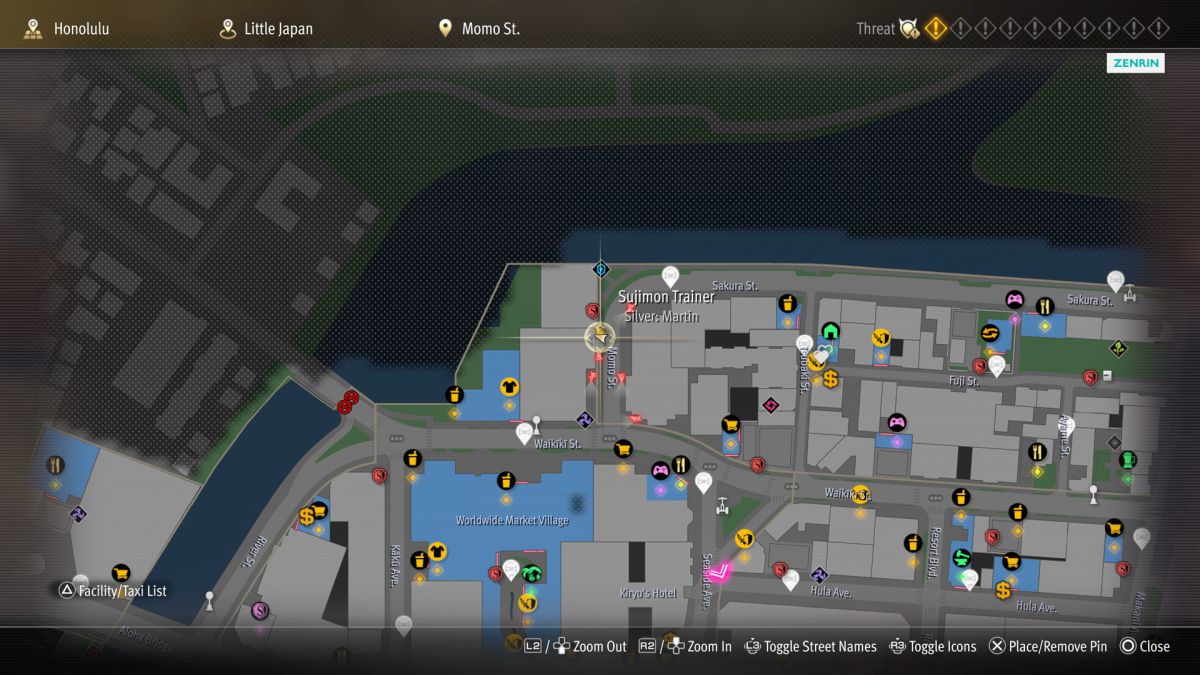
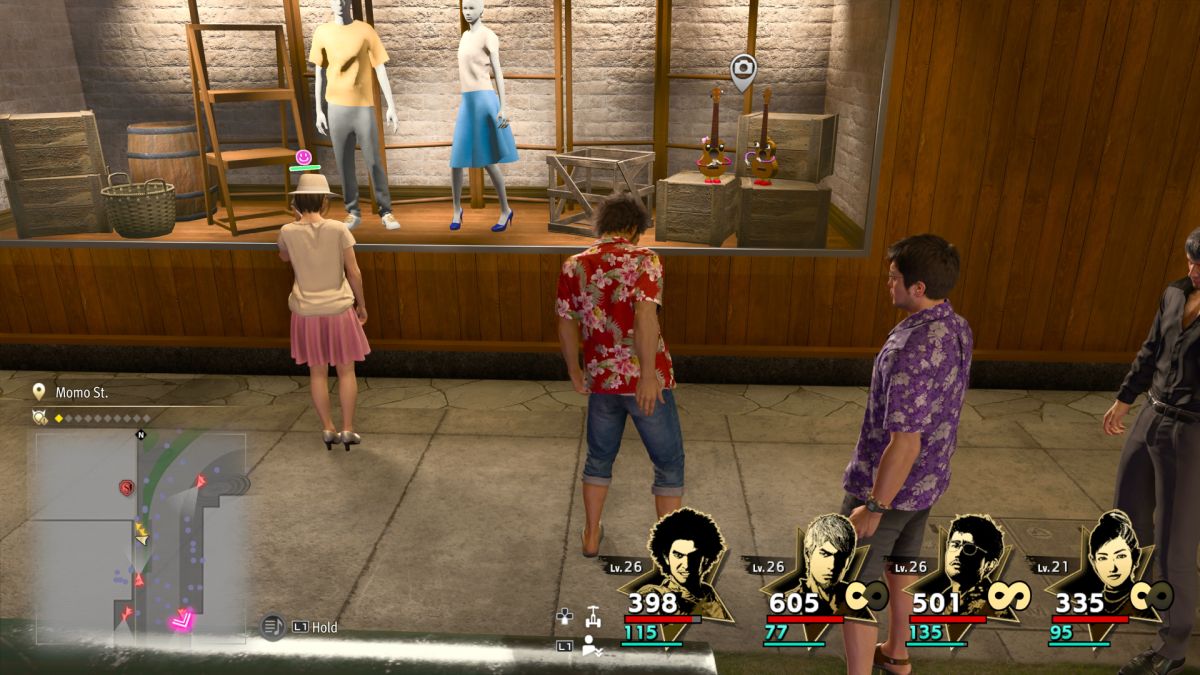
The mascots you need to photograph sit in a store window that faces Momo St. The street itself is fairly brief. I found it easiest to check the map for Sakura St., which runs along the map’s north side. Along that street’s western end, it turns briefly into Momo St. The building you’re looking for on Momo St. has wooden paneling on its face. It is one building east from the 88 Tees T-Shirt Store.
3. Jeff’s Taco Truck
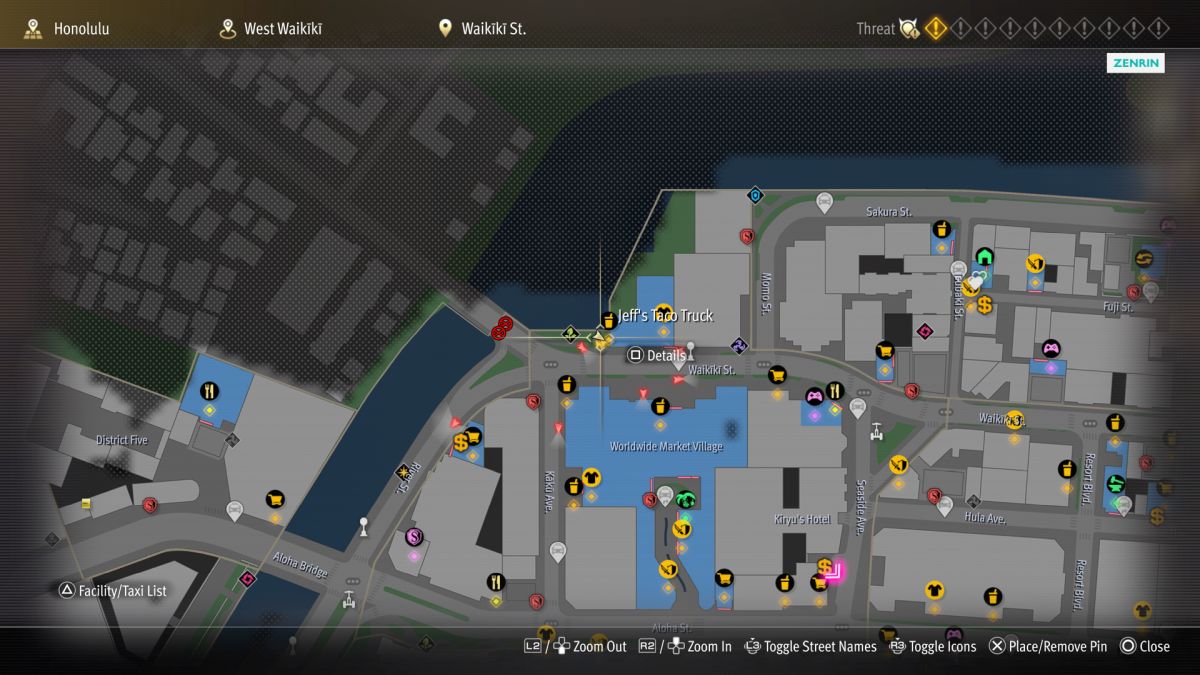
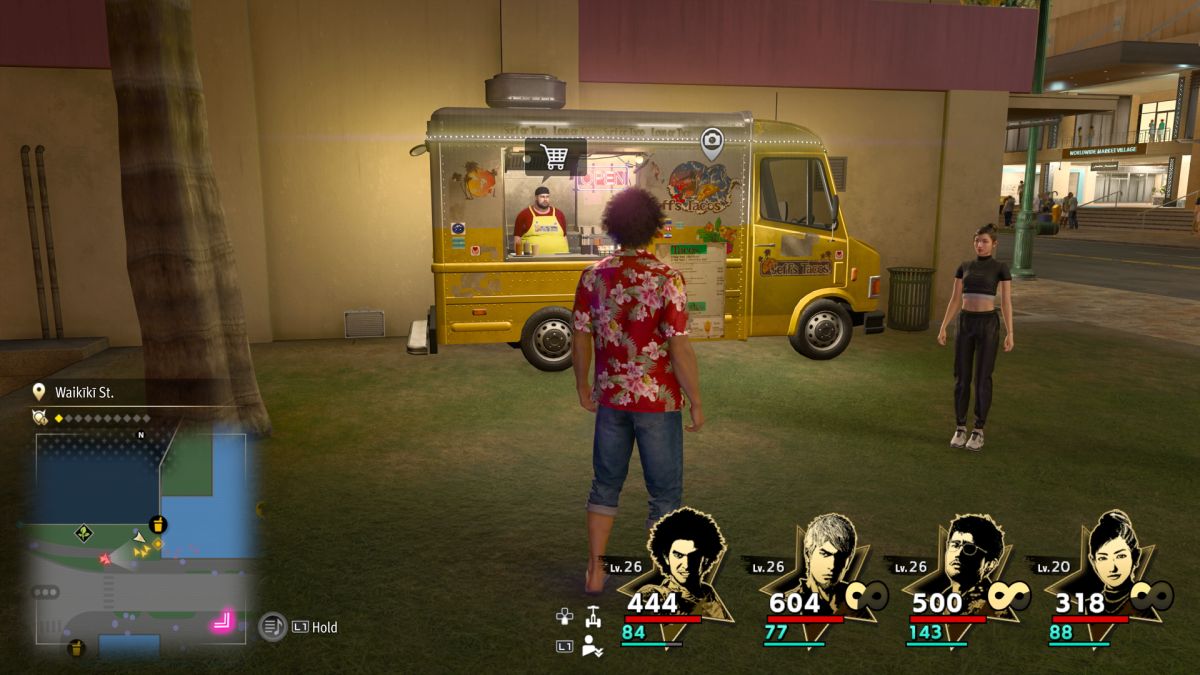
You visit this location pretty early in the game, so you can simply select the Jeff’s Taco Truck location on your map to easily find it. The W Waikiki St. fast travel location is very close to it, once you activate it. The truck itself is just north of the Worldwide Market Village‘s northwest edge.
4. Matsumoto Shave Ice
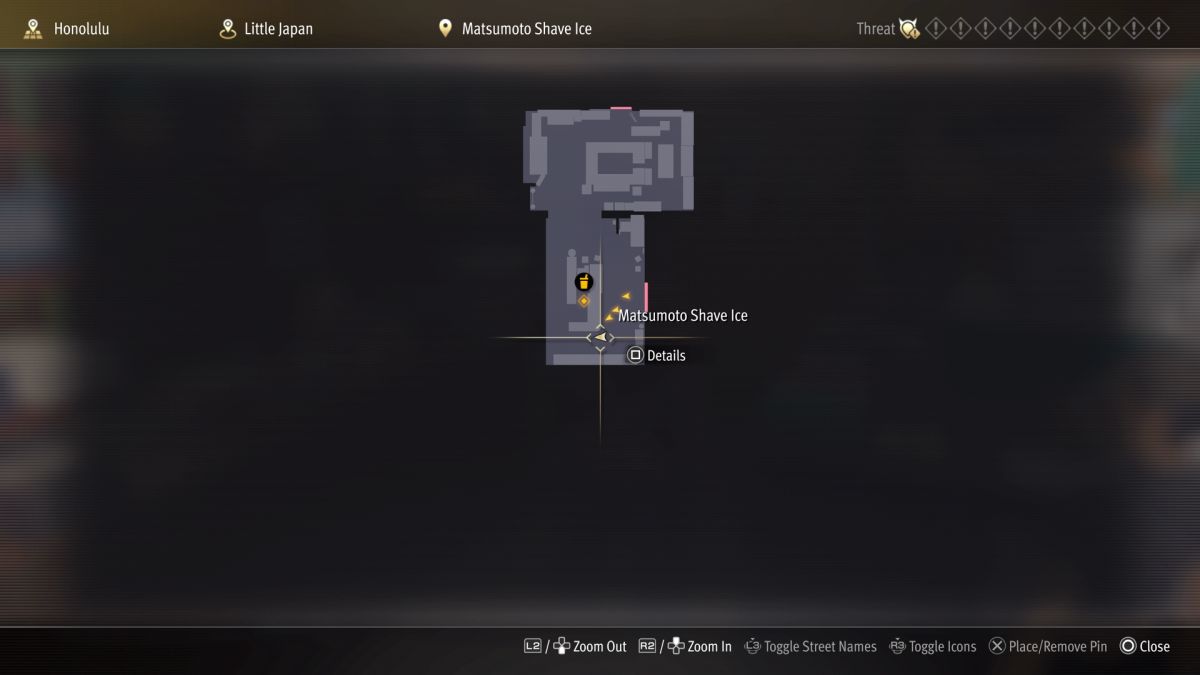
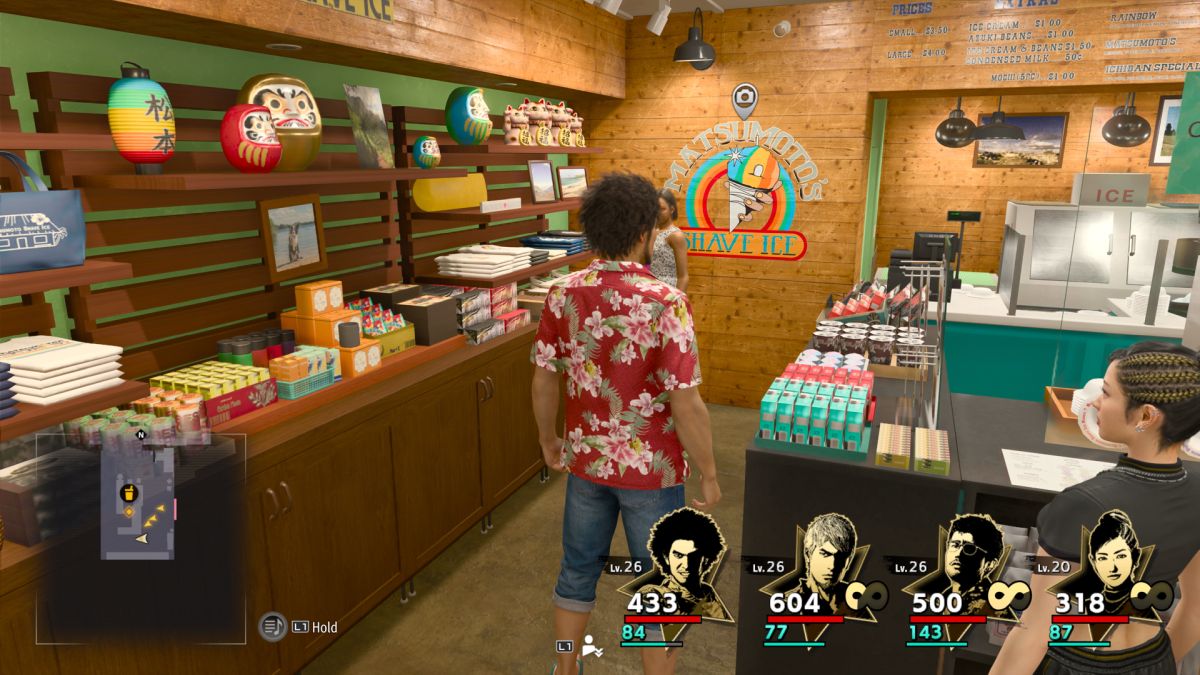
Matsumoto Shave Ice is just a short distance northwest from Revolve Bar. Basically, it’s diagonally across the street. To take the desired photograph, head in the front door and look to the back wall, left of the front counter.
5. Revolve Bar
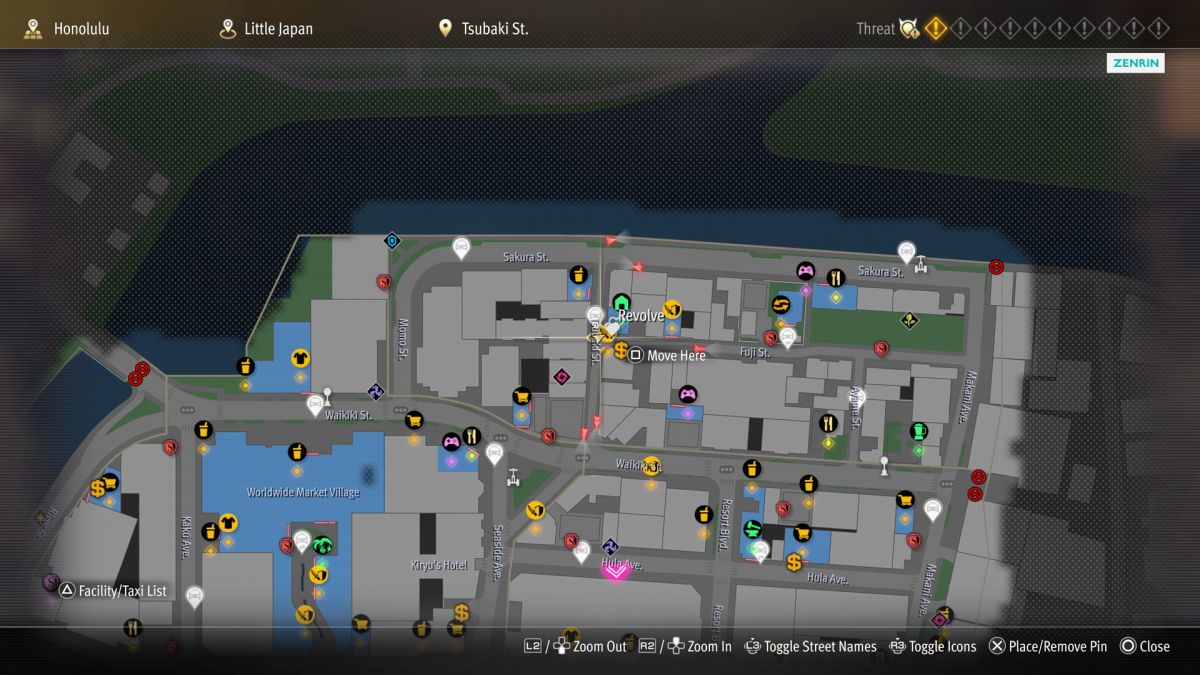
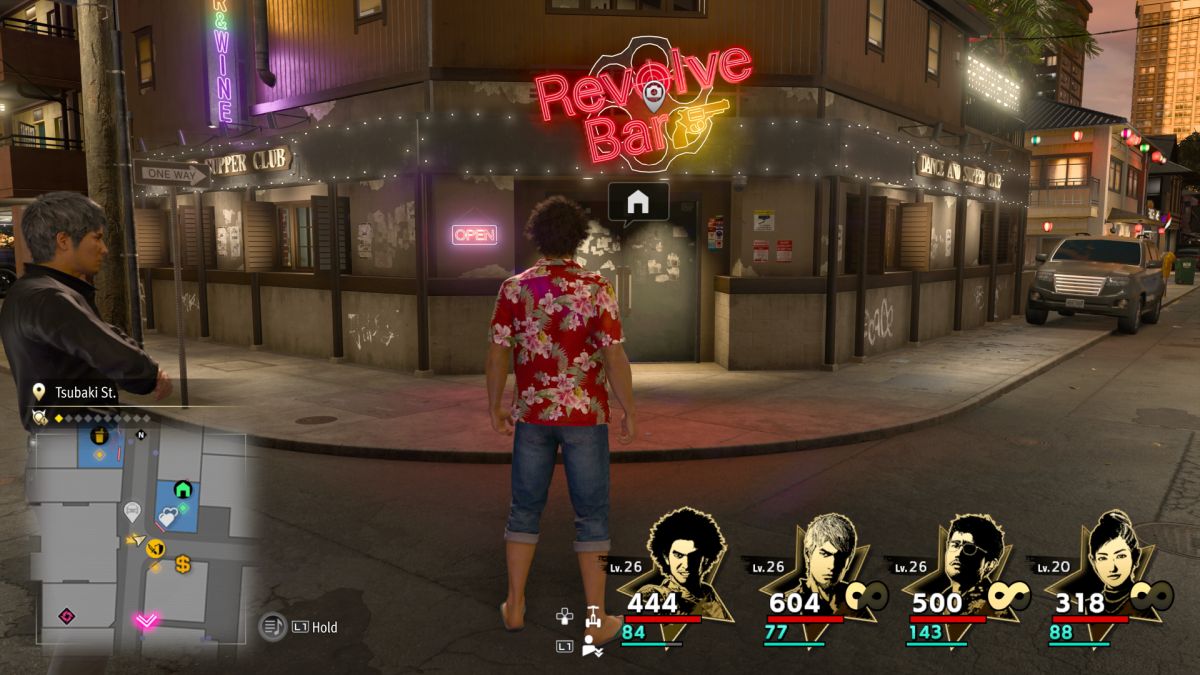
You’ll become very familiar with this location, shortly into the campaign. Make sure that you stop to take a picture of its front exterior sign, which hangs over the entryway.
6. Yamabiko
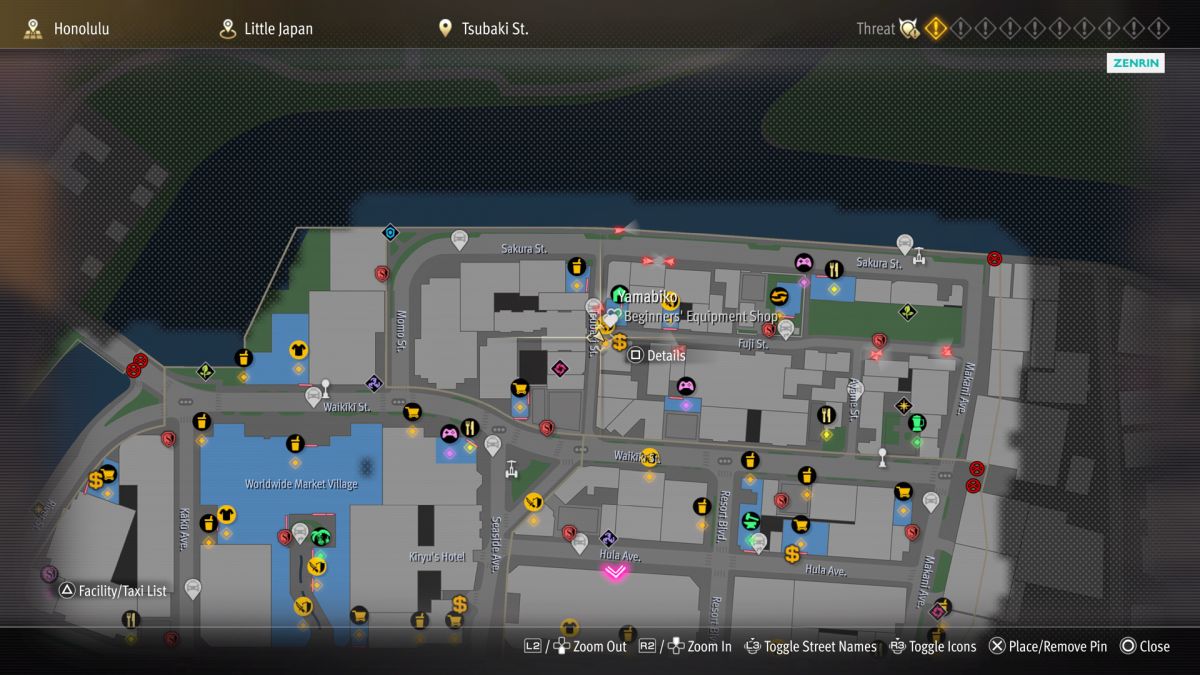
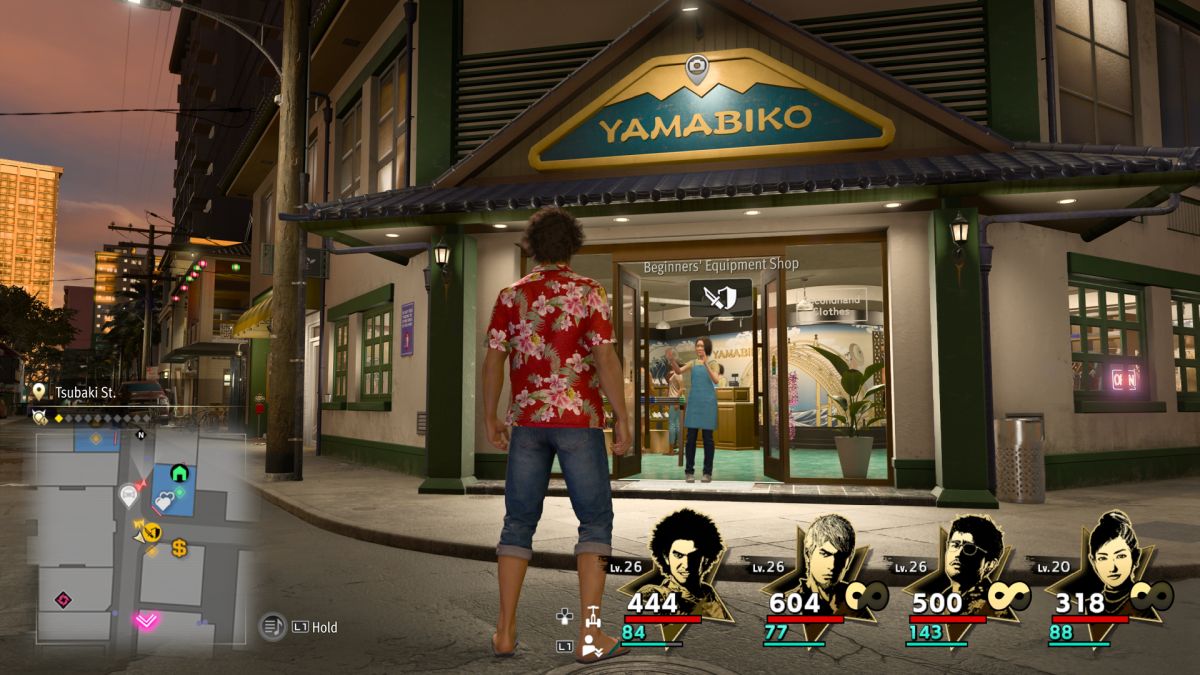
Make your way to the Revolve Bar, and then look just across the street, one building to the south. That building is Yamabiko, and you need a picture of its exterior sign.
7. Mt. Fuji Planter
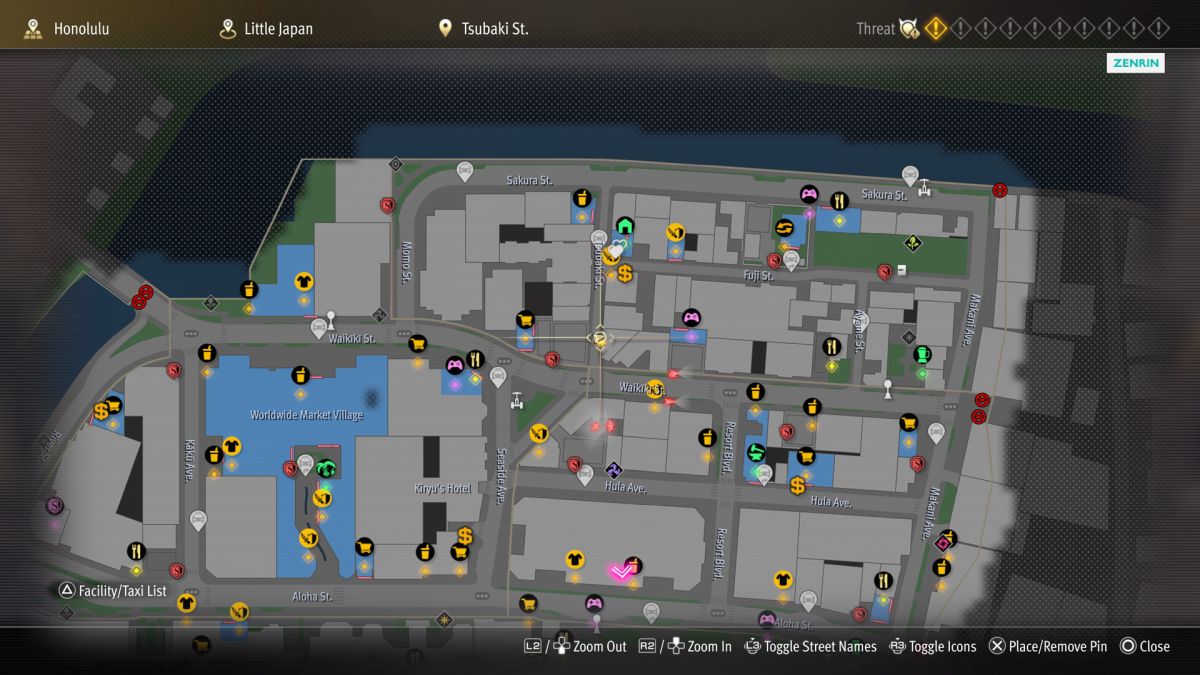
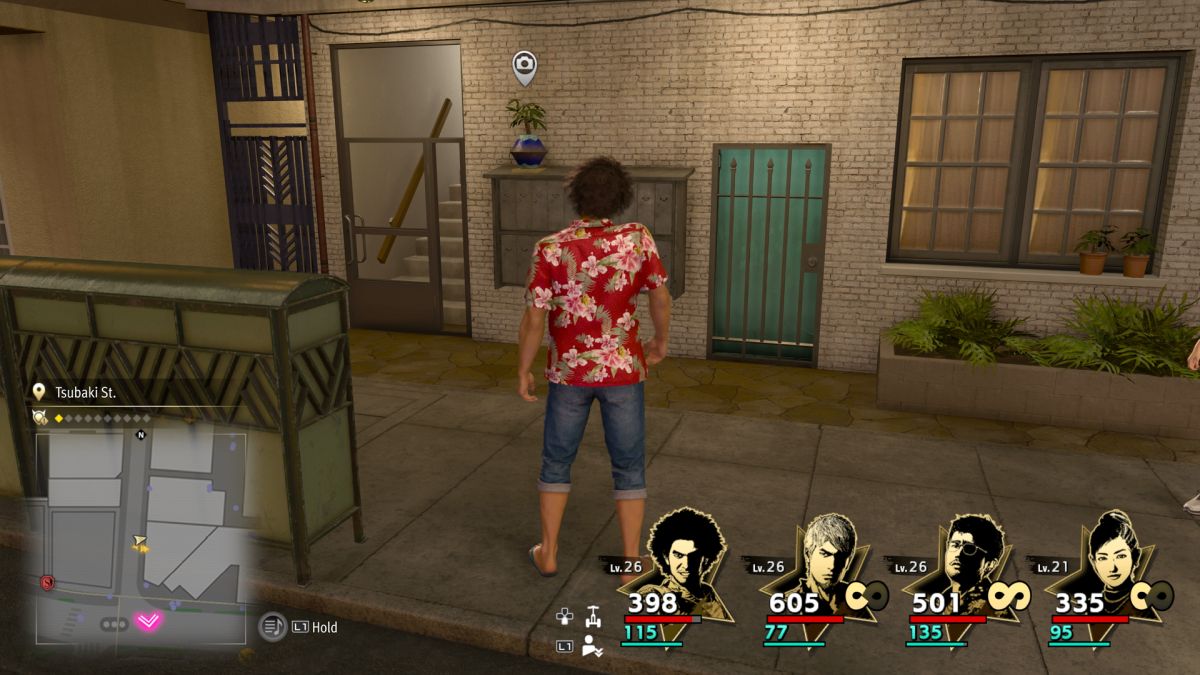
Out of this batch of photos, this is the one that took me the longest to find. Starting from Revolve Bar, head south along Tsubaki St. and keep an eye to your left. Watch for a bank of green magazine displays along a sidewalk. Under the awning behind those, you’ll see a set of gray mailboxes. The planter is sitting on top of them.
8. Toba
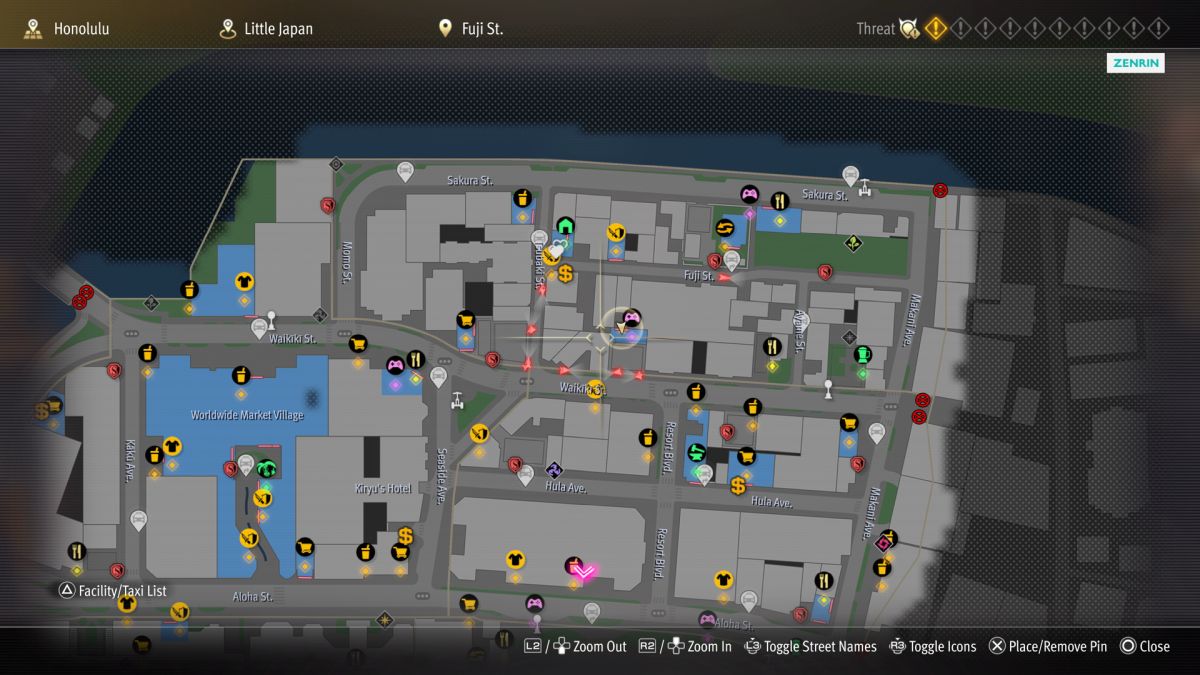
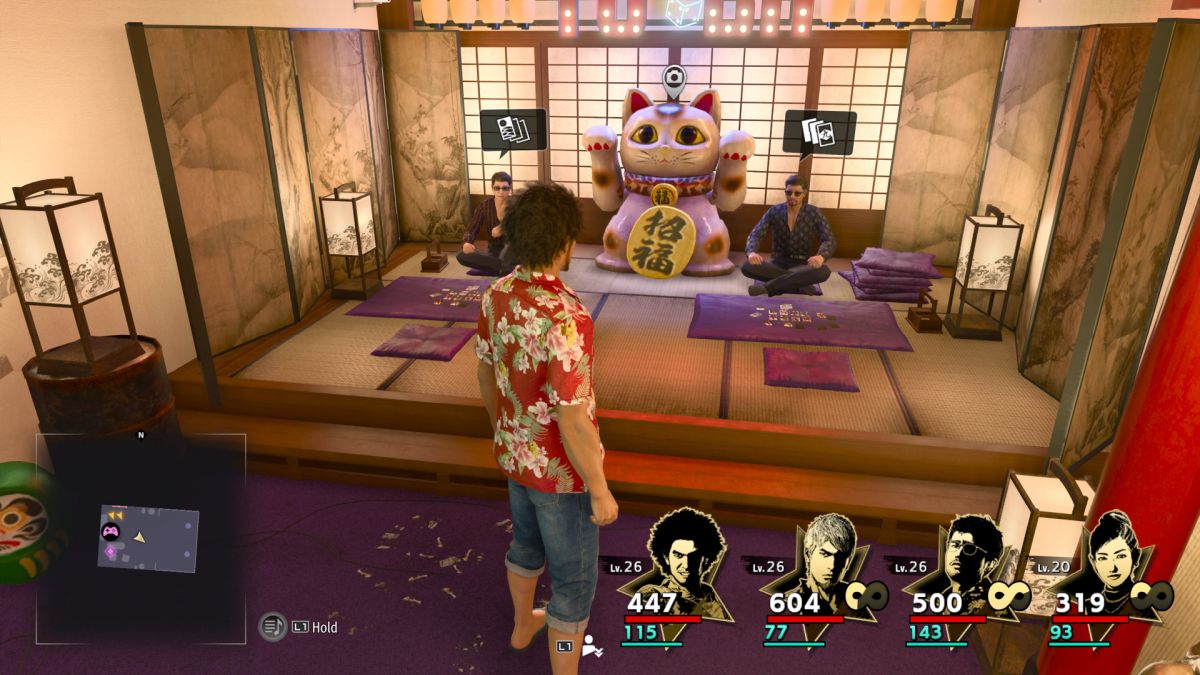
You have to look inside a building to find this one. The building in question is the Gambling Hall, located across the street from the Wink Mini Mart. However, getting there requires you to take a back route. Take Fuji St. east from Tsubaki St. and veer right to travel through the plaza with the pink umbrella stands. Continue until you reach a dumpster in front of a wall with graffiti, then veer left. When you reach the next wall in that direction, head around its left side to find a statue in front of a door. You can enter the door to arrive within the hall, where you should easily spot the target you need to photograph.
9. Dolphin Mural
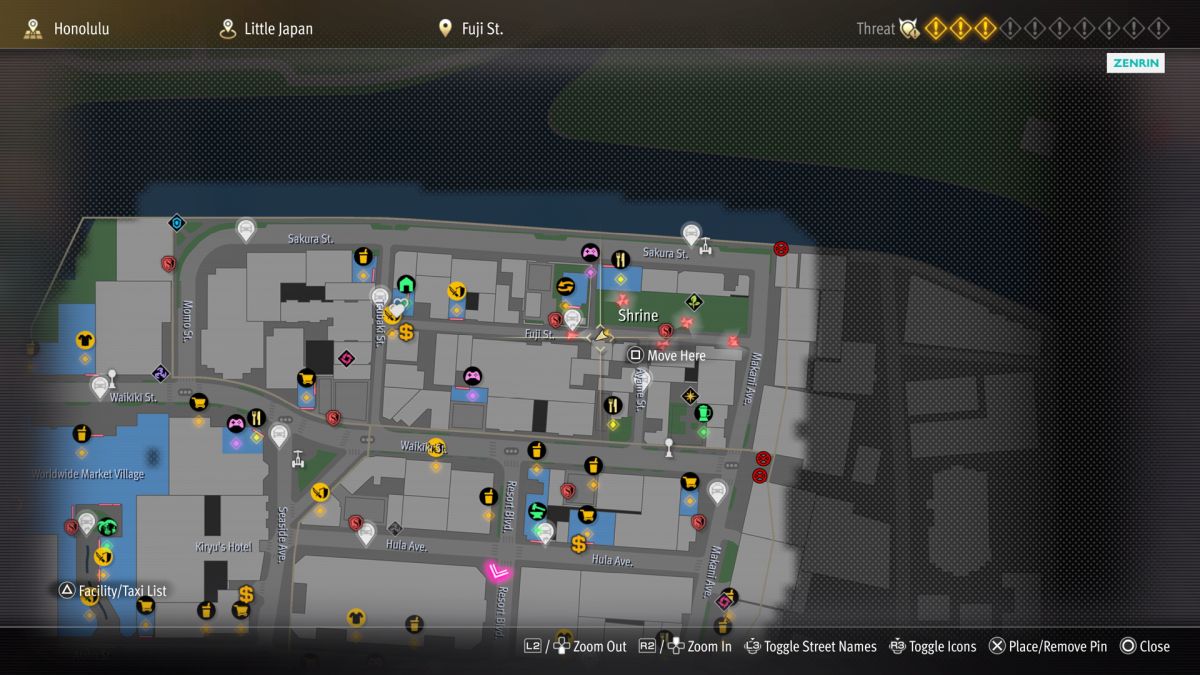
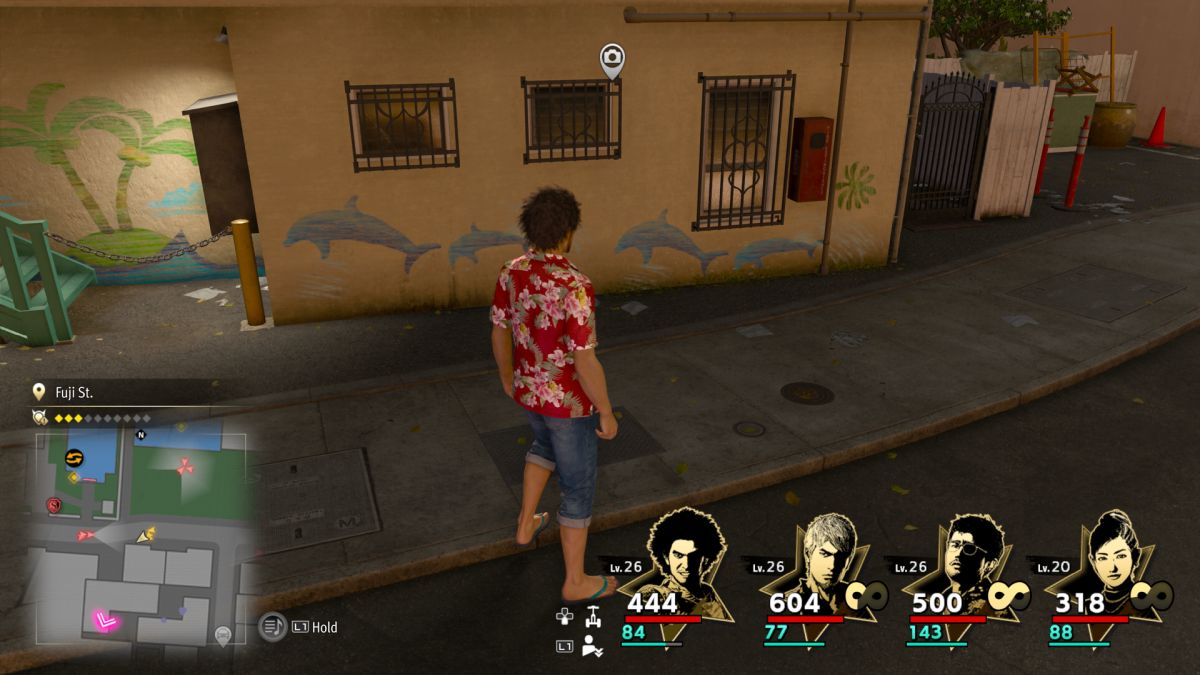
The mural is painted on a wall along the south side of Fuji St., which is the next street south from Sakura St. If you use the Shrine fast travel point, you’re almost there. Just look diagonally to the southeast from the shrine itself, and you should easily spot the mural on the white buildings with blue staircases.
10. Shinobi Sushi
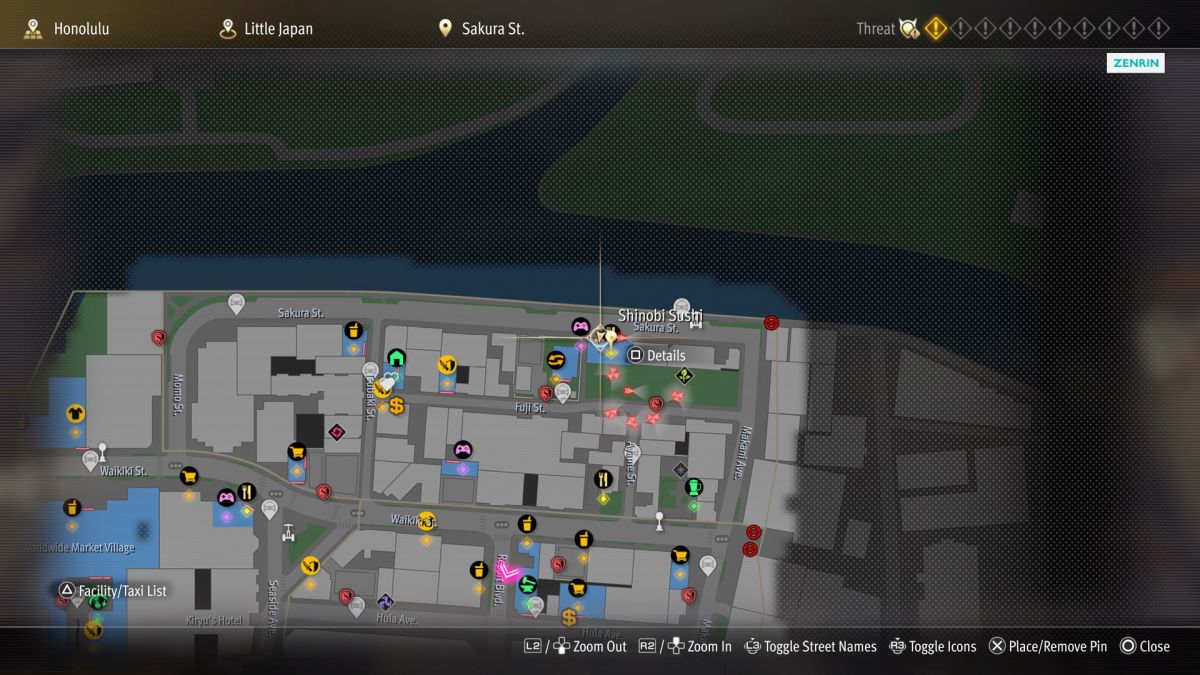
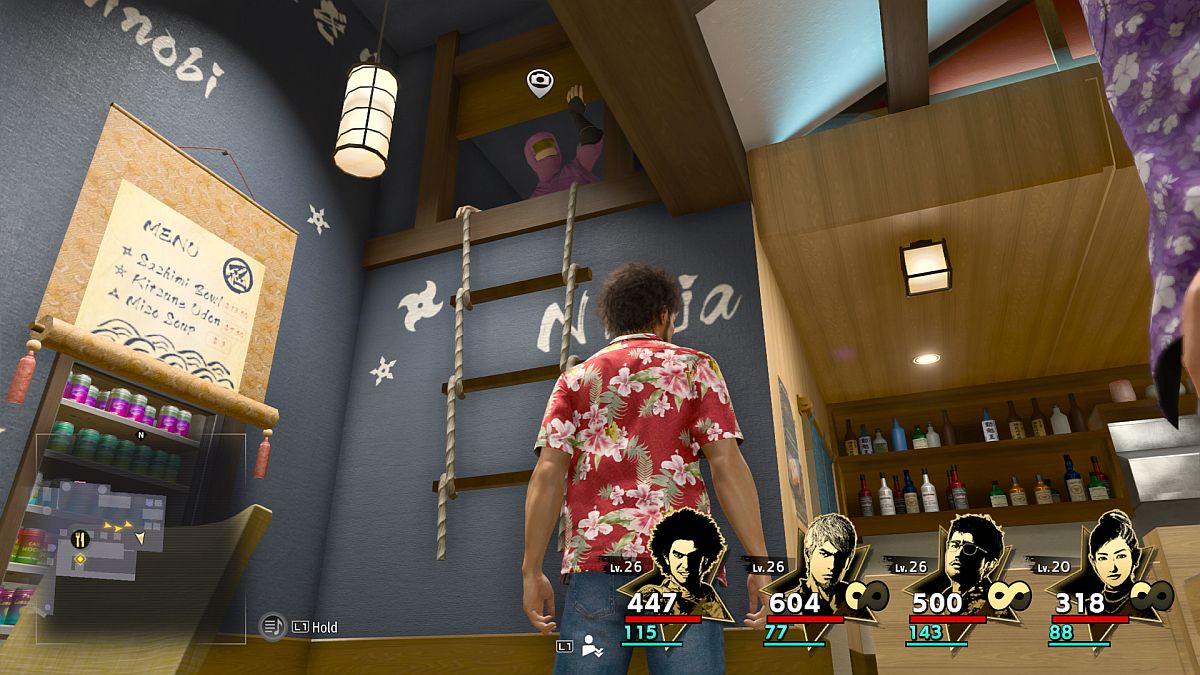
Shinobi Sushi is near the very north point on the map, along Sakura St. You can fast travel most of the way there, using the E Sakura St. location. Once you arrive at the establishment, enter the building. Inside, head immediately to the left wall from the counter. I had to try for a bit before I got in a position that would let me snap the picture, by focusing high on the blue wall with the rope ladder.
11. Ryukai Shrine
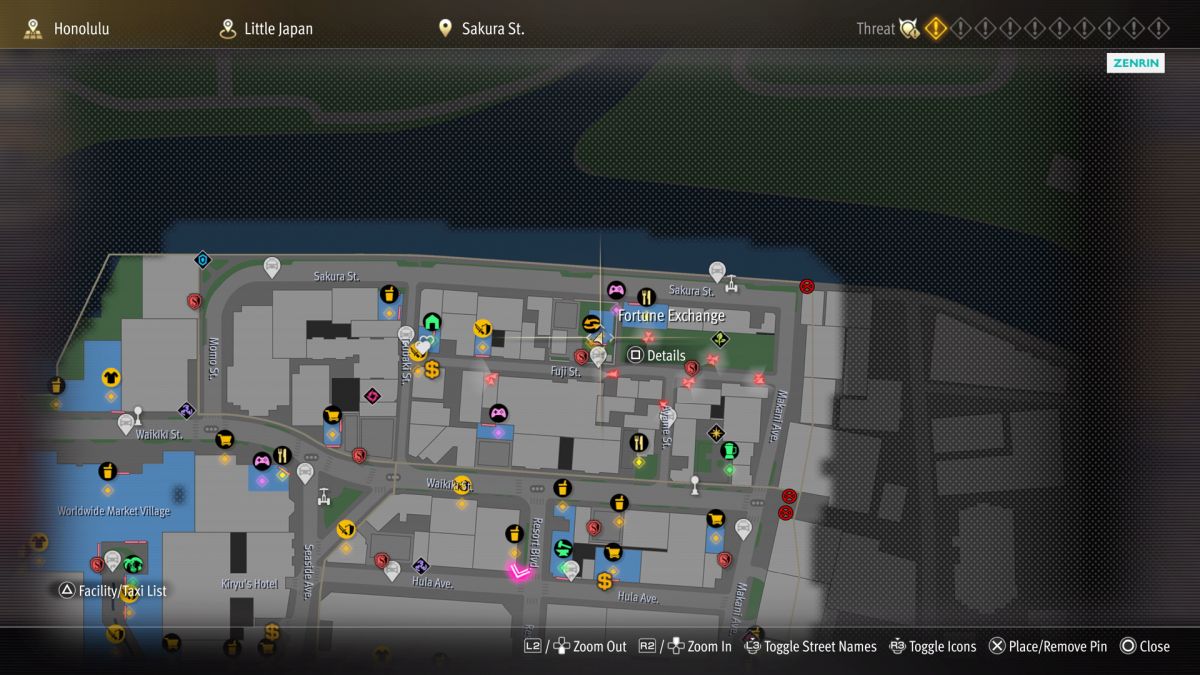
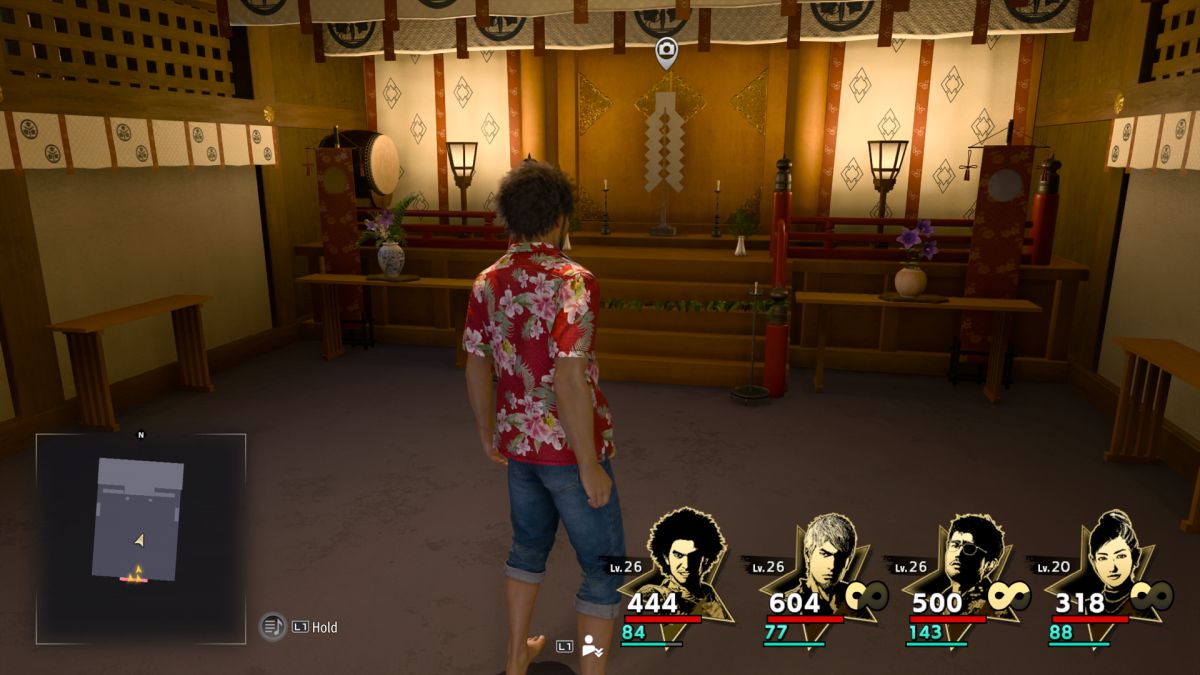
Ryukai Shrine is the building near where you can exchange blessings for loot. You can fast travel to the Shrine location and then immediately enter the building. Inside, take a picture of the pedestal at the back wall.
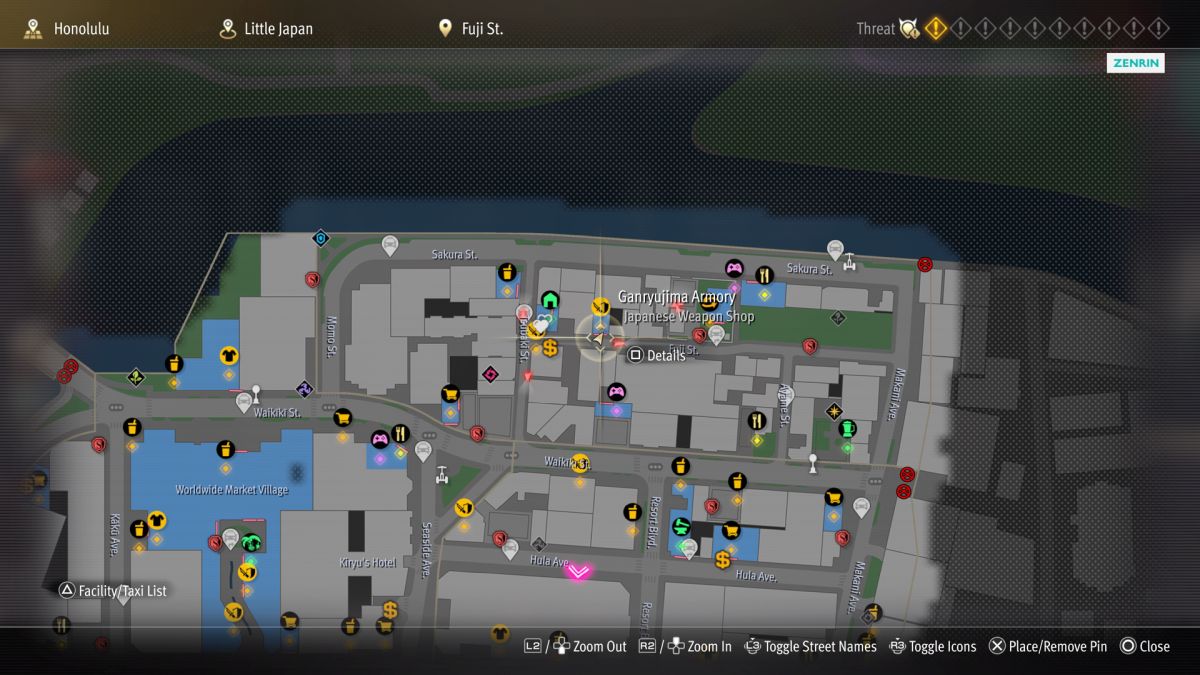
12. Ganryujima Armory
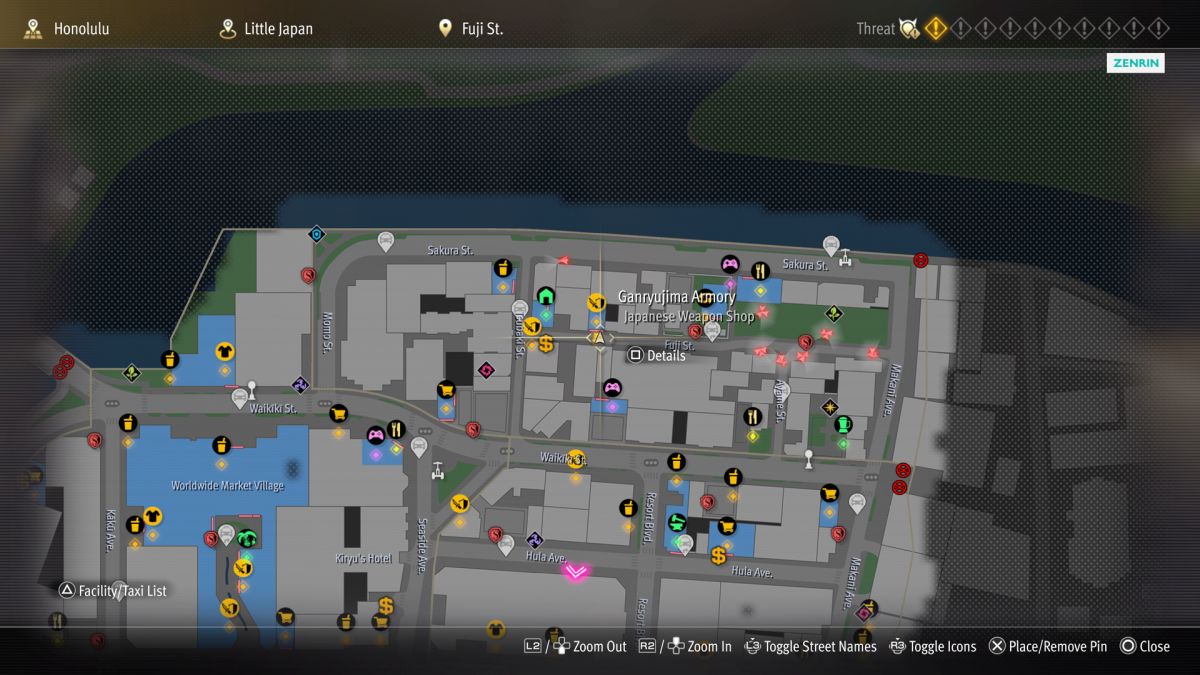
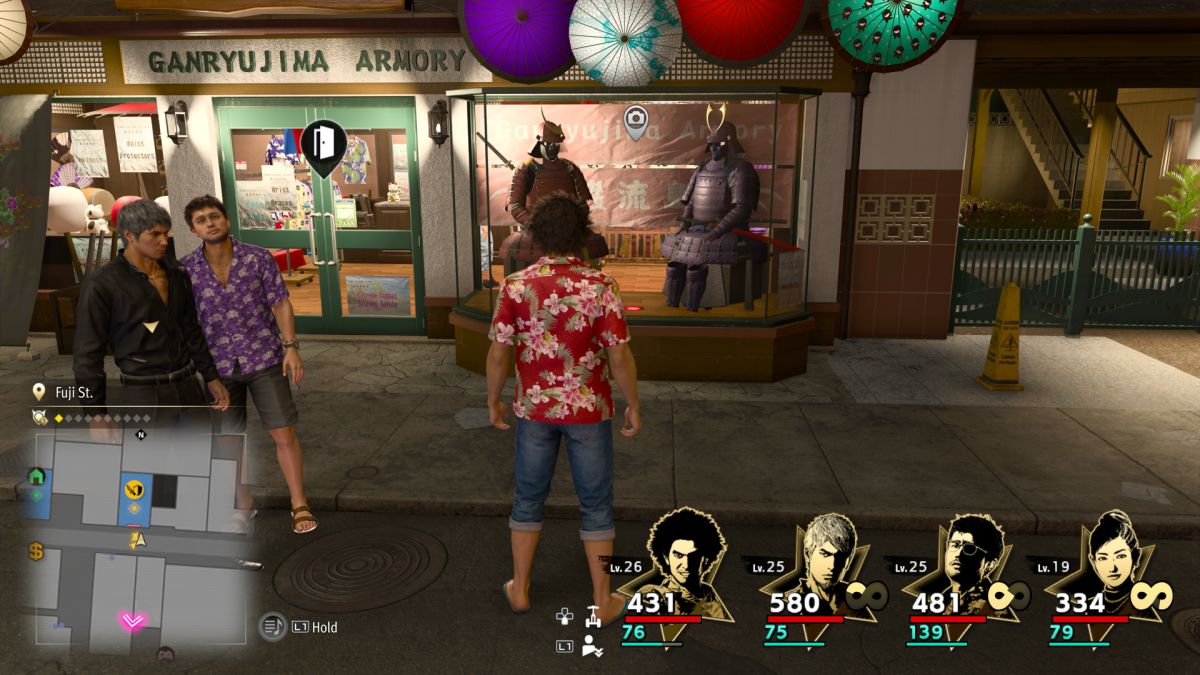
Follow Fuji St. east from the Revolve Bar front entrance. As you travel, watch the buildings to your left. Ganryujima Armory will be on your left, easy to spot. You should take a picture of the posed suit of armor in its display window.
13. Ganryujima Dharma
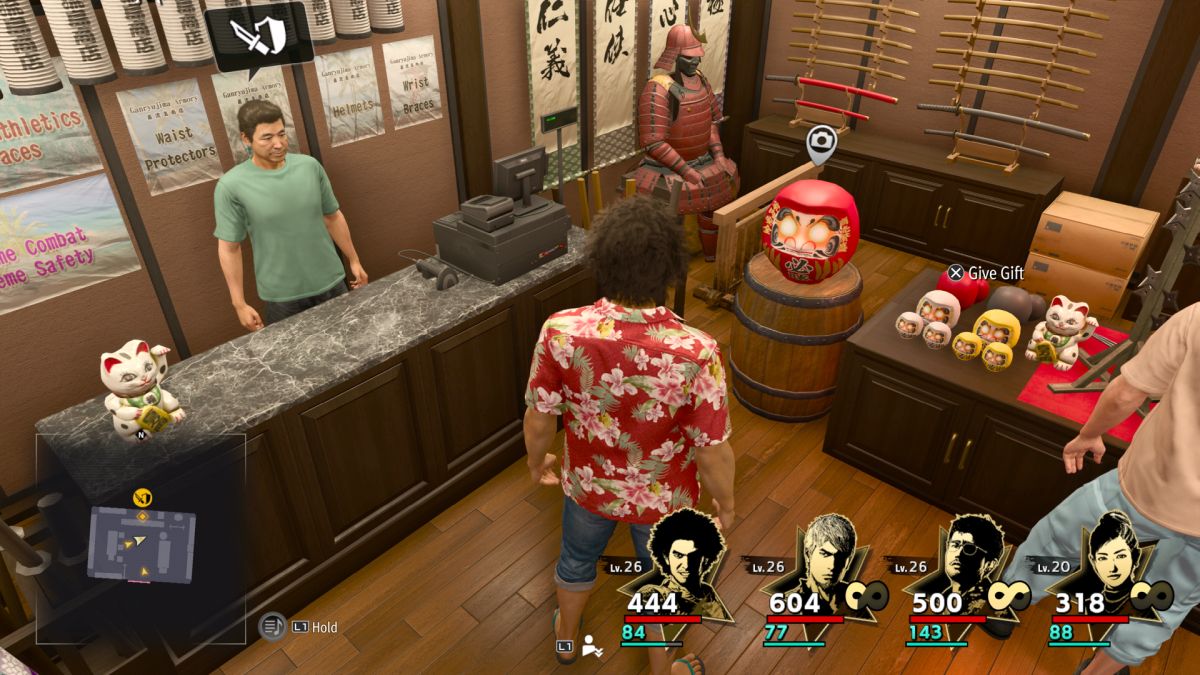
Find Ganryujima Armory not far east of Revolve Bar. Enter the store and look to your right, just ahead of the counter. The object you need to photograph rests there, on a barrel.
14. Ahi Poke Garden
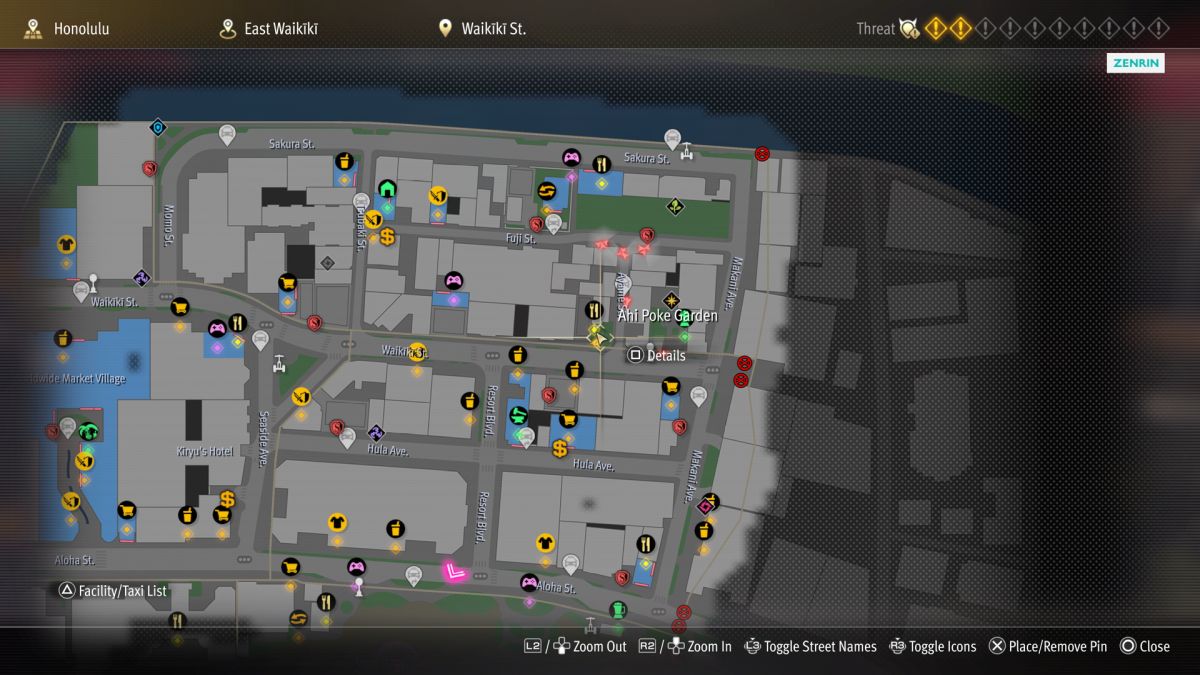
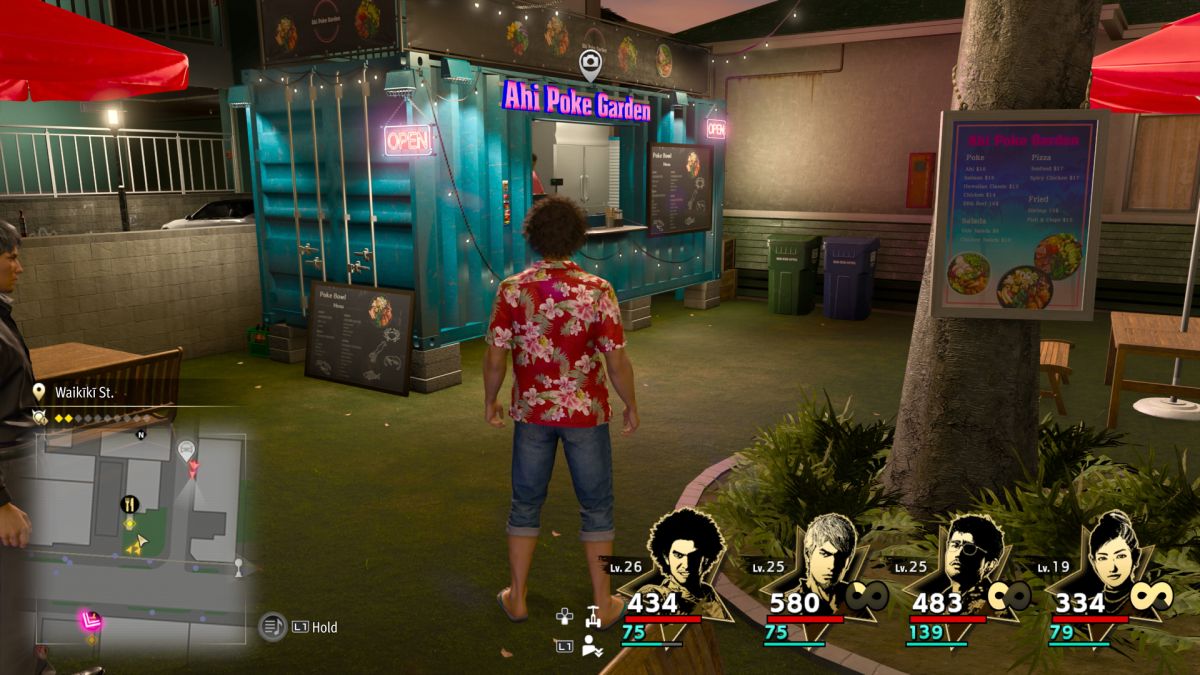
Ahi Poke Garden is a dining establishment located along Waikiki St., where it intersects with Ayame St. You can get there quickly if you fast travel to the N. Waikiki St. fast travel location, then head a very short distance southwest. The location is easy to spot because of all the wooden tables and chairs with pink umbrellas. Focus your camera on the Ahi Poke Garden logo for your photograph.
15. Big King Pizza
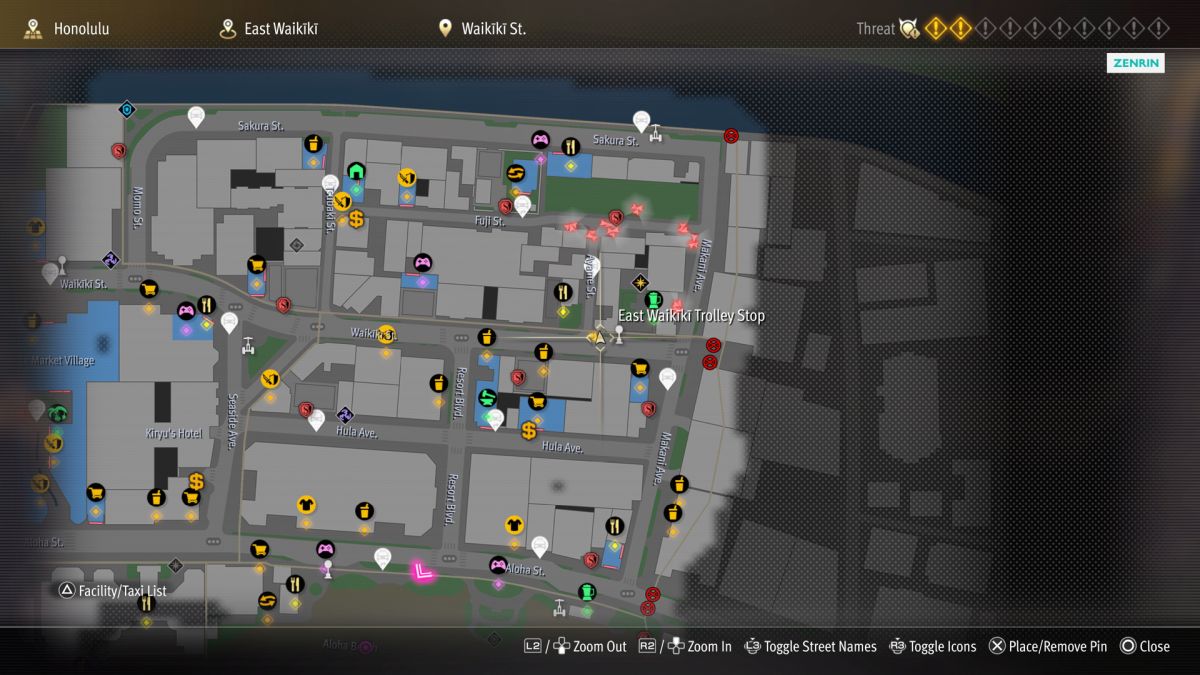
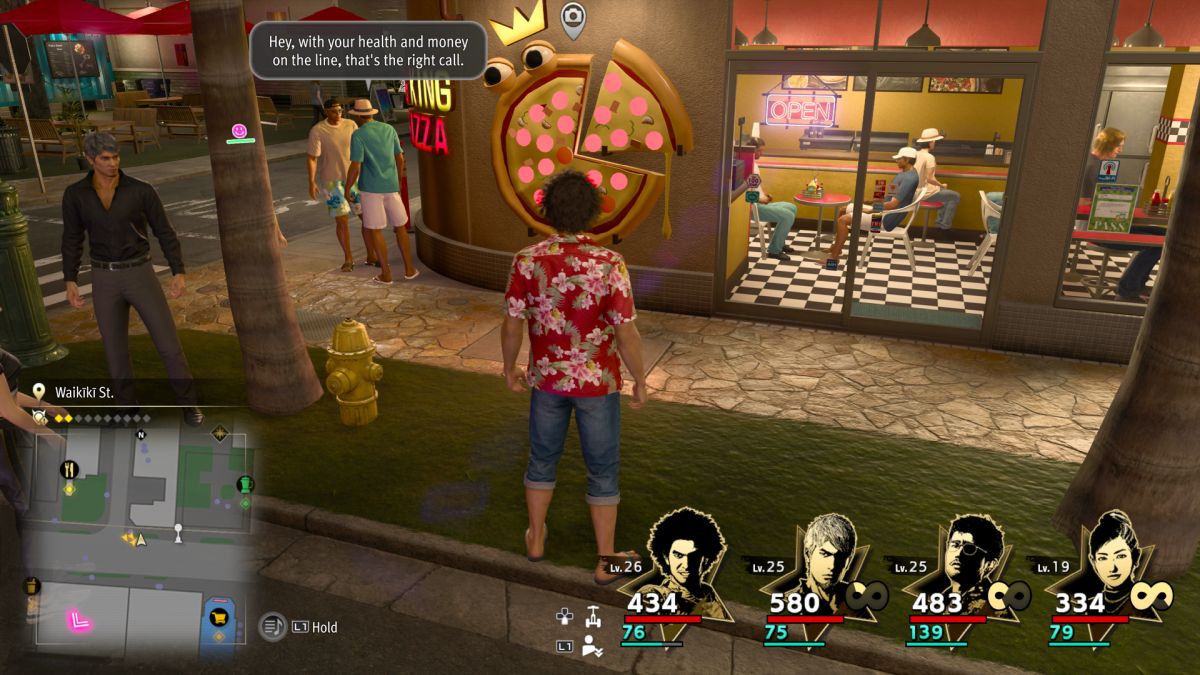
Big King Pizza is located across the street from Ahi Poke Garden, right near the East Waikiki Trolley Stop. You can get there quickly if you make use of the Makani Ave. fast travel location and just head a short distance northwest. The pizza you need to photograph is easy to spot on the building’s exterior.
When you snap all of the required photos and show off your results at the main branch of Alo-Happy Tours, you receive the Ephemeral Short Sword as a reward. It’s a suitable weapon for a hero. Since you’re hoofing it around town anyway, you might as well learn about all Honk-Honk locations in Like a Dragon: Infinite Wealth.