You participate in a huge variety of activities in Like a Dragon: Infinite Wealth. One recurring event is the Photo Rally, which lets you snap pictures in weird locations for great prizes. Here is our guide listing all Waikiki Photo Rally locations in Like a Dragon: Infinite Wealth.
Like a Dragon: Infinite Wealth – All Waikiki Photo Rally locations
You meet the proprietors at Alo-Happy Tours early in the campaign. The main branch, at the Waikiki location, is part of the Worldwide Market Village. You are promised rewards if you snap photos of memorable places within the various districts. There are 15 locations to document in Waikiki.
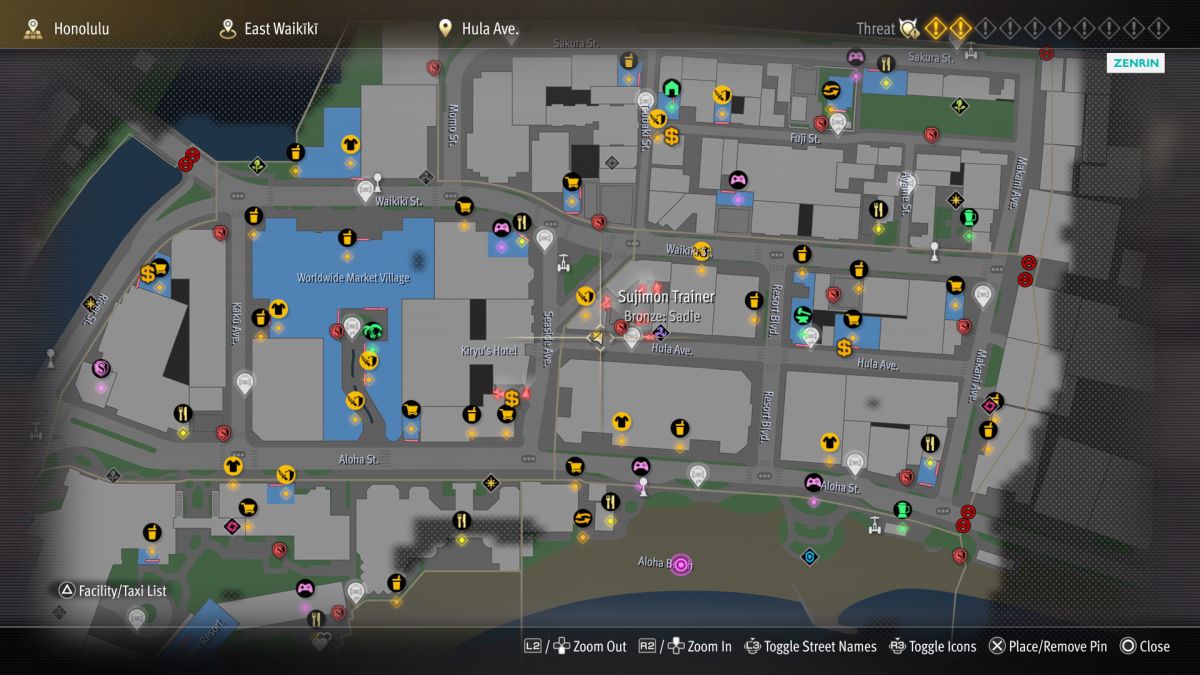
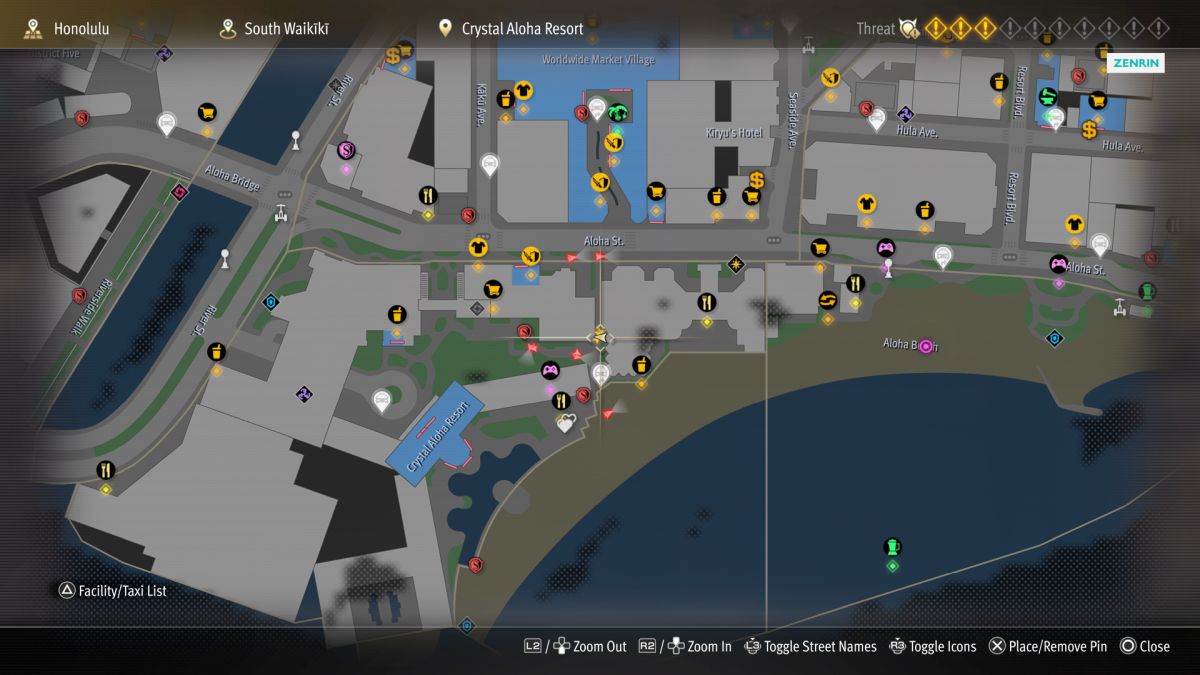
Below, we’re listing all 15 locations. For each location, we’ll provide some brief written directions. We’re also including map screenshots, plus screenshots showing your characters standing near the target. Locations are listed in the order they are presented.
1. Seaworthy Treasures
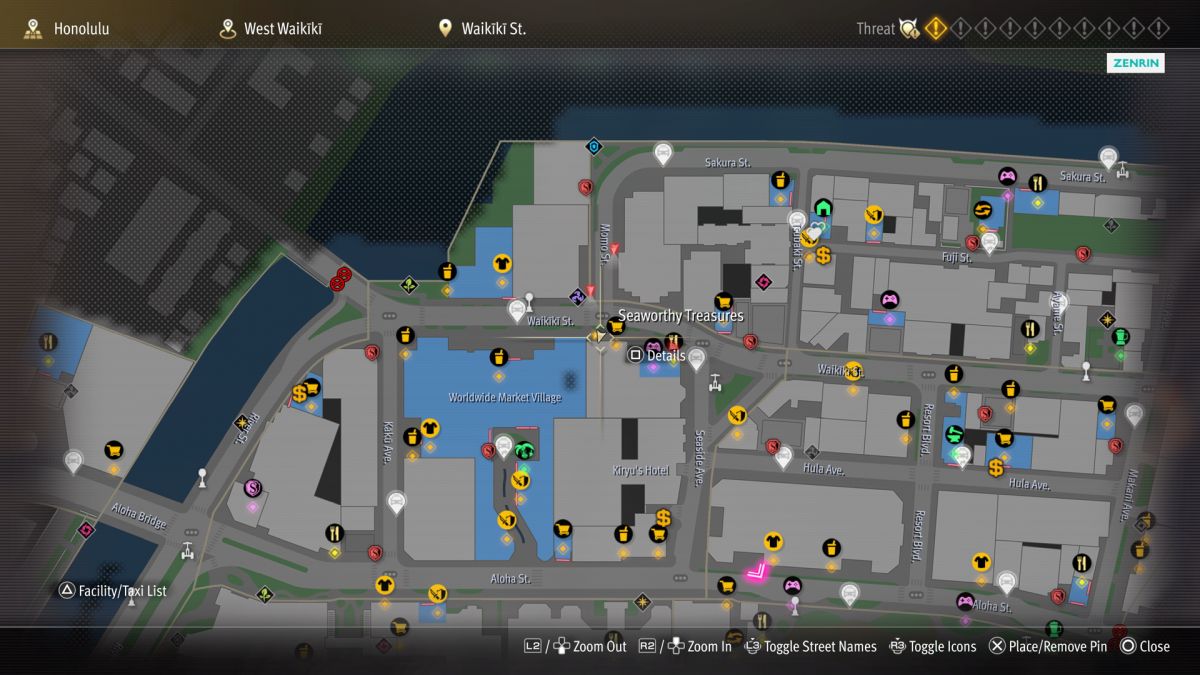

On your map, the Worldwide Market Village appears as a sprawling blue building. Just to its right, there is a gray building, which contains the Seaworthy Treasures store. Head the very short distance east along Waikiki St. to reach the store and take a picture of the display in its front window.
2. Cream & Berry
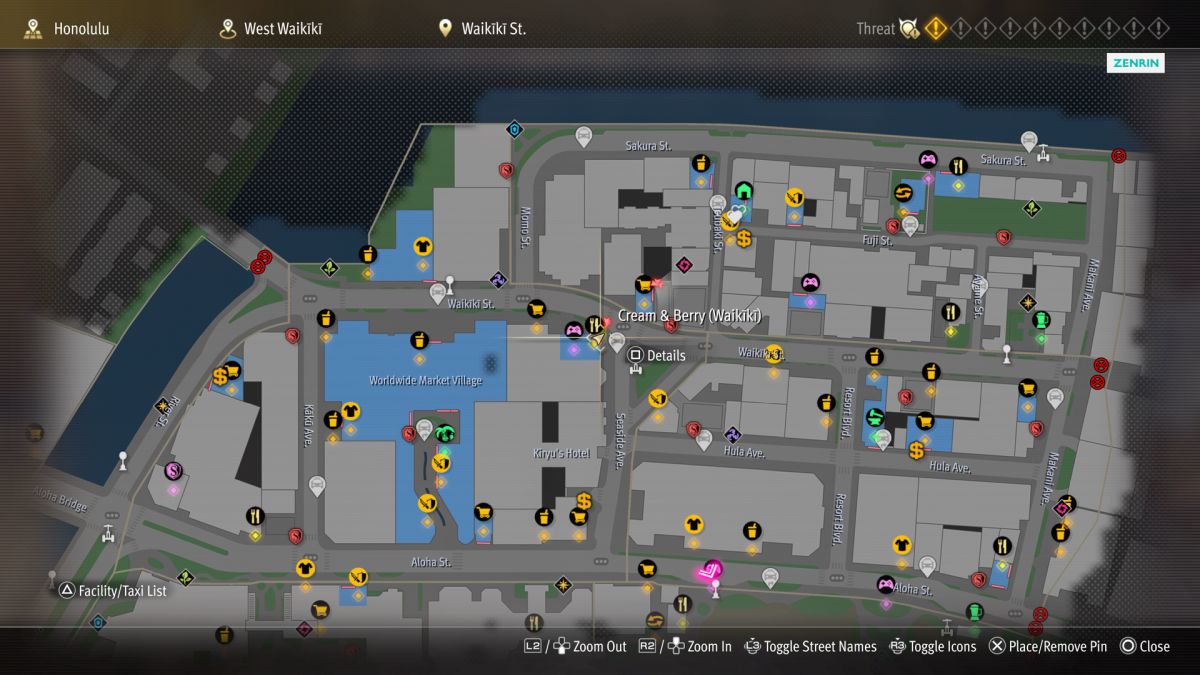
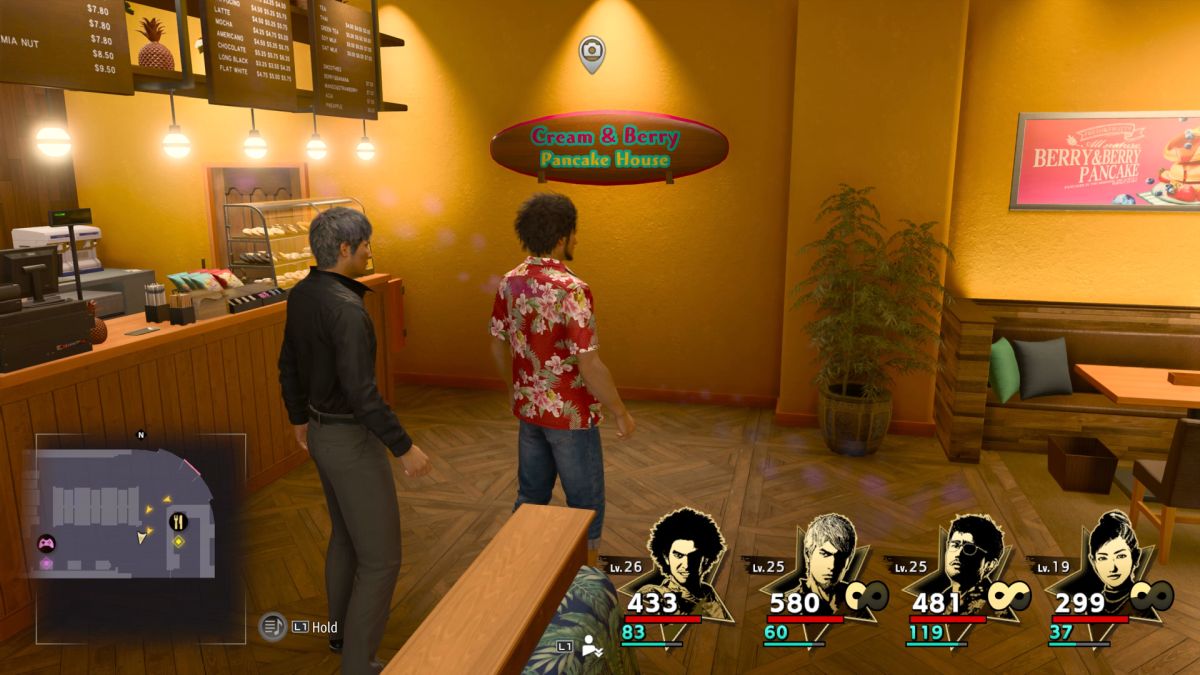
Use the Seaside Ave. fast travel point to appear right in front of the Cream & Berry (Waikiki) location, where you sometimes meet Miss Match. There are multiple Cream & Berry locations throughout Hawaii, but you want the one on Seaside Ave. Inside, take a picture of the logo on the wall, near the front counter.
3. Dolphin Statue
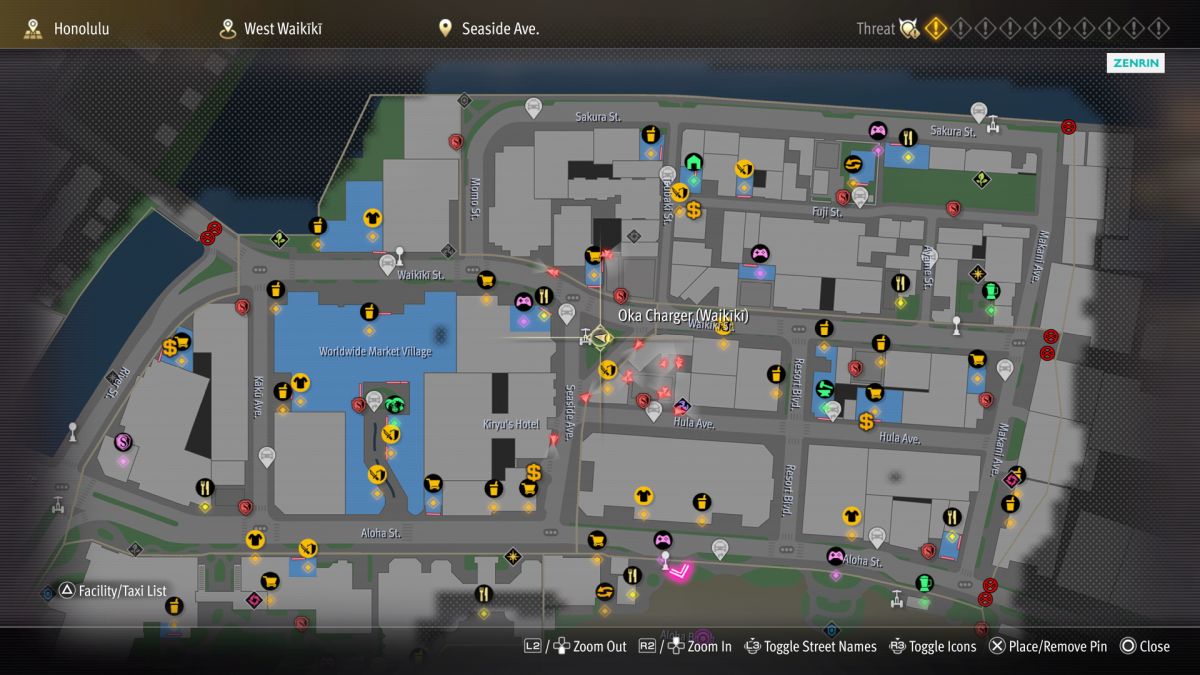

Take the Seaside Ave. fast travel point. Once you appear, look 90 degrees to your right. Across the street, you’ll see a small park with the dolphin statue you need to photograph.
4. Mohala Shave Ice
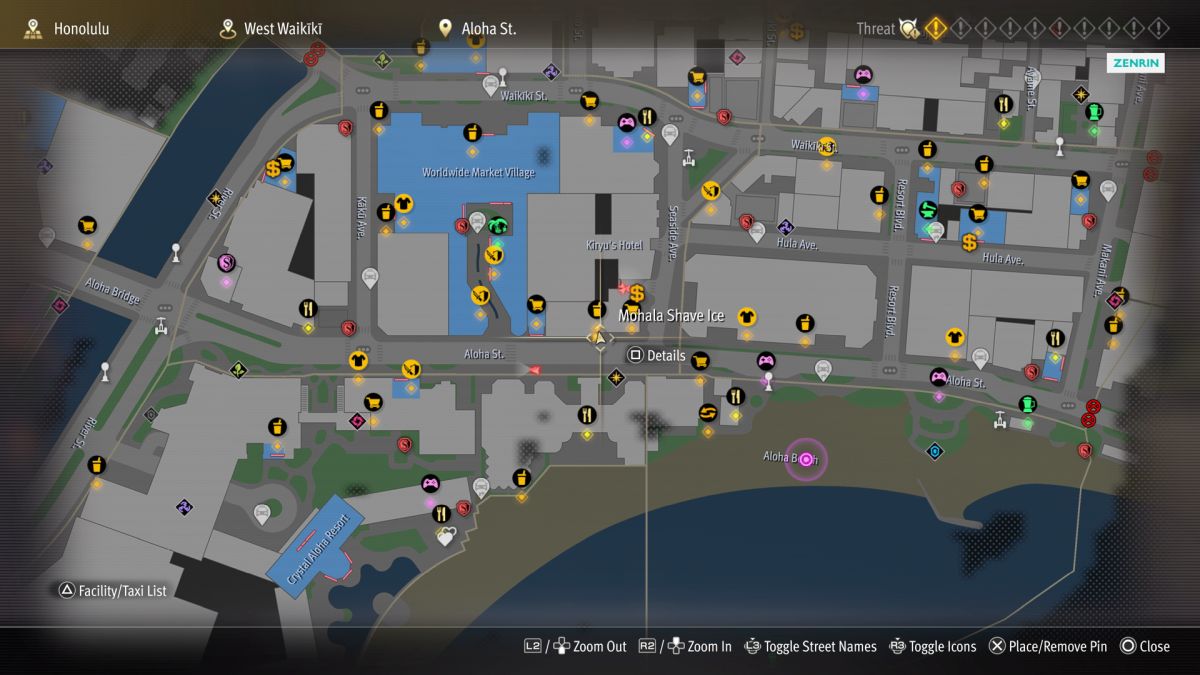
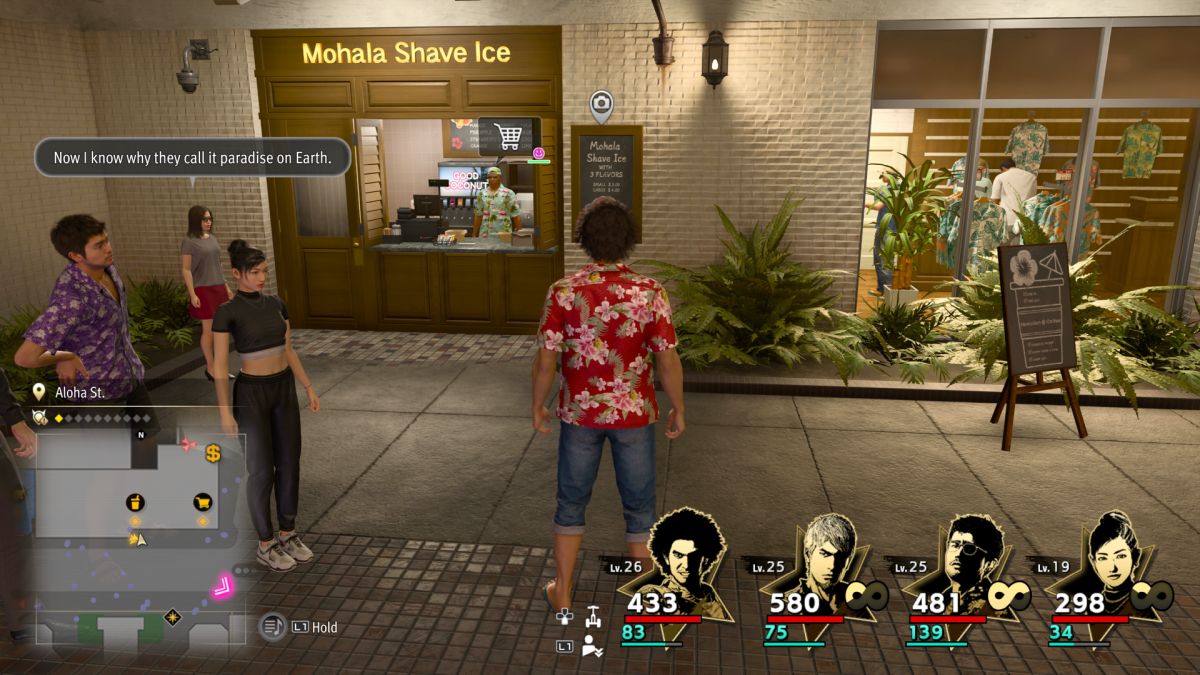
On the Hawaii map’s eastern half, Aloha St. runs through most of the city and past Aloha Beach. At about its midway point, not far east from the southern entrance to the Worldwide Market Village, you’ll find Mohala Shave Ice facing the street. Take a picture of the small sign, just to the right of the establishment’s front door.
5. Alo-Happy Tours
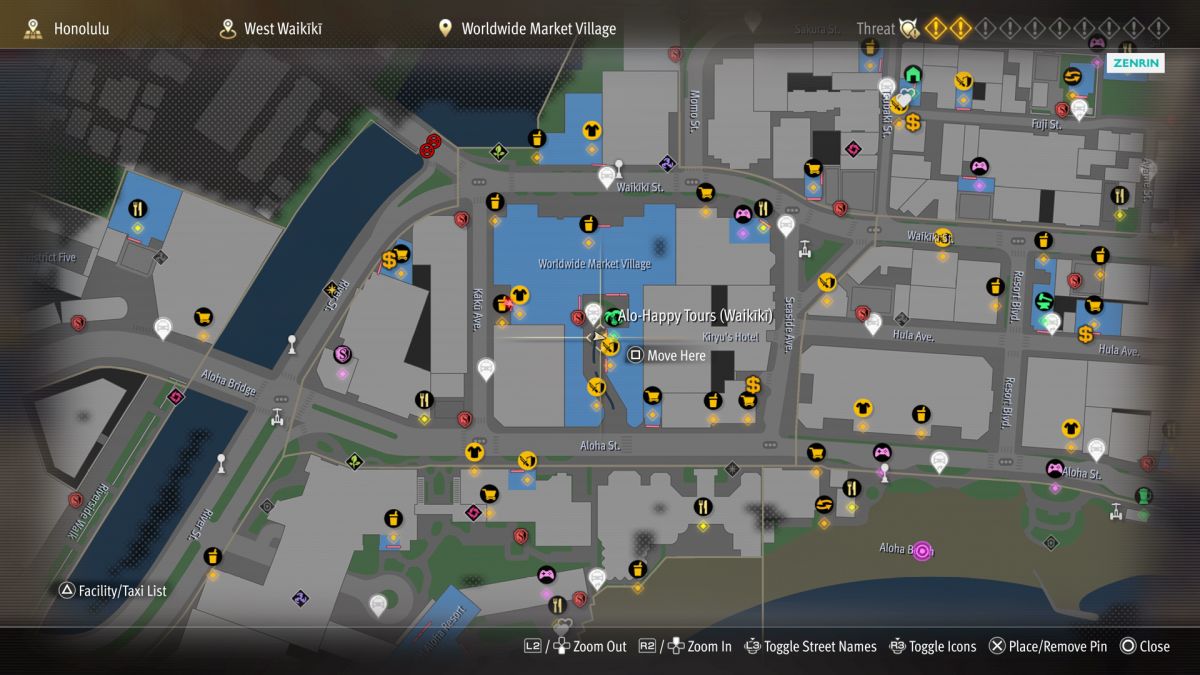
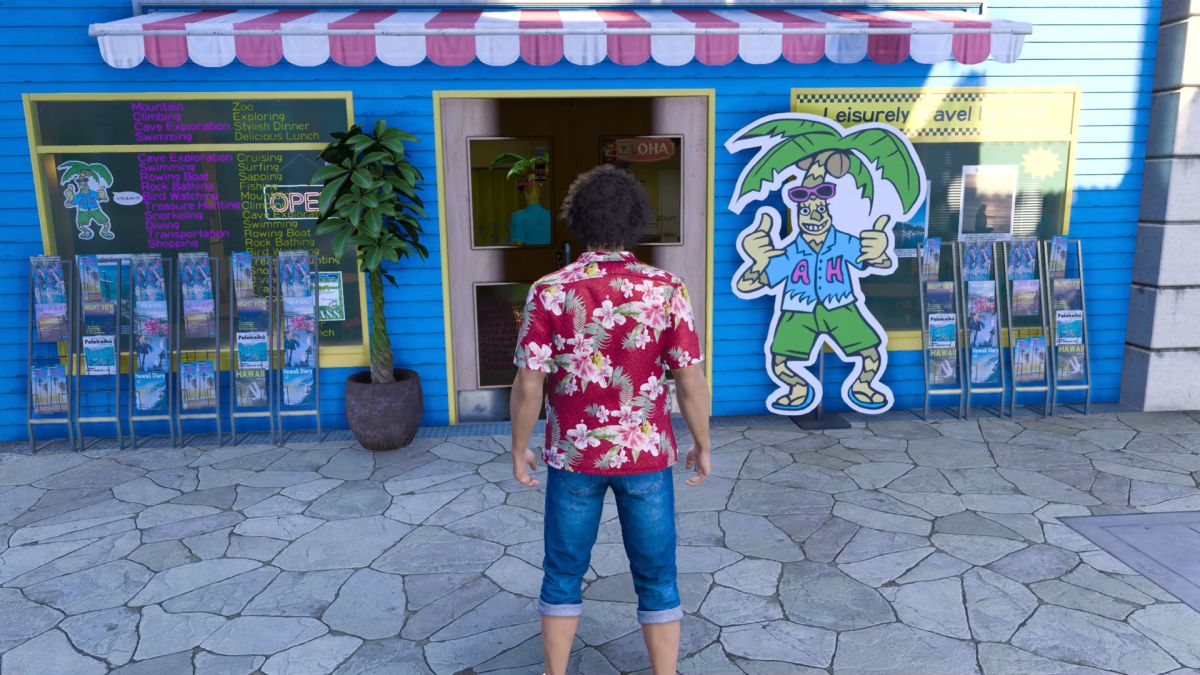
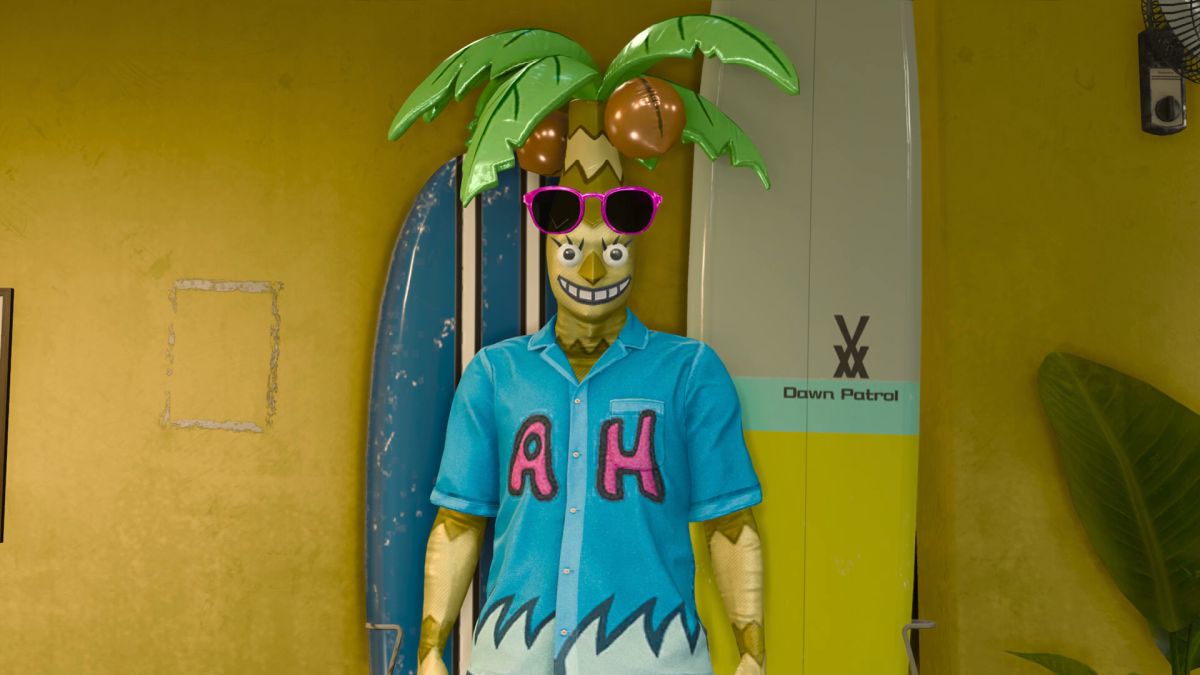
If you’re paying attention when you first learn about the Photo Rally event, this is likely the first photograph you will take. Simply step outside the Alo-Happy Tours (Waikiki) headquarters and look back at the building. You’ll see the mascot you need to photograph.
6. Hawaii Plaza
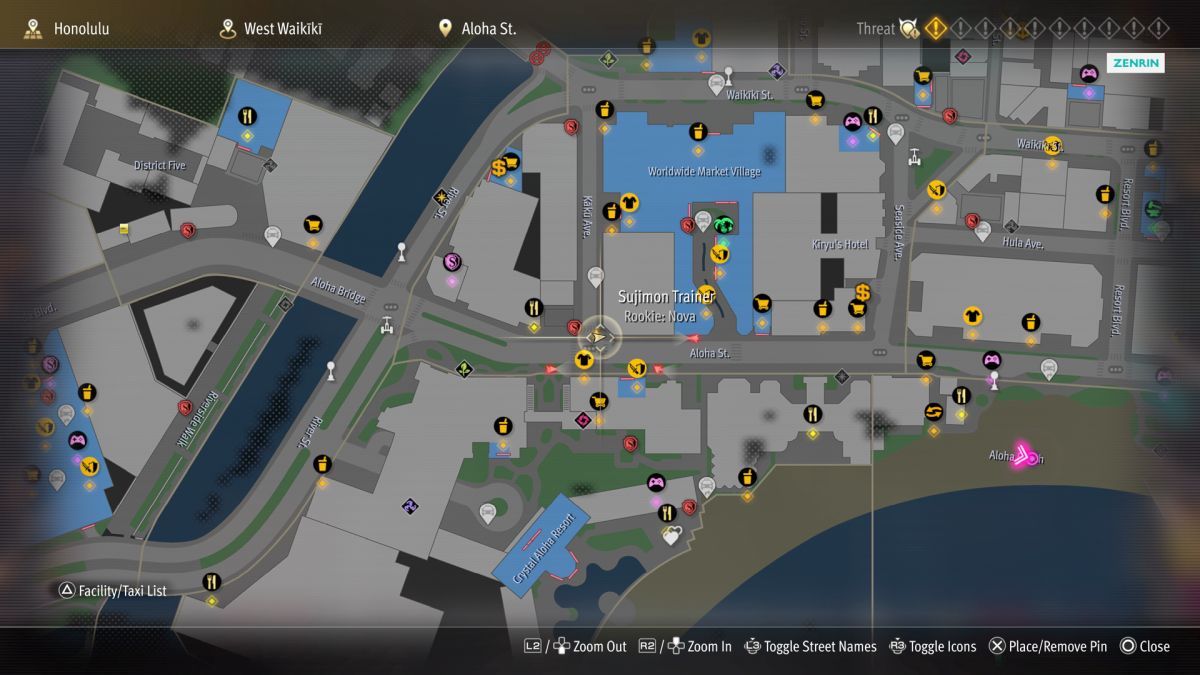
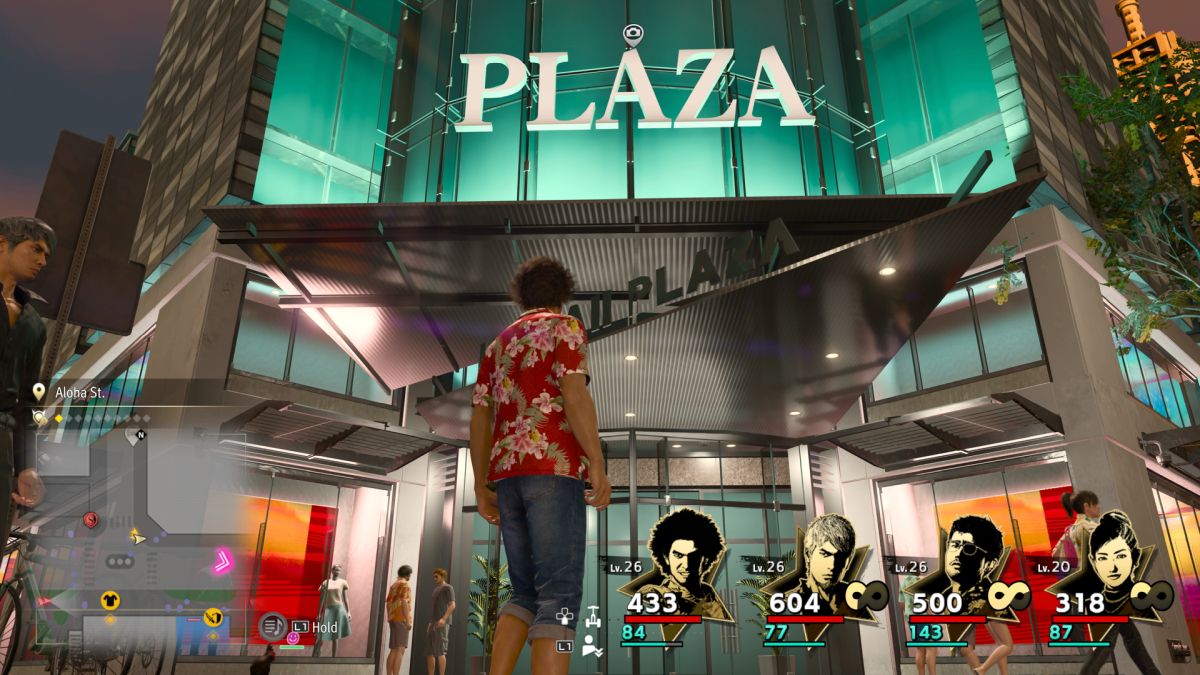
I spent a long time looking for this stop on the tour. It is located along the southwest corner of the building connected to the southwest side of the Worldwide Market Village. If you fast travel to Kaku Ave. and then head south, the area you need to photograph will be on your left as you round the large building and start east on Aloha St.
7. Pineapple Dog House
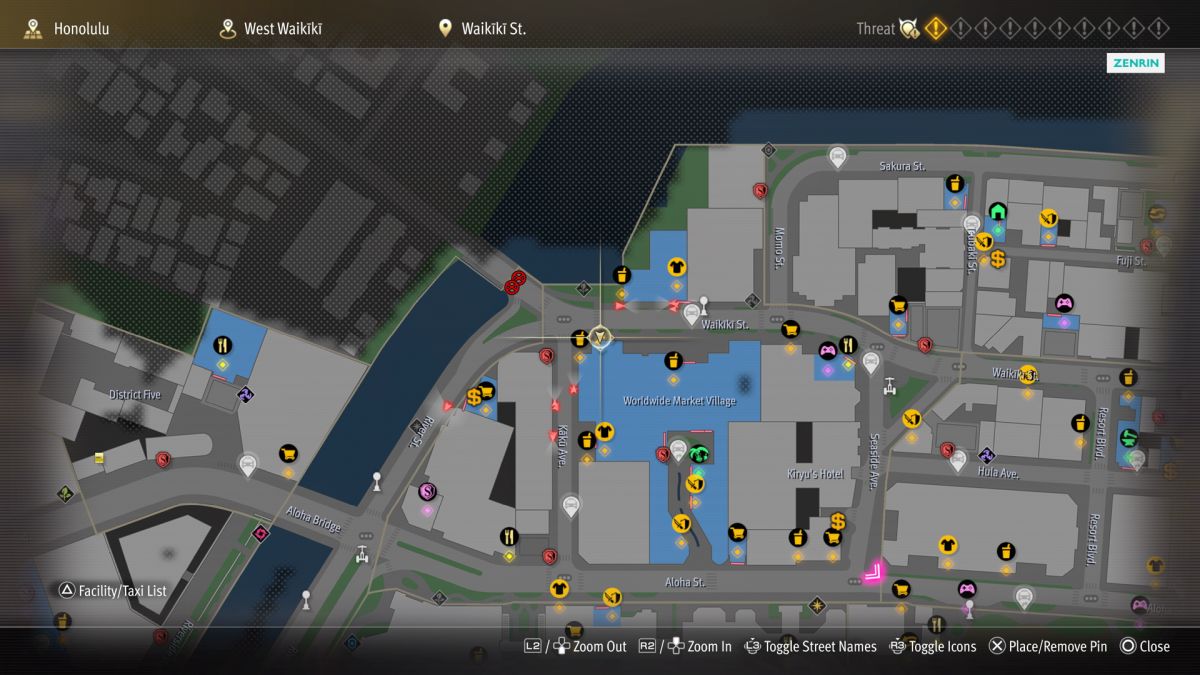
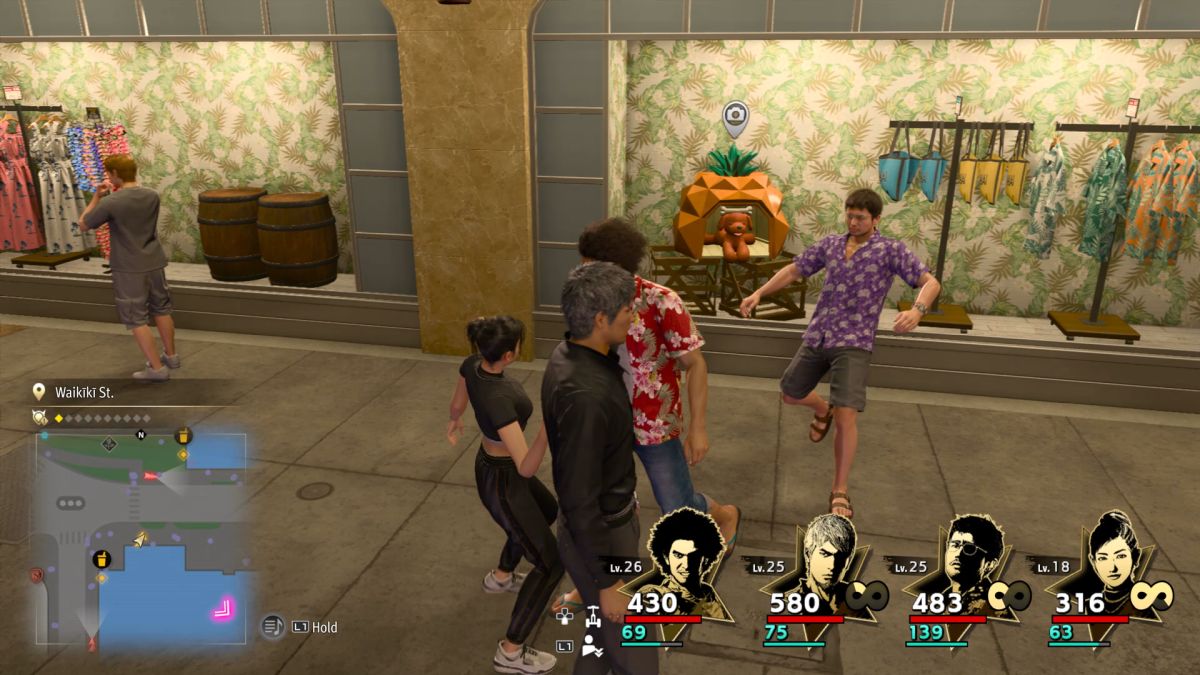
If you fast travel to W Waikiki St., you appear on the sidewalk facing due east. Immediately turn around and head directly west. As you proceed, watch the shop windows to your left. There is a series of three large display windows. The dog house is part of a display in the third window, across the street from Jeff’s Taco Truck.
8. No Surf No Life

Travel to Hula Ave. using the W Hula Ave. fast travel site. Then head west on Hula Ave. while keeping your eye on the building now to your right. Past a parking lot entrance, you should see a painting and mural to photograph.
9. Snowtown USA
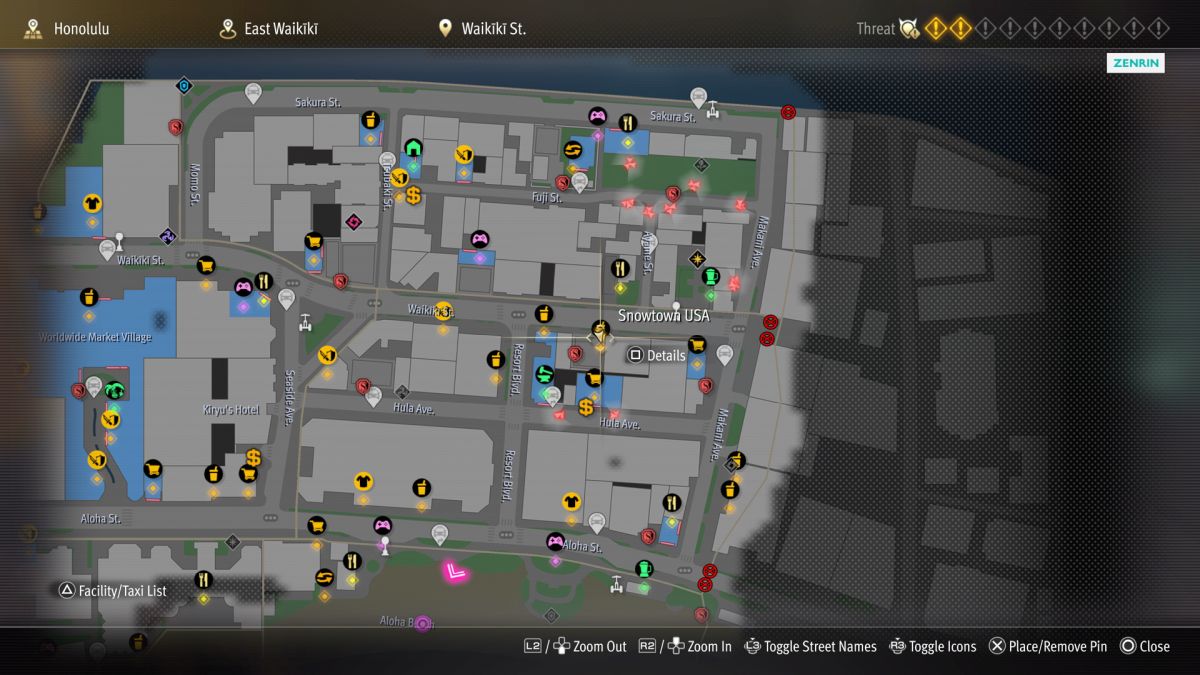
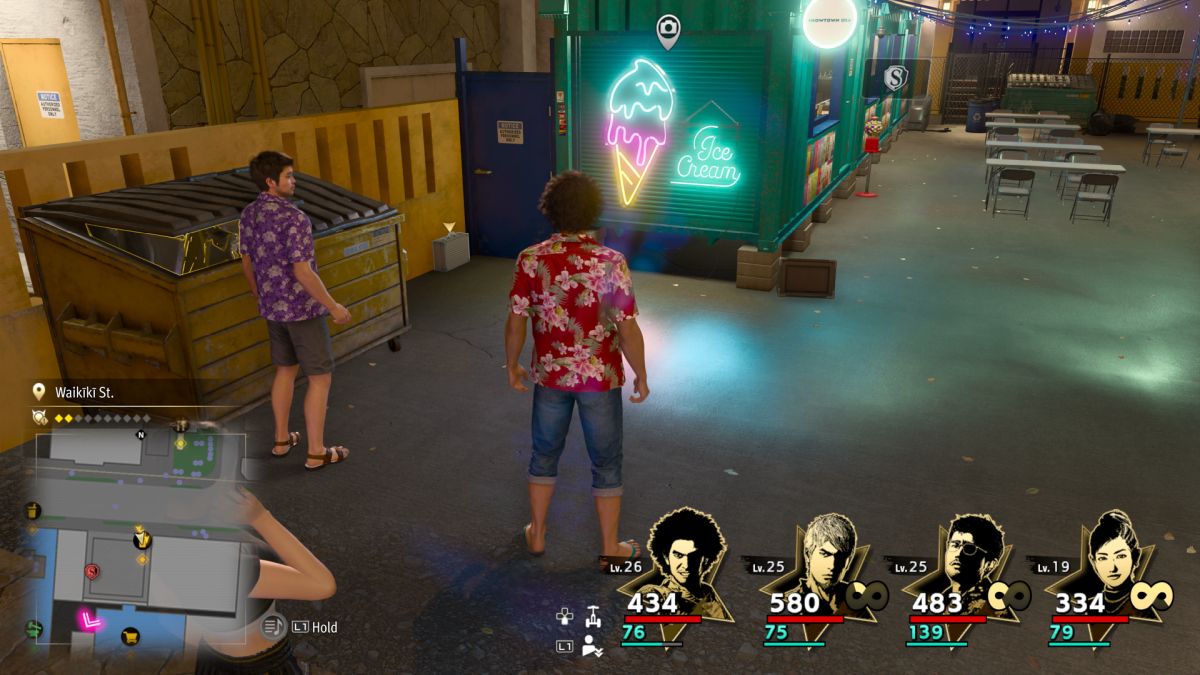
The fastest way I have found to reach this location quickly is to fast travel to the N Waikiki St. location, and then head south along Ayame St. (where you materialize) to reach Waikiki St. As you reach the intersection, look ahead and to the right to spot the small Snowtown USA stand. It’s across the street from the Ahi Poke Garden. You need to take a picture of the large ice cream cone lights on the side of the booth.
10. Guava Juice Bar
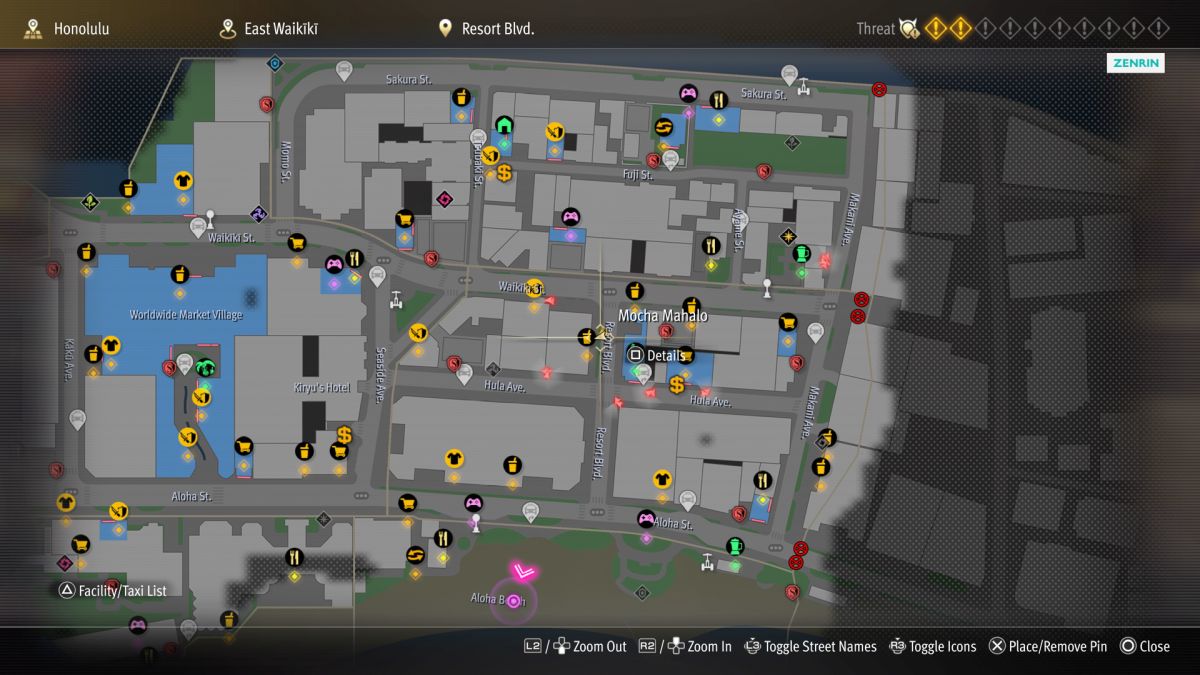
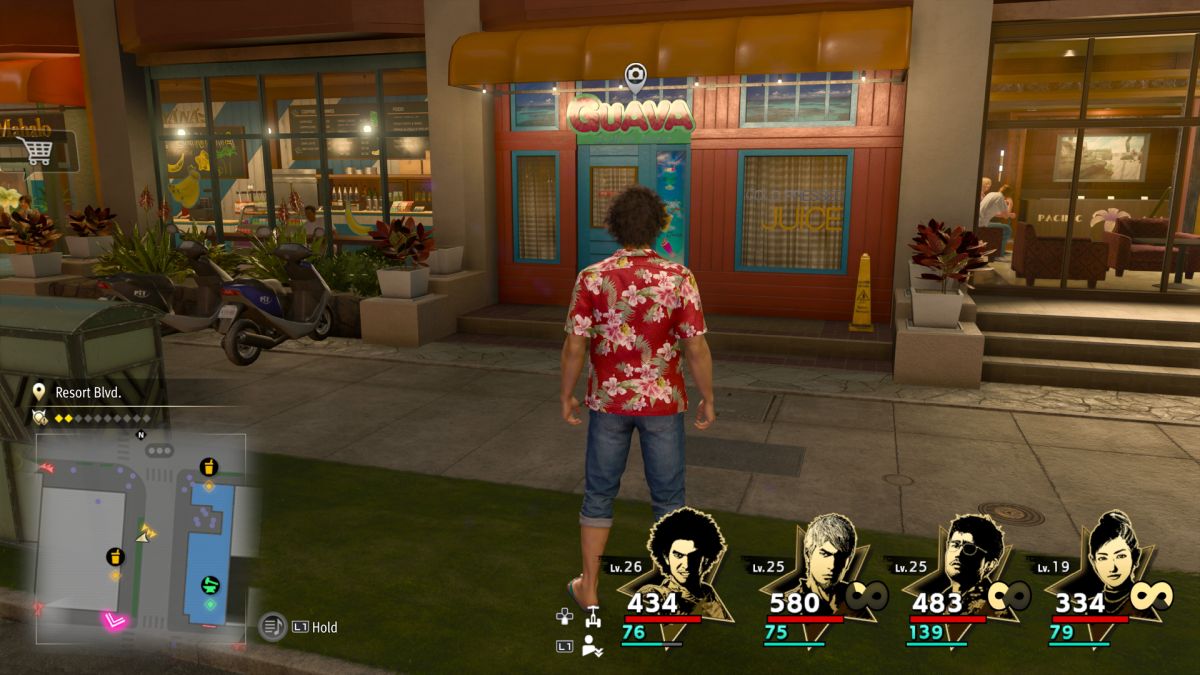
Resort Blvd. runs north from Aloha St., before ending as it meets with Waikiki St. As you travel north along it, you will find Mocha Mahalo, west of the building that houses Julie’s Gearworks. The Guava Juice Bar business you need to photograph is right next to Mocha Mahalo.
11. Julie’s Gearworks
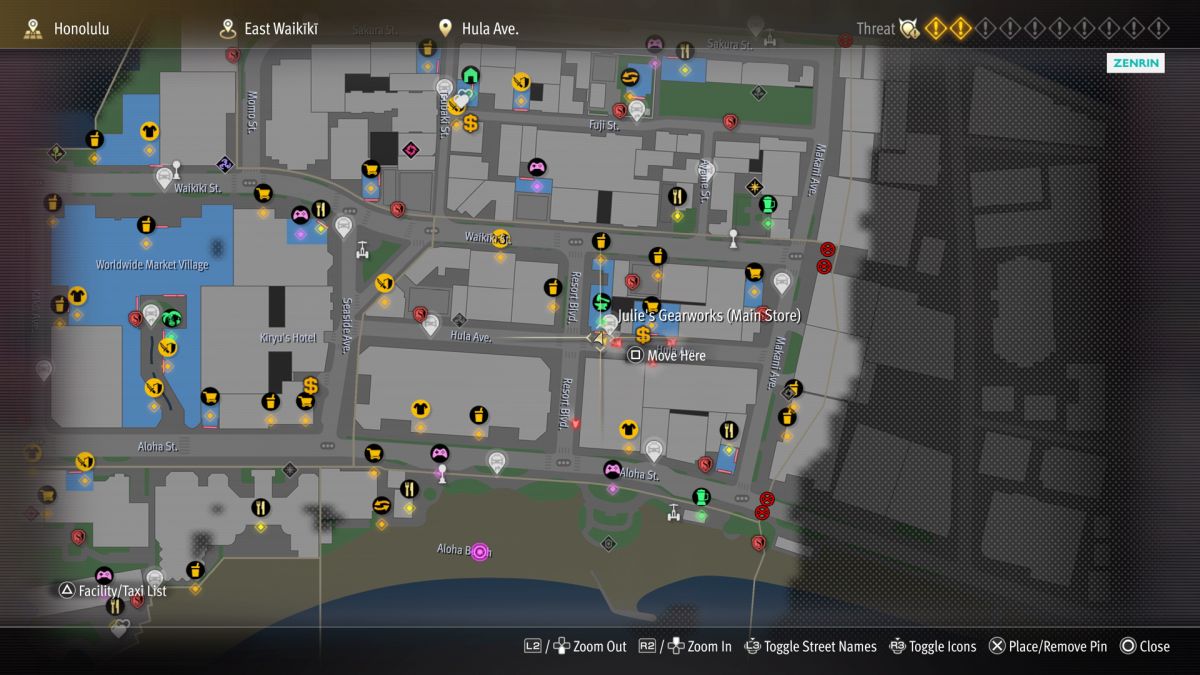
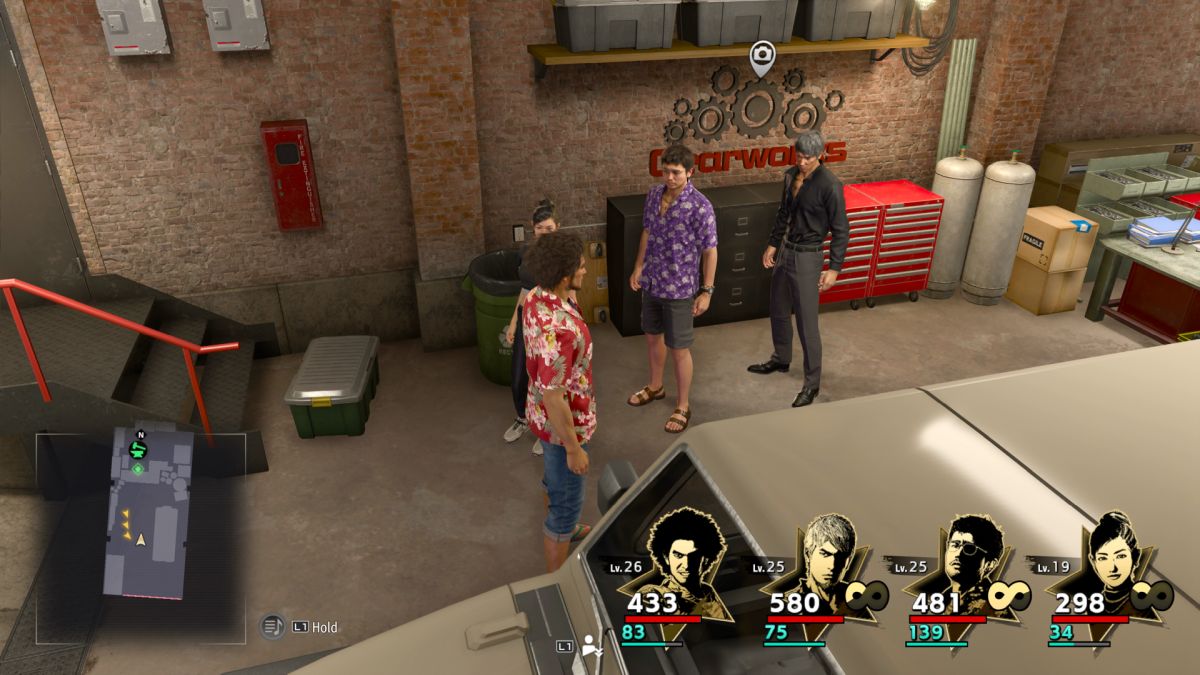
If you want to craft and upgrade weapons frequently (and you kind of do), you’ll probably get familiar with the location of this establishment fairly early in the campaign. It is along Hula Ave. and there is even a fast travel spot nearby. Just fast travel to it and take a photo of the business logo, which is on the wall just inside the bay door and to the left.
12. Oahu Burger
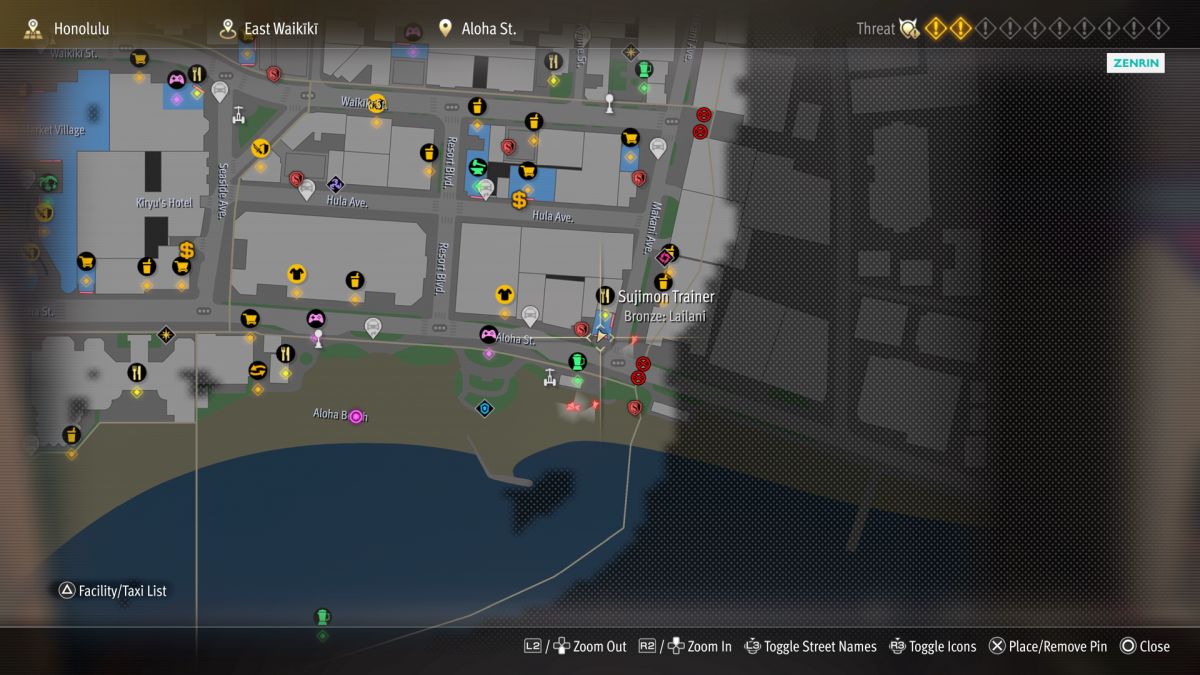

The Oahu Burger is a business located near the lower right corner of the Hawaii map. You’ll find it on the street corner where Makani Ave. and Aloha St. meet. The E Aloha St. fast travel location is nearby. Just head to the establishment and head inside. You’ll find the area you need to photograph in the corner behind the drink machine on the front counter.
13. Aloha Beach Statue
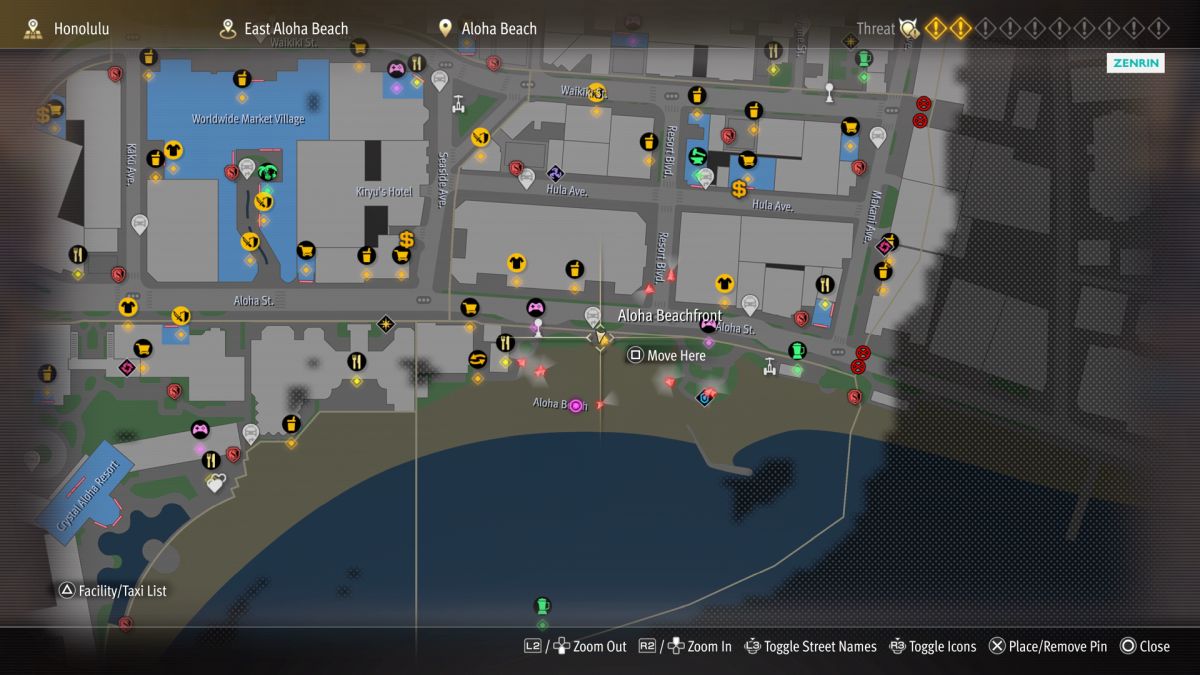
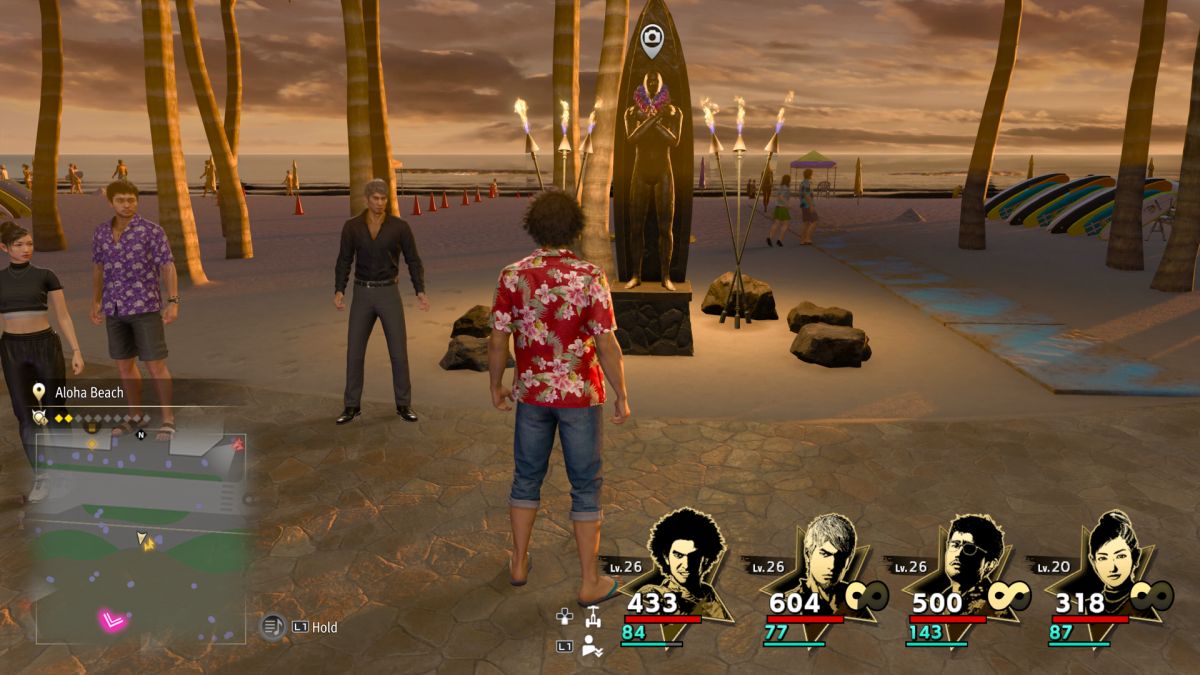
Travel to the Aloha Beachfront fast travel location, along Aloha St. Look south on the sand to spot the statue on a pedestal that you should photograph. It’s just slightly to your left as you materialize after fast traveling.
14. Surf Shop Kope Pot

From the West Aloha Beach fast travel location, simply head north through the alley leading to Aloha St. When you first materialize, you’re facing south, so just turn around and head away from the beach. The Kope Pot counter (along with the surfboards you need to photograph) is on your left.
15. Crystal Aloha Resort
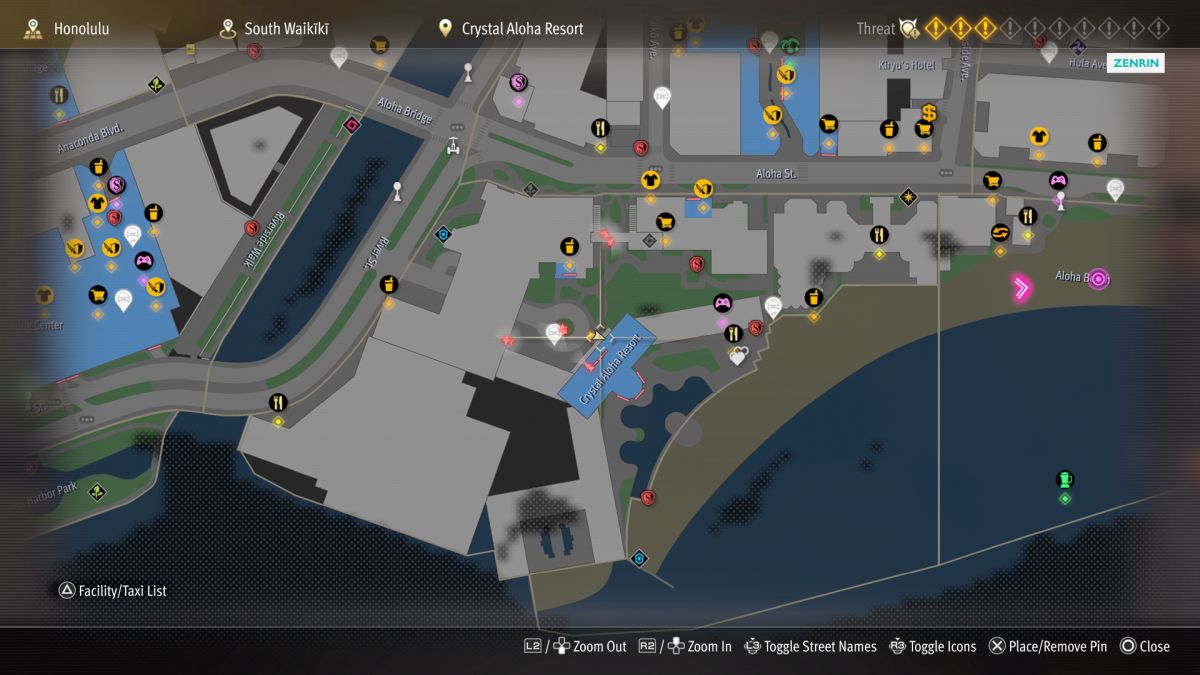
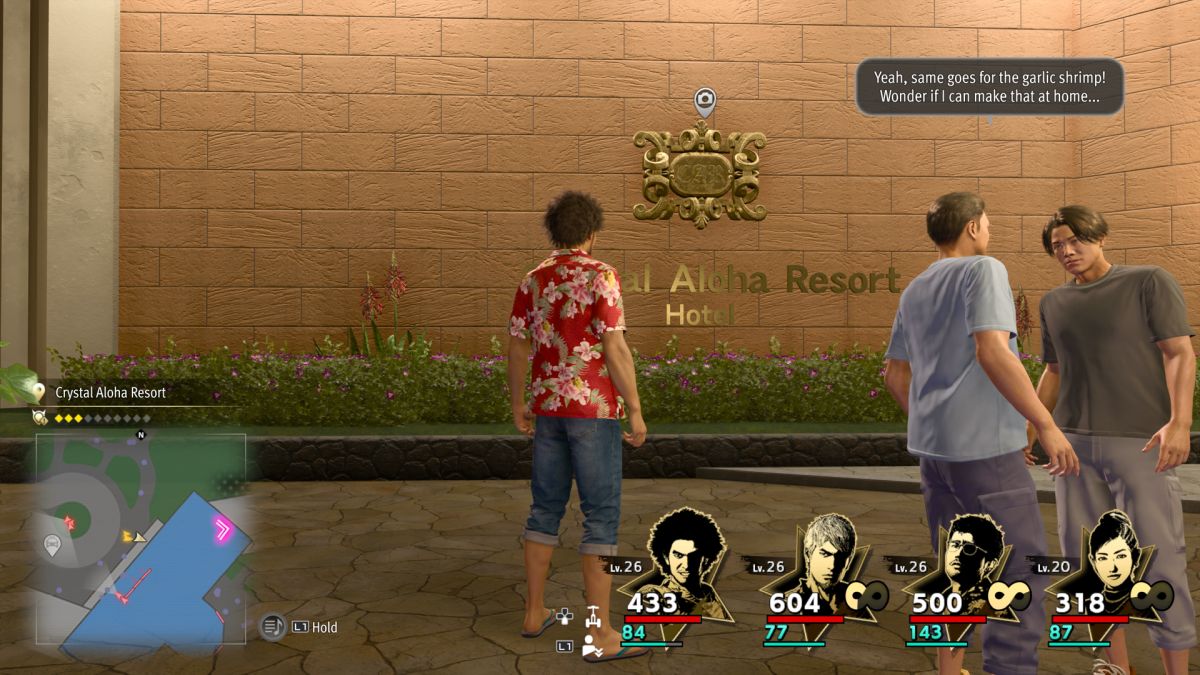
To satisfy this objective, you must take a picture of the front entrance of the Crystal Aloha Resort. It is a large building complex along the western end of Aloha Beach. You should probably approach from River St. and pass through the arch to arrive at the large courtyard. If it is already activated, you can use the Crystal Aloha Resort fast travel beacon. Then approach the building. There’s a wide entry area. You’ll see the logo you need to photograph on a brick wall to the left of the entryway.
When you snap all of the required photos and show off your results at the main branch of Alo-Happy Tours, you receive the Surf Flounder as a reward. It’s a powerful board for an Aquanaut. There are a lot of trophies and achievements in Infinite Wealth, so read our list of them all to know what to focus on in your adventure.