Necromunda: Underhive Wars‘ gang customization mode will eventually lead you to partake in operations. There are various mission types that you can complete either via operations themselves or skirmishes against the AI or human opponents. Here’s our guide to help you out.
Note: For more information about Necromunda: Underhive Wars, you can check out our guides and features hub.
Necromunda: Underhive Wars – Operations and skirmish
Sector rewards and operations
After creating your gang and recruiting your characters, you’ll get to select a sector in Necromunda: Underhive Wars. This is just a quick step that’s part of the game’s unending sandbox mode where you’ll replay various missions.
Sectors will have their own difficulty (the levels of the AI gangs you’re facing off against) and a particular clan request. Completing a clan request awards you with a loot casket (random rewards) and some credits. Here are some examples:
- Flying Rats – Defeat 8x Deadeyes.
- Destroyers – Defeat 14x Heavies.
- Salvage Opportunity – Secure 6x Salvage Caskets.
- Stalling Orlocks – Obtain more resources than the Orlock Gang.

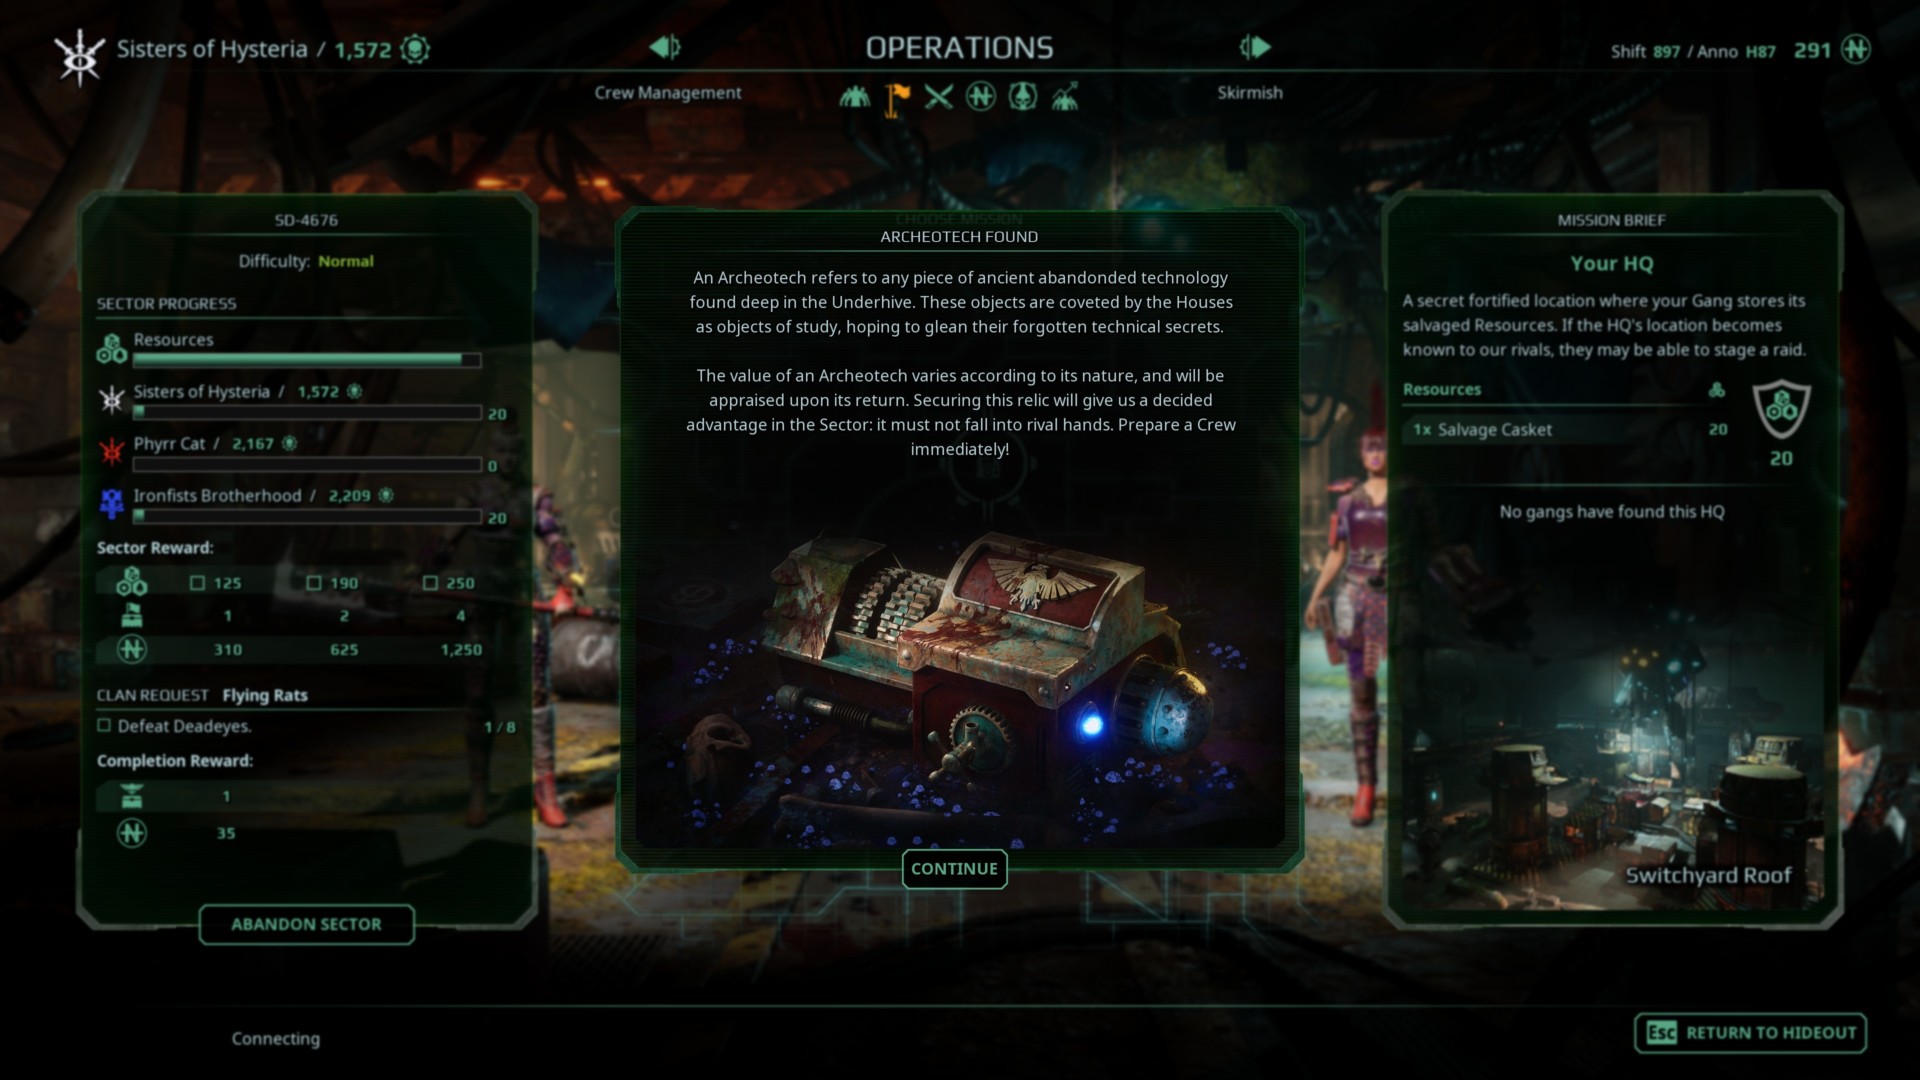
For that last part, you’ll learn about this soon enough once you open the Operations menu. Here, you’ll see your gang’s name and any rivals that might be in the same sector. You’ll also notice the resources that have been depleted in the entire sector (and the ones amassed by each gang).
Resources are generally obtained as you complete missions successfully. The Operations screen itself allows you to choose from the available missions in the sector.
Infamy, facilities, and shifts
Update: I’ve been informed that there’s currently an issue with selecting Infamy perks and facilities. For reference, the first gang I created was just to check out some initial features and I’ve since deleted that bunch. Then, after finishing Necromunda: Underhive Wars‘ campaign and unlocking additional cosmetic options, I created my actual gang (technically the second gang I’ve created). As of now, I’m not sure if the issue with Infamy and facilities is directly tied to just the first gang you create or if you’d need to finish the campaign as well. If you have more information about this issue, let me know.
After completing your first mission, you can check the Infamy menu. This will let you select from several HQ facilities that will provide boons as you progress:
| Facility | Effect 1 | Effect 2 | Effect 3 |
| Gambling Den and Brewery | Fighters gain +10 XP each battle | +1-2 concoction consumables (i.e., healing or support items) each shift | +40-60 credits each shift |
| Salvaging Benches | +1-2 armor pieces each shift | +1-2 tactical explosives each shift | +1-2 offensive explosives each shift |
| Medical Lab | +1-2 medical consumables each shift | +20% chance of a miracle recovery when injured | -20% chance of receiving a maiming injury when injured |
| Training Ground | -20% cost of hiring fighters | -6 XP cost of stat upgrades | -10 XP cost of skill upgrades |
You can only pick up to two facilities, so make sure that you’re getting the most bang for your buck during your Necromunda: Underhive Wars progression.
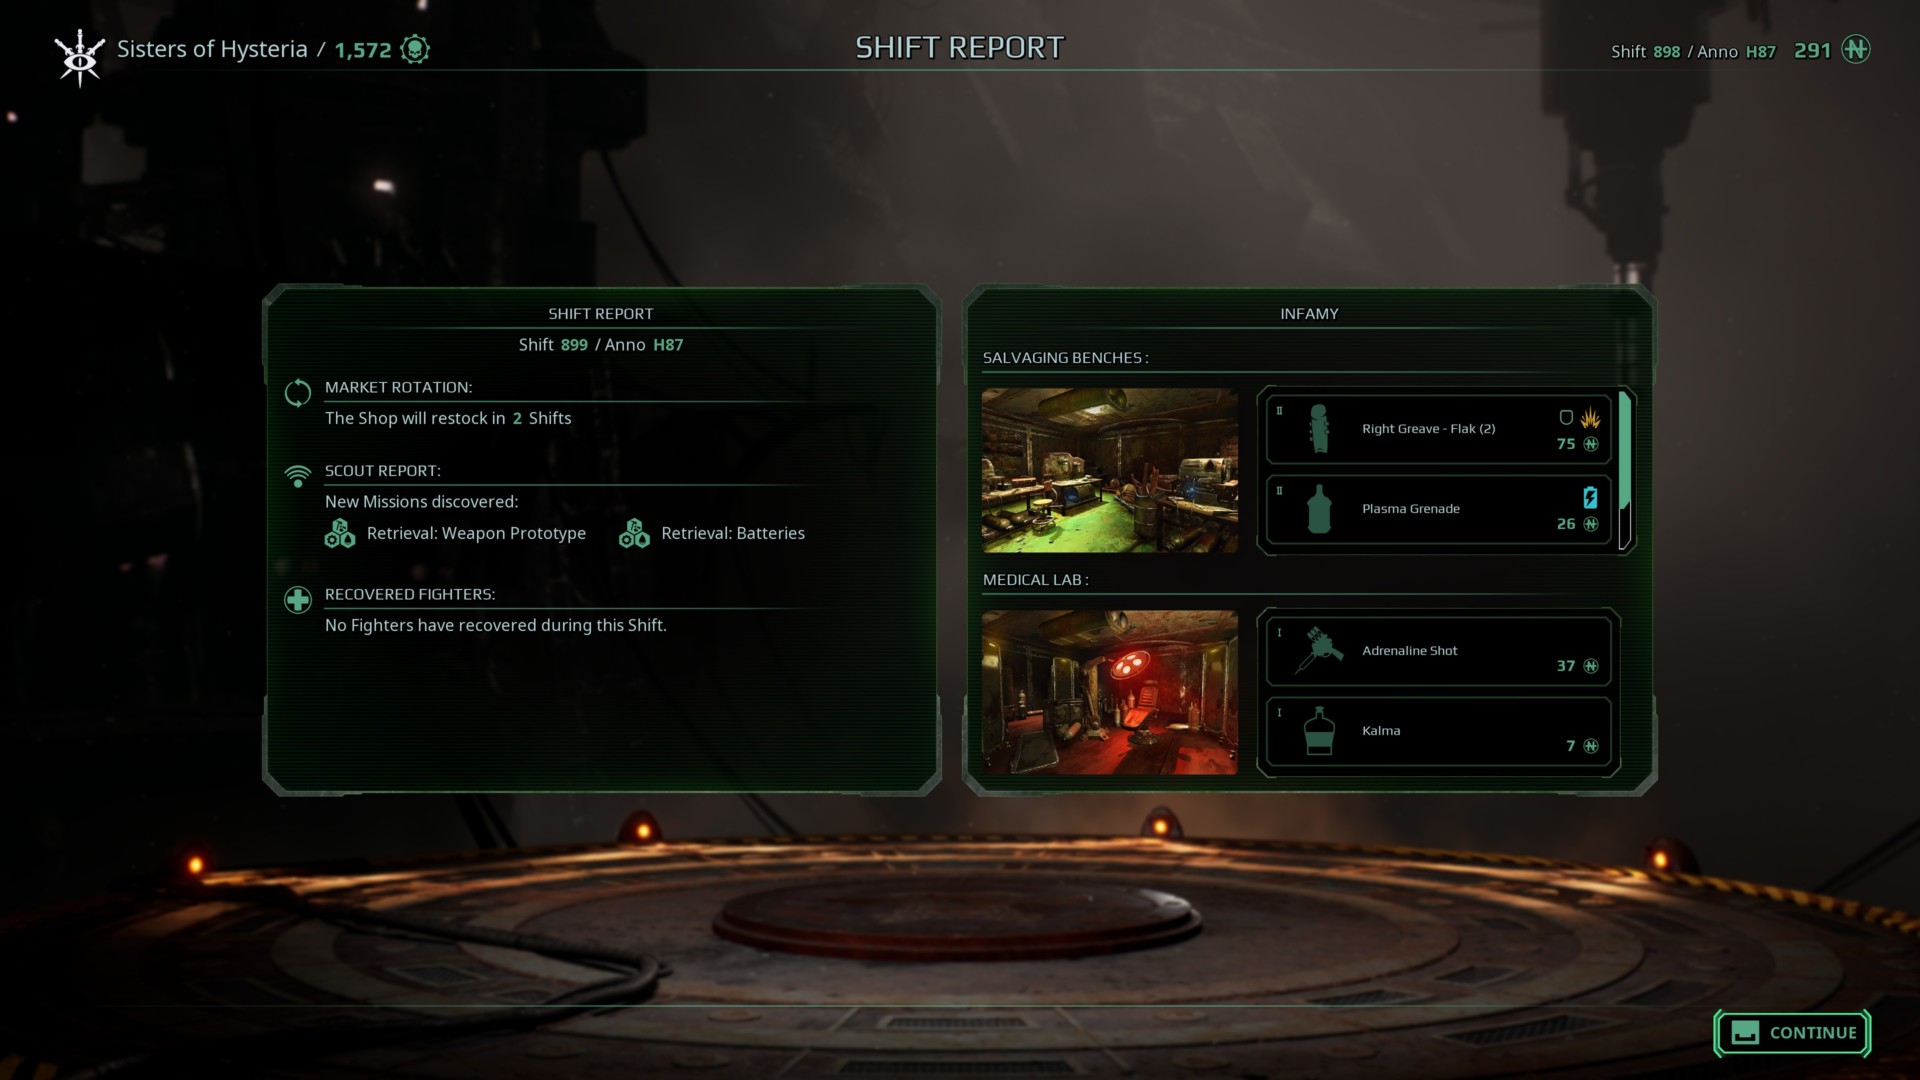
You might’ve noticed the term “shifts” being thrown around. This denotes the passage of time as you complete activities. Operations take shifts to complete whereas skirmish matches do not. For instance, if you complete one operation and you have the Salvaging Benches facility, you can expect these new armor pieces or explosives to pop-up in your gang’s hoard.
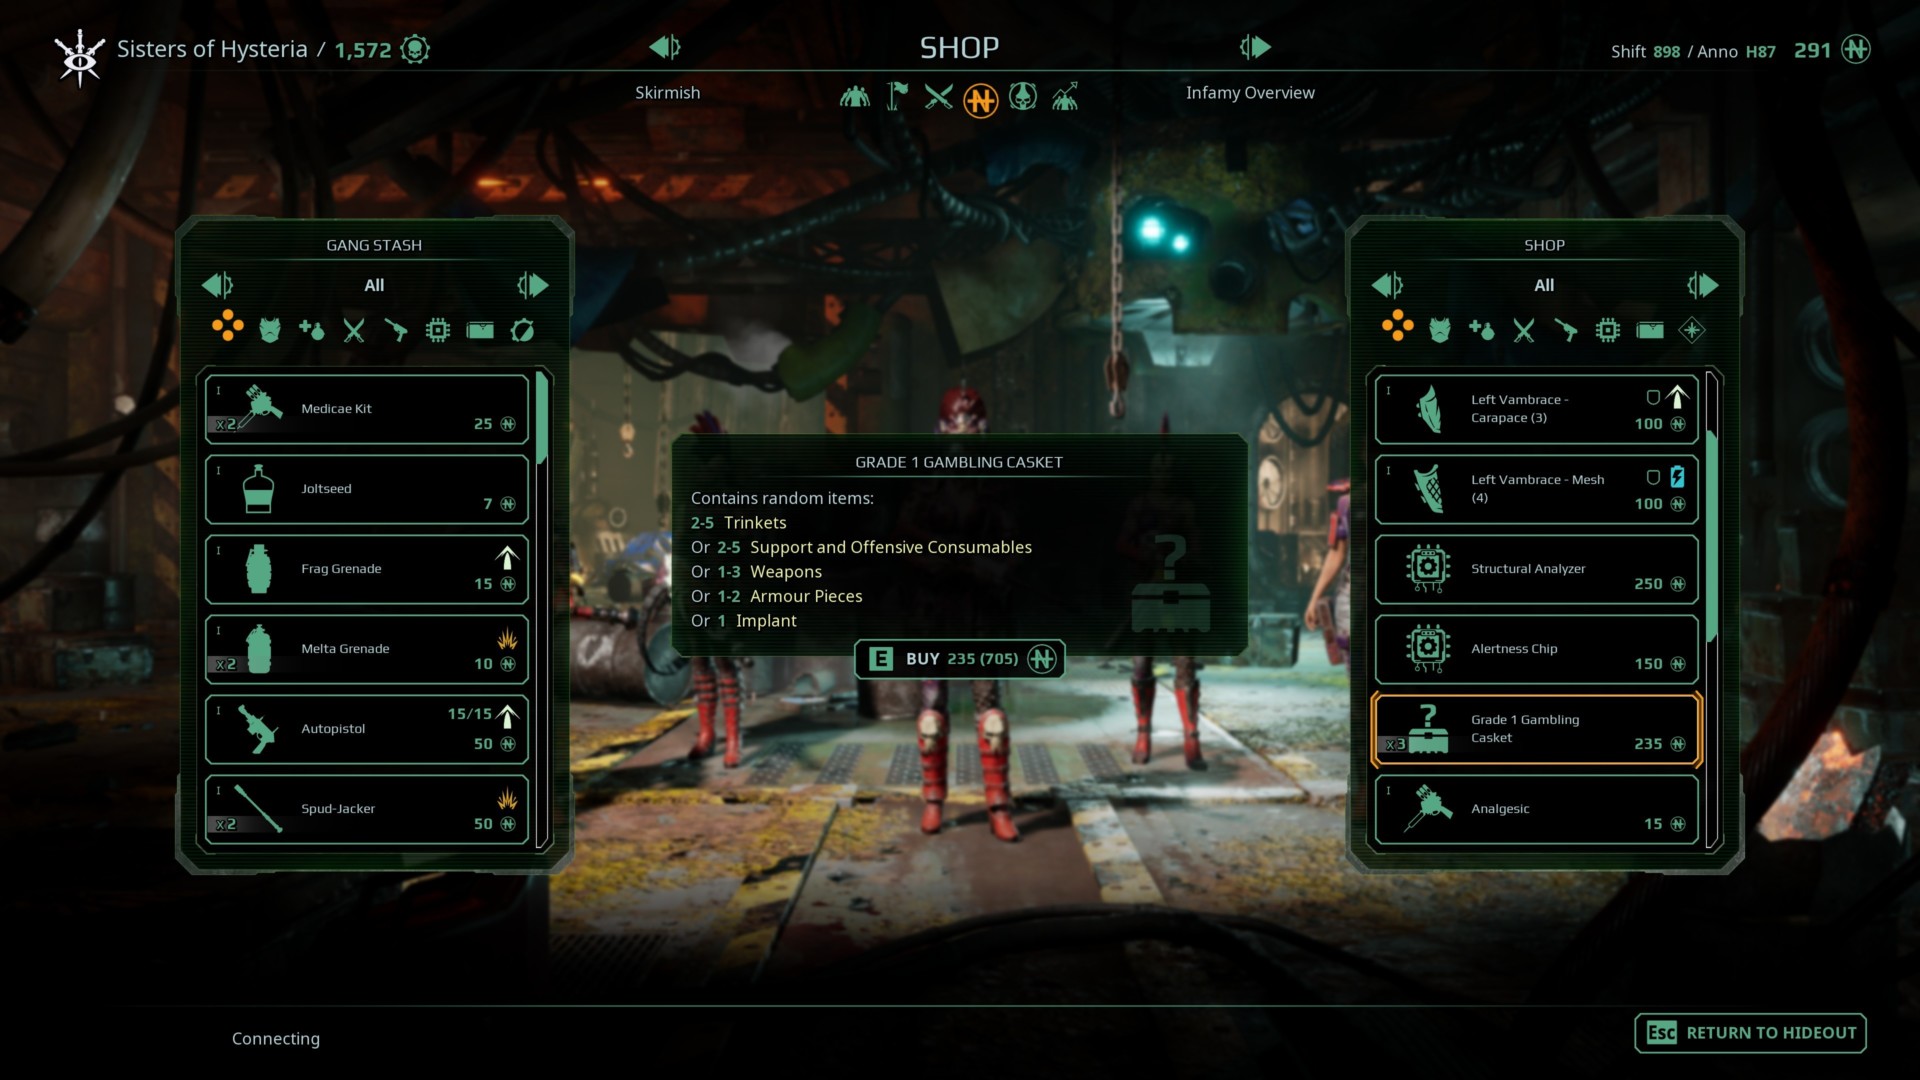
After a couple of shifts (or missions), you’ll also unlock the merchant. Here, you can spend your credits to purchase armor and weapons or sell all the junk you don’t need. You can also purchase loot caskets (loot boxes) using those credits if you want randomized rewards.
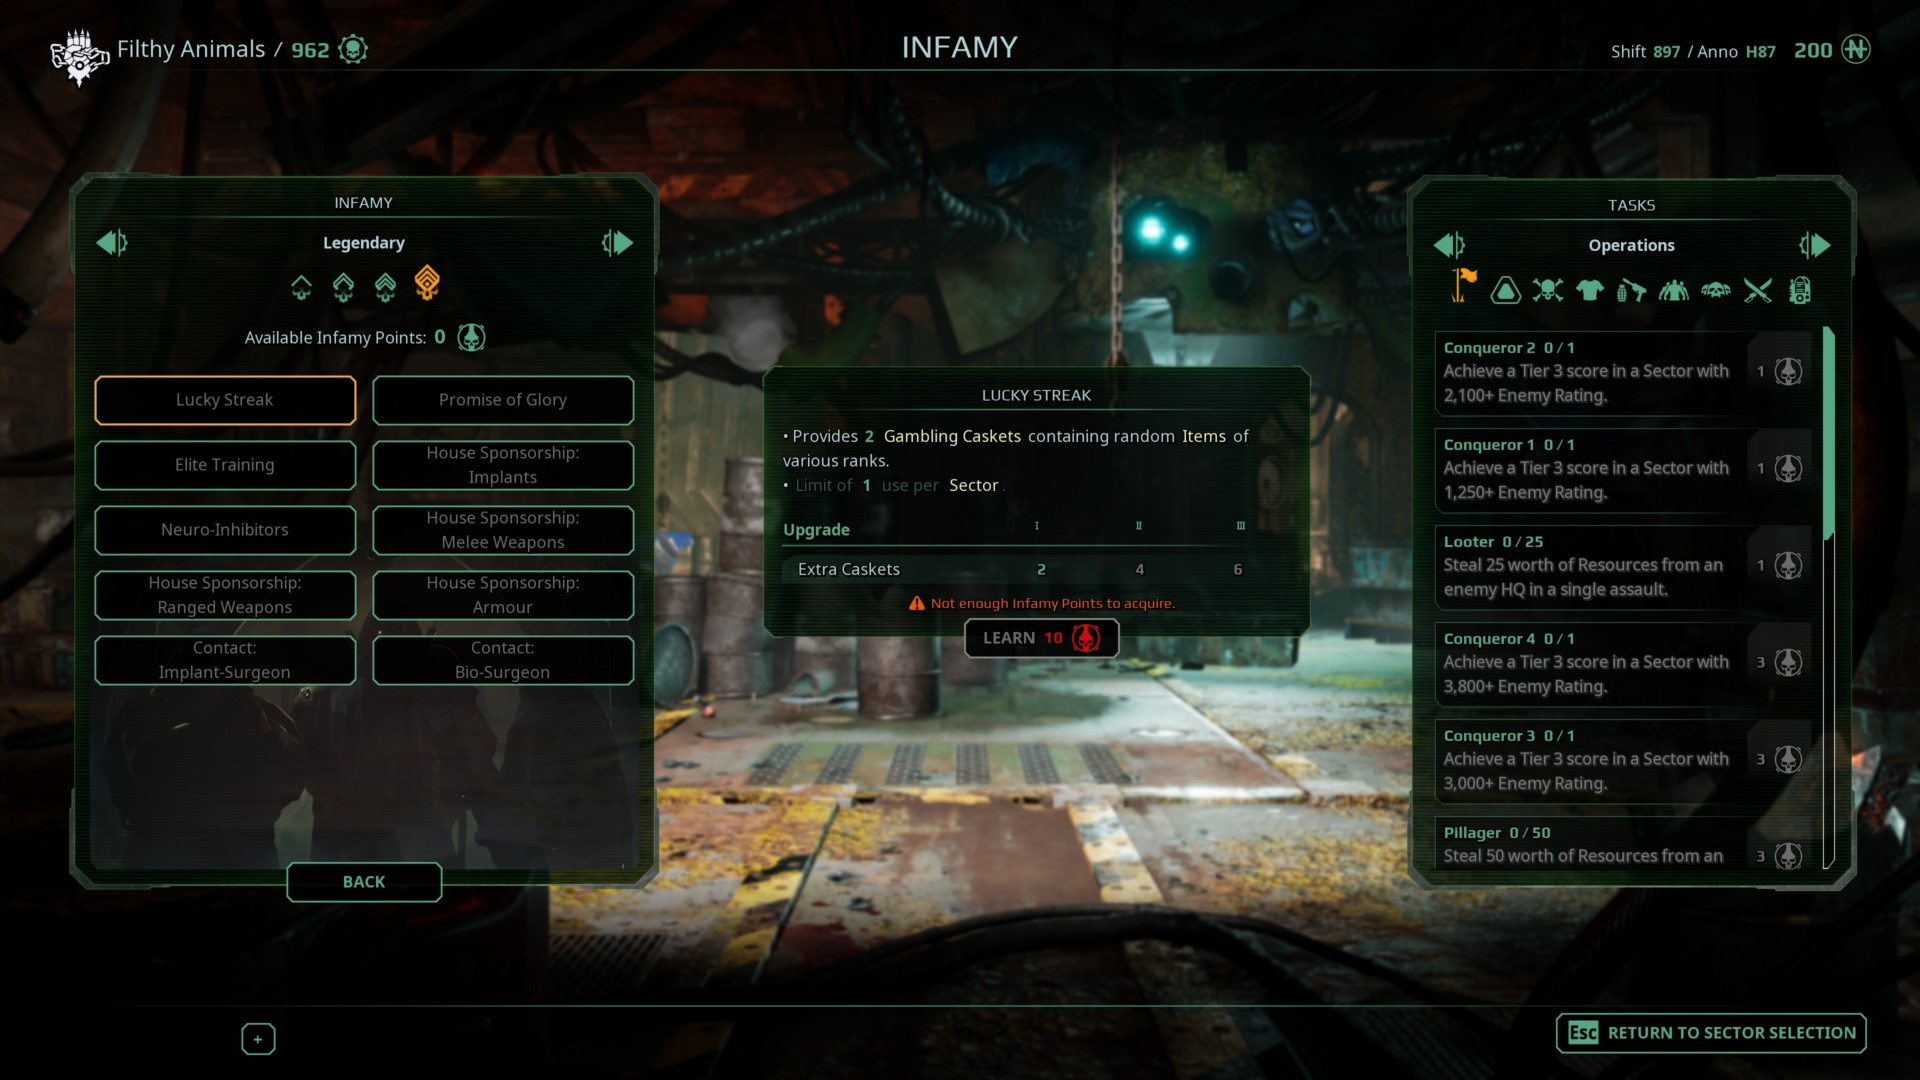
Infamy points and perks
Below the facilities, you’ll get to select your Infamy perks. These are quite beneficial in the long run, and there are multiple tiers depending on their effects — i.e., common, rare, epic, and legendary. Examples include:
| Infamy Perk | Rarity | Effect | Cost (Infamy point) |
| House Blessing | Common | +1 loot casket after completing a clan request in a sector | 1 |
| Wealthy Benefactor | Rare | Start the next operation with +100 credits | 3 |
| Persistent Haggler | Rare | +10% credits when selling items in merchant shops | 3 |
| Capitalistic | Epic | Each shift, gain +15 credits | 6 |
| Enemy Ferocity | Epic | +10% credits and +1 loot casket after each successful operation; enemy fighters deal 10% more damage | 6 |
| Lucky Streak | Legendary | +2 loot caskets containing random items of various ranks | 10 |
| Promise of Glory | Legendary | A random character joins (up to rank 5) | 10 |
To acquire Infamy points, you’ll need to complete certain tasks throughout Necromunda: Underhive Wars‘ sandbox mode. These range from defeating a certain number of a specific class, obtaining a number of skills and passives with a particular class, attaining a score threshold in a sector’s operations, or finishing the campaign.
Skirmish
If you don’t want to complete operations in Necromunda: Underhive Wars, then you could simply try some skirmish matches. You can pick between an exhibition/practice run or a contest (which provides some rewards). You’re allowed to choose regular matchmaking versus other players or create a custom match (you can include AI opponents too).
Then again, be forewarned that Necromunda: Underhive Wars has agonizingly slow pacing. As mentioned in our official review, you could find yourself falling asleep while waiting for the AI characters to finish their turns. You can’t even speed up or skip their moves.

Mission types
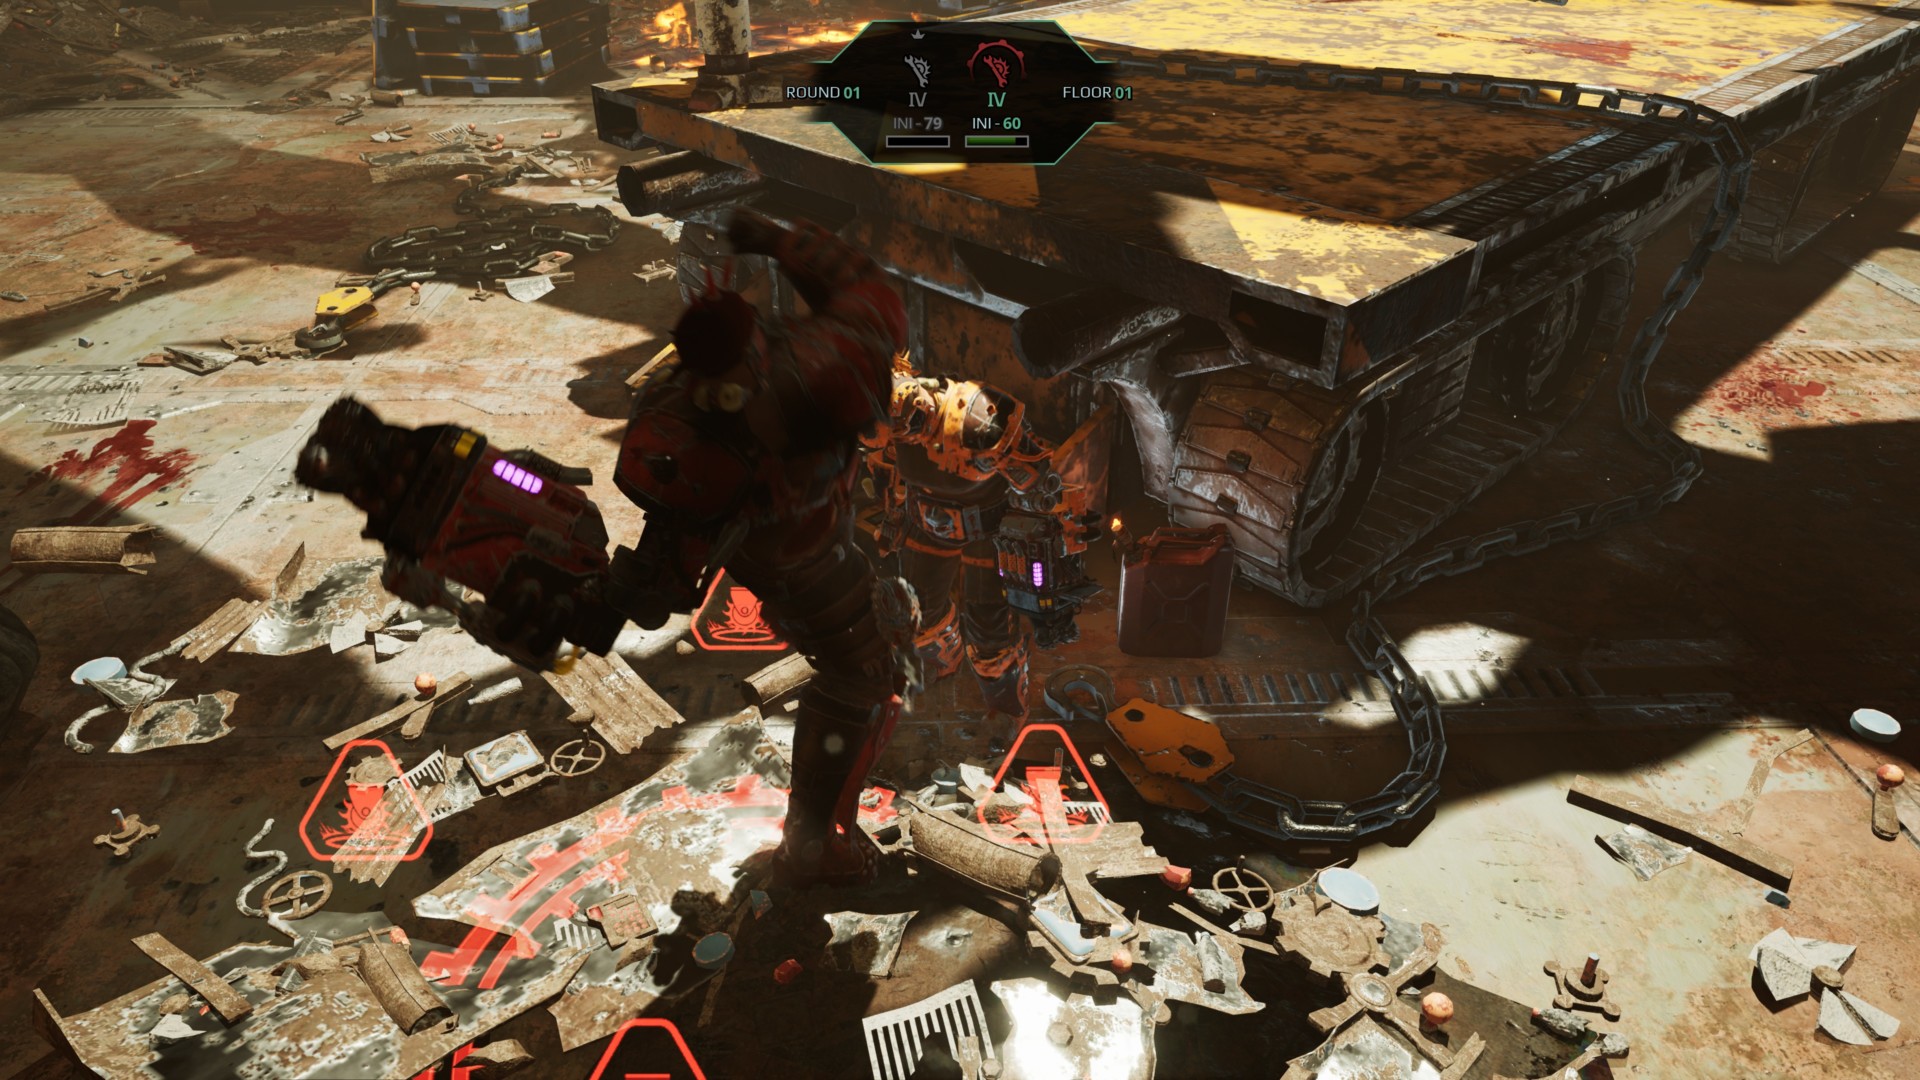
Necromunda: Underhive Wars has a select few mission types for you to choose from. A vast majority can be selected when you’re playing skirmish matches, though some mechanics will be present during Operations.

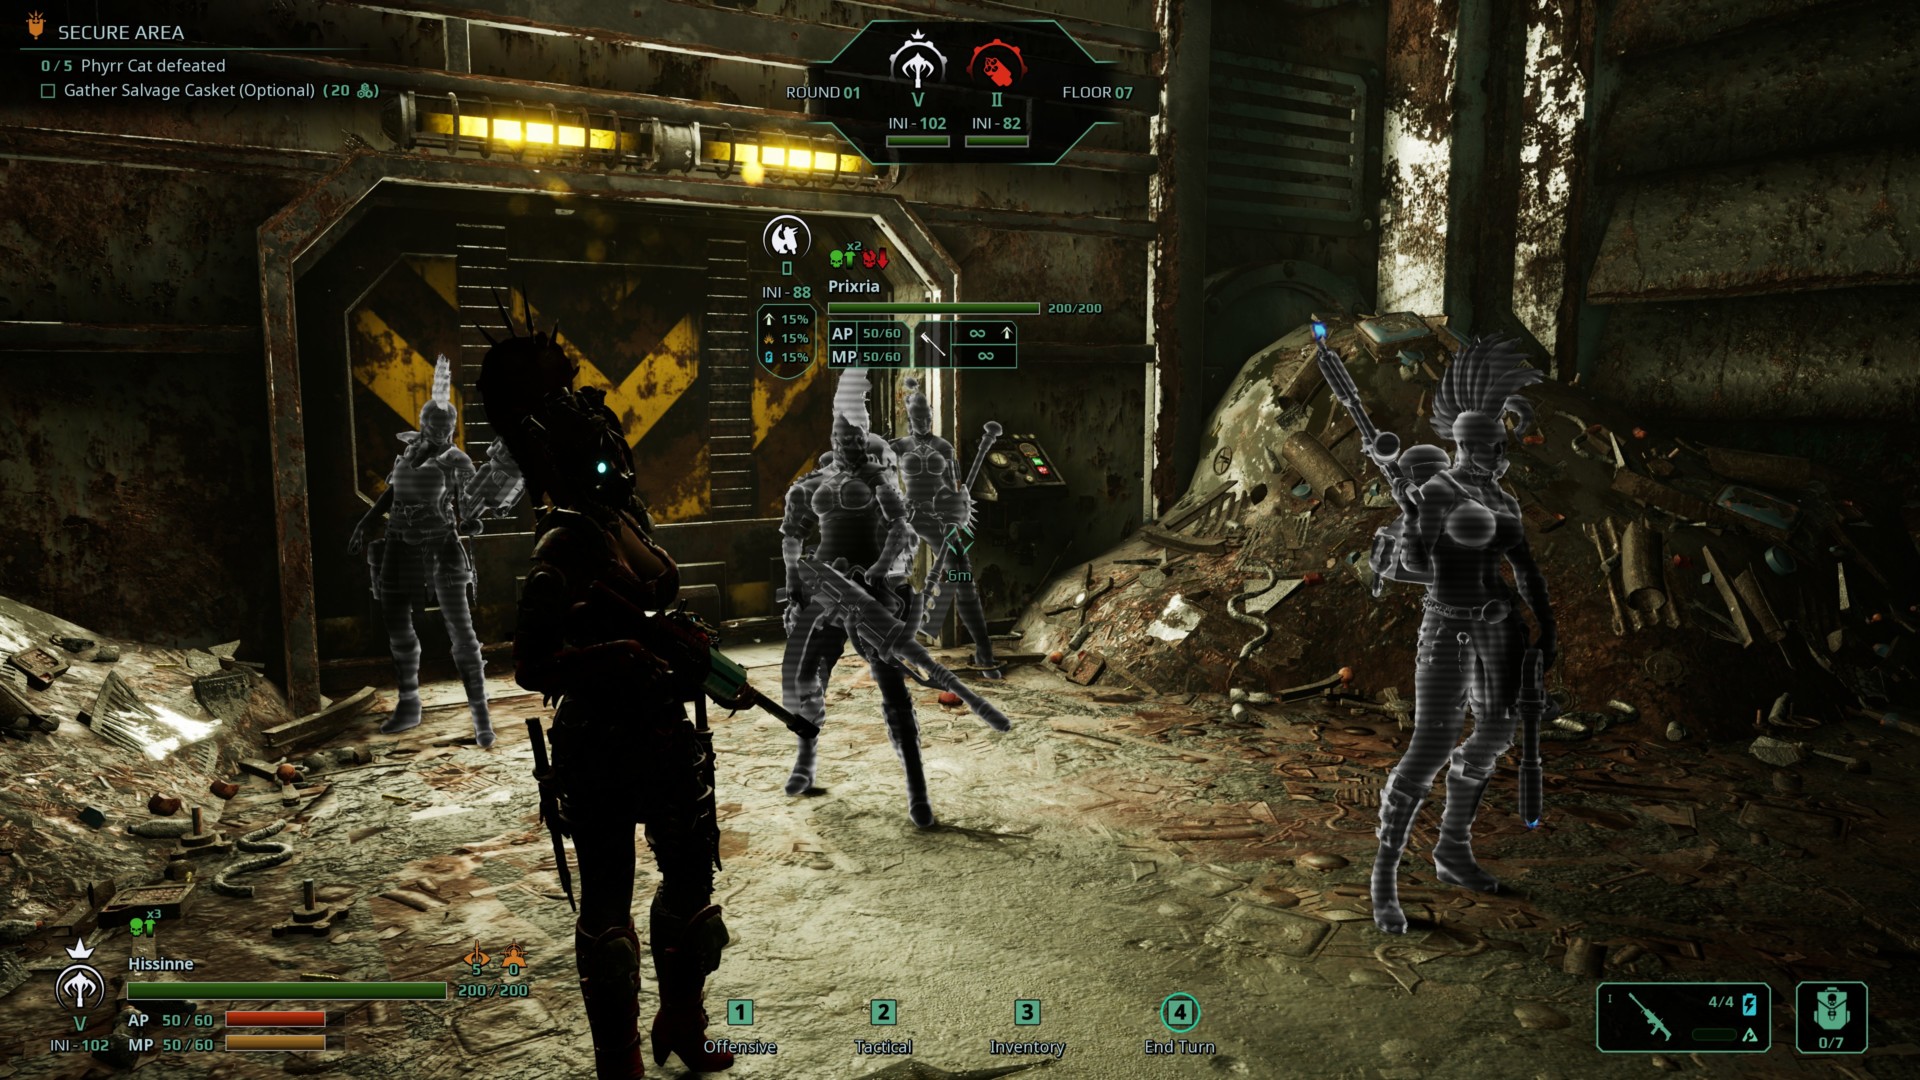
Secure Area – This is a common enough when playing Operations. First, you’ll place your units in various start positions on the map. The objective is to defeat all hostiles while also picking up and extracting the Salvage Casket located somewhere in the area. Additional objectives might include picking up loot crates and other objects and extracting them. Once your foes are defeated, there’s a looting round where you can pick up the drops of various enemies, though your AP and MP will still be limited.
Royal Rumble/Pit Brawl – This is a smaller map where you and your opponent take turns deploying your units. They’ll then duke it out, with each successive turn allowing you to field another fighter. The last fighter standing wins the match for their team. Oh, and the difference in Pit Brawl is that only melee weapons are allowed.
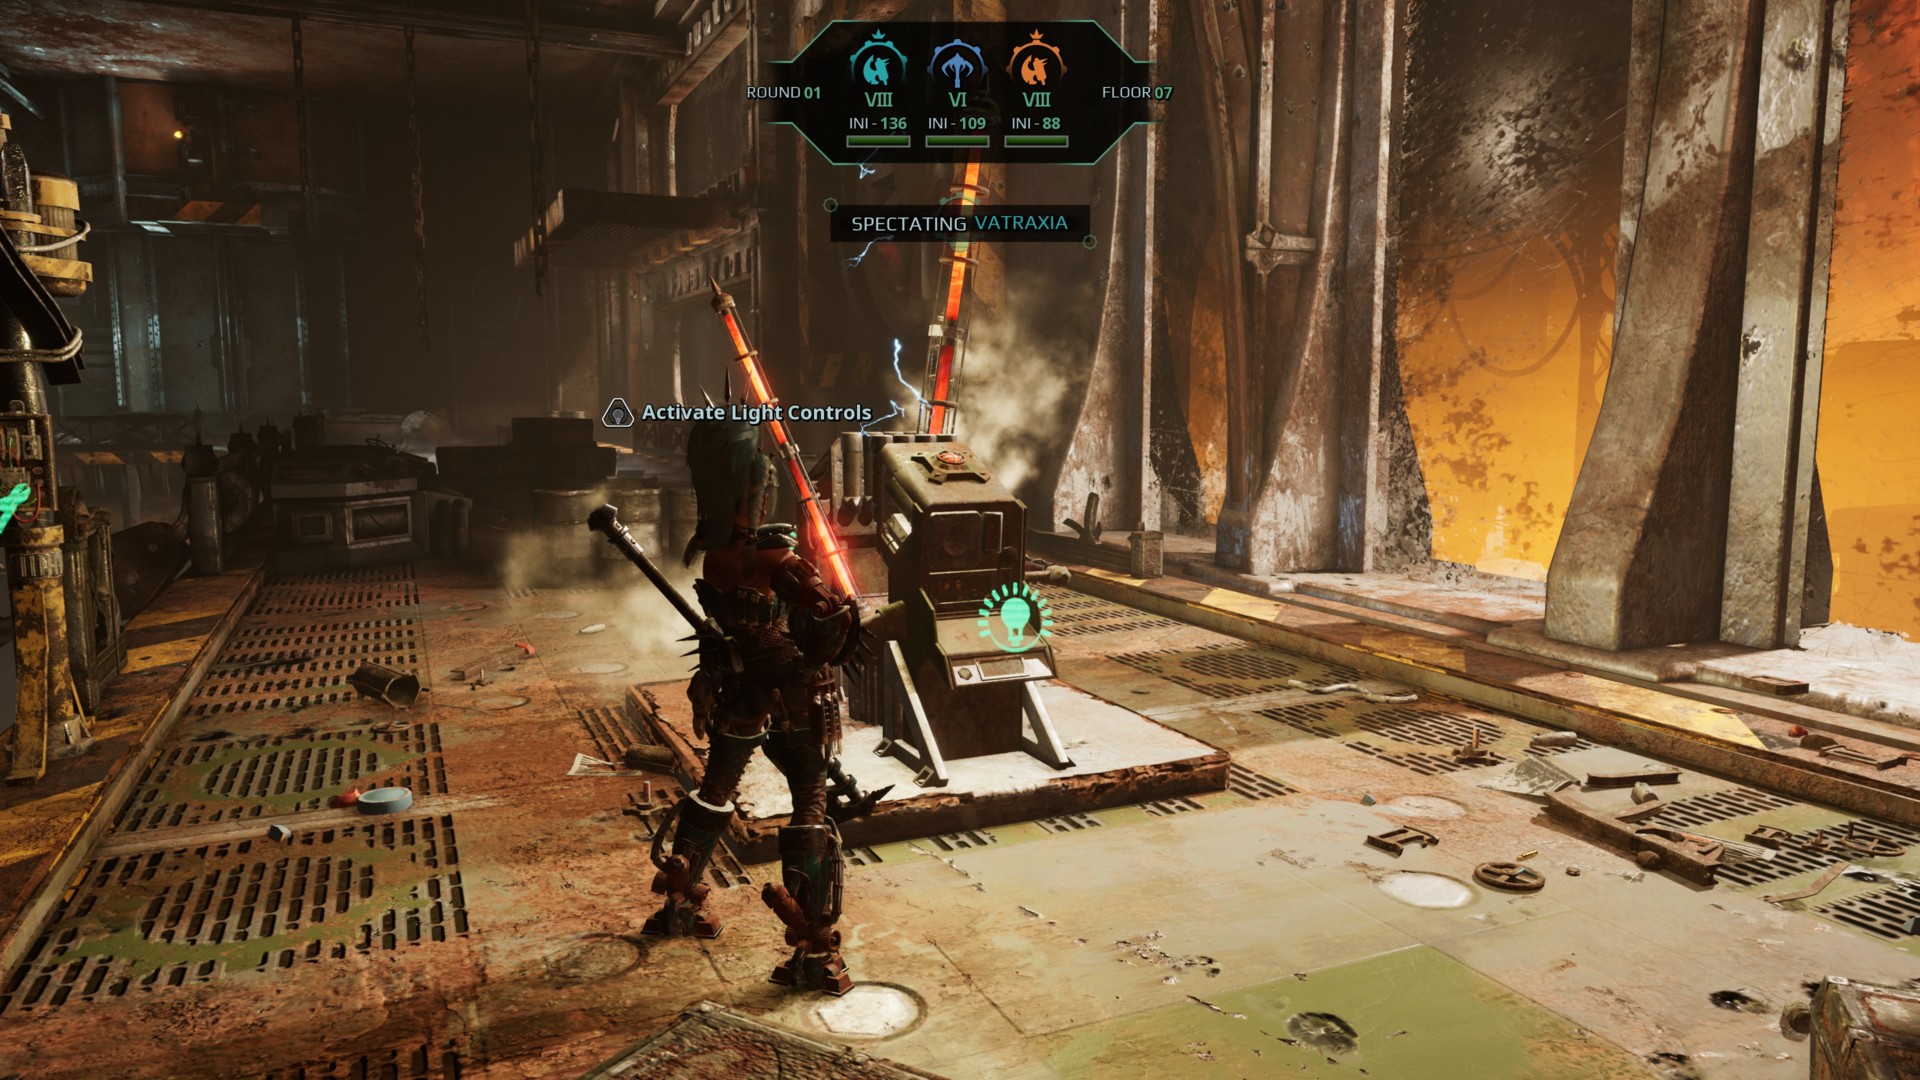
Spectrum Supremacy – Think of this as a match involving “control points,” except those locations are “lights” on the map. Control a light and defend it, and make sure to eliminate your foes that might be grabbing other lights too. At the end of the battle, the team with the most controlled lights is declared the victor.
Retrieval – There are several retrieval-type missions. The objective is simply to grab the required objects and extract.

Necromunda: Underhive Wars is available via Steam. For more information, check out our guides and features hub.