As you continue onward in Act 3 of Pathfinder: Wrath of the Righteous, you’ll encounter more brain teasers. One of these involves a dozen plates, with several bridges that can make sections inaccessible. Here’s our Pathfinder: Wrath of the Righteous Sacred Lands puzzle guide to help you complete the Weary Guardian quest.
Note: For more information, check out our Pathfinder: Wrath of the Righteous guides and features hub.
Pathfinder: Wrath of the Righteous – How to solve the Sacred Lands puzzle
The Sacred Lands puzzle in Pathfinder: Wrath of the Righteous is part of the Weary Guardian quest. Upon arriving in the location, a Primal Treant will welcome you. You have the option to attack it, but I don’t suggest that at all. Instead, continue inside the ruins, whereupon the rest of your party will be left behind. That’s right, only your main character will venture forth.
Note: I suggest saving your game outside the ruins. You can reload this save in case you mess up.

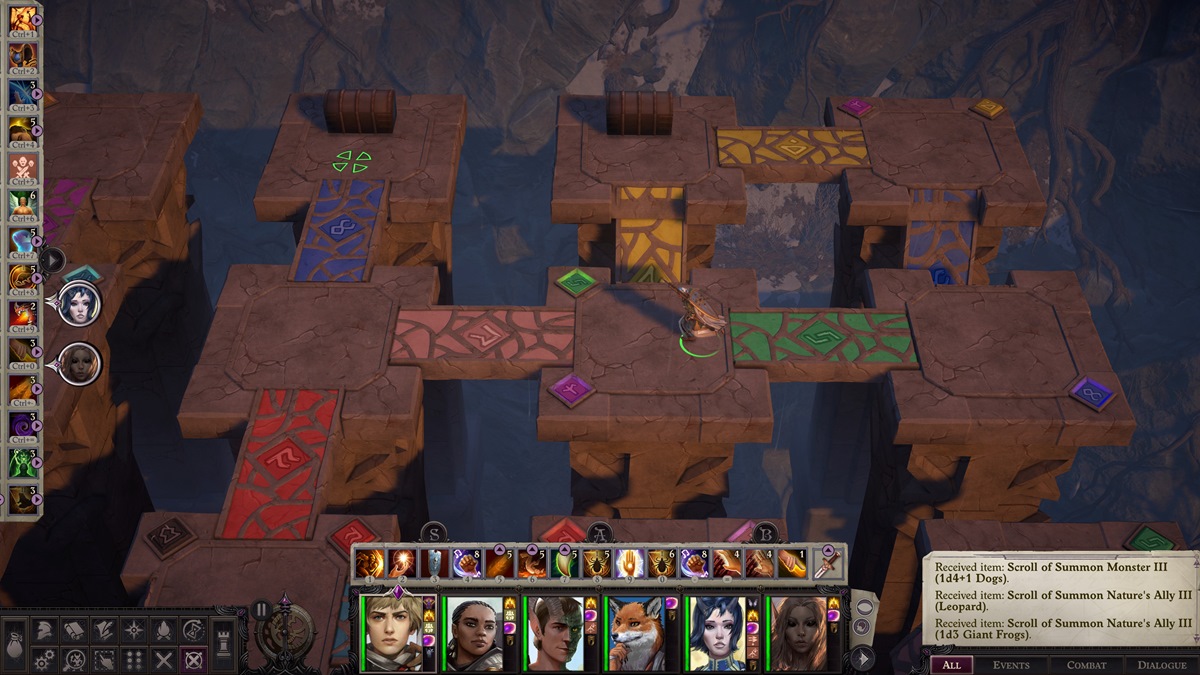
Sacred Lands puzzle solution and area map
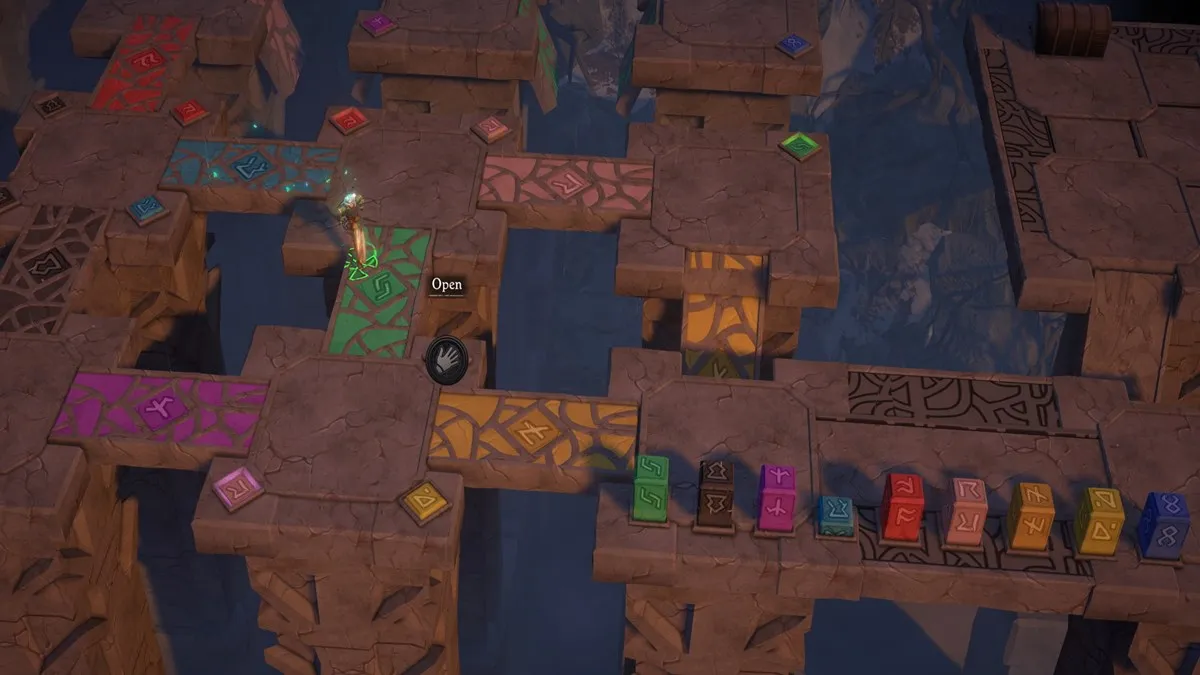
This area has several platforms connected by bridges, and you’ll also notice several colored plates on the floor. Whenever you press one, it’ll collapse or raise a corresponding bridge. Since your goal is to reach the opposite side of the ruins, you’ll need to be mindful of what you’ll interact with. It can be fairly easy to recover (i.e., press the same switch again). However, if you mess up and run around too much, you might find it all a bit confusing. Load the aforementioned save it that happens so you can start from the beginning.
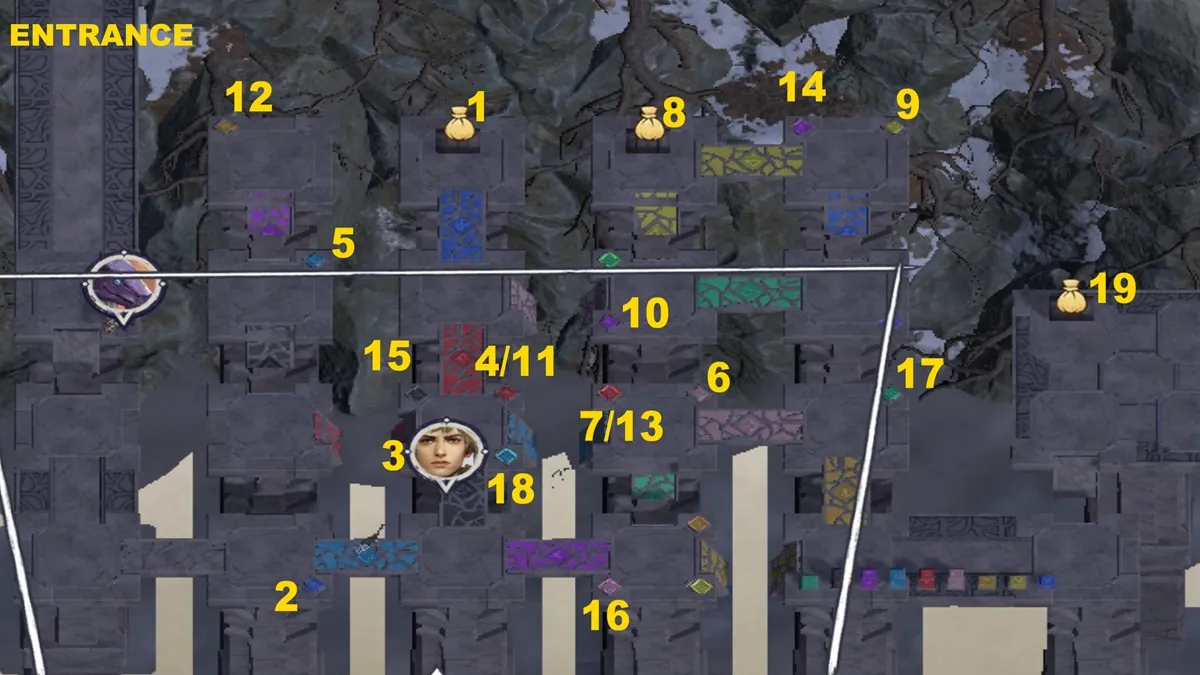
In any case, you can refer to the map below. We’ve numbered each spot that you need to go to and any related actions. Take note of the sequential order as well.
The full sequence
- #1 – Run all the way to the chest at the upper-left section without touching anything for now. Pick up the Elven Notes.
- #2 – Dark blue plate (lower-left).
- #3 – Black plate (middle/lower-left).
- #4 – Red plate (middle).
- #5 – Light blue plate (upper-left).
- #6 – Pink plate (right).
- #7 – Red plate (right).
- #8 – Open the upper-right chest to obtain a few magic scrolls.
- #9 – Yellow plate (upper-right).
- #10 – Purple plate (right).
- #11 – Red plate (same as #4).
- #12 – Yellow plate (upper-left).
- #13 – Red plate (same as #7).
- #14 – Purple plate (upper-right).
- #15 – Black plate (middle/upper-left).
- #16 – Pink plate (lower-right).
- #17 – Green plate (right).
- #18 – Light blue plate (middle; same platform where #3, #4/11, and #15 are).
- #19 – You’ve finally made it to the other side of this area.
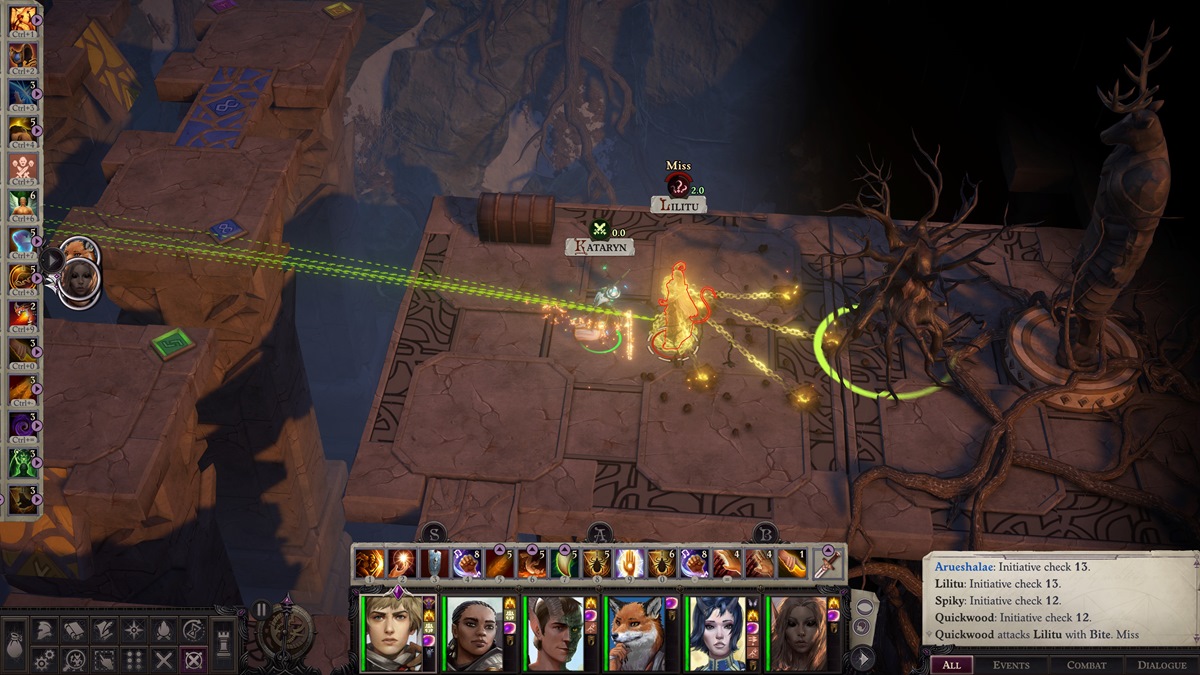
Once you’ve reached the other part of the ruins, a demoness named Lilitu will appear. You can reply to her based on the Mythic Path that you’ve chosen. For instance, the Angel Mythic Path has your character telling her to begone like the foul hellspawn that she is. The Azata Mythic Path, meanwhile, lets you call on an Ancient Treant Guardian to help you during the battle.
After defeating Lilitu, you can open the chest to acquire more scrolls. Then, exit the temple and talk to the Primal Treant. That’s it, you’ve solved the Sacred Lands puzzle in Pathfinder: Wrath of the Righteous, and you’ve also completed the Weary Guardian quest.
Pathfinder: Wrath of the Righteous is available via Steam.