The second encounter in Destiny 2: Beyond Light’s Deep Stone Crypt raid is quite tough. You’ll need to battle Atraks-1, a Fallen Exo with several clones. Here’s our guide to help you out.
Note: For more information, check out our Destiny 2: Beyond Light guides and features hub as well as our full Deep Stone Crypt raid guide. Likewise, please be reminded that this article contains minor spoilers.
Destiny 2: Beyond Light – Deep Stone Crypt second encounter guide (Atraks-1)
After clearing the first encounter (Cylinders/Crypt Security) in Destiny 2: Beyond Light‘s Deep Stone Crypt raid, you should end up in a new area. There’s even a creepy chamber with a gigantic statue of the Darkness.
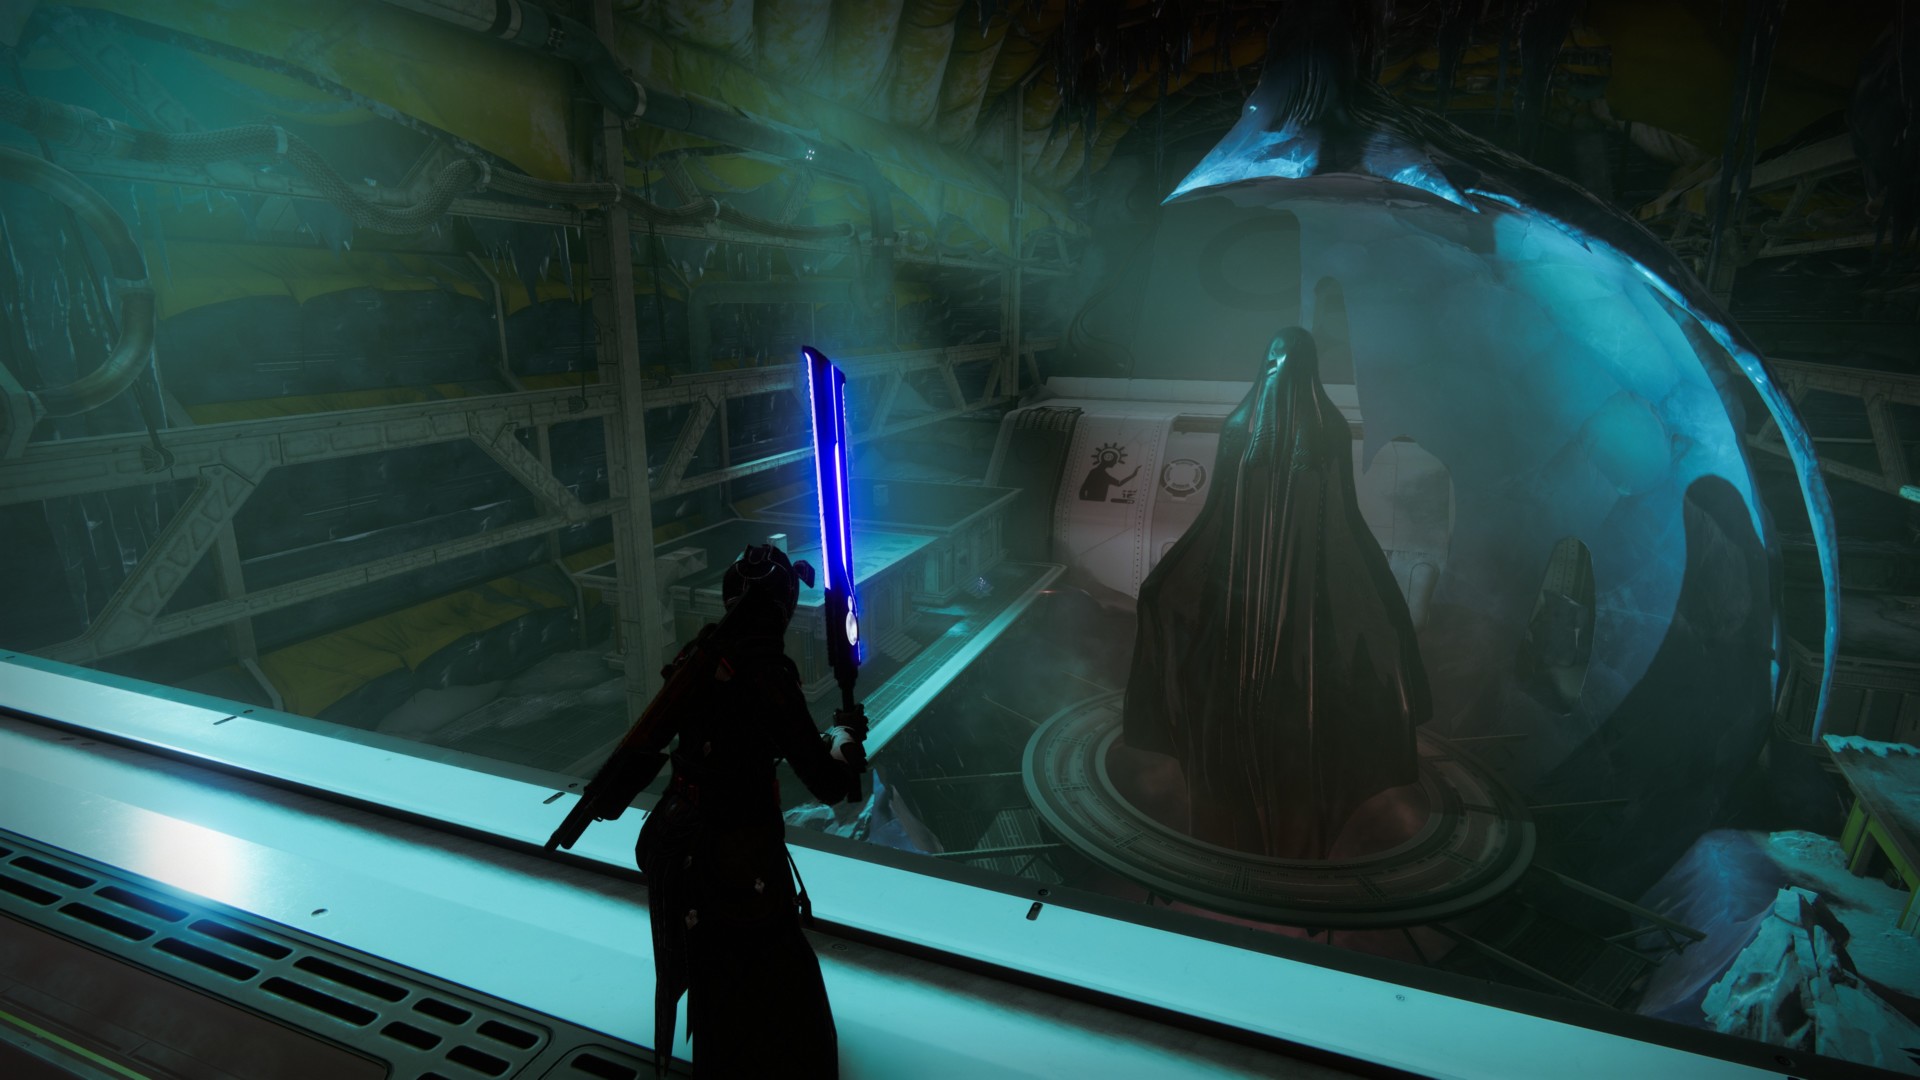
Anyway, you should stumble upon a room where Taniks, now an Abomination, greets you with a surprise. You won’t fight him now because its time for Atraks-1.
You can start the fight by getting close to the orb in the middle of the area.
Loadouts/subclasses
Mob-clearing and crowd-control supers would be helpful such as the Hunter’s Silence and Squal. Alternatively, Hunters can run Celestial Nighthawk and Golden Gun for more damage. Emergency supers such as the Titan’s Ward of Dawn bubble and Warlock’s Well of Radiance are useful in a bind.
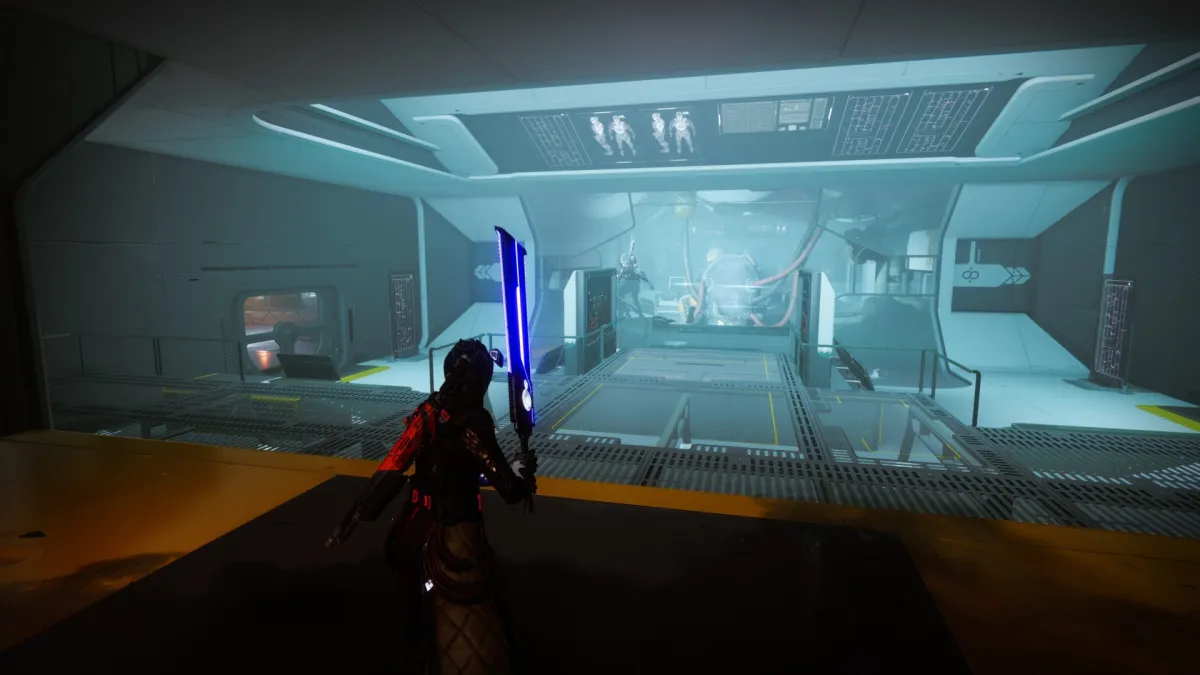
As for weapons, I went with a sniper rifle, Riskrunner (add-clearing due to lots of Arc damage), and the Falling Guillotine sword.
Teams and roles
Split up the team into two subgroups with three players each:
- Ground team – Have one assigned Scanner; these players will stay in the normal area.
- Space team – Have one assigned Scanner and one assigned Operator; these players will go use the elevator to reach outer space.
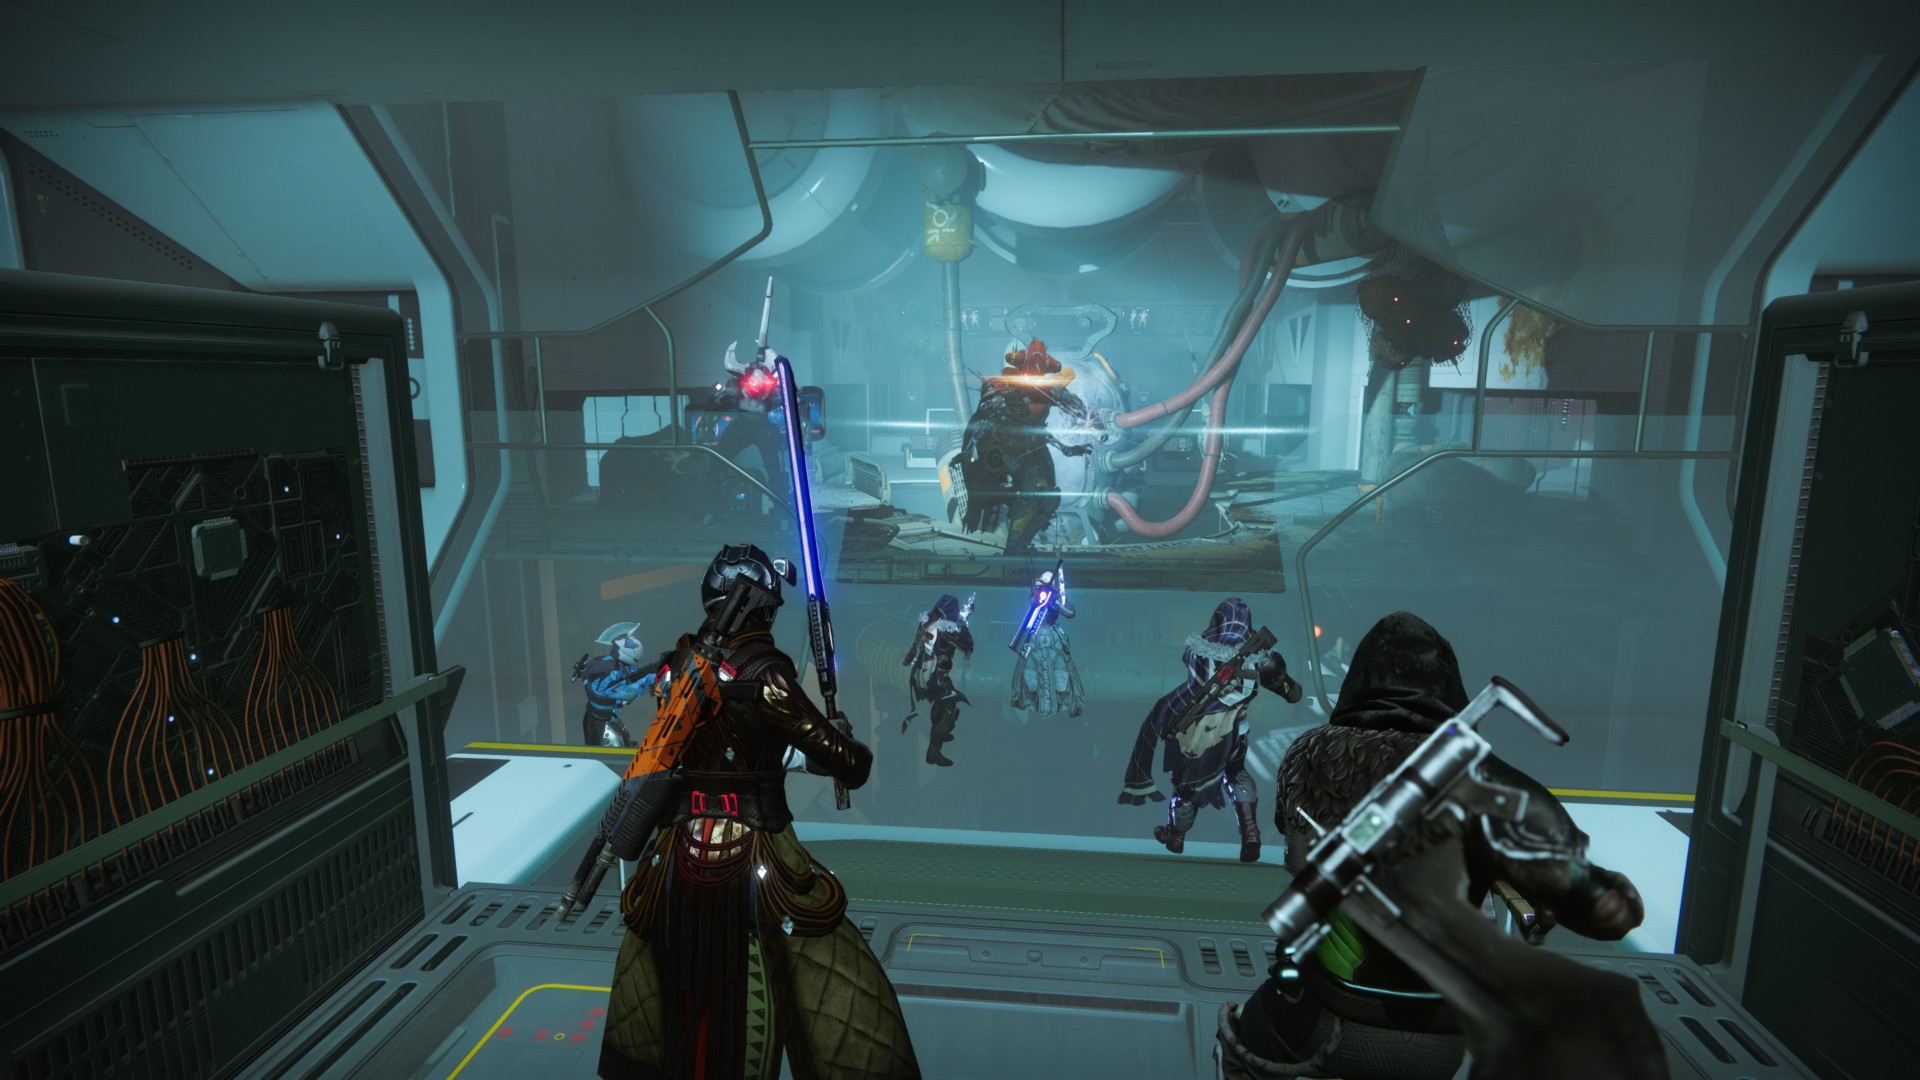
The idea here is to look at the bottom-left corner of your screen to see that “sentinels” have spawned. These are servitors, the same ones that’ll block the augmentation devices which will become very important later. Likewise, make sure you take out the shanks since they’ll make mincemeat out of players.
Keep in mind that when servitors spawn, the Operator vandal (red icon) and Scanner vandal (yellow icon) will spawn on the ground floor and space area respectively.
Note: For the rest of this guide, the images I’m using are for the space team/space area since that’s my assignment.
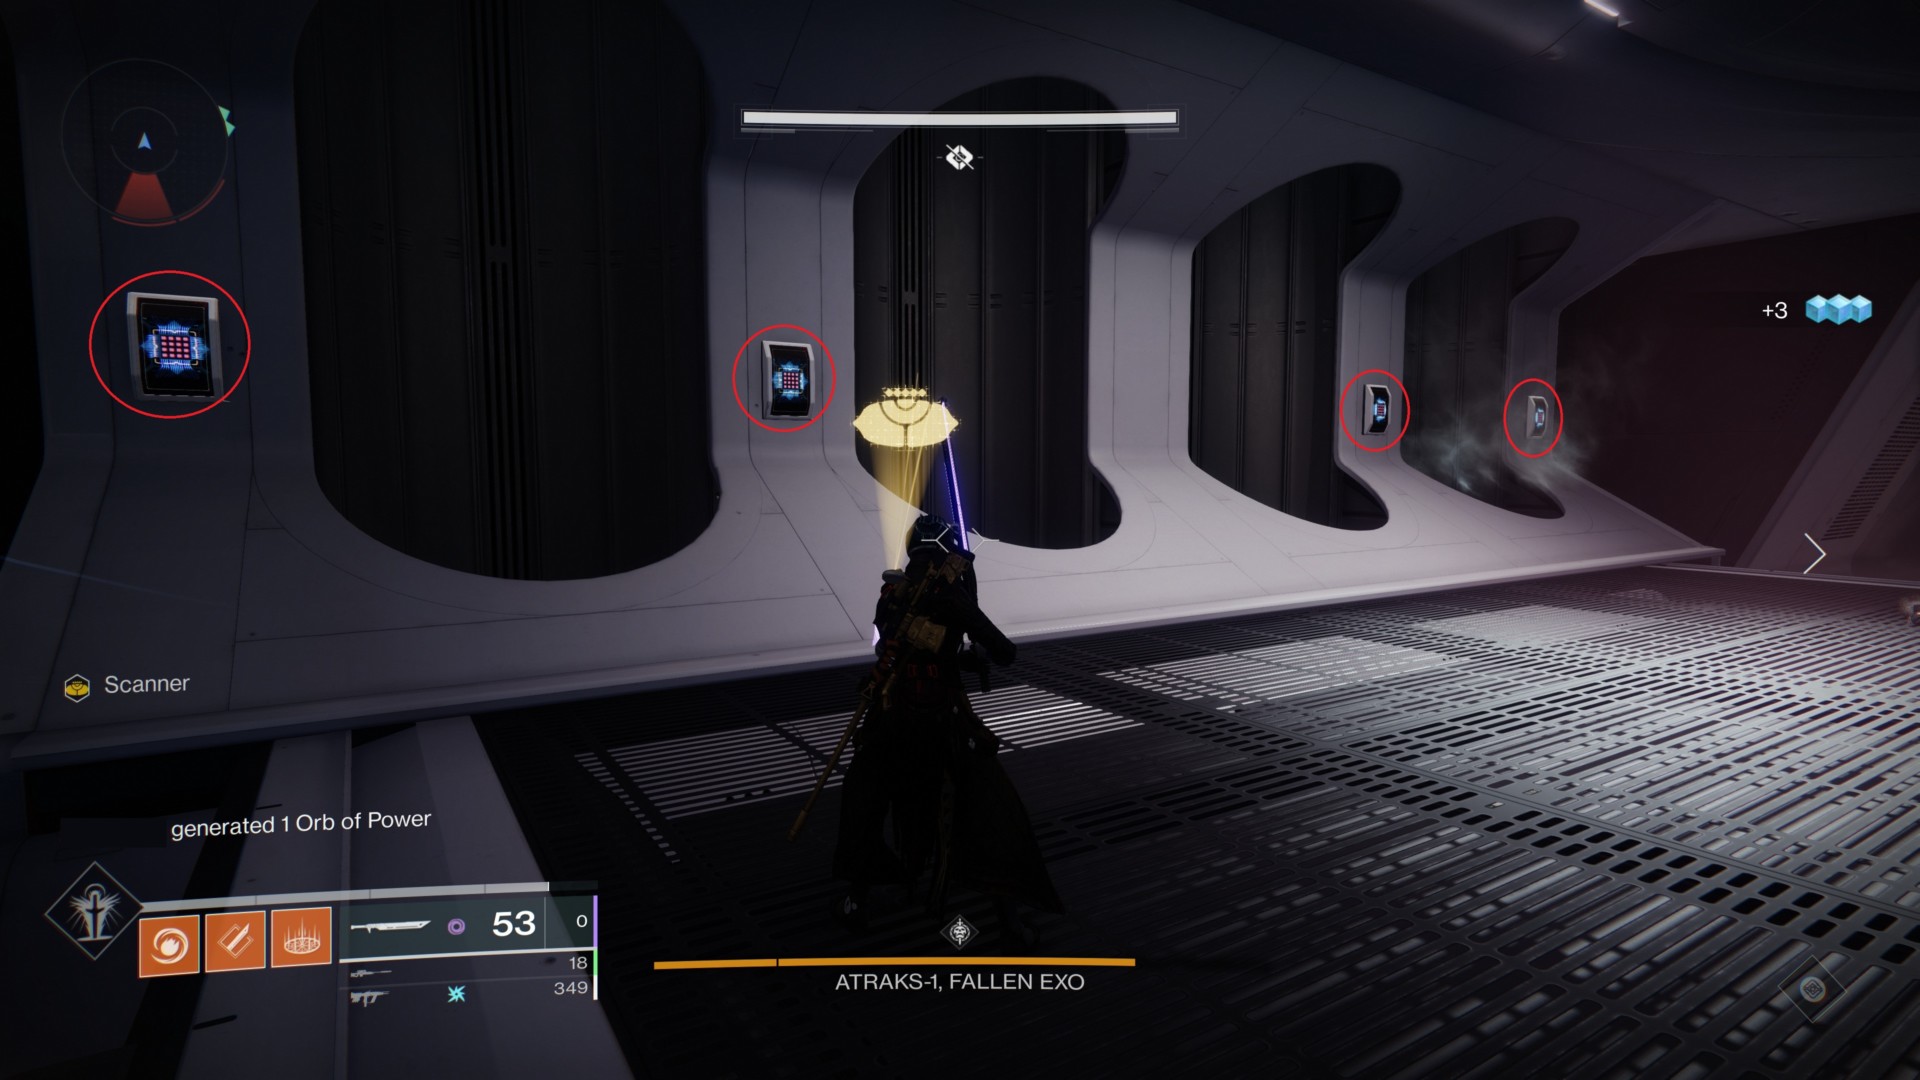
The Scanners
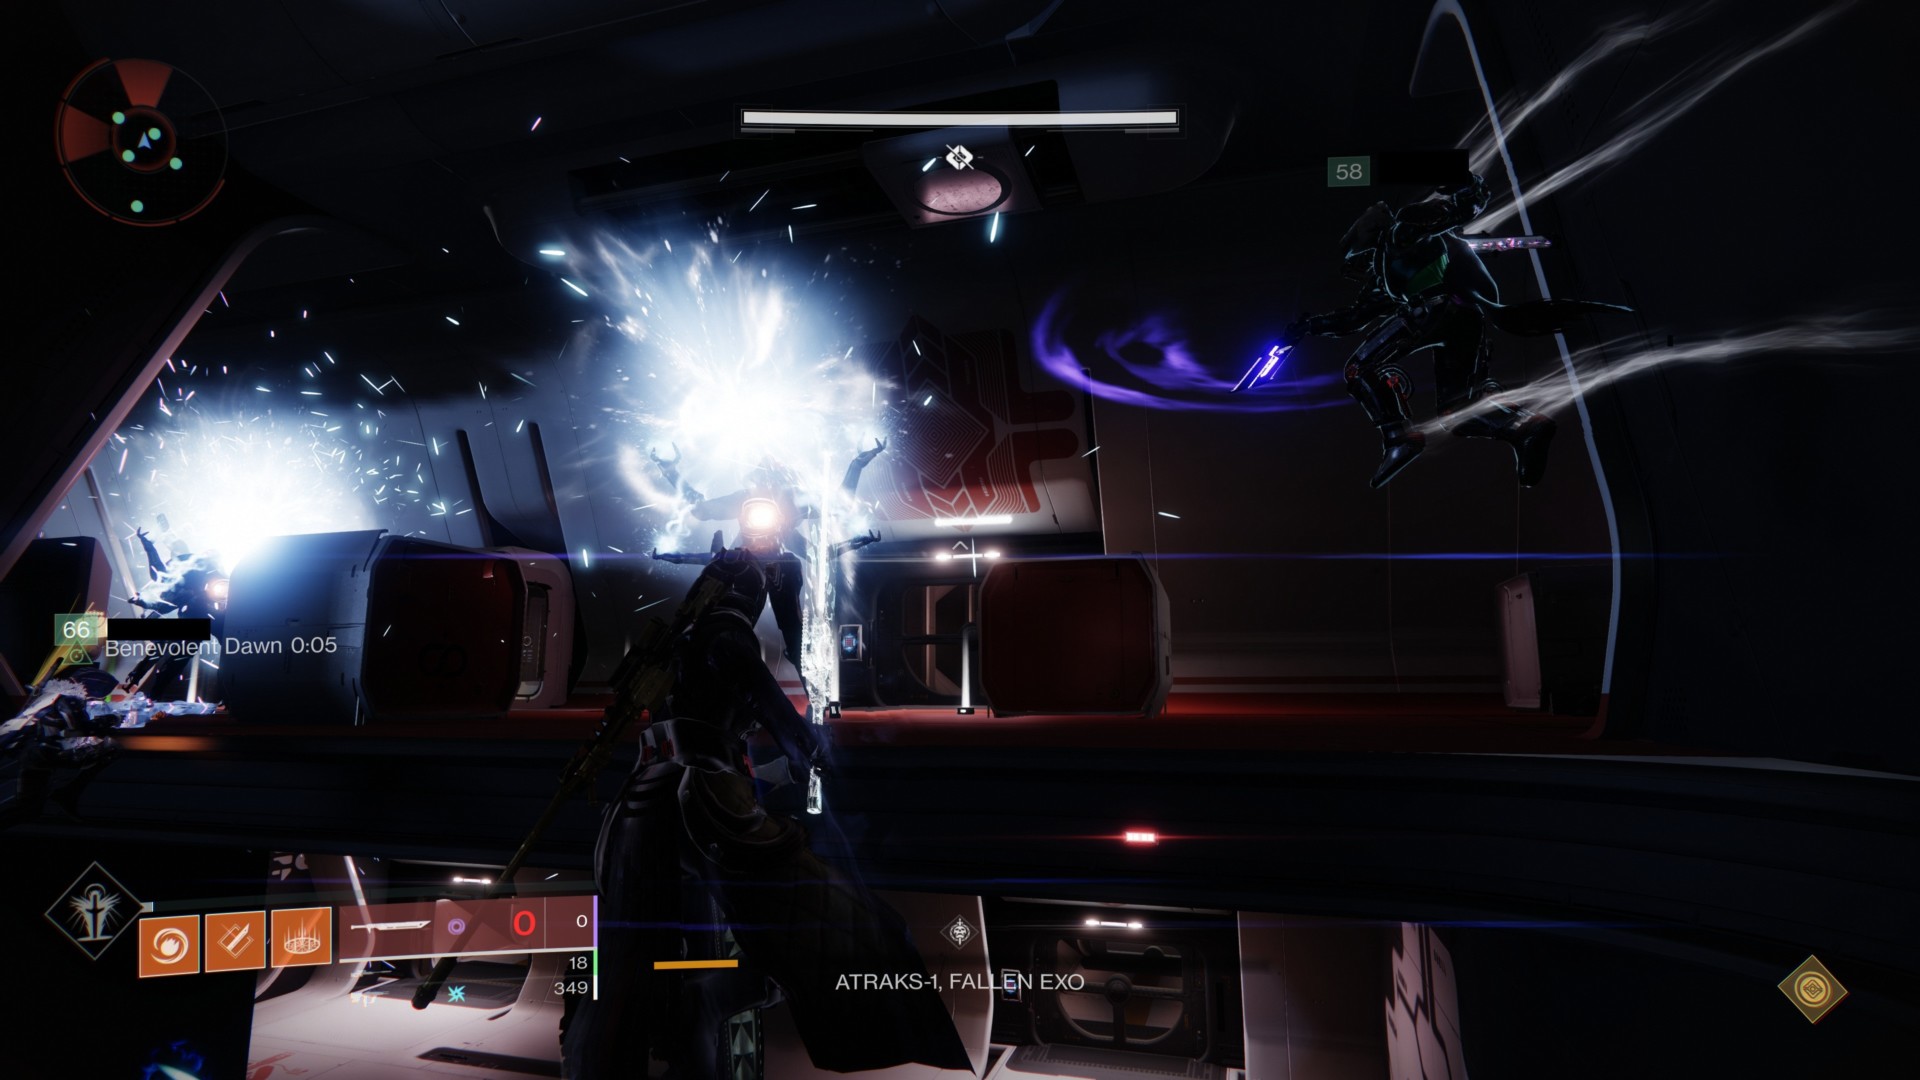
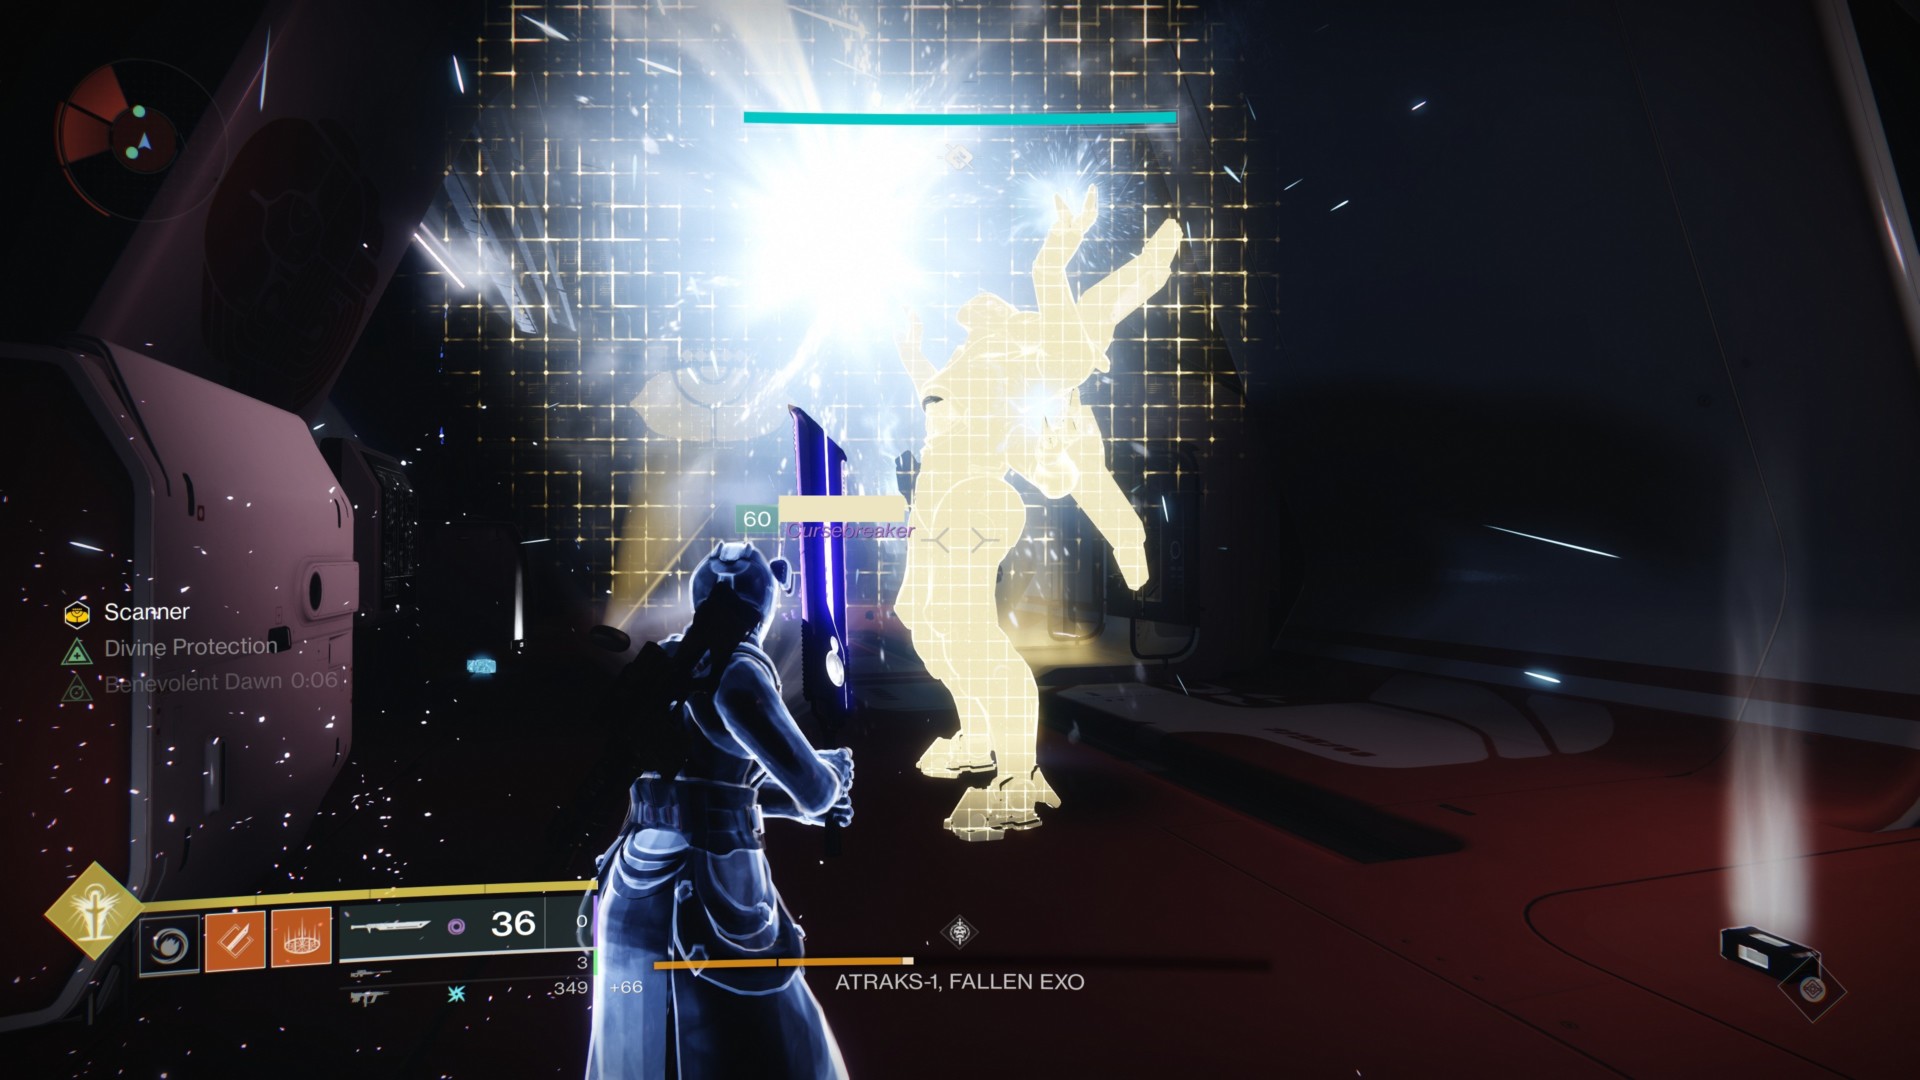
As the Scanner in the space team, your job is to look for the Scanner vandal (the one with the yellow icon). Watch out because it can sometimes spawn very close to one of Atraks-1’s replicants/clones. This boss will easily one-shot you or do tremendous damage.

After picking up the Scanner buff, wait for the notification that says “Extinction Protocol.” This is the wipe mechanic.
You should immediately look for the Atraks-1 clone that has a yellow glow. You and the remaining players need to kill it immediately, otherwise, your group will wipe.
Note: Shooting the wrong clone might also cause a wipe.

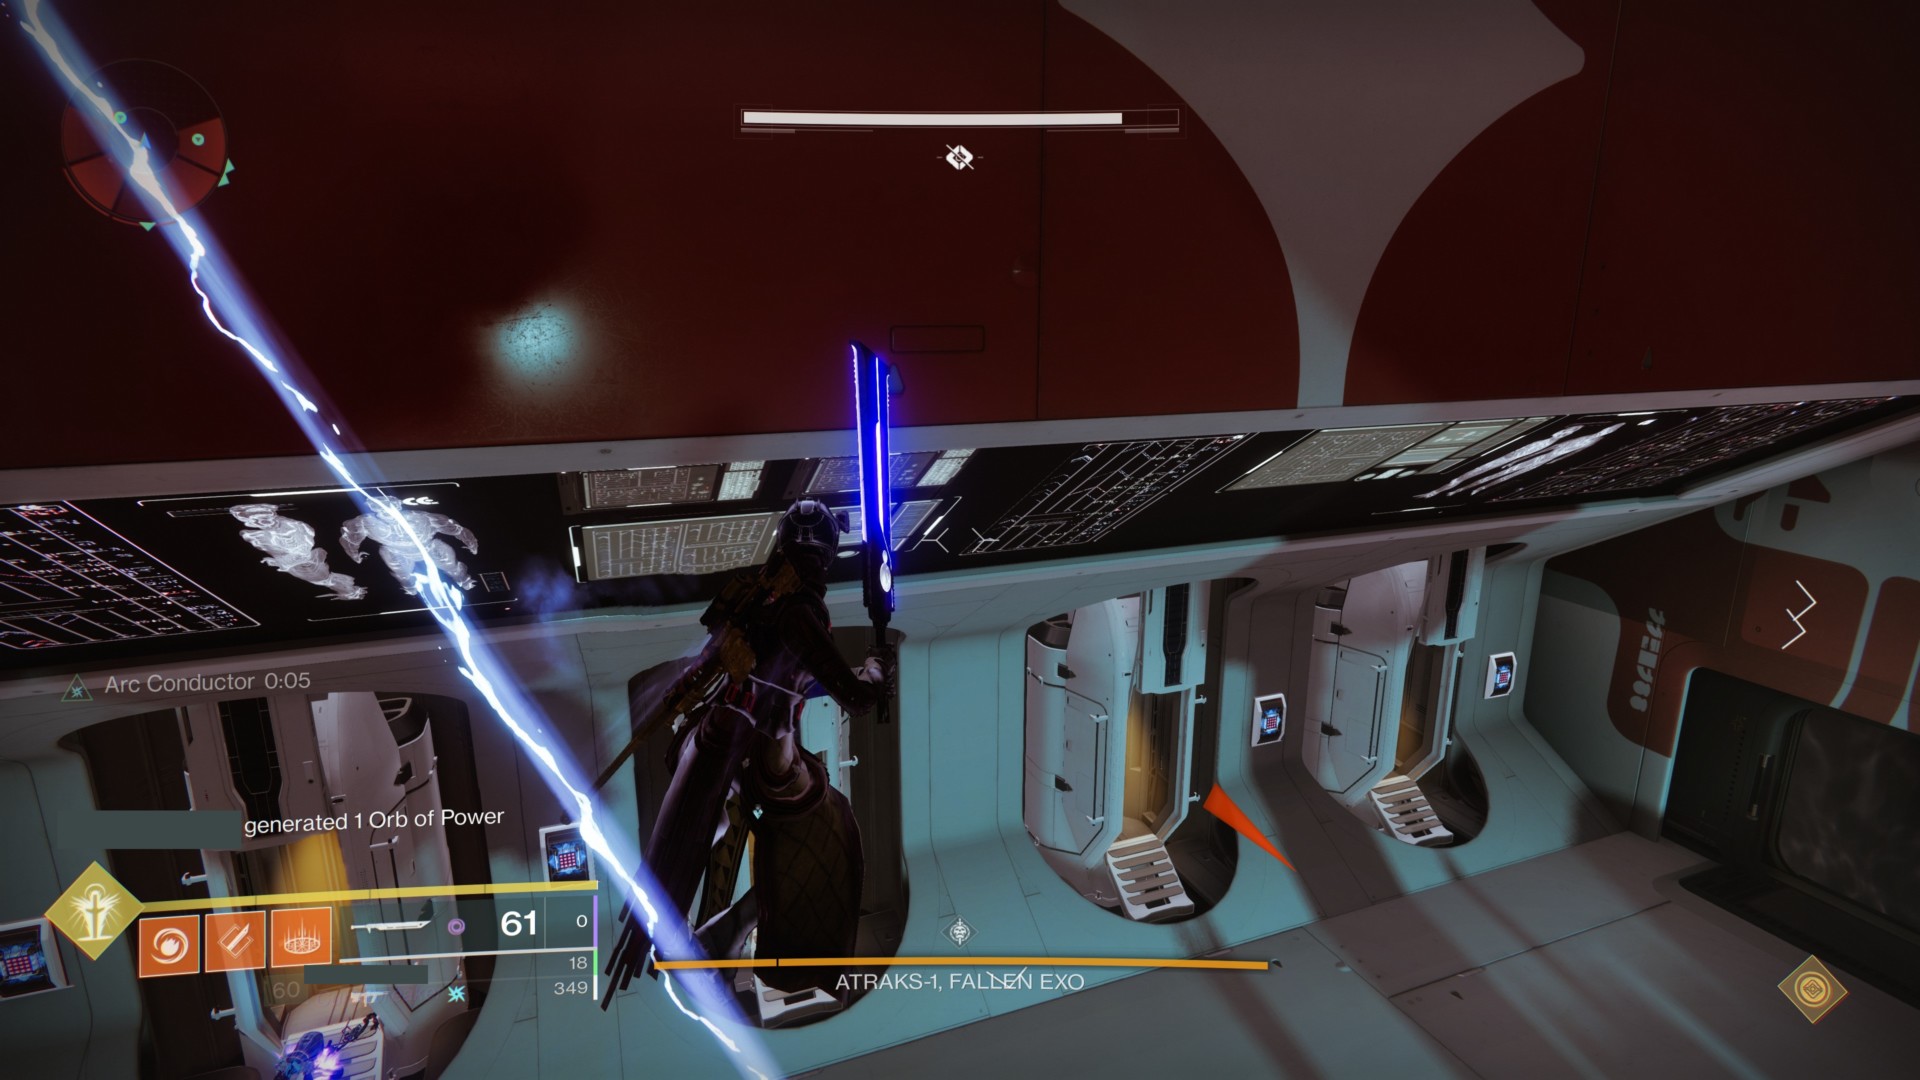
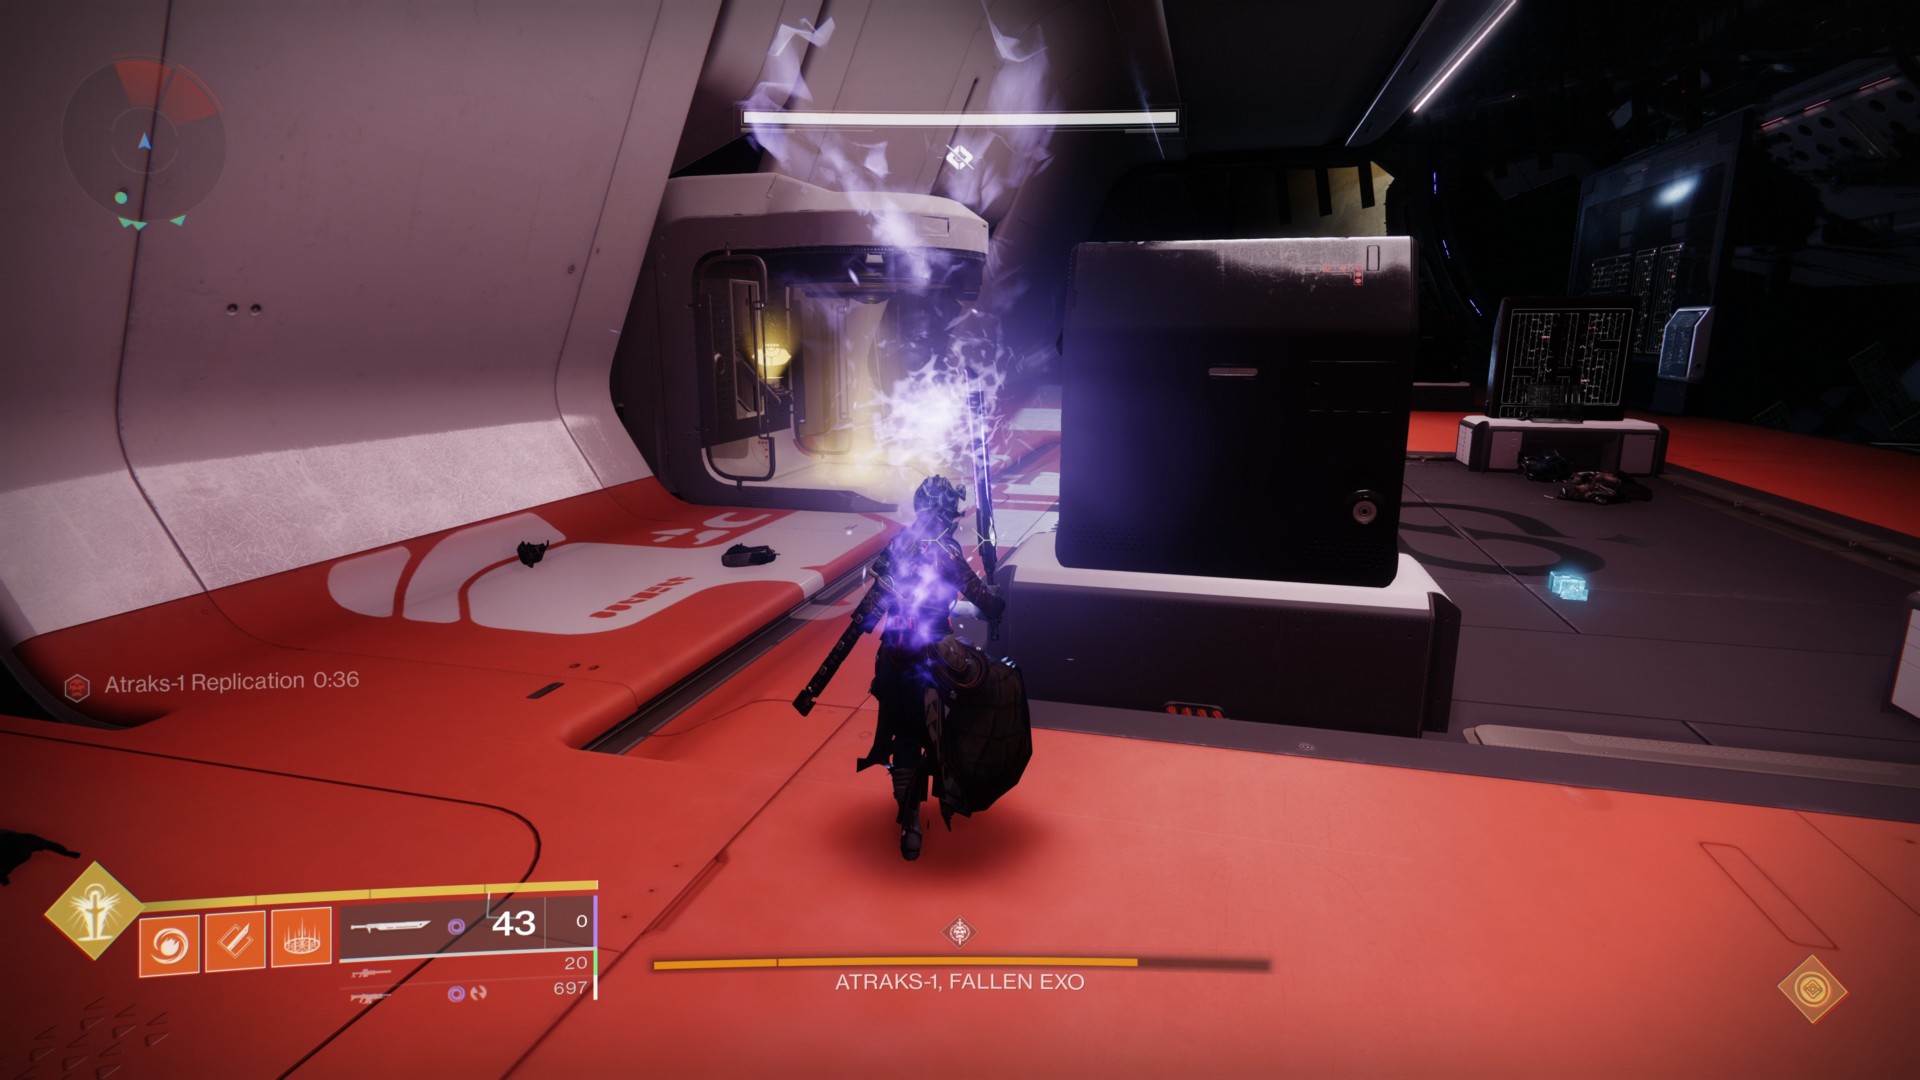
DPSing the boss efficiently
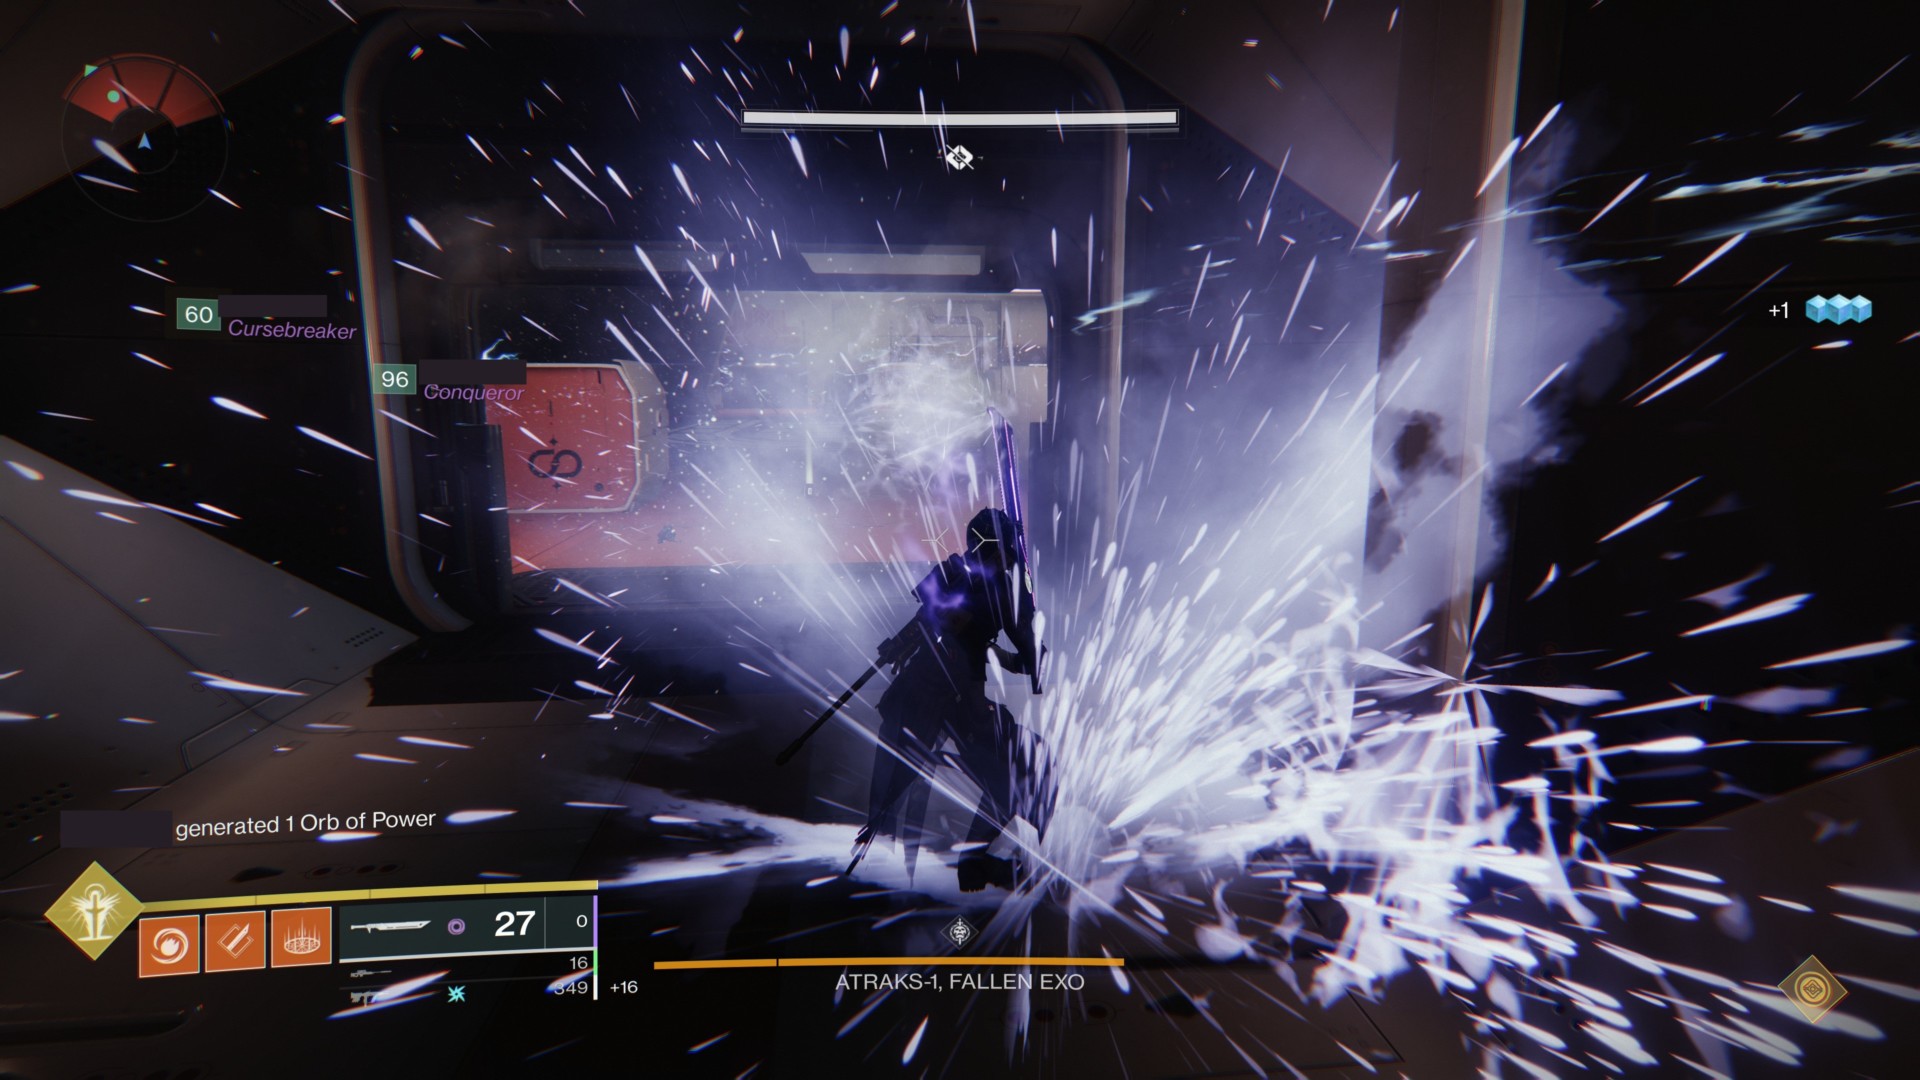
You’ll want to maximize your DPS on each clone. To do that, simply do a quick countdown — i.e., “3, 2, 1” — before you and your teammates in your subgroup start to wail away using swords.
A good combo is to use with the Falling Guillotine sword is three light attacks followed by a heavy attack.
Passing the Scanner buff
After killing the Atraks-1 clone, use the augmentation device. This will pass the Scanner buff to the ground team and it’ll get picked up by the assigned Scanner there.
The ground team will kill then kill the correct clone. Next, the Scanner buff gets passed back to the space team to kill another clone. That’s followed by another pass to the ground team. All in all, you’ll be killing four Atraks-1 clones each phase.
Remember to time your DPS with your subgroups so that you can maximize the damage each time.
Note 1: Make sure servitors are killed quickly. If they’re still alive, the augmentation device won’t work and you won’t be able to pass the buff.
Note 2: There are multiple augmentation devices in each area. Regardless of the device you use to pass it, it’ll still appear in every possible device in the opposite area.
The Replicator buff
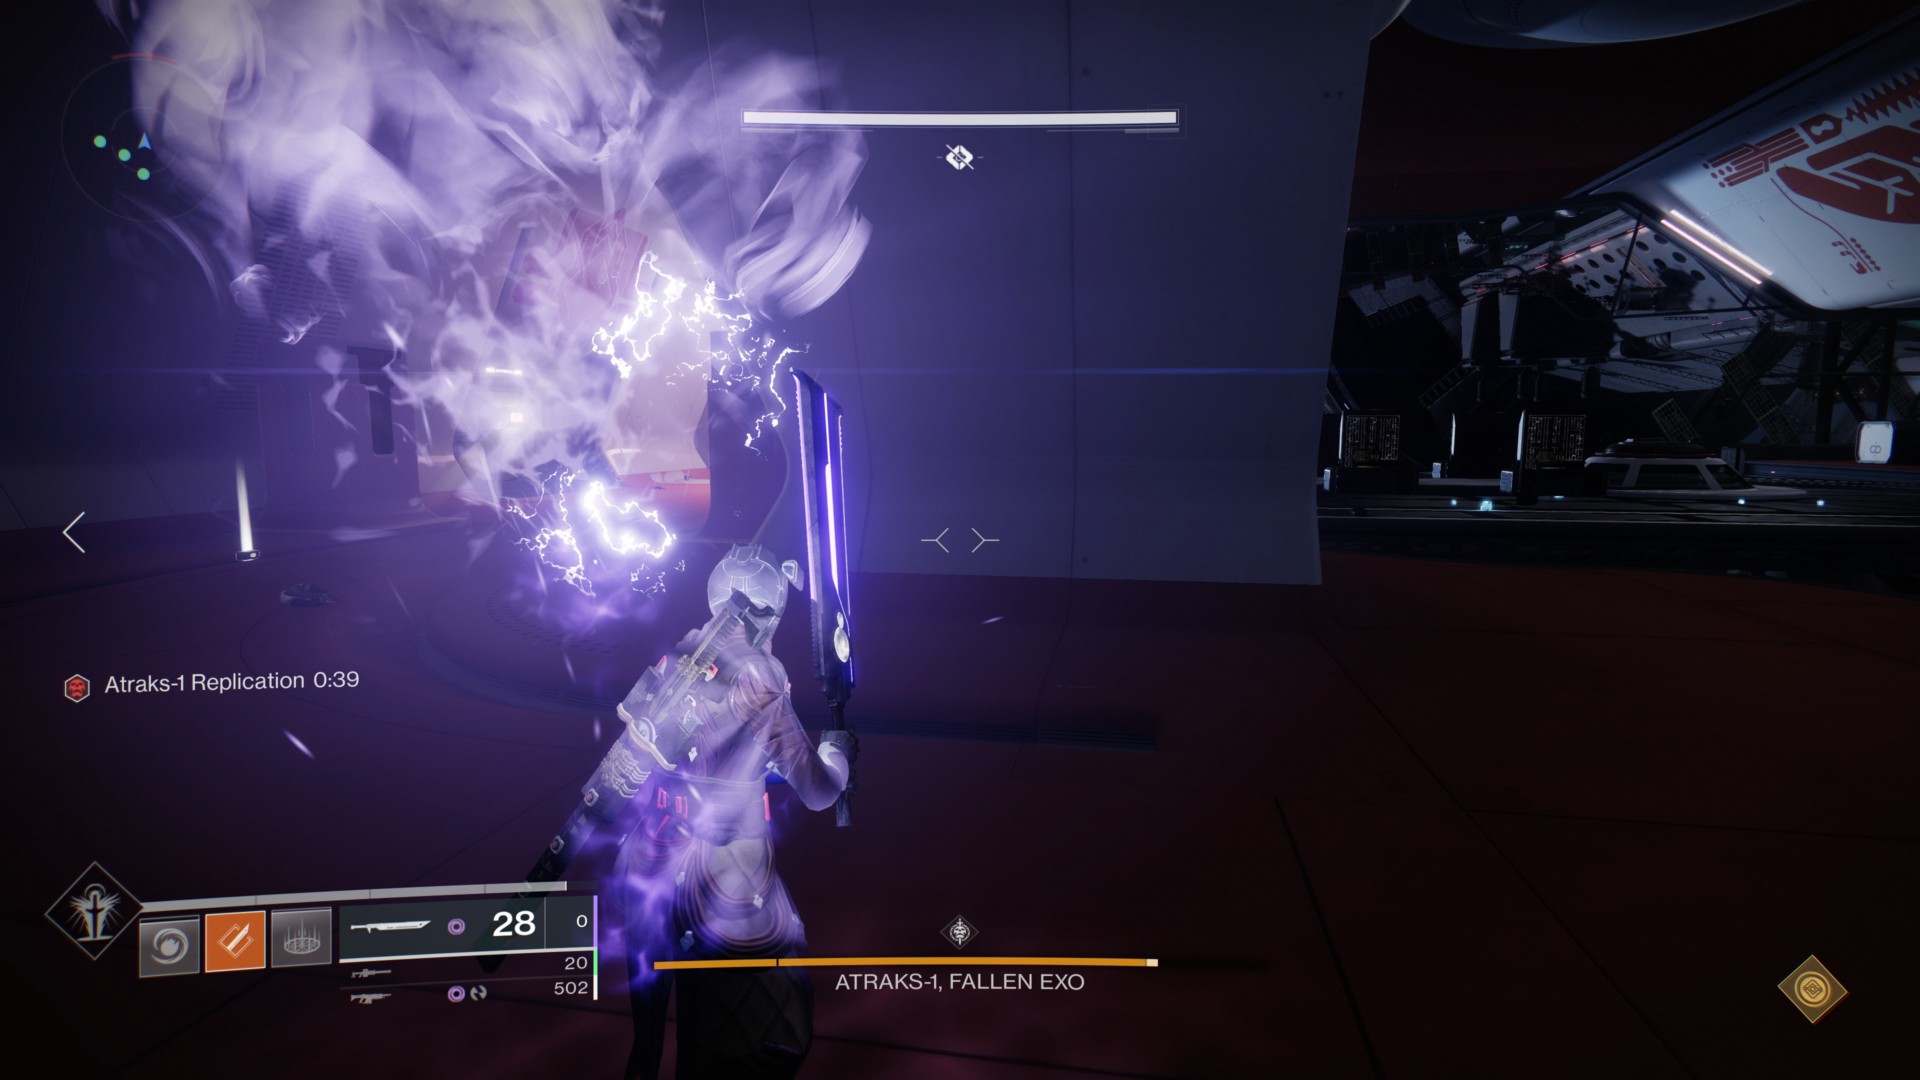
This is a core mechanic in this Deep Stone Crypt encounter. Whenever an Atraks-1 clone dies, it leaves behind a purple orb that gives the Replicator buff.
A player needs to go near this orb to pick it up or it’ll cause a wipe. Once picked up, the player will see that there’s a 40-second timer that slowly counts down.
When it expires, the player holding it dies. It’s the job of the Operator to help them out with this mechanic.
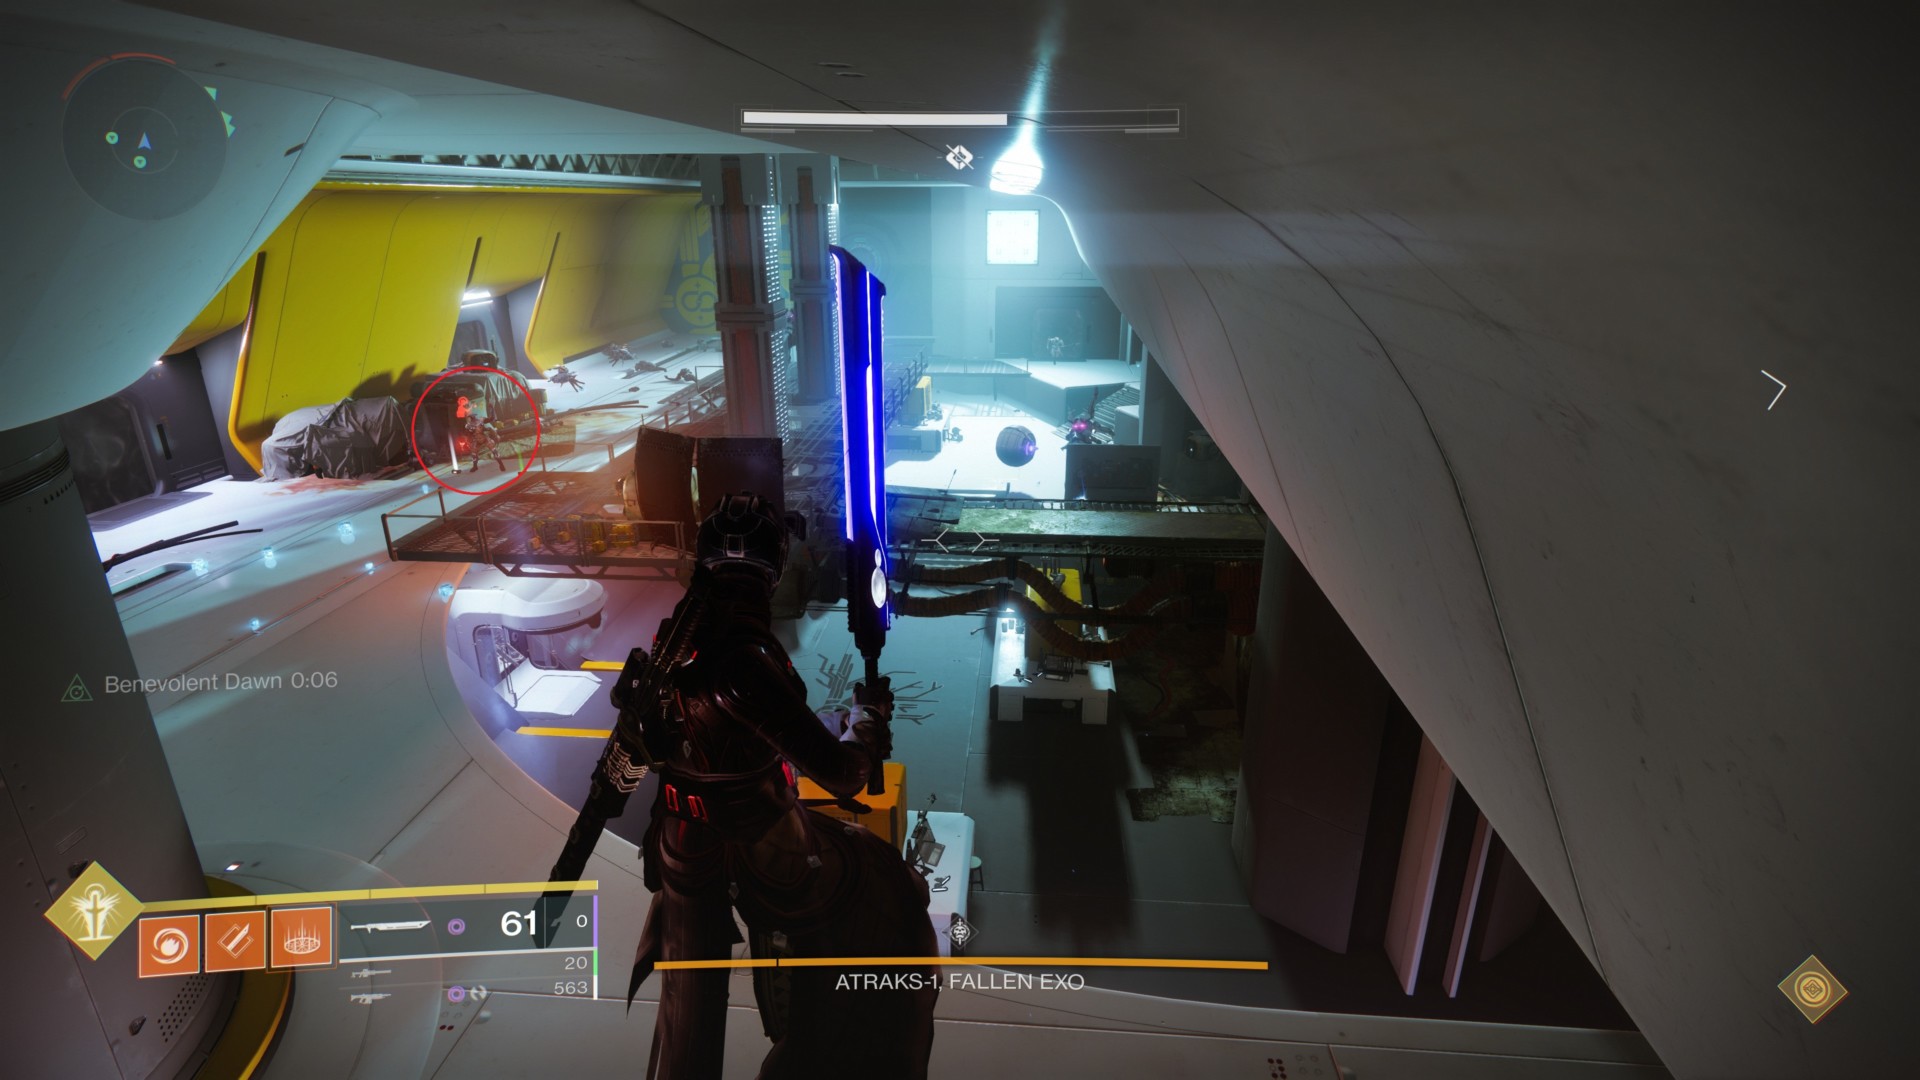
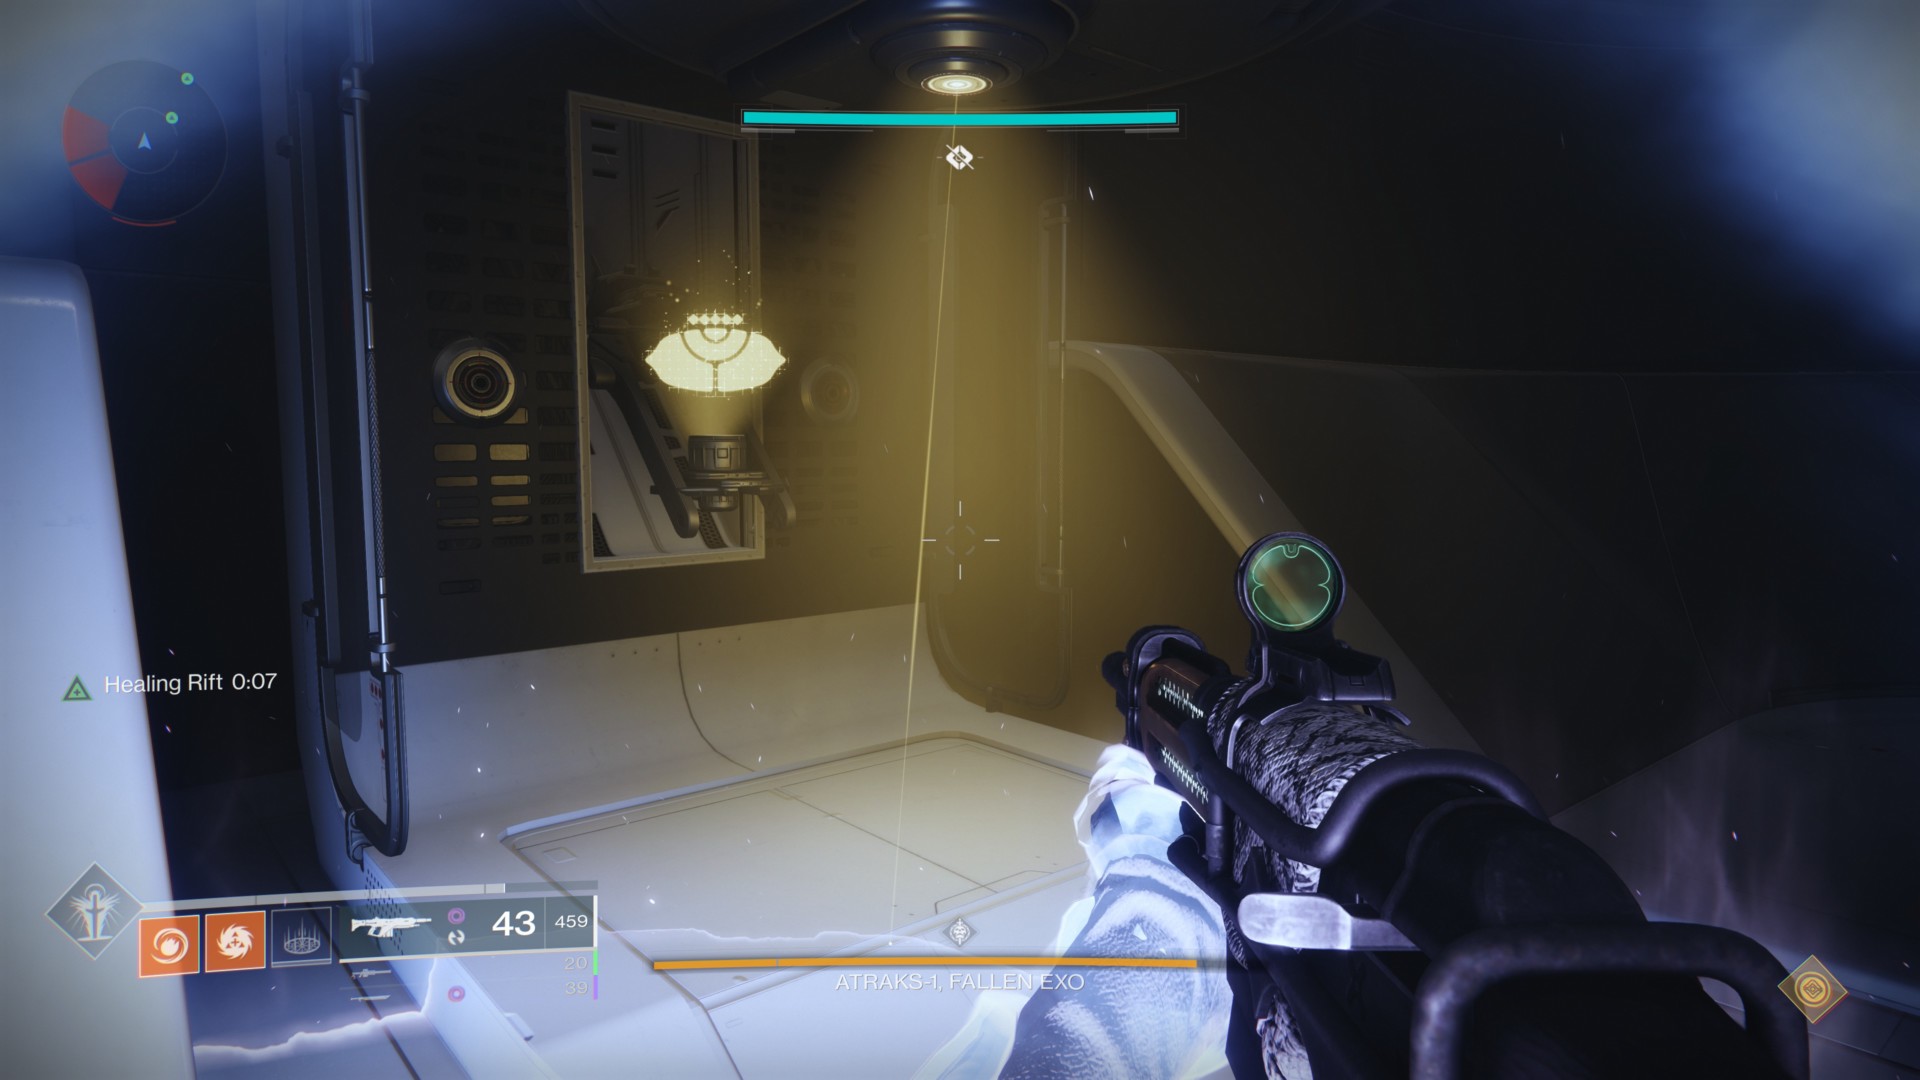
The Operator and shooting the airlocks
Remember the Operator vandal that spawns on the ground floor? Fairly early in the encounter, a ground team player needs to pick it up then use the augmentation device to pass it to the space team. The assigned Operator in the space team will then grab it.
The objective of the Operator is to check the side rooms in the space area (two up top and two at the bottom). These are airlocks with panels that can be opened via well-placed shots from the Operator.
The player with the Replicator buff runs inside the airlock and the Operator shoots the player so they drop their orb. In a few seconds, the orbs will get blown to outer space. Make sure you run out of the airlock or you’ll get sucked out as well.
Note 1: Ensure that the players are further apart. If the orb drops and rolls to the Operator, the buff will automatically get picked up and can cause a bit of confusion.
Note 2: If you’re assigned as a Scanner, it’s okay if you also end up with the Replicator buff. If you need to pass the Scanner buff to the other team, do that first. After that, go to the airlock suggested by the Operator to get your Replicator buff “cleansed” (aka. sucked to outer space).
Because there are clones getting killed by the ground team, another task for the Operator is to shoot the elevator’s panels. This will send the elevators back down. The players that are part of the ground team will kill their clone/s, pick up the Replicator buff/s, and use the elevator to go to the space area.
They’ll also get “cleansed” by the Operator via the airlocks. Afterward, ground team players will use the elevators to go back to the ground floor.
Transition phase
After downing four Atraks-1 clones and successfully getting rid of four Replicator buffs, you’ll have a short transition phase where you’re just killing adds and waiting for servitors. Make sure the ground team players have used the elevator to head down as well. Moreover, the airlocks will get reset so they can be used again for each successive phase.
If you’re the space team Scanner (which was my role during this encounter), the Scanner buff still appears in one of the augmentation devices. Make sure you’re on the lookout for this so you can have the buff for the next part.
Your team will lather, rinse, and repeat all the tasks to get the boss’ health low enough. Oh, and remember that the replicants’ wipe mechanic will always start in the space area before going to the ground area.
Last stand phase
When Atraks-1 is down to the last 25% of his health, all replicants/clones, eight in total, will start channeling their wipe mechanic.
All players on the ground floor need to head to outer space as well. As for whoever has the Scanner buff, they need to call out the correct clones (the glowing ones) so that they can be shot in order. If this is your role, I suggest you stay back and on top of the walkway (near the elevators). This gives you a vantage point to spot all the mobs that’ll be glowing.
Examples of callouts include:
- Back right, mid right, or front right (closest to the elevators).
- Back left, mid left, or front left (closest to the elevators).
- Back mid or front mid (the one closer to the elevators).
- Mid top (a clone that might be on the middle area’s platform).
Once you’re done, congratulate yourself because you’re one step closer to finishing Destiny 2: Beyond Light‘s Deep Stone Crypt raid. It’s time to head to The Descent and grab the second secret chest.