Minecraft Dungeons takes the ever-popular Minecraft for a spin with action role-playing game (ARPG) mechanics. Newcomers might feel lost, though genre vets would know what to expect. Still, there are a few quirks to take note of during your journey. Here’s our beginner’s guide to help you out.
Note: For more information, check out our Minecraft Dungeons guides and features hub.
Minecraft Dungeons: Beginner’s guide – 5 tips for new explorers
1. Progression by repetition: Difficulty, power levels, and loot drops
There are two difficulty modes to take note of while playing Minecraft Dungeons:
- Campaign difficulty pertains to Default, Adventure, and Apocalypse mode (with each mode having stronger enemies, better loot, and additional items and enchantments that are part of the pool). You’ve got Default mode available by, err, default, and the other two are unlocked once you defeat the Arch-Illager in the previous mode.
- Map difficulty, meanwhile, pertains to incremental and numbered increases within each map and mode going from I to VI (ie. starting the Cacti Canyon map on Default IV difficulty). Each incremental increase also ramps up the difficulty since there’s a power level (PL) requirement.
Your power level is the average of all the item pieces that you have equipped (one melee weapon, one ranged weapon, one armor piece, and three artifacts). If you’re well below the recommended PL for a map, then you can expect things to be very tough. Conversely, you won’t be able to go below a map difficulty’s threshold if you’re above its recommended PL. For instance, if you’ve got 20 PL, you can select difficulties with a recommended PL of 21 or higher. However, you won’t be able to select those with less than 20.
Of course, the higher the difficulty, the better the items you’d get. As such, you’ll want to crank up the difficulty to gain loot that can boost your levels. Remember, though, that your drops are still subject to RNG, so expect to be disappointed if you’re still getting low-level items.
Note: You’re given three lives for each map that you play. Dying will respawn your character in the same area with all artifacts off-cooldown. But, if you lose all your lives, it’s game over and you’ll need to restart the entire level.

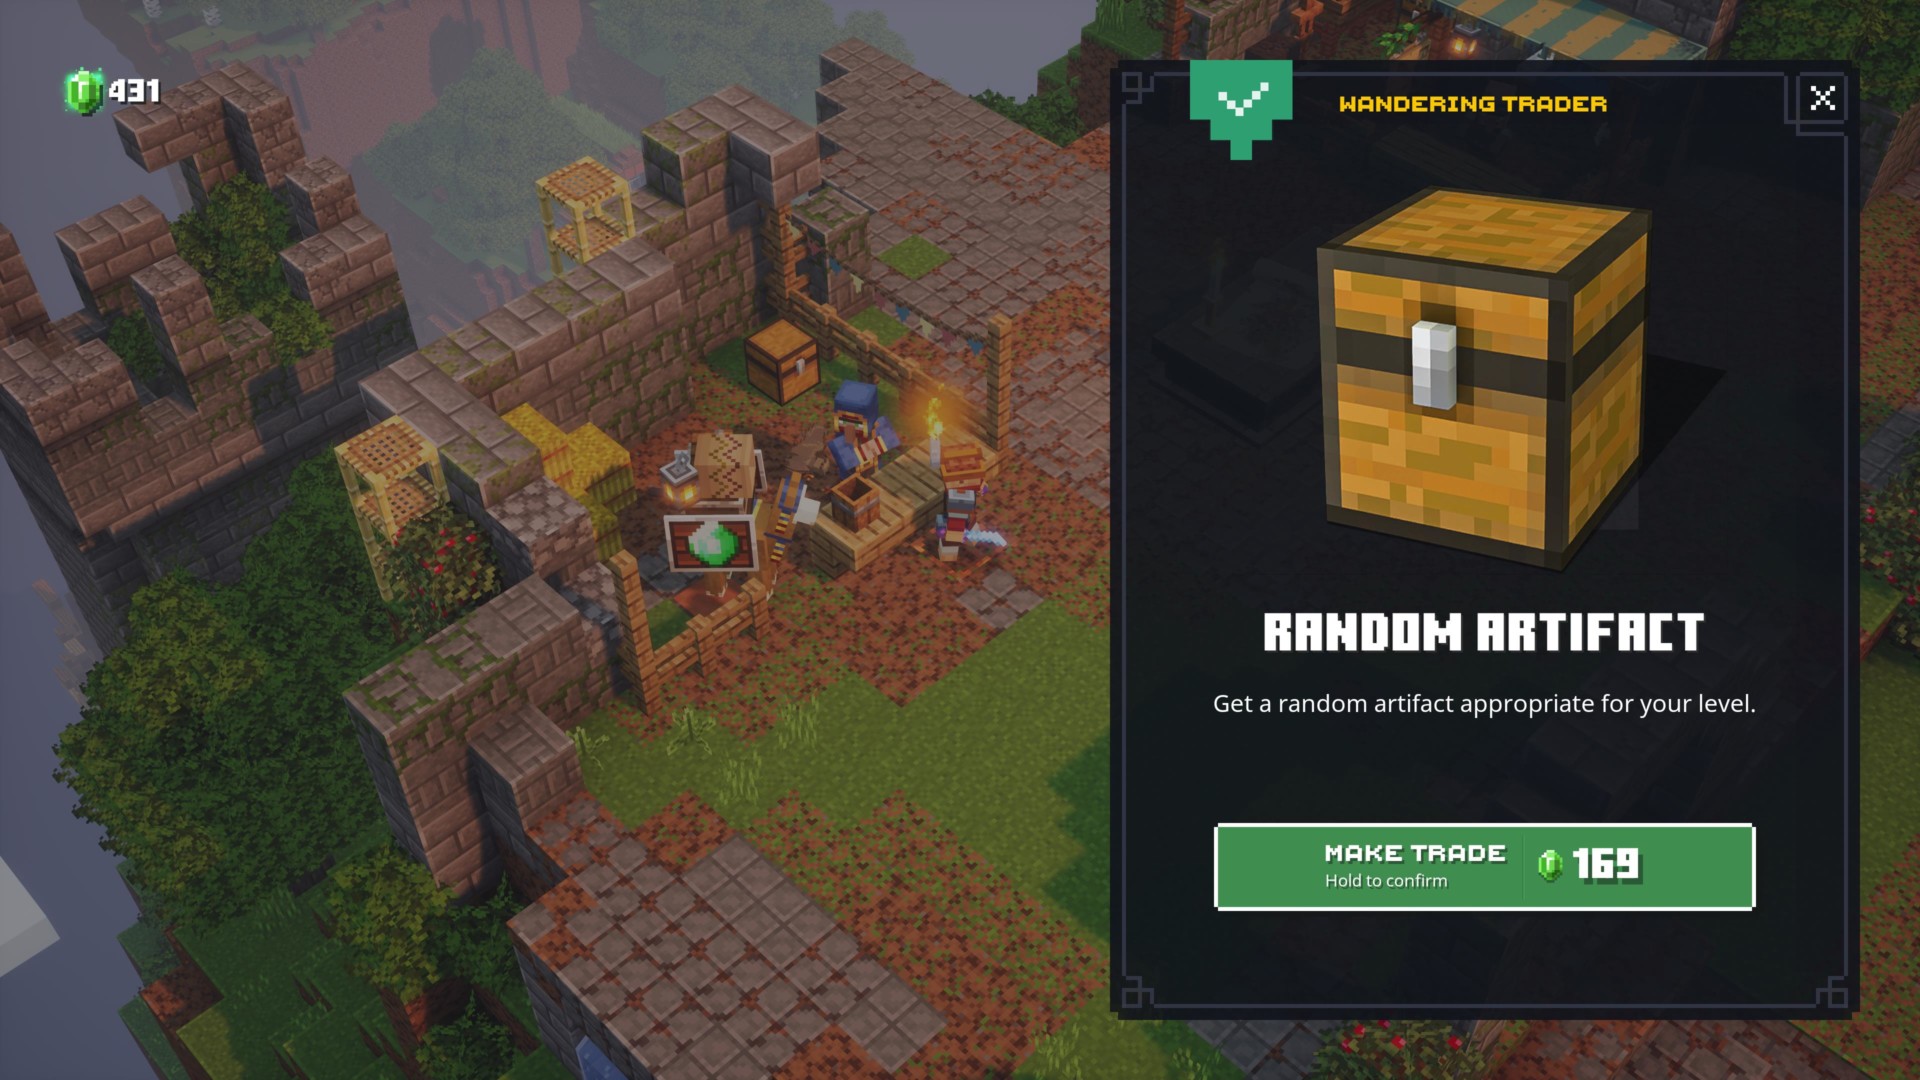
2. The Blacksmith and the Wandering Trader: Spending all your emeralds (gold)
The Blacksmith and Wandering Trader are NPCs that pop up in your town after a couple of missions on Default mode, and you’ll see early on what they bring to the table. These two characters will become your “gold sinks” in Minecraft Dungeons. Basically, they exist just so you could spend all the emeralds you’ve acquired to obtain new stuff.
The Blacksmith lets you spend your emeralds to obtain gear pieces (weapons and armor), whereas the Wandering Trader does the same for Artifacts. Again, RNG plays a huge role here, which means it’s highly possible to get low-level drops as well as unique items. It’s also possible to find items that are part of the loot pool for the campaign difficulty that you’re playing on.
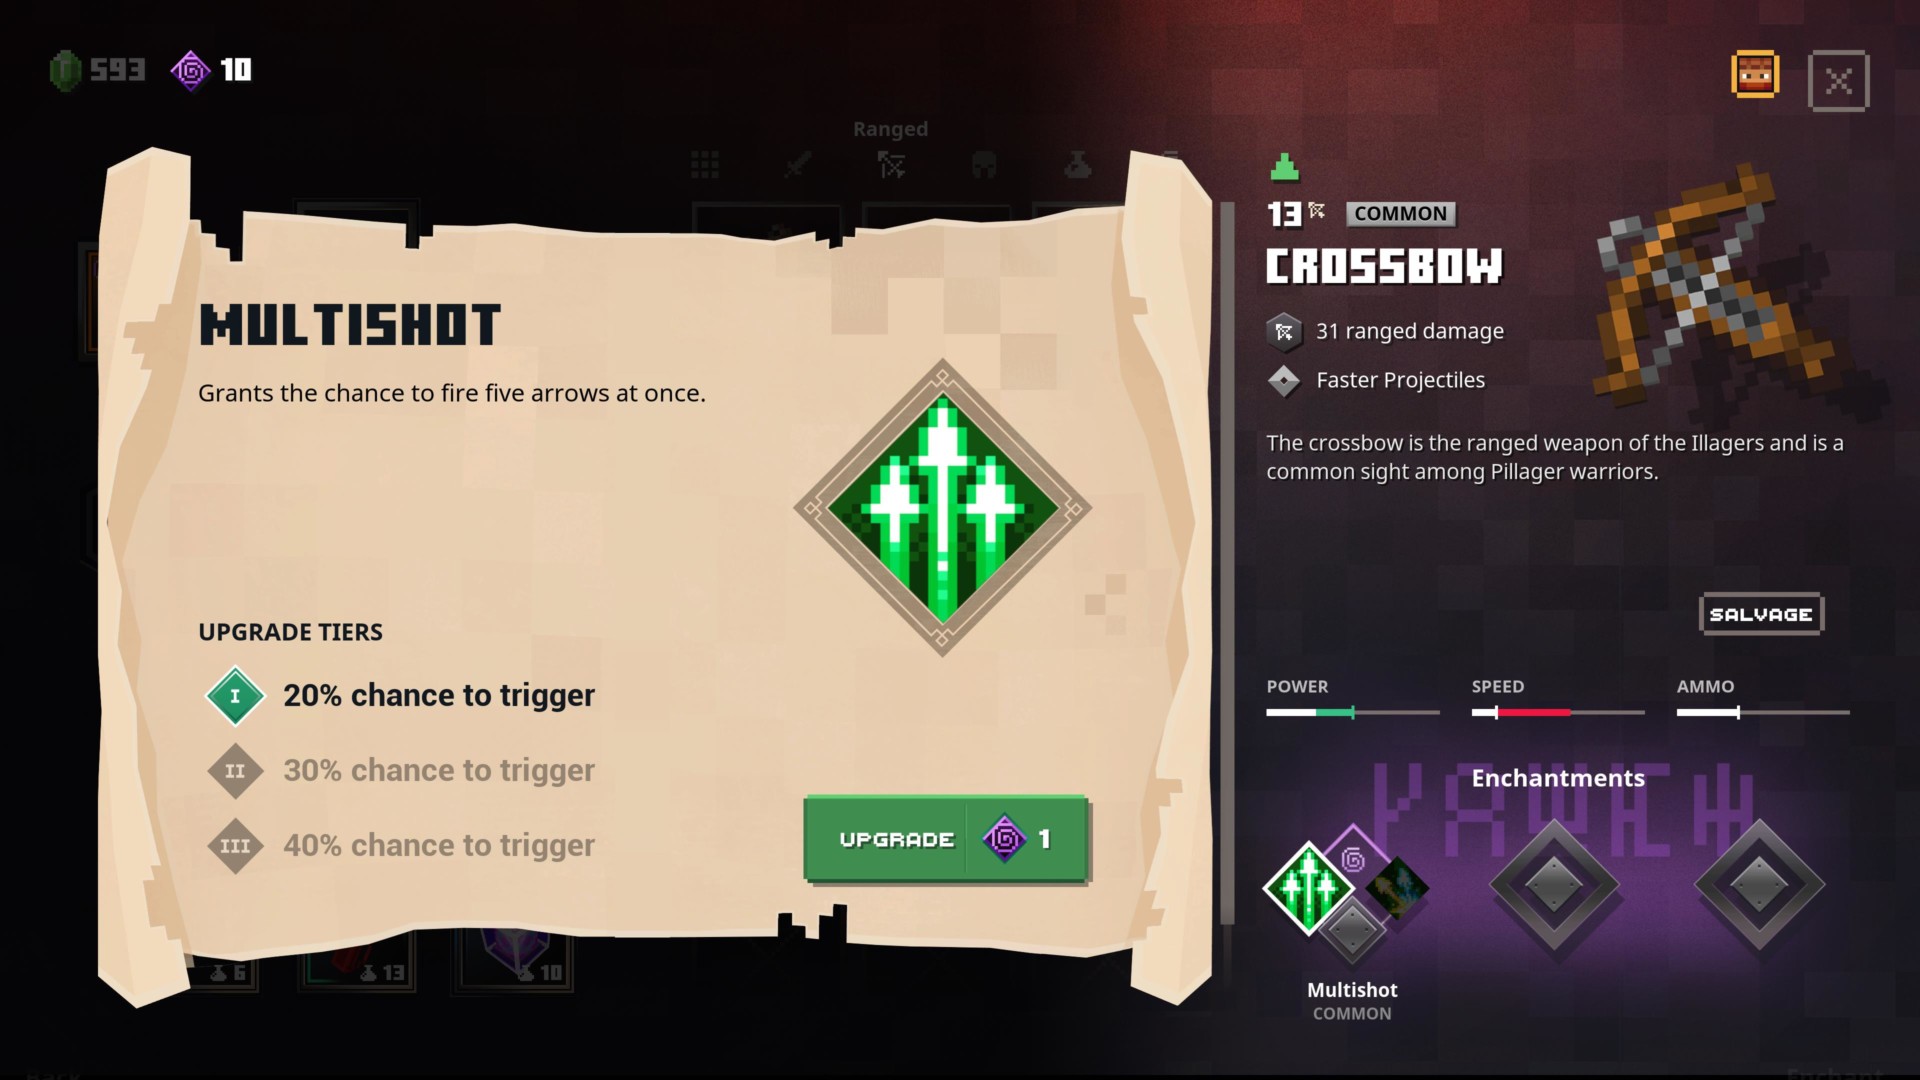
3. Enchantments: Super cool weapon and armor boosts
Enchantments are powerful buffs for your melee weapon, ranged weapon, and armor. Multiple types will be available for each item (and even the same item types may not have similar enchantments available). However, only one can active at any given time depending on how many clusters there are. In general, a higher-level or rarer item should have more enchantment clusters, though that’s not always the case, and, again, RNG plays a huge factor.
Enchantment points are obtained only after you level up, which means they’re a limited resource. Still, if you feel that an enchanted item is of no use to you already, you can safely salvage it to refund some emeralds and any enchantment points you’ve spent.
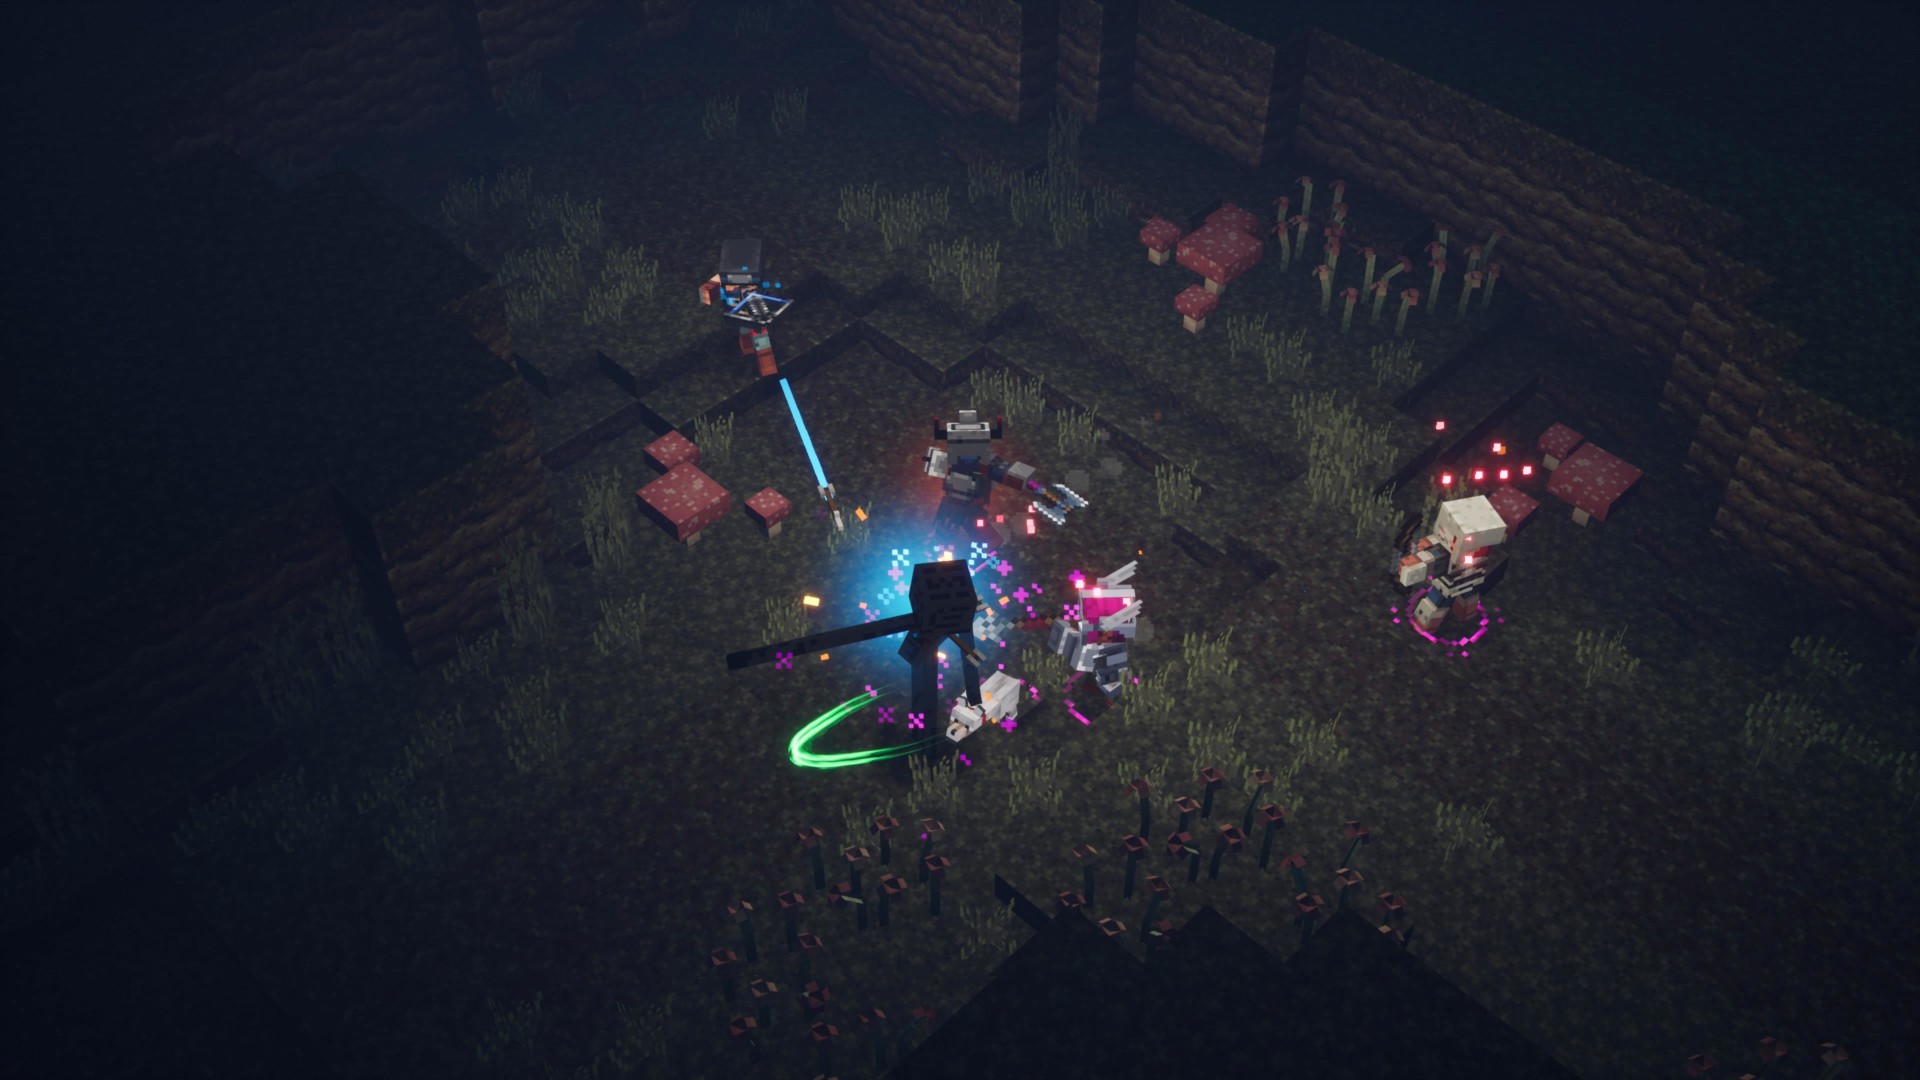
Moving forward, let’s talk about how enchantments function during gameplay. First off, you’ll likely get your butt handed to you if you focus too much on melee. Very few items in Minecraft Dungeons will mitigate damage, and you won’t survive long when there are hordes of the Arch-Illager’s minions surrounding you. However, if you focus primarily on stun (crowd control/CC) enchantments, you may stand a chance. One of the unique weapons I found early on, the Highland Axe automatically stunned all foes I hit. Meanwhile, a unique armor piece that dropped had the “Snowball” enchantment which also stunned enemies further away, along with the “Potion Barrier” perk which mitigates a ton of damage after using a potion.
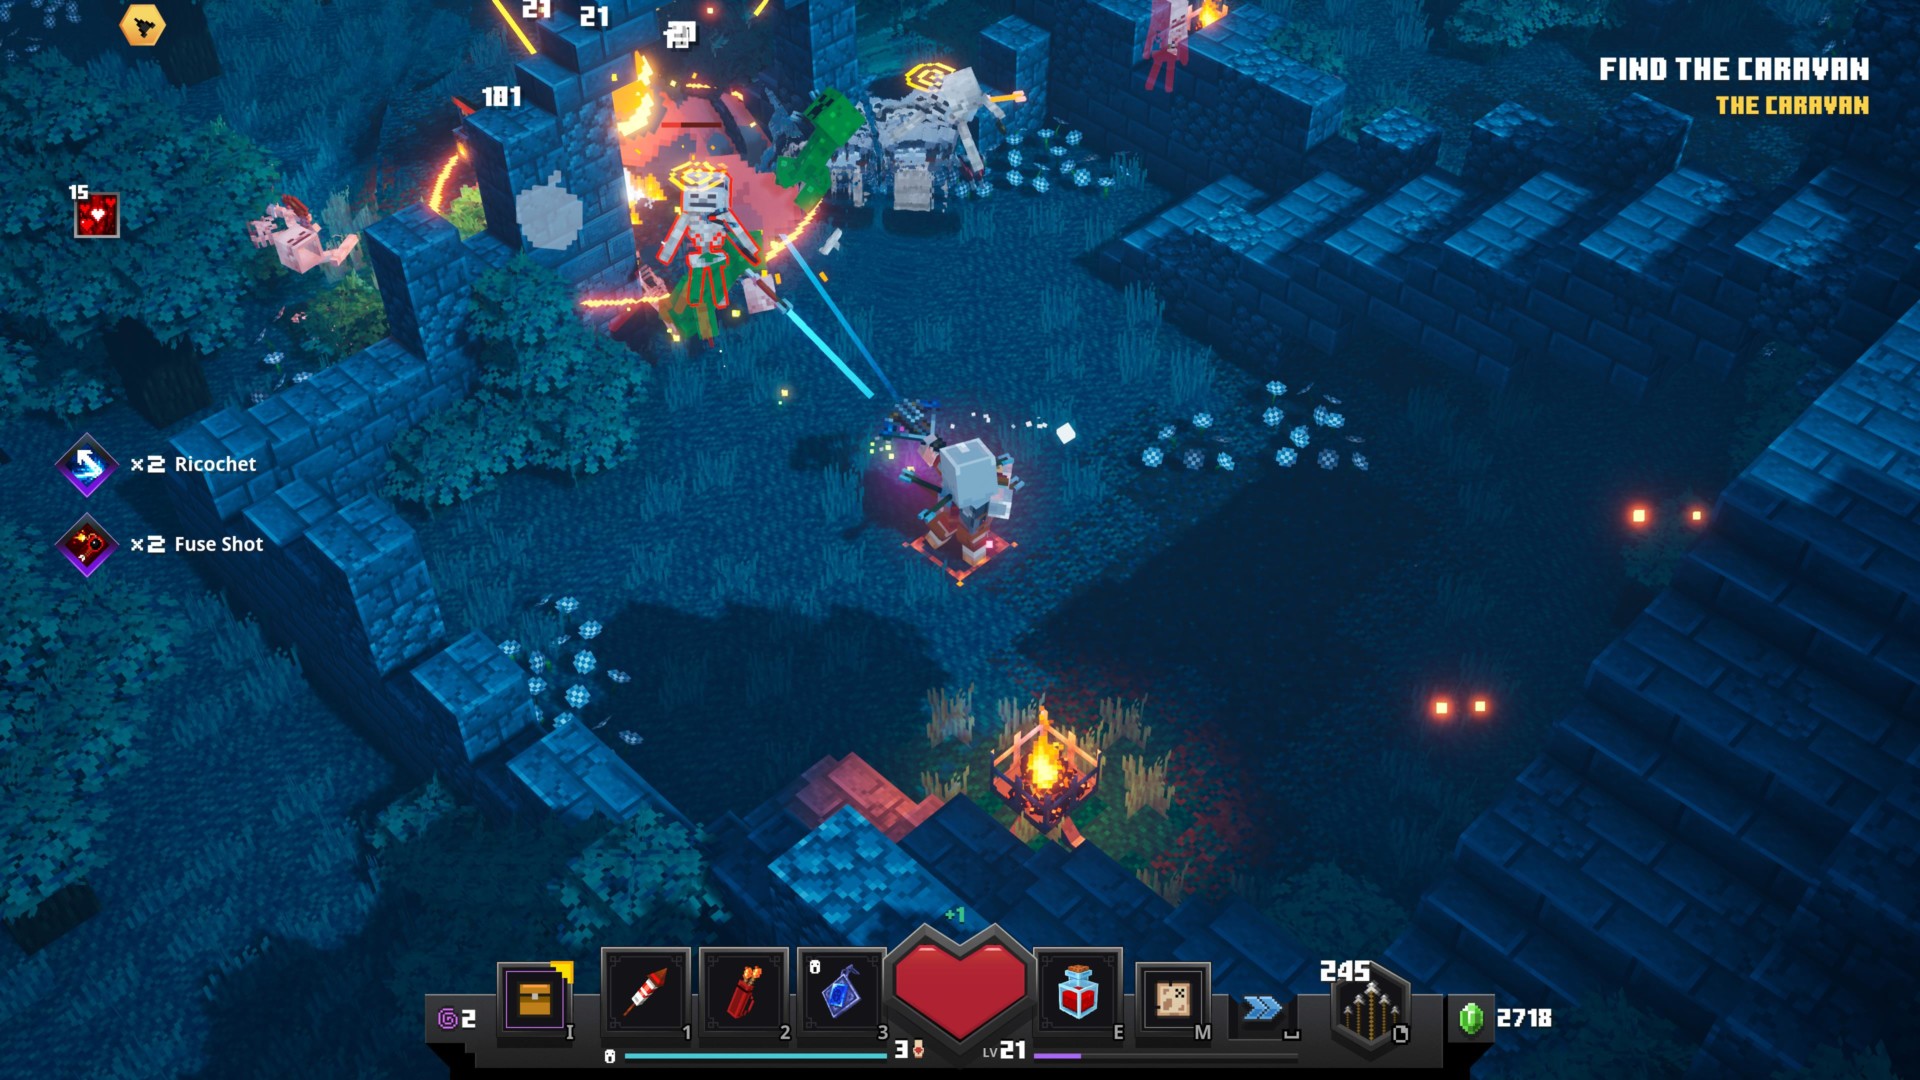
Additionally, you’ll get your butt handed to you (twice) if you’re not careful about ranged opponents. Outside of the “Deflect” enchantment, you don’t have the means of preventing yourself from turning into a pincushion. The goal, therefore, is to eliminate enemies from further away whenever possible. The rapid crossbow and scatter bow can do this with ease. If you find those with “Fuse Shot” and “Multishot,” then you’ll chew through hordes in no time.
Note: For more information about weapons, armors, and enchantments, head over to our Minecraft Dungeons items guide.
4. Artifacts: Your spells and skills
Eschewing the traditional “class-based” system of other ARPGs, Minecraft Dungeons, instead, uses a dynamic system where your equipped items essentially become your “build.” It’s also very simplistic and shallow at times, though there are a few caveats to take note of. If you’ve got your weapons and armor ready, then the next step is to figure out the artifacts you want to use.
Artifacts in Minecraft Dungeons function as your spells and skills. One might pull enemies towards you and slow them down, while another will summon a llama to aid you during encounters. There are, of course, some useful combinations while leveling:
- Fireworks Arrow – This is likely the first artifact you’ll obtain while you’re playing, and if you find high-PL variations, it remains a worthwhile pick for your artifact slots. It fires a single arrow that explodes for massive damage, making it great for multi-target nuking.
- Flaming Quiver – Another artifact that provides you with more ranged capabilities, the Flaming Quiver has several arrows that apply the burning status effect on targets. If you’re using a scatter bow, the triple shot means having three flaming arrows at the same time.
- Soul Healer – Your potion might heal you a lot, but it’s also got a lengthy cooldown. The Soul Healer artifact can be used during those critical moments when you desperately need a heal. It uses the souls of defeated enemies (more souls/hostiles defeated means stronger heals), so you’ll have a nifty way of healing up as long as you’re trouncing mobs.
Note: For more information about your, ahem, “spells” and “skills,” head over to our Minecraft Dungeons artifacts guide.

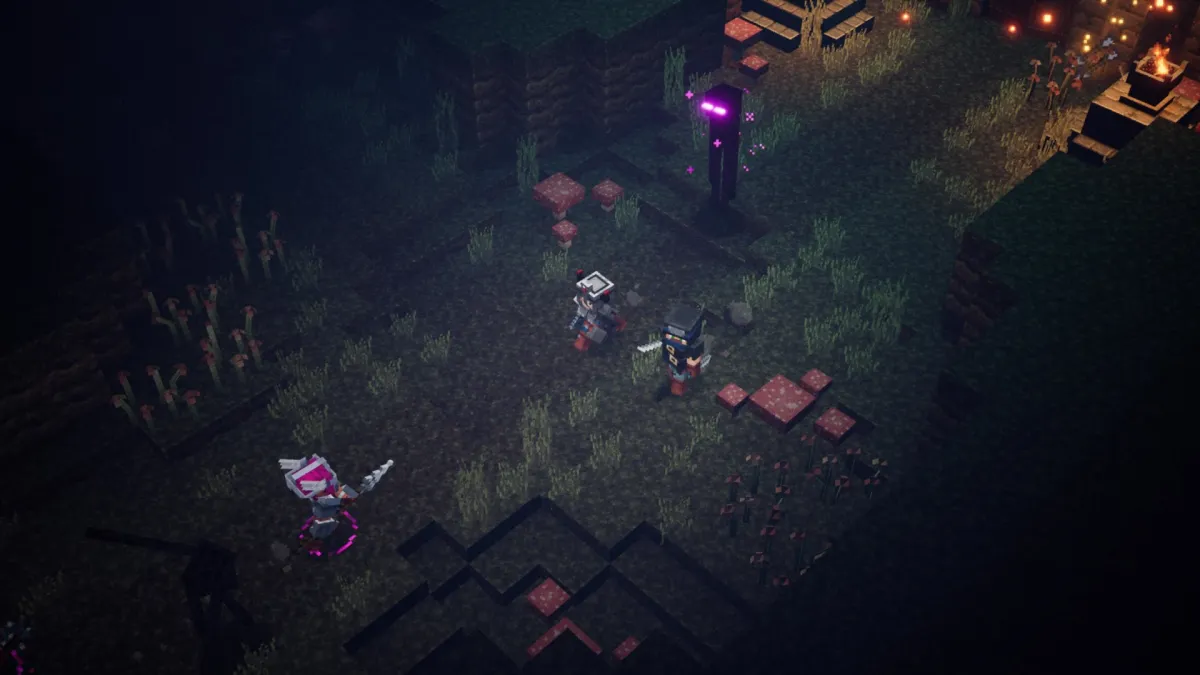
5. Elites: The Enderman, Redstone Golem, and Evoker
You’ll encounter these elite enemies as you go through Minecraft Dungeons‘ levels. Sometimes, you’ll need to figure out when to hold your ground and when to kite them. For instance, the Enderman has very predictable attacks that can be easily avoided. It teleports and rushes up to swipe you, but you can fire a shot and dodge roll to get to safety. If you’ve got an armor piece with the “Potion Barrier” enchantment, you can pop it and wail away on the enemy before it teleports again.
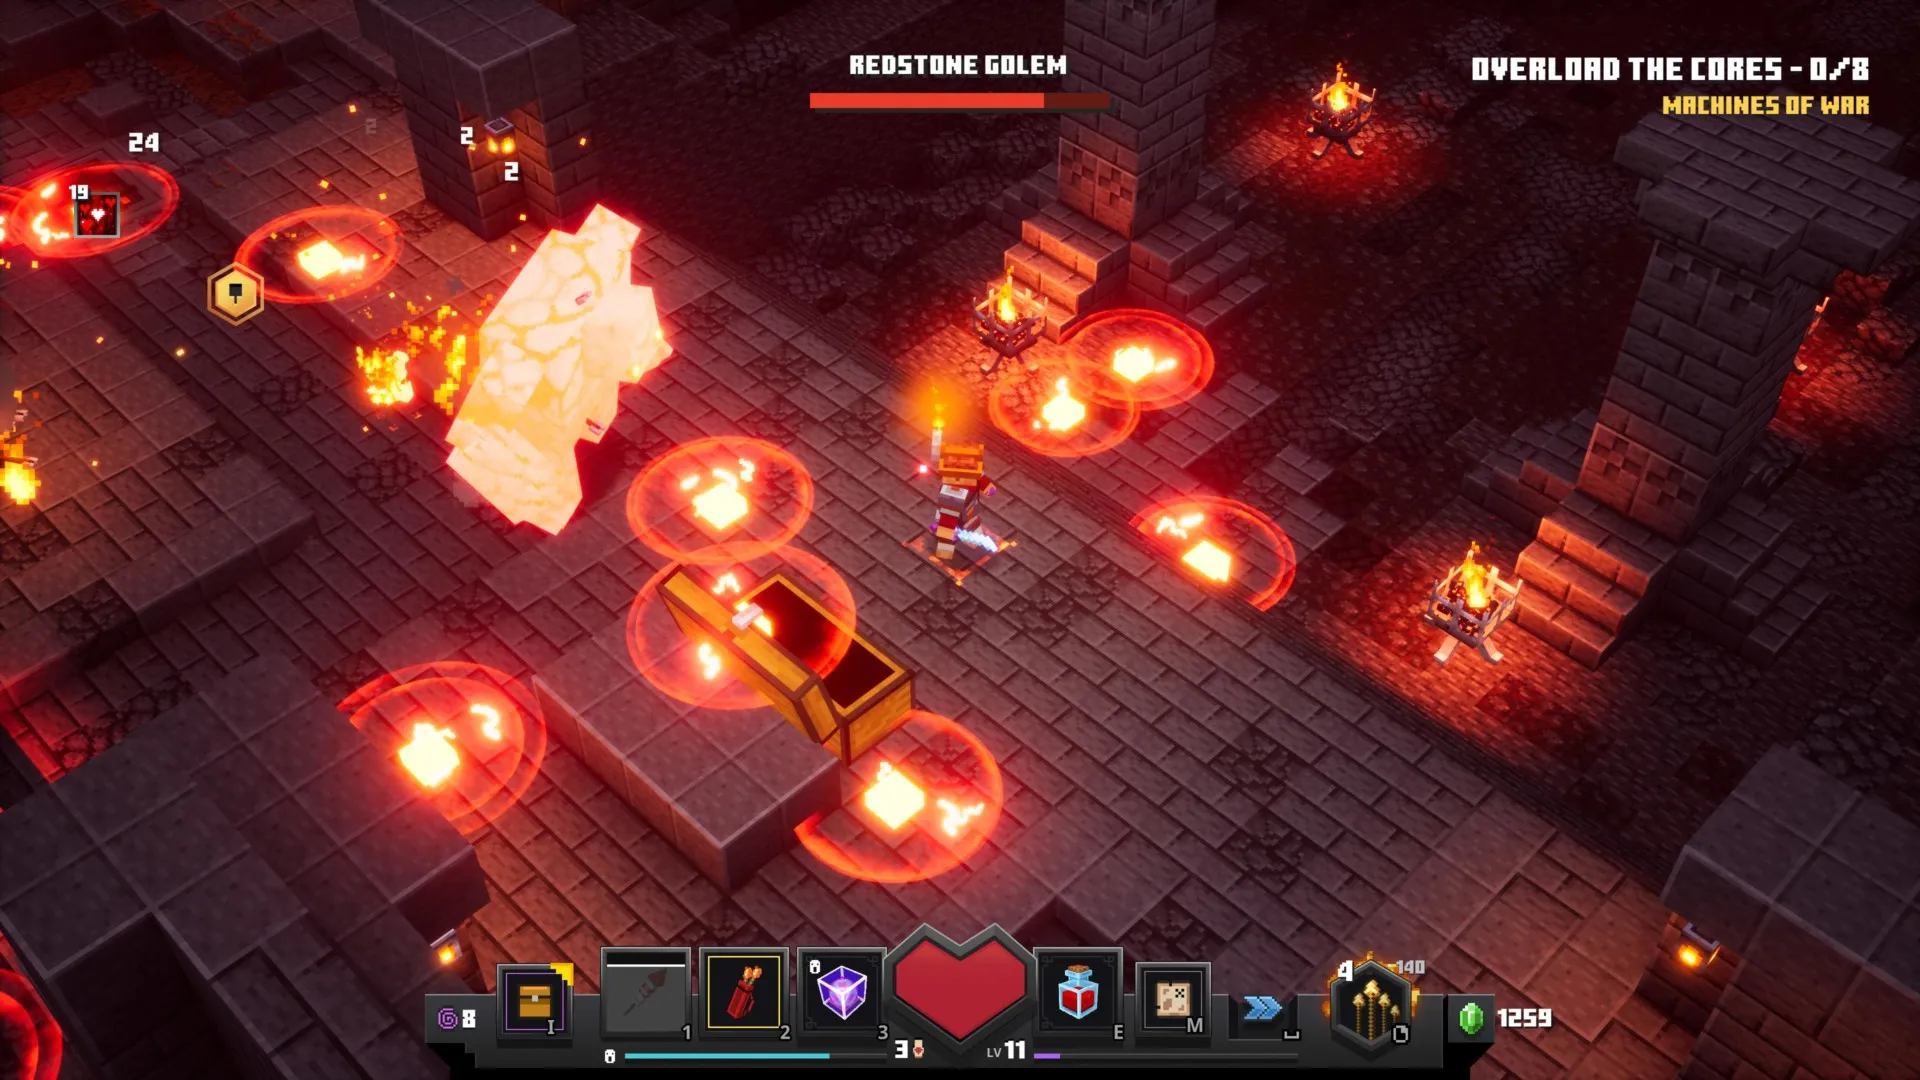
As for the Redstone Golem, this slow-moving brute can also be easily kited and burst down thanks to level design. If you moved behind a pillar, the Redstone Golem can get stuck while trying to reach you, and, if you’re using a scatter bow, firing a shot at close range will have all three arrows hit this stony beast. Once it slams on the ground to cast fire pits, you can get up close and whack it until it’s downed.
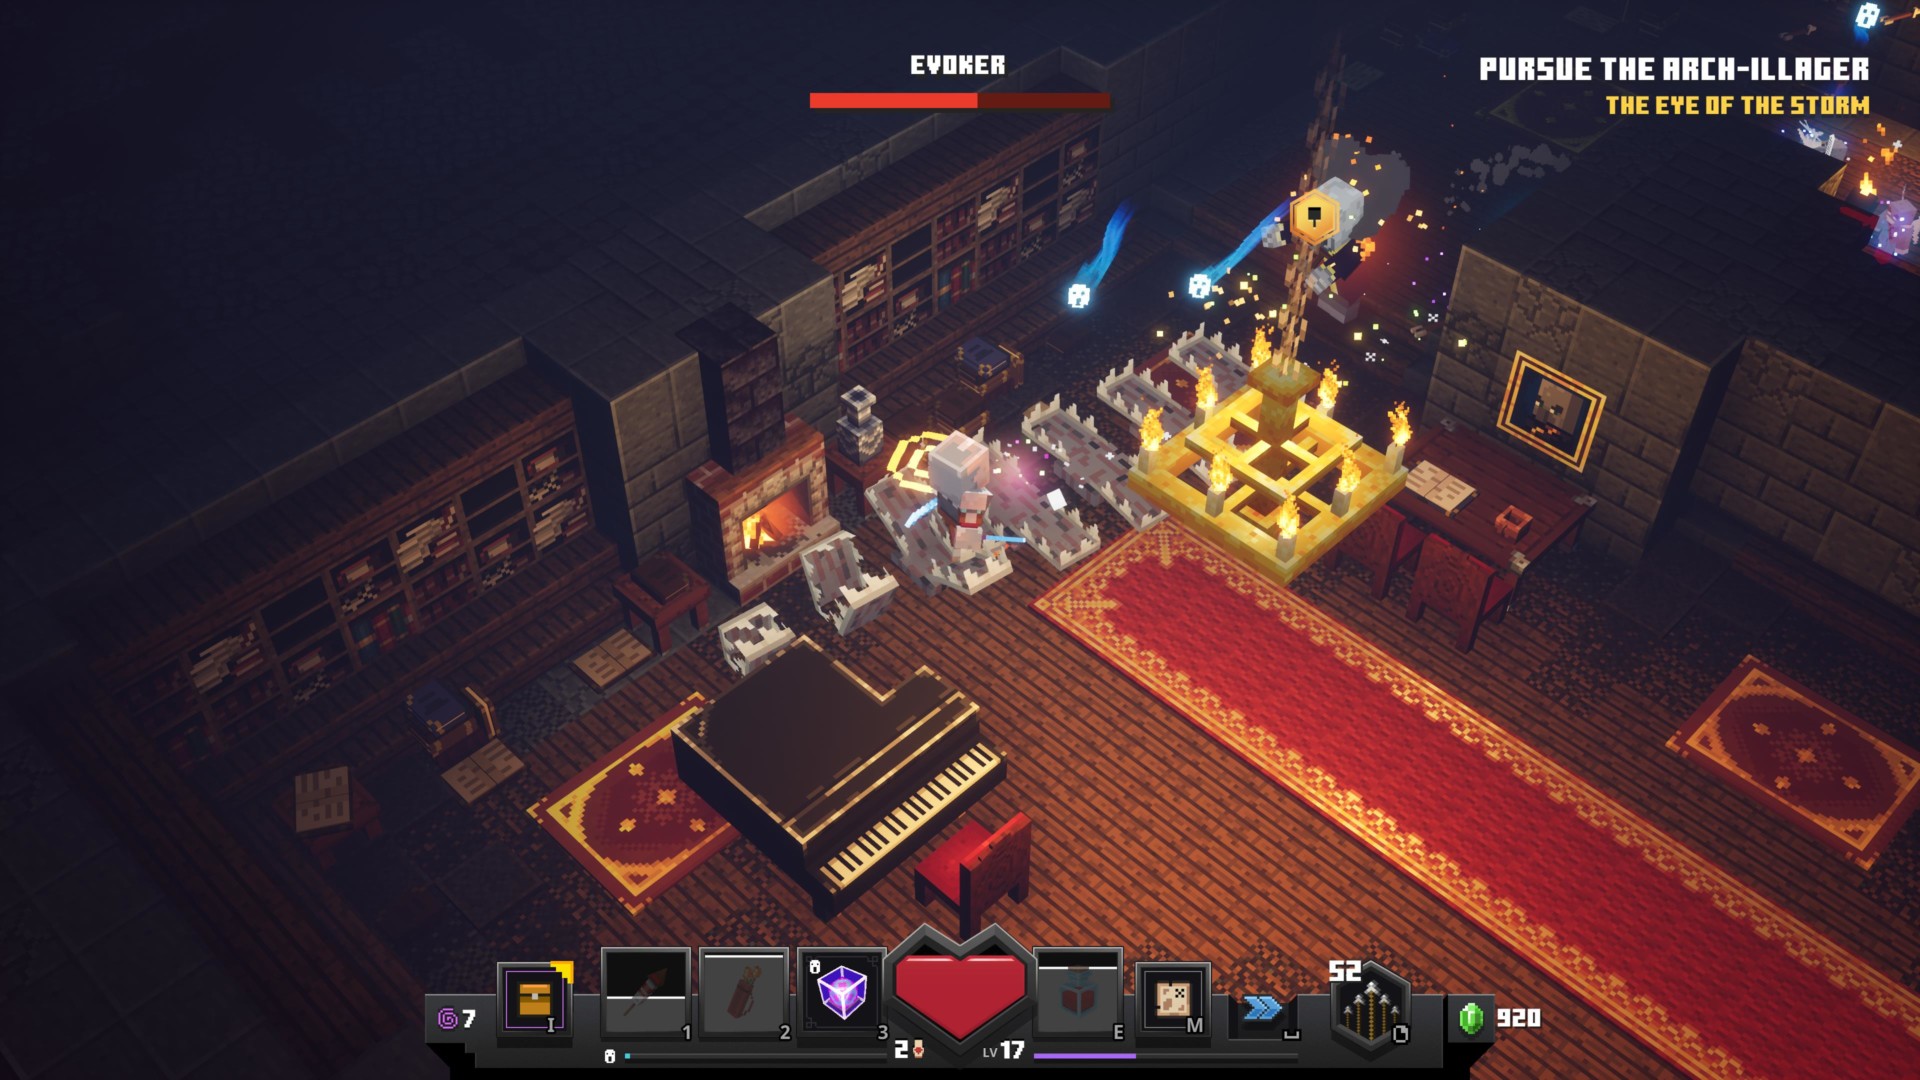
The Evoker, meanwhile, is probably the most annoying elite you’ll find in the game. This caster summons tiny ghost angels that’ll chew through your health if you’re not careful. It also spawns spikes in a straight line or a circle, and you only have half a second to avoid them. At best, take it out from a distance with your ranged weapons or artifacts. Alternatively, a potion (plus an armor piece with the “Potion Barrier” effect) allows you to get up close and personal.
Minecraft Dungeons is available via the Microsoft Windows Store or Microsoft’s Xbox Game Pass for PC. For more information, check out our guides and features hub.