Modern Warfare Zombies Act 4 features only one mission and it’s called Bad Signal. Much like the Story Missions in Tier 2 and Tier 3, Bad Signal is extremely challenging, especially solo.
Being the tryhard that I am, I attempted to complete the Bad Signal mission solo which I don’t recommend. Do this mission with a squad because it’s tough. I had three self-revives, Pack-a-Punched guns, and Jugger-Nog, and I died at the last Seal (which was extremely painful). Also, I highly recommend getting at least one gun to Pack-a-Punch level 2 to clear out the level two zombies within the Anomaly with ease.
How to investigate the Anomaly in Modern Warfare Zombies

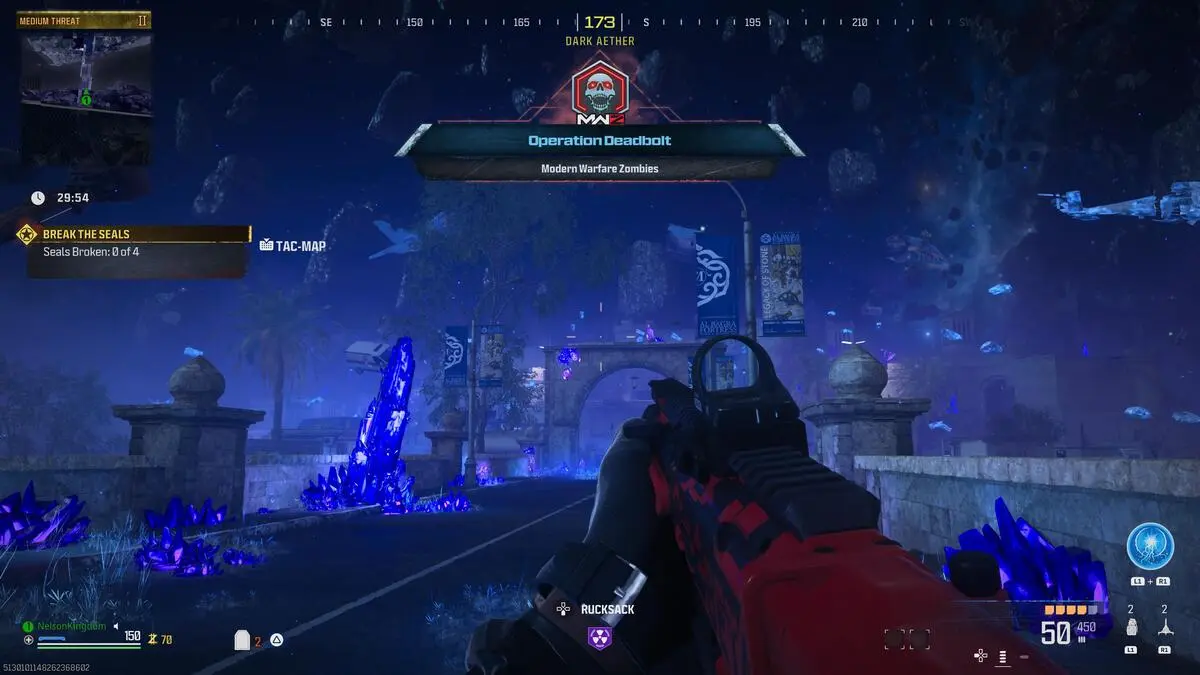
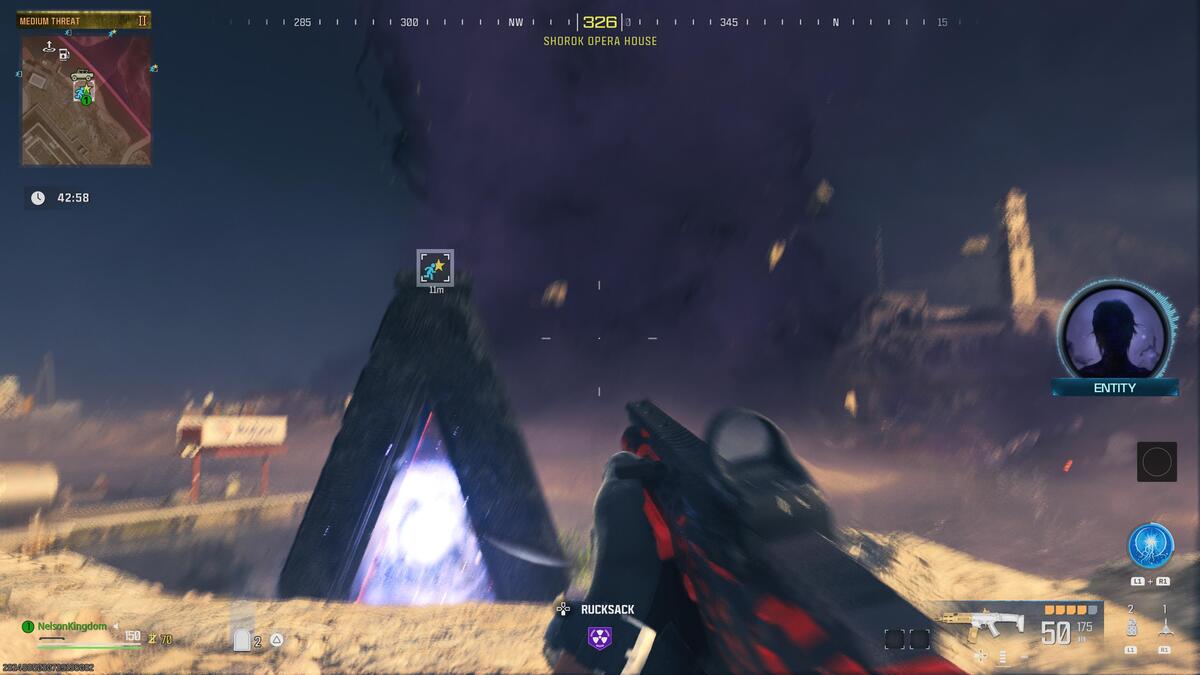
After equipping the Bad Signal mission (which anyone can do regardless of the Tier level they’re currently at), the first thing you need to do is investigate the Anomaly. If you’ve played the Extraction and Shepherd mission, you’ll know what to do here — wait a few seconds and you’ll see a Bad Signal exfil point show up on your Tac-Map. Use the image above to help you find it.
Related: Use this chart to get all Schematics in Modern Warfare 3 Zombies
If you’re ready to face hordes of level two zombies and bosses, then head over to the Anomaly. You’ll see a big swirling purple vortex which, to my knowledge, doesn’t do much. What you need to do now is interact with the triangle gate.
You’ll see a timer on the left side of the screen asking everyone to vote. To vote, all you need to do is open your Tac-Map and hold down triangle (if you’re on PlayStation 5, or whatever the button prompt is for you); you’ll see the prompt on the top right of the Tac-Map.
How to Break the four Seals in Modern Warfare Zombies
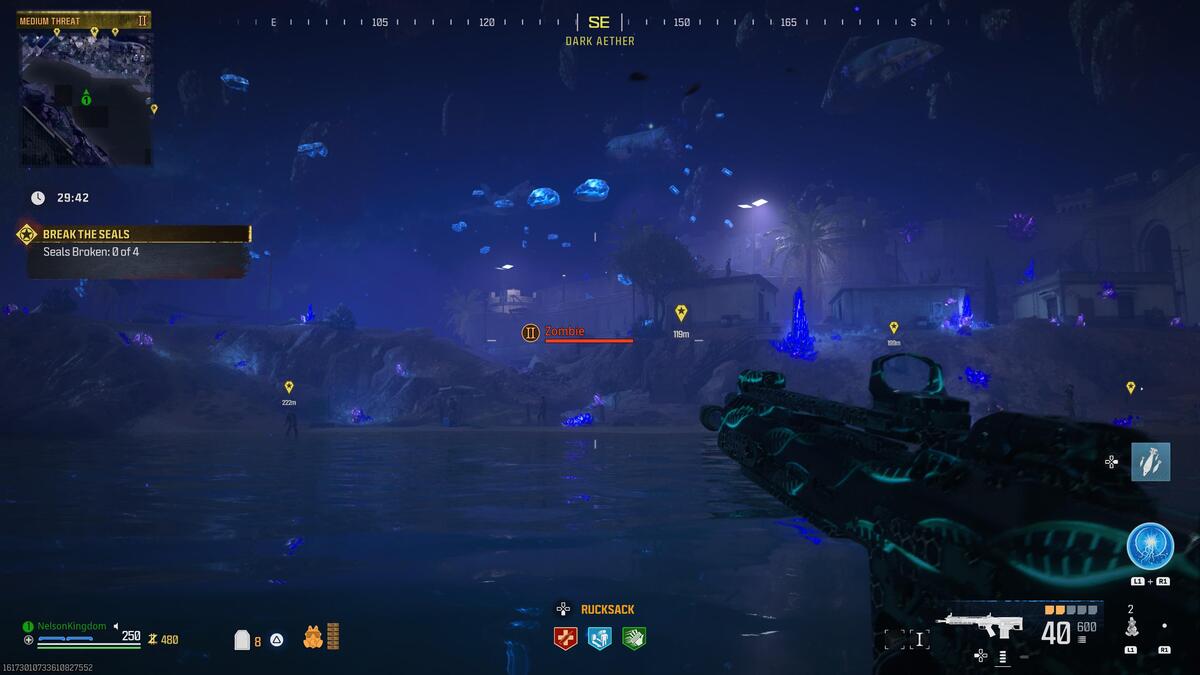
After teleporting into the Anomaly, you need to break four Seals. They are spread out across the map and you’ll see their locations pop up in your HUD. I recommend starting on the right side and swimming over to it, ensuring that you’ll run into the least amount of zombies.
Once you see the Seal, you need to approach it and interact with it (which takes way too long) to start the process. You’ll see a blue ring around the Seal. Your goal now is to defeat zombies within the blue circle.
To do this, train them together, turn around, and shoot. I used Monkey Bombs and the Energy Mine to great effect in the ring. I also used a Mortal Strike which worked well. Use whatever you’ve got, just watch your health because tons of zombies, hellhounds, Disciples, Manglers, and Mimics will rush you — it’s kinda insane.
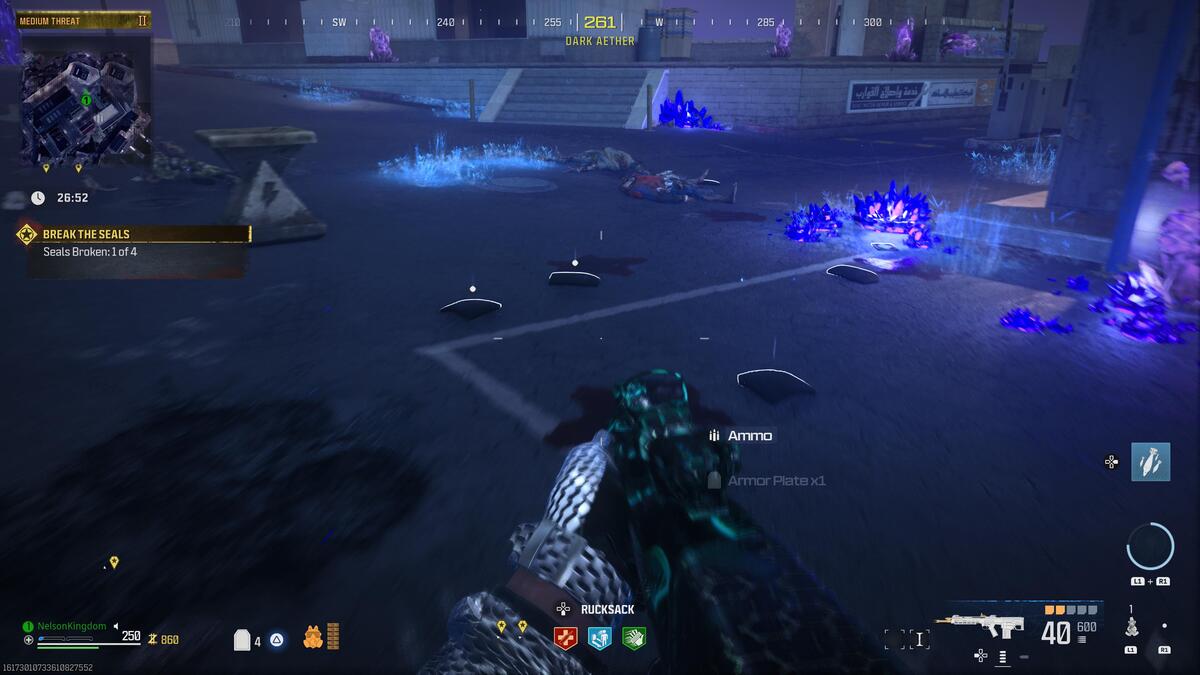
Once you have enough zombie kills, the Seal will explode and destroy all the surrounding zombies giving you a brief moment of respite. Use this opportunity to replenish your shields and ammo as there will be a lot on the ground. Once you’re ready, head out to the next Seal and do this process three more times.
How to leave the Dark Aether in Modern Warfare Zombies
Like I said, I died at the last Seal which was very frustrating, but I watched MrDalekJD complete this mission and after you break the Seals, you need to defeat a huge worm boss named Gorm’gant. This boss is hard to defeat, and you do it by focusing on the purple spots on its sides. However, if you have Insta-Kill, you can shoot the worm once and defeat it.
After defeating Gorm’gant, make sure to grab the Locked Diary in the Reward Rift, snag any other rewards on the ground, and get out of there. You’ll finish the Modern Warfare Zombies Bad Signal mission and be rewarded with a cinematic, the So Many Teeth Charm, and 10,000 XP.
Other Modern Warfare Zombies articles