The Whisper is a challenging quest, but it’s much harder if you’re hunting for the Oracles. Some are so well hidden that it could take hours to find them. Fear not, Guardian; here are all the Oracle Locations in The Whisper Exotic Quest in Destiny 2.
How to find every Oracle in The Whisper in Destiny 2
Oracles seem to be time-gated, and at the time of writing, only two are up for grabs. That said, I can show you where they all spawn, as the targeting reticule still goes red when you aim at where they are supposed to be.
It’s also worth mentioning that if you’re hunting for Oracles in a group, each player in the Fireteam must shoot it at least once for it to count.
Here’s every Oracle spawn, and I’ll update this guide if Bungie throws a curveball for the later ones.
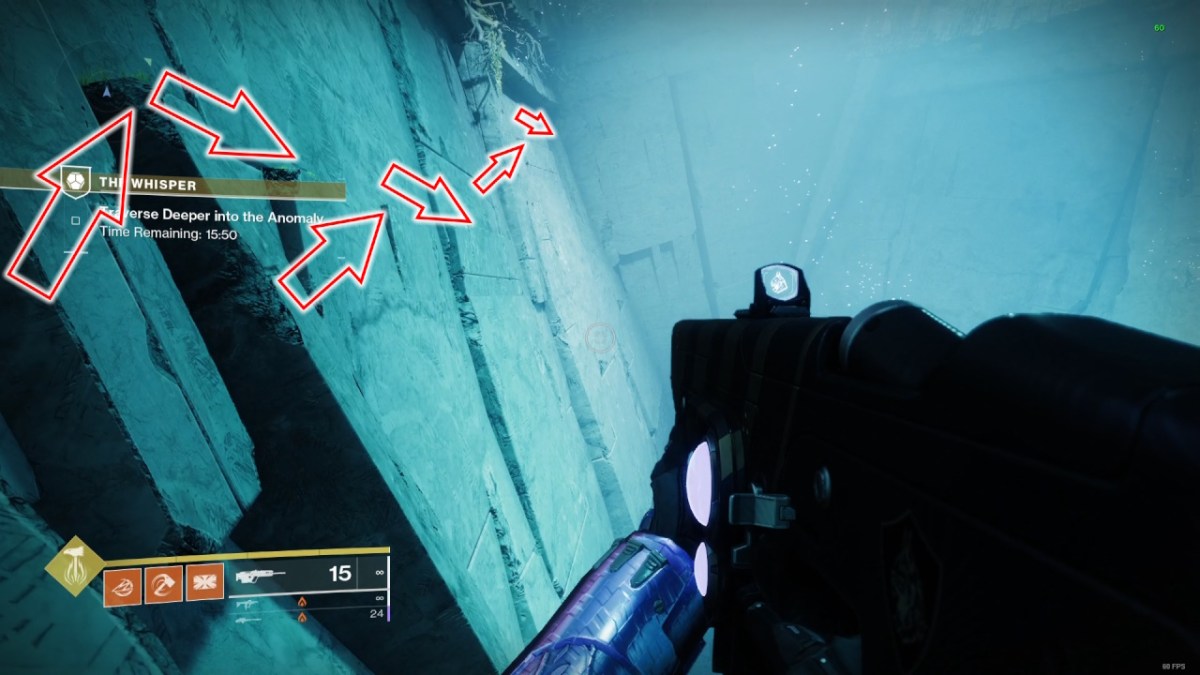
#1 Underground Entrance
The first Oracle is right by the start of the mission after you’ve fallen down the hole protected by the Taken Blight. Instead of jumping ahead as normal, head left as indicated in the picture above.
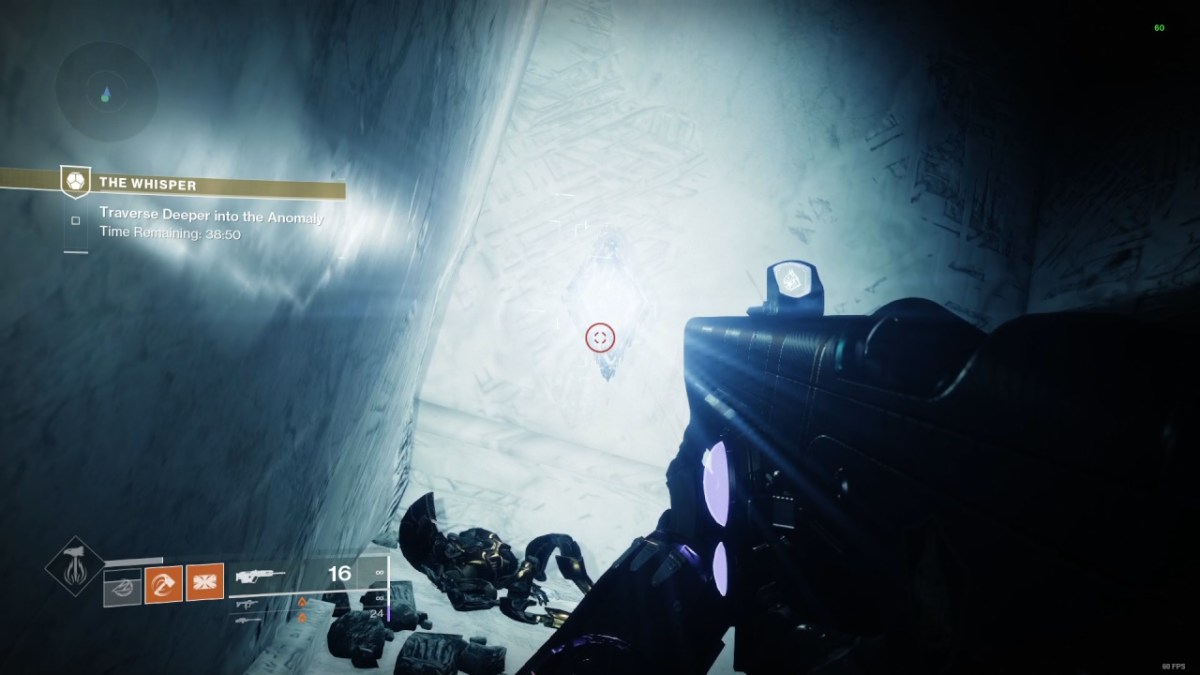
Walk to the end of the ledge and turn left again, and you’ll find the Oracle in the corner.
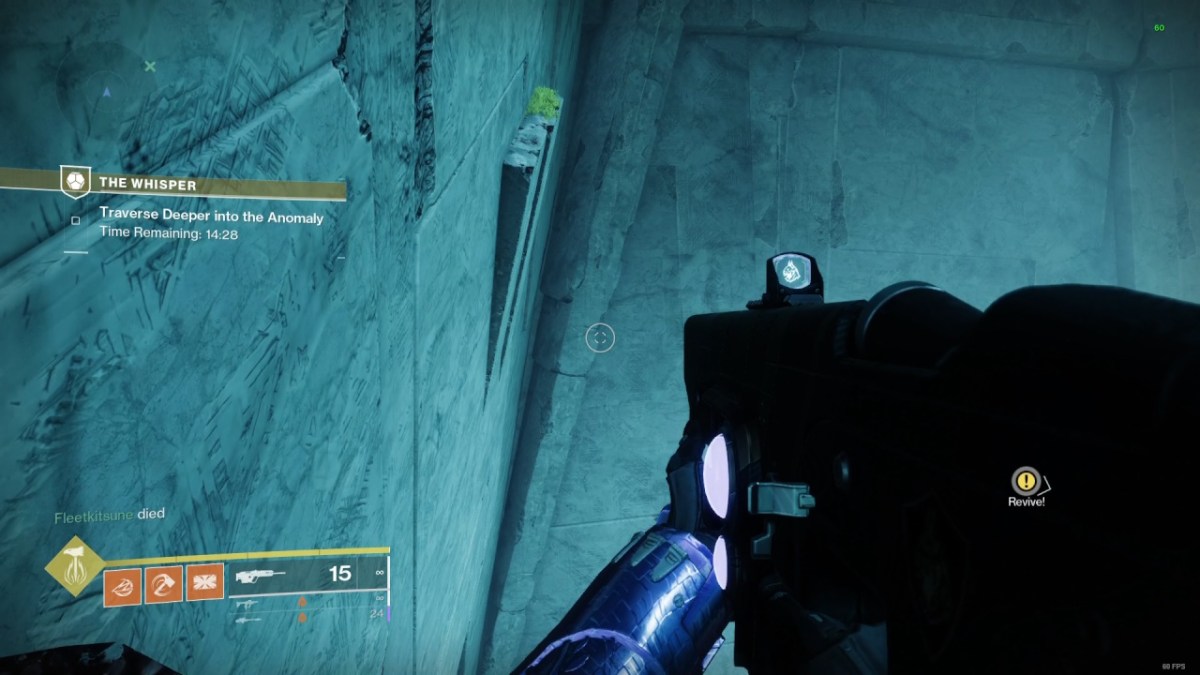
#2 By the moving platform
You’ll find the next Oracle just after the moving platform, which slowly raises and lowers in the following area.
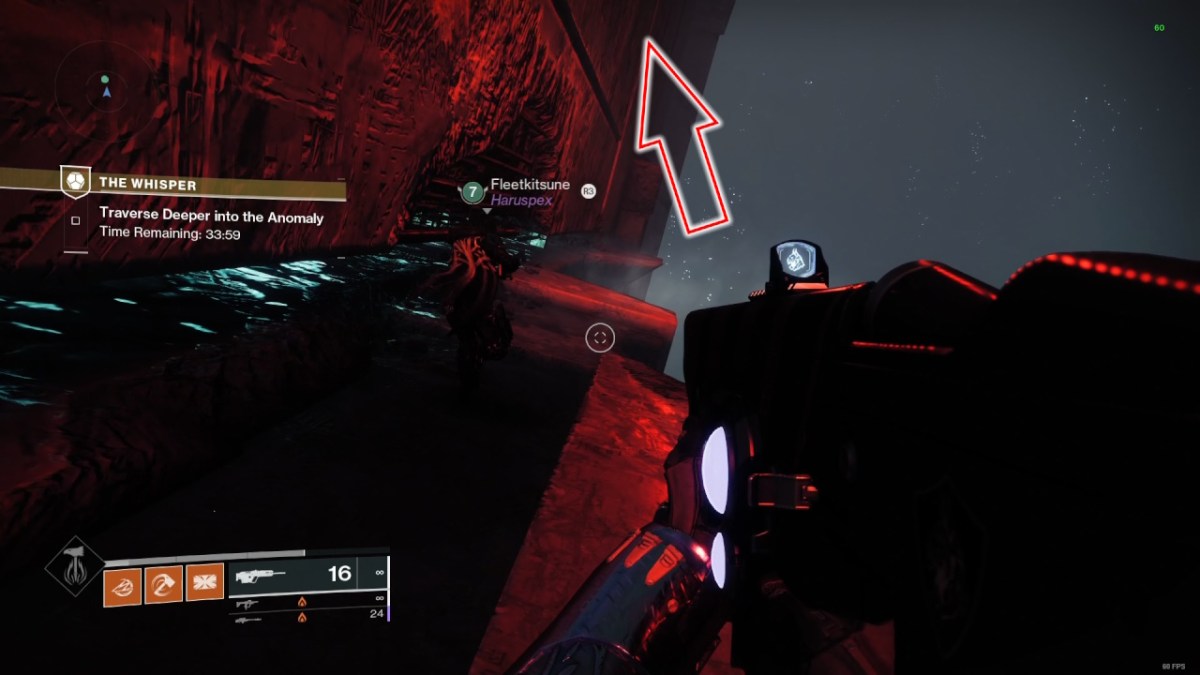
Walk past the door you’d usually take to exit the area. You’ll find a small hole in the wall by the arrow in the picture above.

The hole is hard to see, but the Oracle lights it up nicely.
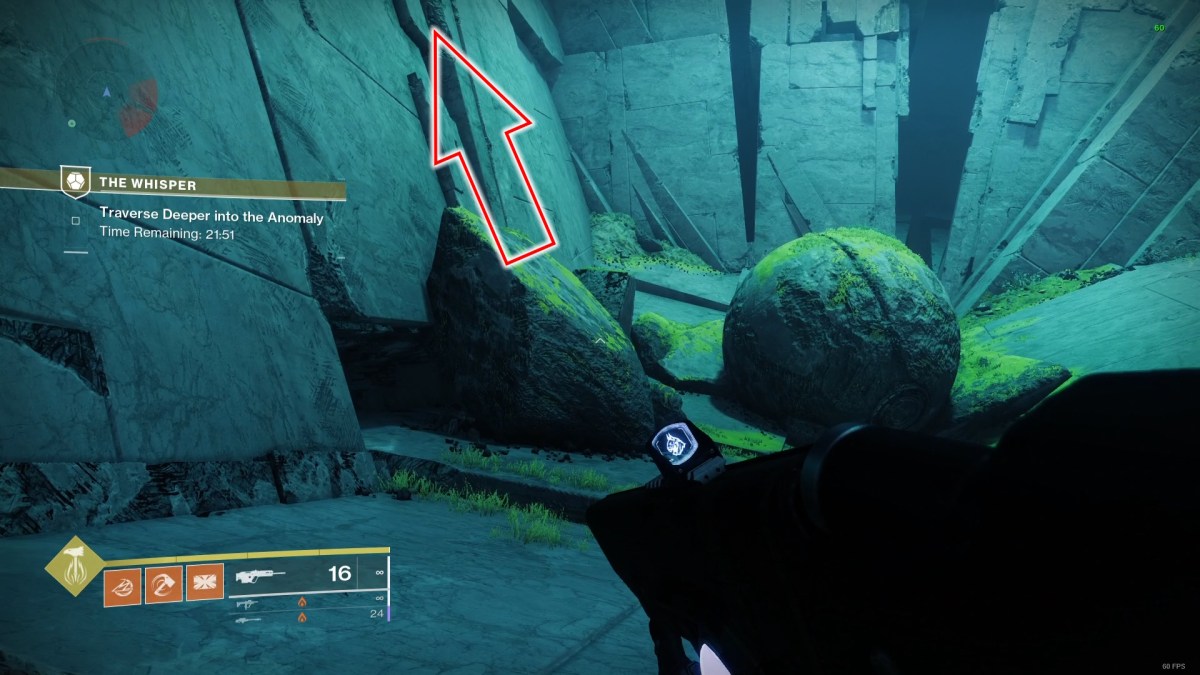
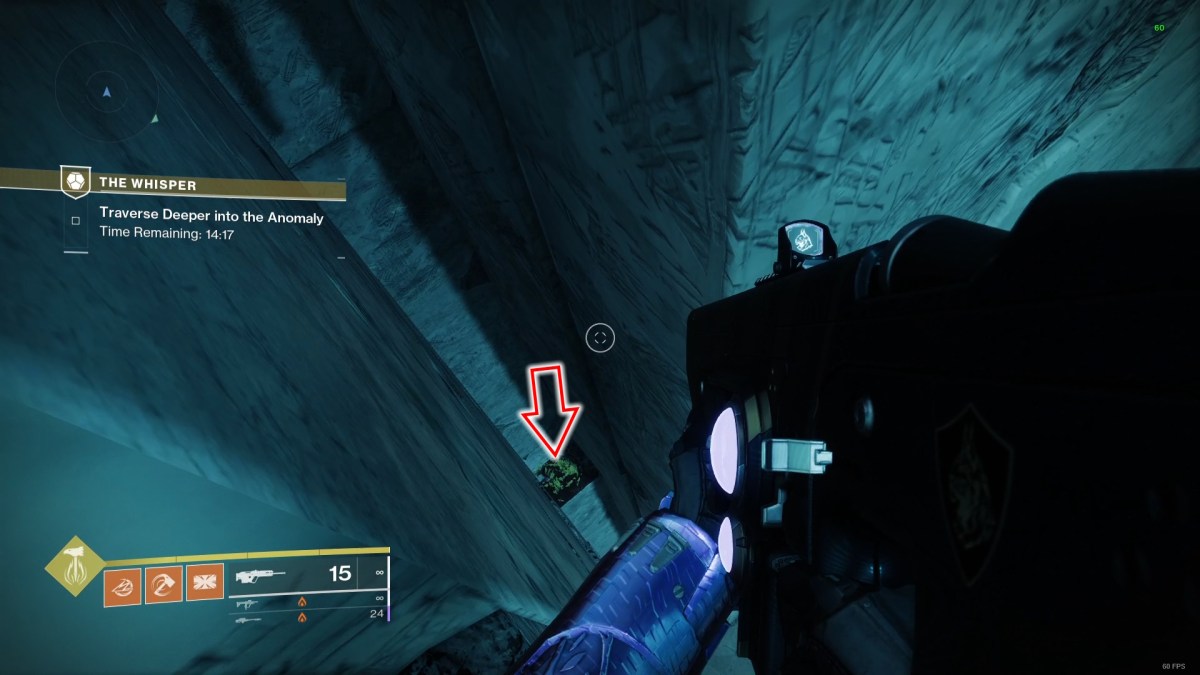
#3 After the launching jumps

You’ll find the next Oracle after you’ve cleared the ledges with the launchers that push you off. You usually jump to the door in the picture above, but if you jump right around the corner instead, you’ll find the Oracle.
This one is unobtainable at the time of writing, although it still affects your weapon crosshairs.
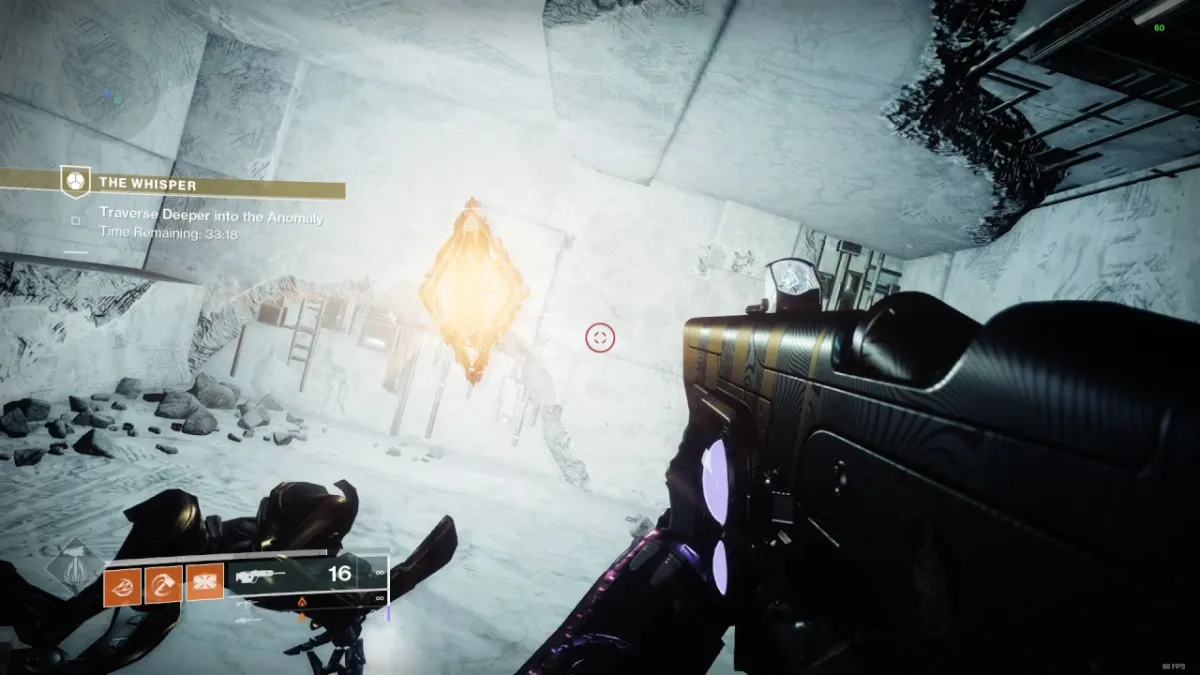
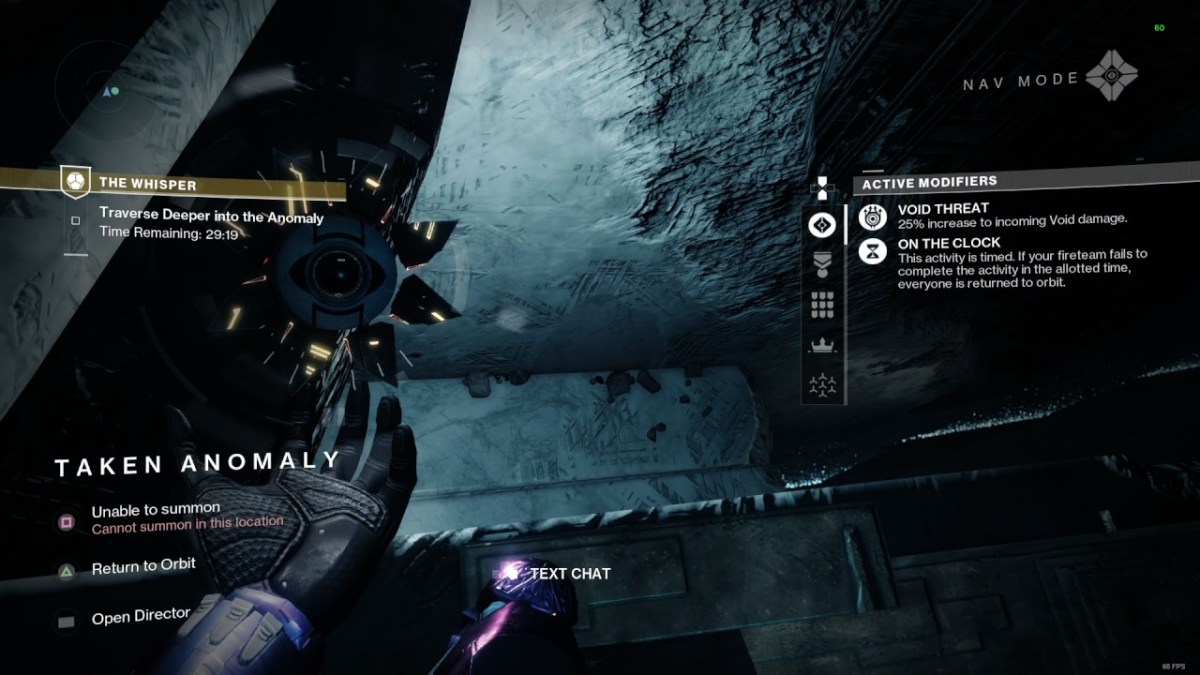
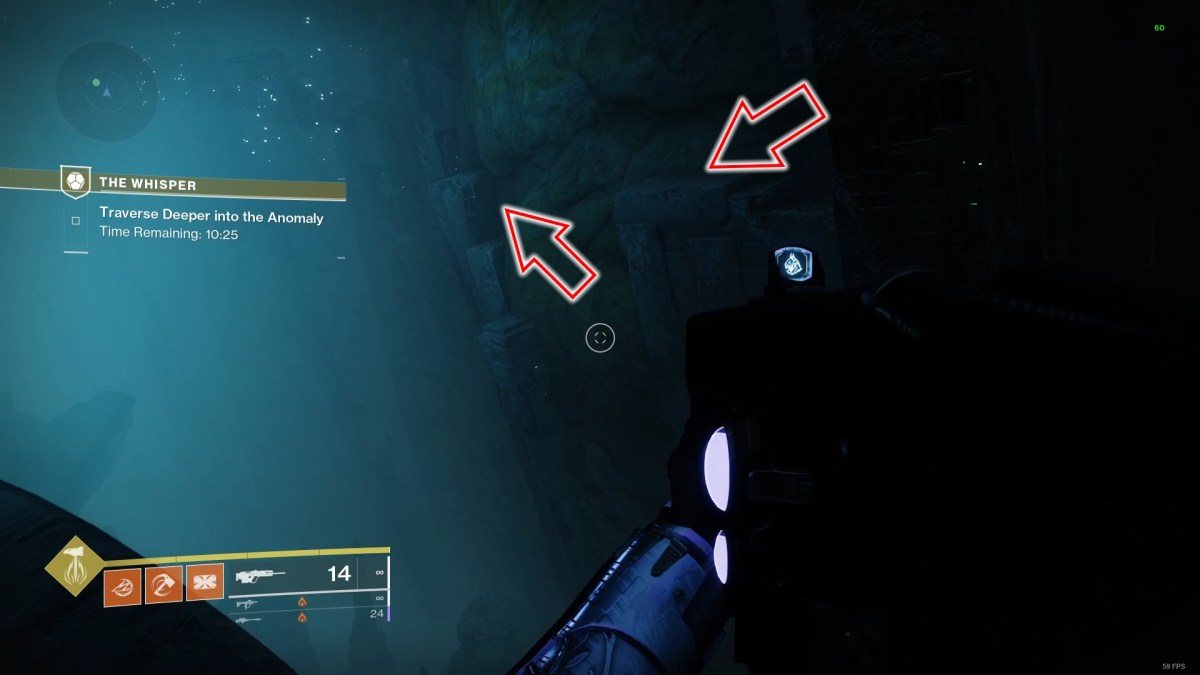
#4 Above the Taken Anomaly Room
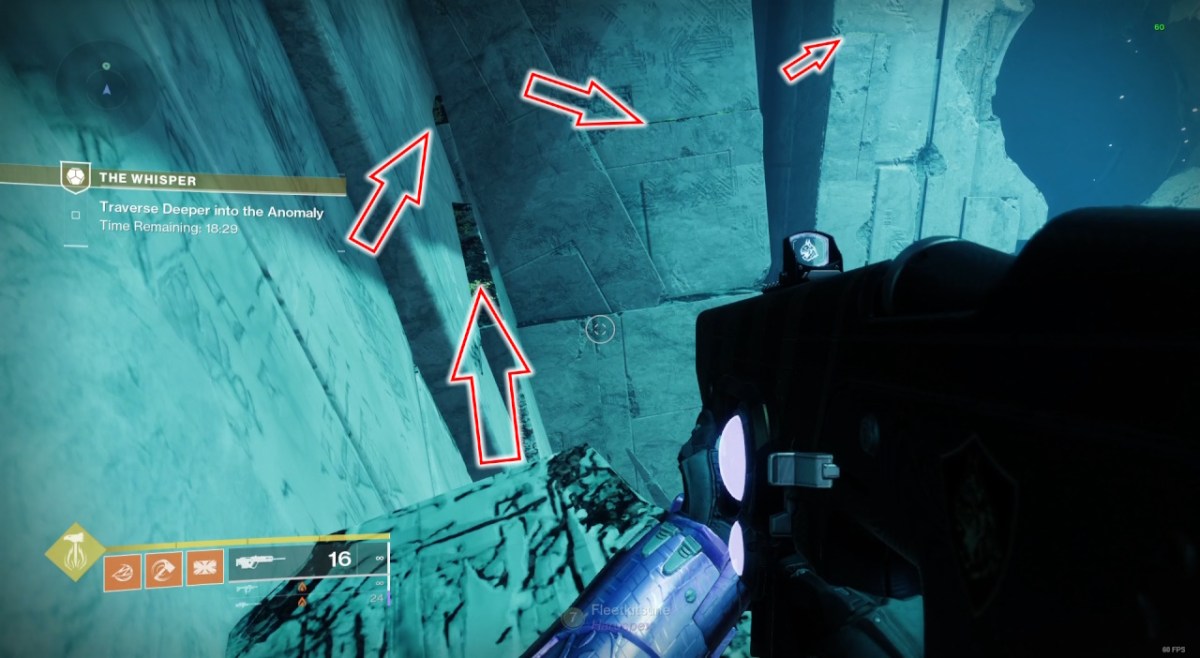
There are 2 Oracles in this room: one above and one below. The one above is arguably the hardest to find in the entire mission, so let’s start there.
You can jump to a ledge above the arrow in the image above. Carefully use the grassy shelves to climb up the wall. If you ever get stuck, you can usually aim at any grass you see, as it indicates the ledges you’re after.

You can jump further up the wall here (pictured above). There’s a dark room on the way up, but you can avoid it as it only offers an easy way down.
Follow the ledges as shown. Some of these are incredibly narrow, but the jumps shouldn’t be too hard to make, even as a Hunter.
Continue following the ledges until you reach the back wall. If you get stuck, you’ll usually find the next ledge is slightly above you.
When you reach the ledge in the corner, jump to the shelf in the picture above and walk all the way to the end.
Finally, peer down and to the left, and you’ll see the grassy patch in the picture above. Jump down to it, and you’ll find a hidden room containing the Oracle.
#5 Below the Taken Anomaly Room
Thankfully, this Oracle is much easier to find. Jump down the chasm in the middle of the room and strafe to either side. You’ll find a ton of Shadow Thralls down here, which constantly respawn.
Make your way to the back wall, and you’ll find a small gap you can crawl through, housing the Oracle.
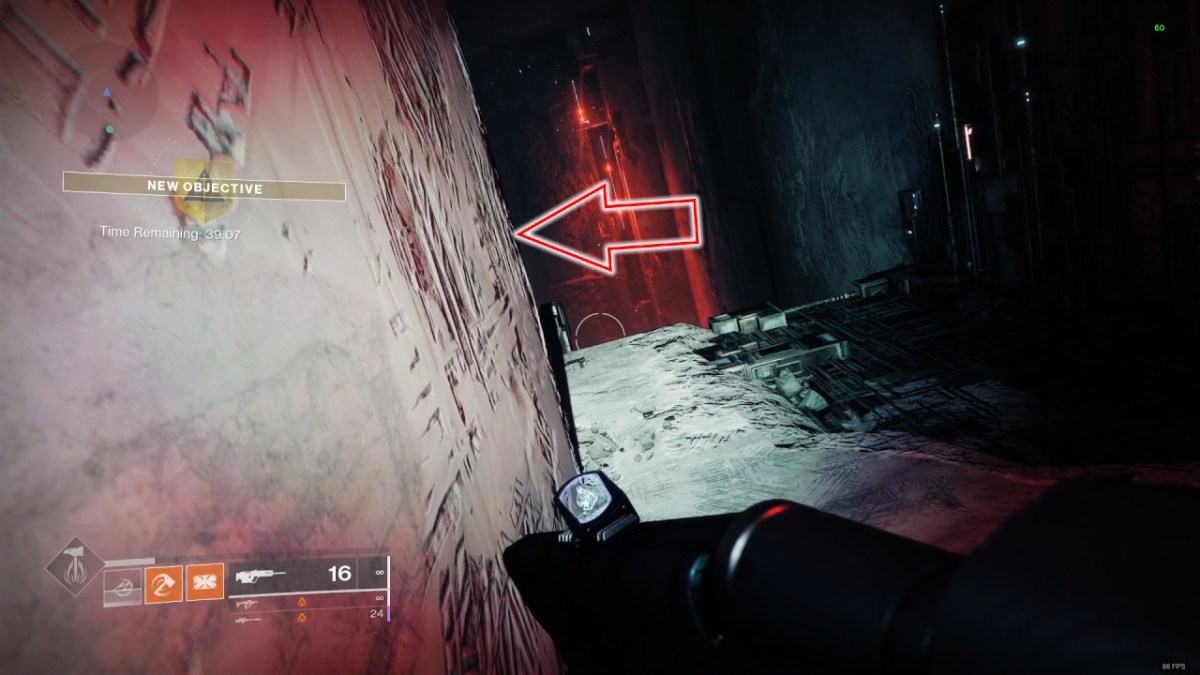
#6 Before the leap of faith
You’ll find the penultimate oracle in the area where the voice says, “You shall drown in the Deep.” Follow the narrow ledge around the left as usual, but stop before jumping down.
It’s very dark in this area, but you can use your Ghost to light up your surroundings. You’ll see this platform just to the left of the ledge. Drop down, and you’ll find the Oracle in the room beside you.
#7 By the Vex Portal
This Oracle took me the longest to find, and I’ve mentioned it last as I don’t think you can get back from here unless the Portal is activated in the future.
This Oracle is in the same area as the one above but instead of heading left around the ledge, you go right instead. This is another puzzle, but the jumps are far more straightforward. Follow the blocks up and around until you can see a Vex Portal.
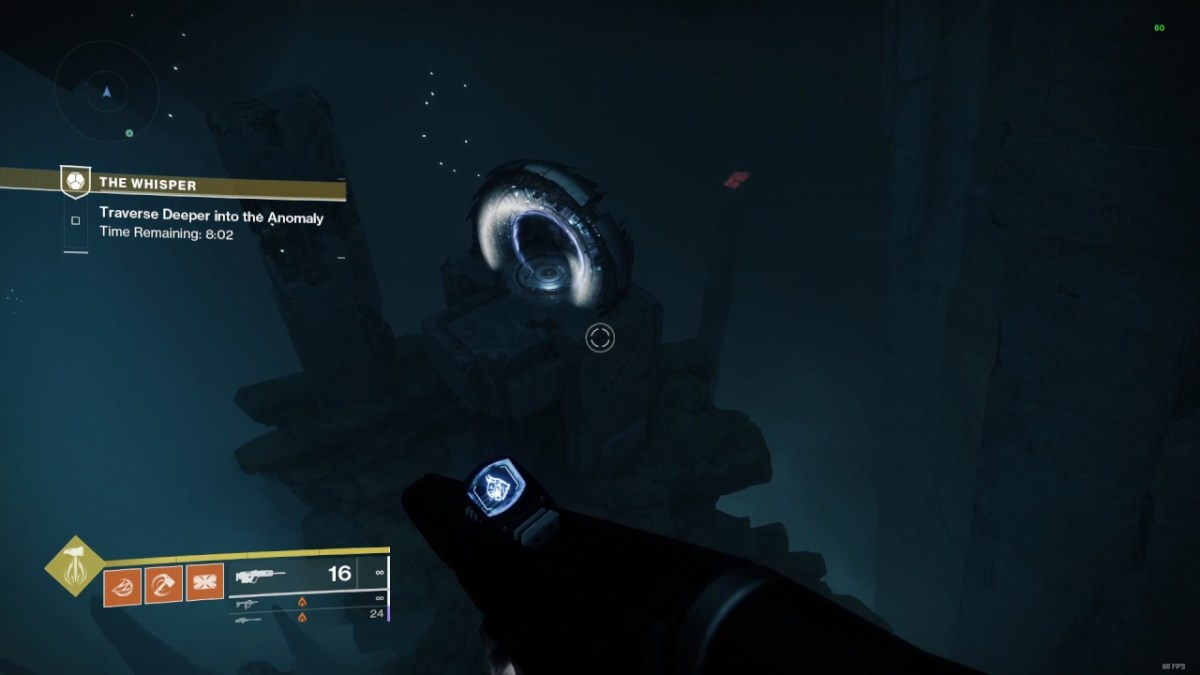
I’m unsure where the Oracle will be around here, but my reticule glows red when I aim just beyond the Portal. At the time of writing, the Portal is inactive, and there’s nothing on the red platform behind it.
As I mentioned earlier, getting back from here is extremely difficult. You can use Strand Grapple Grenades or an Eager Edge Sword for longer jumps, but it might be faster just to restart the mission.
What do the Oracles do in The Whisper Exotic Mission?
You’ll complete the Oracular Seeker Triumph when you find all seven Oracles. You’ll also earn the Karve of the Worm Exotic Ship to show off in orbit.
We don’t know how often Bungie will activate Oracles in The Whisper or in what order. The two that are currently live are right by the start of the quest. Hopefully, the others will appear in the order I’ve mentioned them as they progress into the area.
The Whisper Exotic Mission has a lot to unravel, but make sure you try Onslaught mode to get the Brave weapons.