
If you explore the world of Wuthering Waves, you will eventually find some mysteries that might seem unsolvable. Well, time to tackle one of them. Here is how to find and use the two Guide Crystals in Wuthering Waves.
Wuthering Waves: How to find and use Guide Crystals
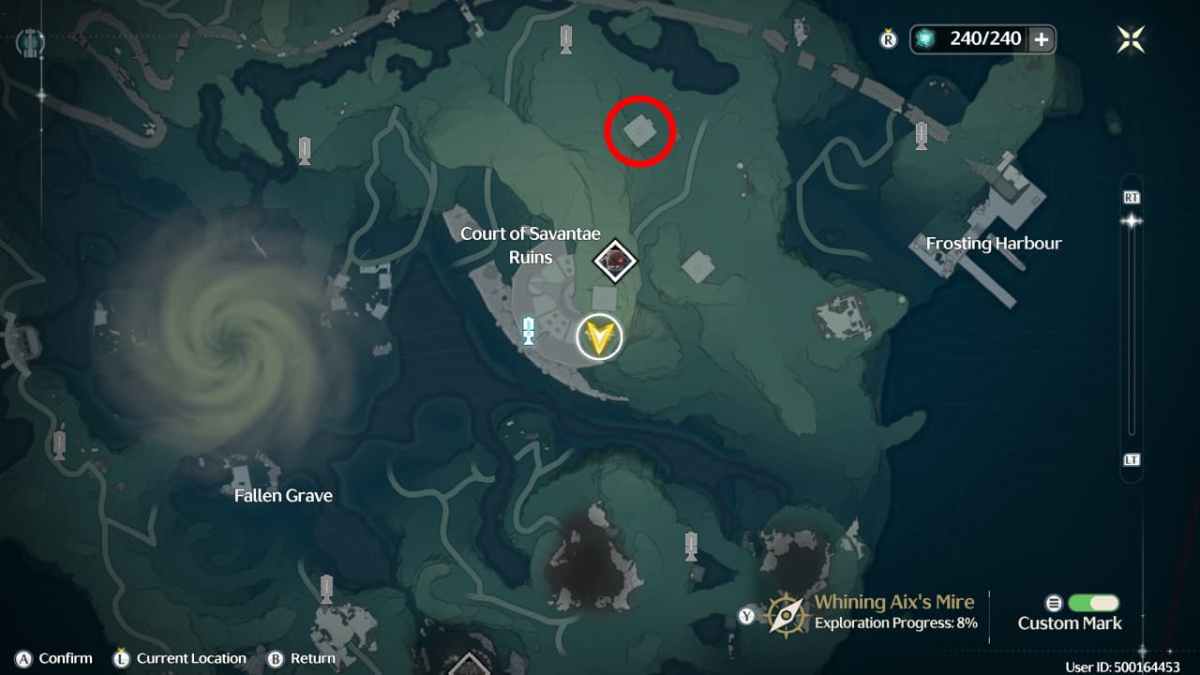
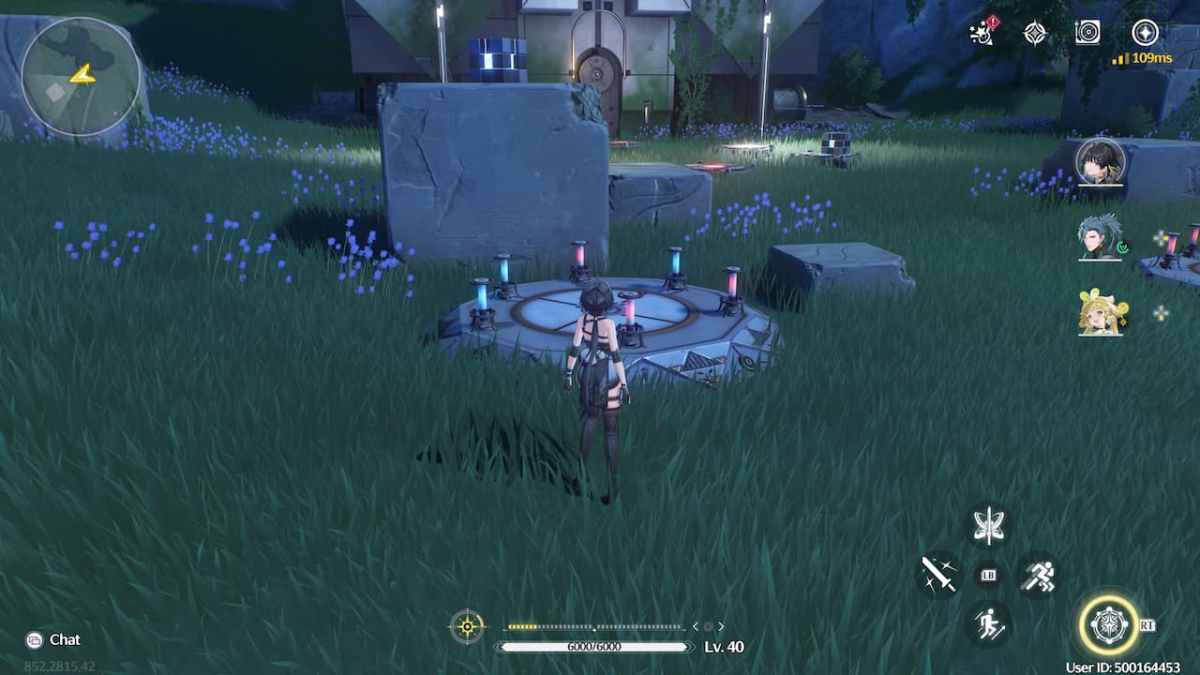
Guide Crystals are not a common resource or material you find in Wuthering Waves but two specific crystals you collect in the Court of Savantae Ruins region of the map — just next to the Mech Abomination boss fight location. You can find it in the southmost region of the map, so keep going south from Jinzhou if you haven’t visited this area of the map.
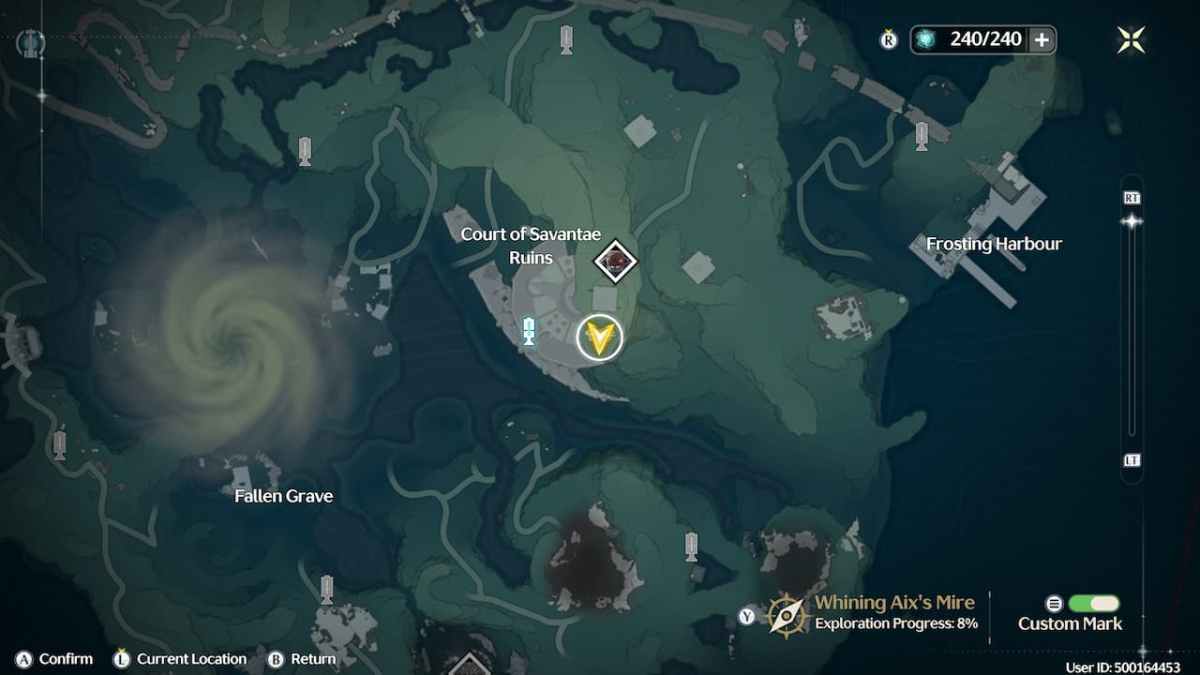
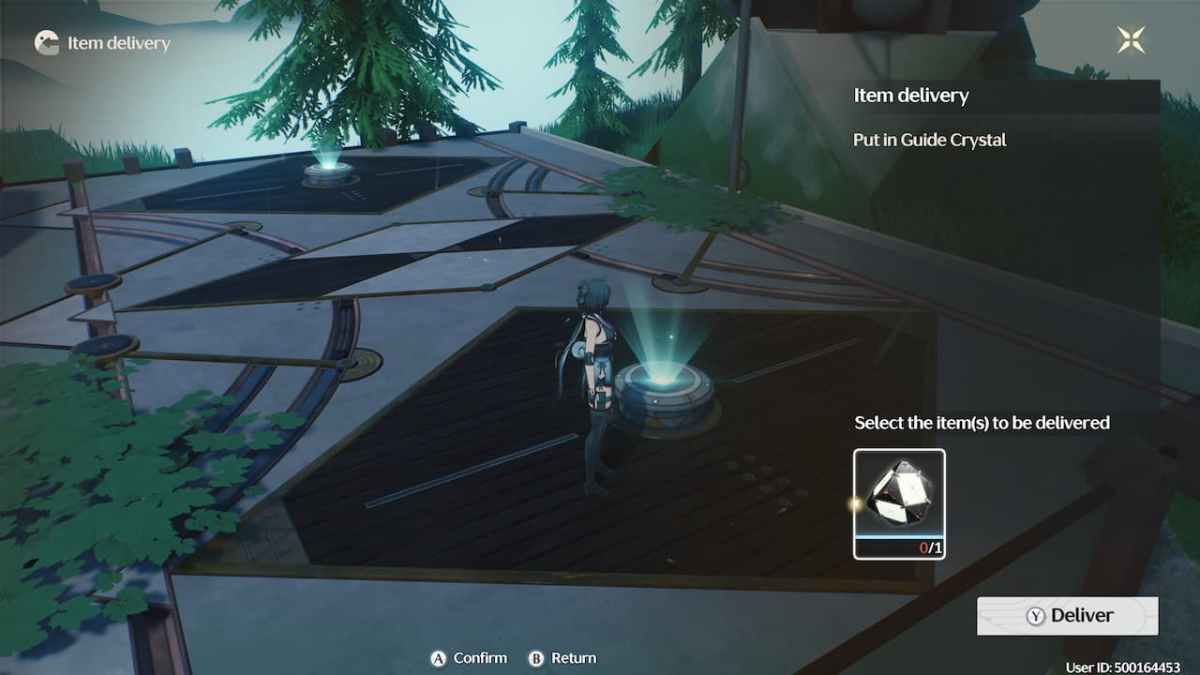
In the location on top, you will find two different Guide Crystal recipients that you can interact with but you will not be able to do anything until you collect these crystals. Thankfully, each of these is close to this area, but you will need to complete two different puzzles that might make your brain hurt. Let’s take a look at them.
Guide Crystal 1: Energy Matrix Puzzle
The very first Guide Crystal we are going to tackle is located to the northeast of the Guide Crystal recipient platform. The corresponding puzzle will be an Energy Matrix Puzzle, which can be considered a Tetris-like puzzle where you will need to use energy pieces of various shapes to activate the blue squares in the Matrix pattern.


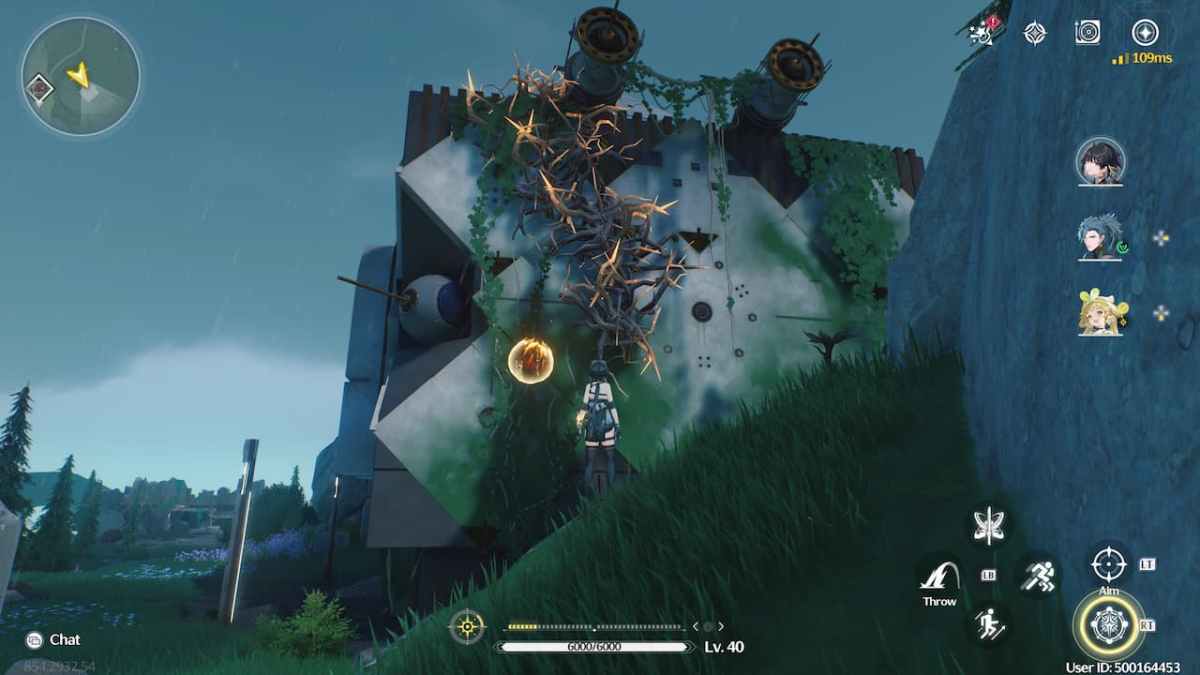
One of the puzzle pieces is locked behind some vines. At the opposite side of its location, you will find an Explosive Charge that you can shoot toward the vines using your Levitator.
Go back to the now accessible puzzle piece — which is a Z-shaped one — and then use your Levitator once again to throw it at the top right corner of the Matrix as shown below.


Let’s take care of the two pieces that are lying on the platform. Take the L-shaped one and throw it toward the bottom part of the Matrix. Remember that only the blue slots count toward the puzzle’s completion, but you can fill out the white slots if your piece’s shape and position allow it.
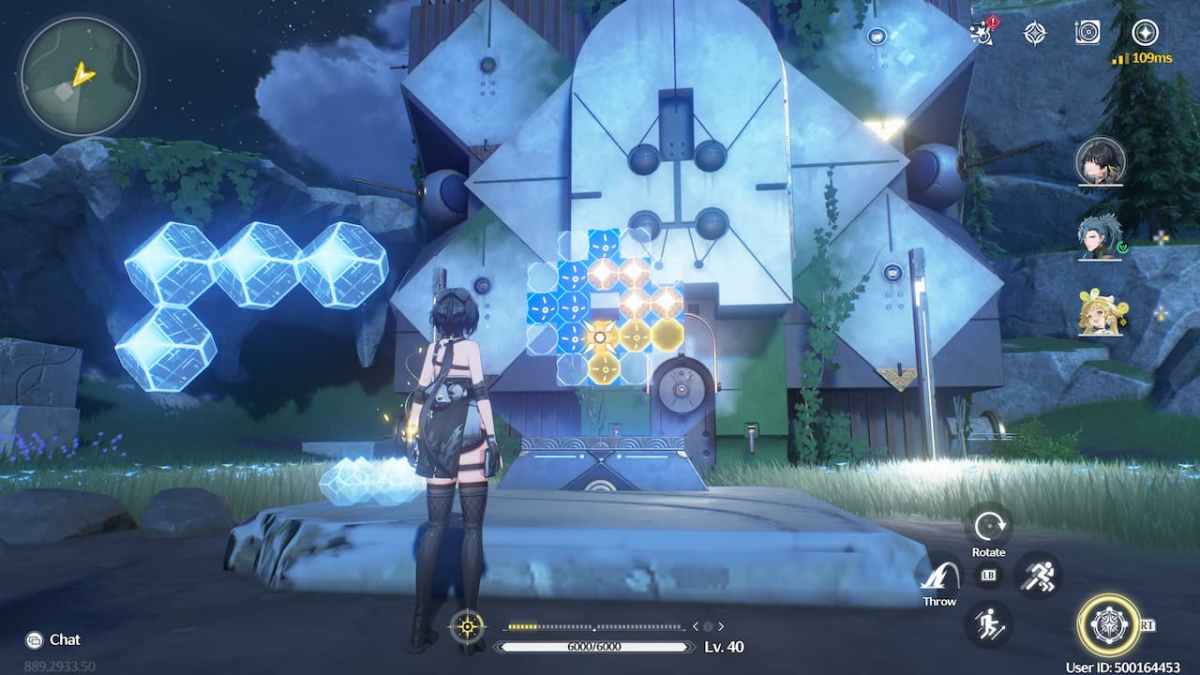
Take the square piece and throw it to the bottom right corner of the Matrix.
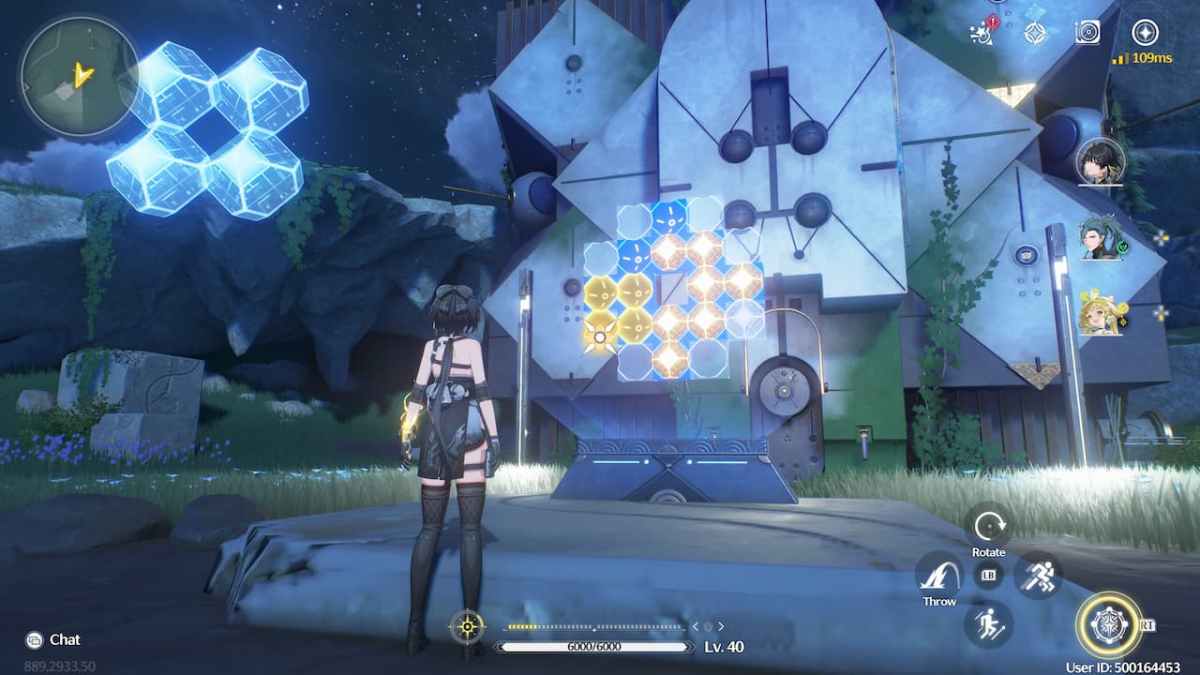
Finally, the last piece is an L-shaped one and should be right behind you next to a stone block. Shoot it at the top part of the Matrix as shown below.


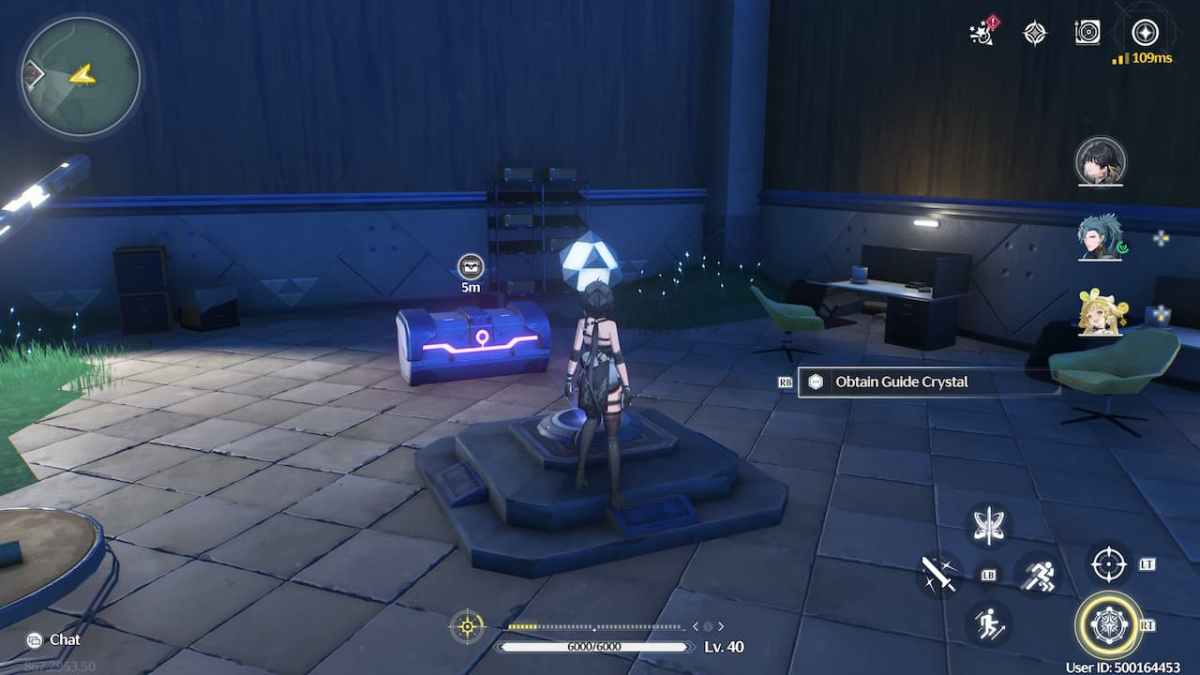
The door of the building in front of you will open up and there you will find the first Guide Crystal along with an Advanced Supply Chest. Collect the first, open the second, and head out for the other Guide Crystal Puzzle.
Guide Crystal 2: Pressure Pads Puzzle
The next puzzle and Guide Crystal is located north of the initial Guide Crystal platform. By the way, you will probably find some exile foes and TD enemies in this area, so fight them if they are especially annoying.
This is a pressure pad puzzle that has multiple stages. The first one will be represented by the pattern you see below. The blue tubes indicate pressure pads that are activated, with the red ones being the ones that are not – thanks, Captain Obvious.
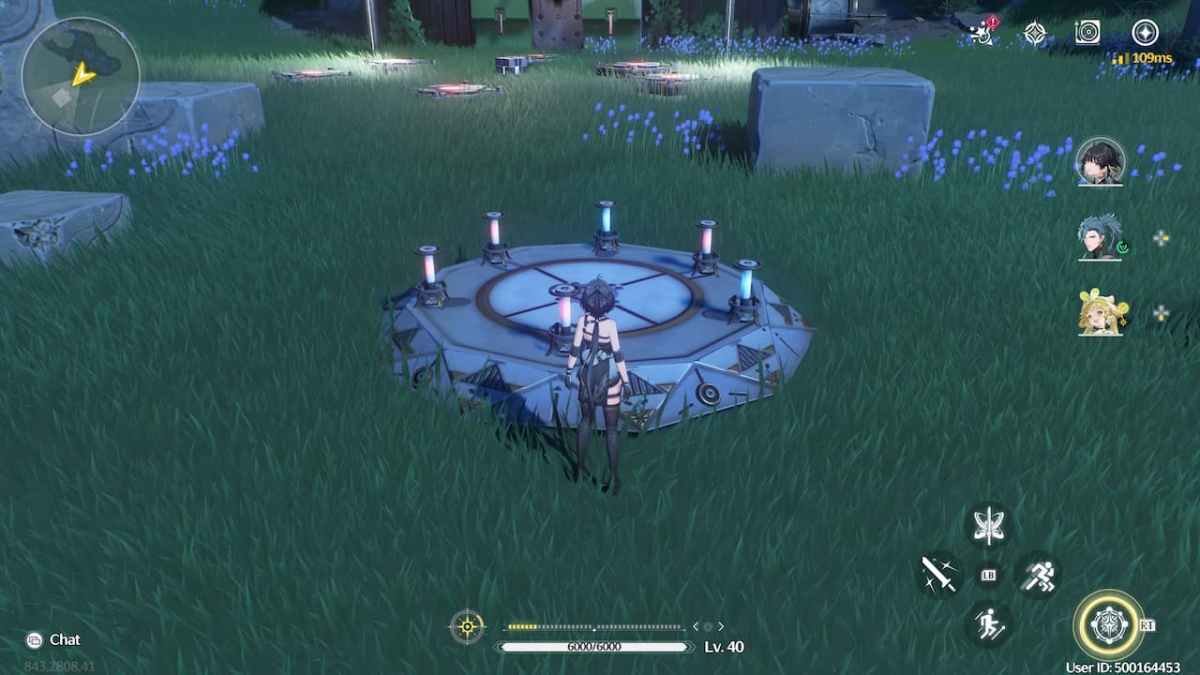
Replicate the first pattern by placing the only cube in either the bottom right or north pressure pad and then stand on top of the other. You won’t have to keep standing there, so don’t worry about stepping out. You will unlock an additional block when you complete the first pattern.

The second one features three different blue tubes. Use the two blocks to activate the top left, top right, or bottom left pressure pads and stand on the one that’s left.
This will, again, open up the way to the building ahead which will lead you to the other Guide Crystal and another Advanced Supply Chest.


Bonus Premium Supply Chest
You can head to the Guide Crystal right away, but there is another secret here. You will notice another pattern to the left of the other ones, but this one is represented by flowers.
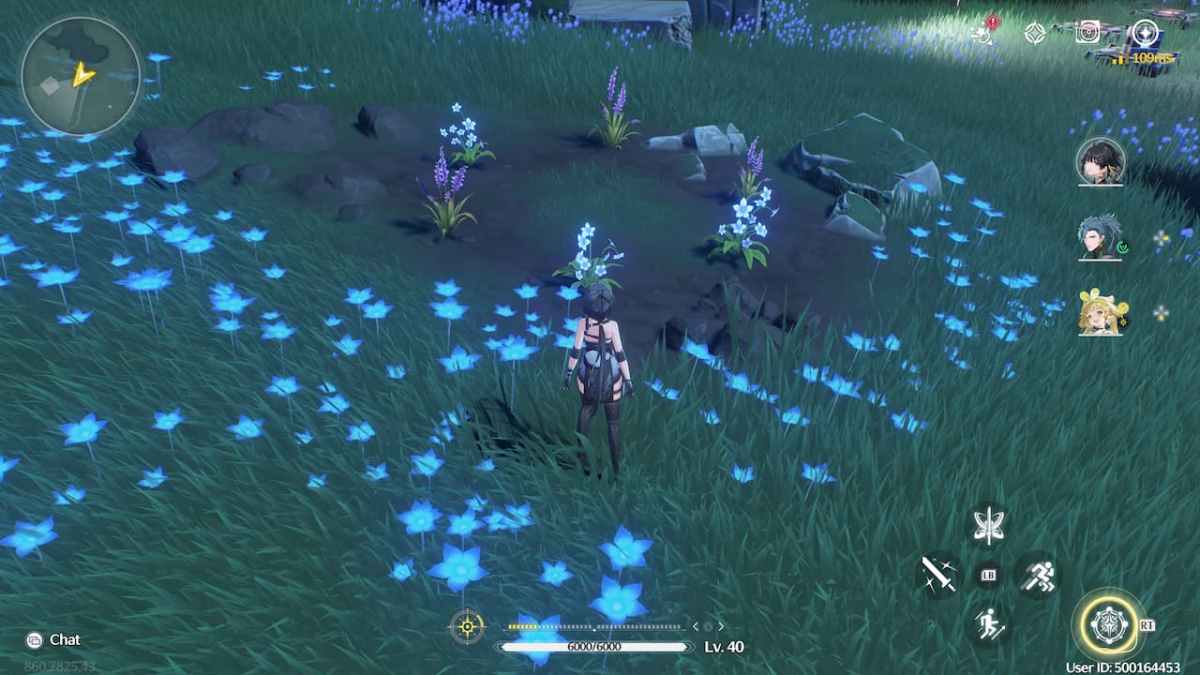
Use your two blocks to activate the pressure pads at the bottom, bottom left, or top right and stand on top of the remaining pad and you will spawn a Premium Supply Chest filled with rare materials and a decent amount of Shell Credits.


Head back to the Guide Crystal platform and interact with each Guide Crystal recipient to deliver each of the Guide Crystals you have collected. Once you do, another Premium Supply Chest will appear for you to open.


And that’s it for this Guide Crystal mystery! You can use the rewards you gather to level up your Resonators so that you can fight more TD enemies and complete challenges that will only get more difficult the higher your Union Level and SOL3 Phase are. Use the credits wisely and be prepared to face the strongest of world bosses or Tacet Field challenges.


Published: May 29, 2024 06:18 pm