The footage you take in Content Warning is what it’s all about. Snapping the spookiest vids will result in the best viewer results. However, if your game has decided to bug out, or all of you died in Content Warning, then you’ll want to recover the lost footage. Thankfully, there is a way.
How to recover lost footage if all teammates died
So you and your team have shot that sick footage that’ll send shivers down even the most hardened spines. However, due to unforeseen on-the-job hazards, you and your whole team have died. This means that your footage is lost, sitting in a camera deep in the field. How will you get it back?
Thankfully, as long as it isn’t the last day, you can recover the lost footage in Content Warning by heading into the field and just grabbing the camera. As long as you remember where you dropped it, it should still be there. It will have all the footage on it, and you can head back to base and upload it. Don’t worry; you’ll still get those views.
However, if it is the last day and you all die in Content Warning, you won’t be able to head back in to pick up the camera. In this case, you will need to access your PC’s data. This way, you can still recover the footage, as it was stored in your Temp folders.
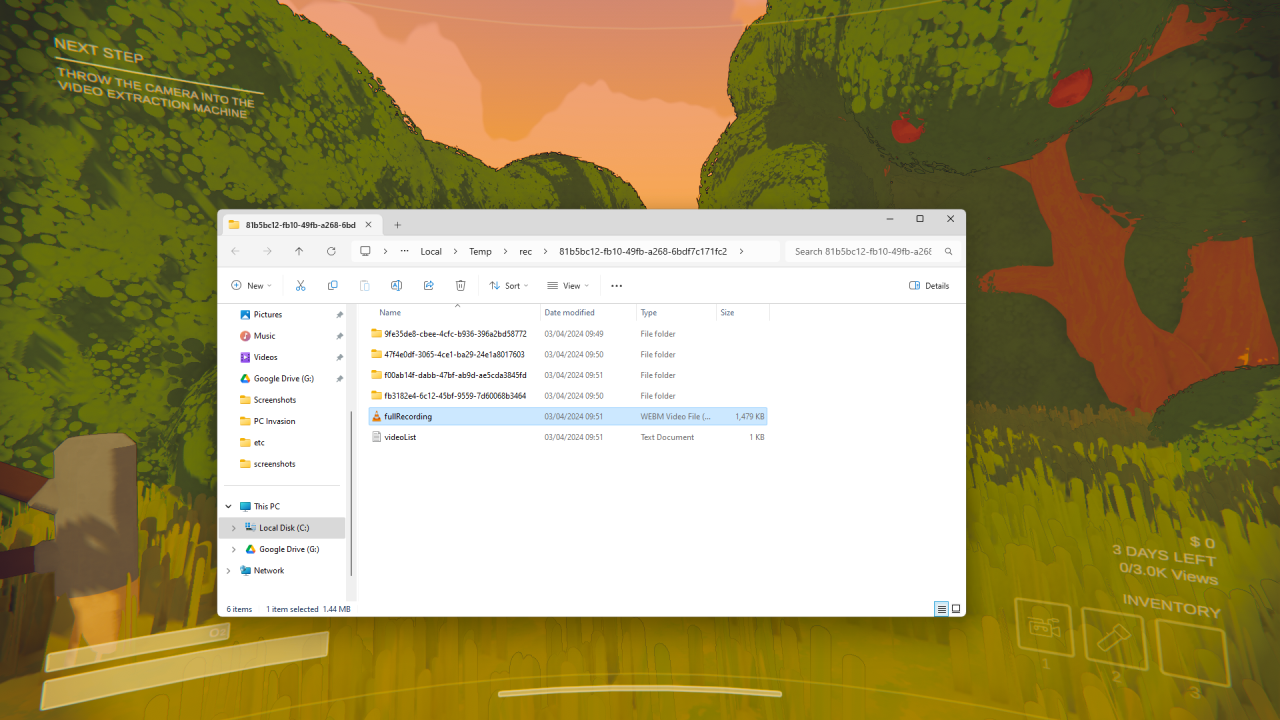
If all of you have died and you didn’t extract the footage, hit F3 before you close the game. this will bring up a debug folder containing all your files. Simply find the Content Warning footage, and move it to a folder you want to keep it in.
How to recover footage with the Failed to Extract bug in Content Warning
If you have come up against the Failed to Extract message after a Content Warning run-through, I feel your pain. You may have shot the best damn footage anyone has ever seen, but due to a bug in the game, all is lost. Or is it?
Using the same method as before, you can simply hit the F3 key before you close the game and access your Temp folder. Provided you are still in the game and in the same session, all your files will be there to grab. However, if you close the Content Warning, the lost footage will be gone forever.