While you’re exploring the town of Updaam, you’re likely to stumble upon a map that someone left behind. It tells you about several glyphs that can be found all over the area. There’s also a safe that’s right next to it. Here’s our Deathloop guide to help you solve the Updaam glyph puzzle so you can open the safe.
Note: For more information, check out our Deathloop guides and features hub.
Deathloop guide – How to solve the Updaam glyph puzzle to open the safe
Updaam (noon)
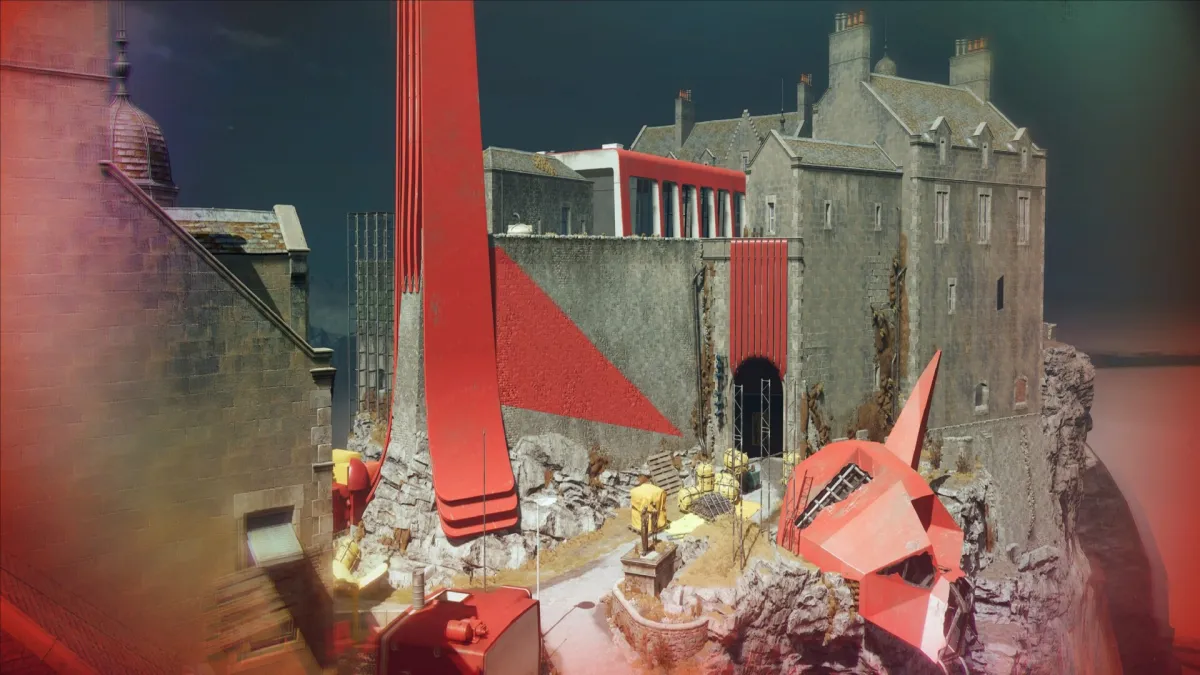
The map and the safe for the Updaam glyph puzzle in Deathloop can be found fairly close to Otto’s Workshop. Just look at the side to find a dirt path that leads to a small cave tunnel. The cave opening also leads to an area just below Dorsey Square.
Now, because Deathloop doesn’t have a map that lets you know where you are, you’ll need to ascertain your location relative to the landmarks around you. In this case, the one that’s clearly marked is the library. There are also lines that form a triangle and other marked spots. We’ll worry about the triangles later. For now, our goal is to head to those marked spots (six in total).
Note: The ones that you’ll find here in the Updaam glyph puzzle in Deathloop aren’t actually runic symbols. Rather, they’re actually numbers etched on those places. Oh, and to be clear, the numbers that you’ll see in the following images are what I have solely on my end. Deathloop uses a system that randomizes puzzle drawings and keycodes, including this one, so your own numbers will be different. However, the locations will be the same for all players.
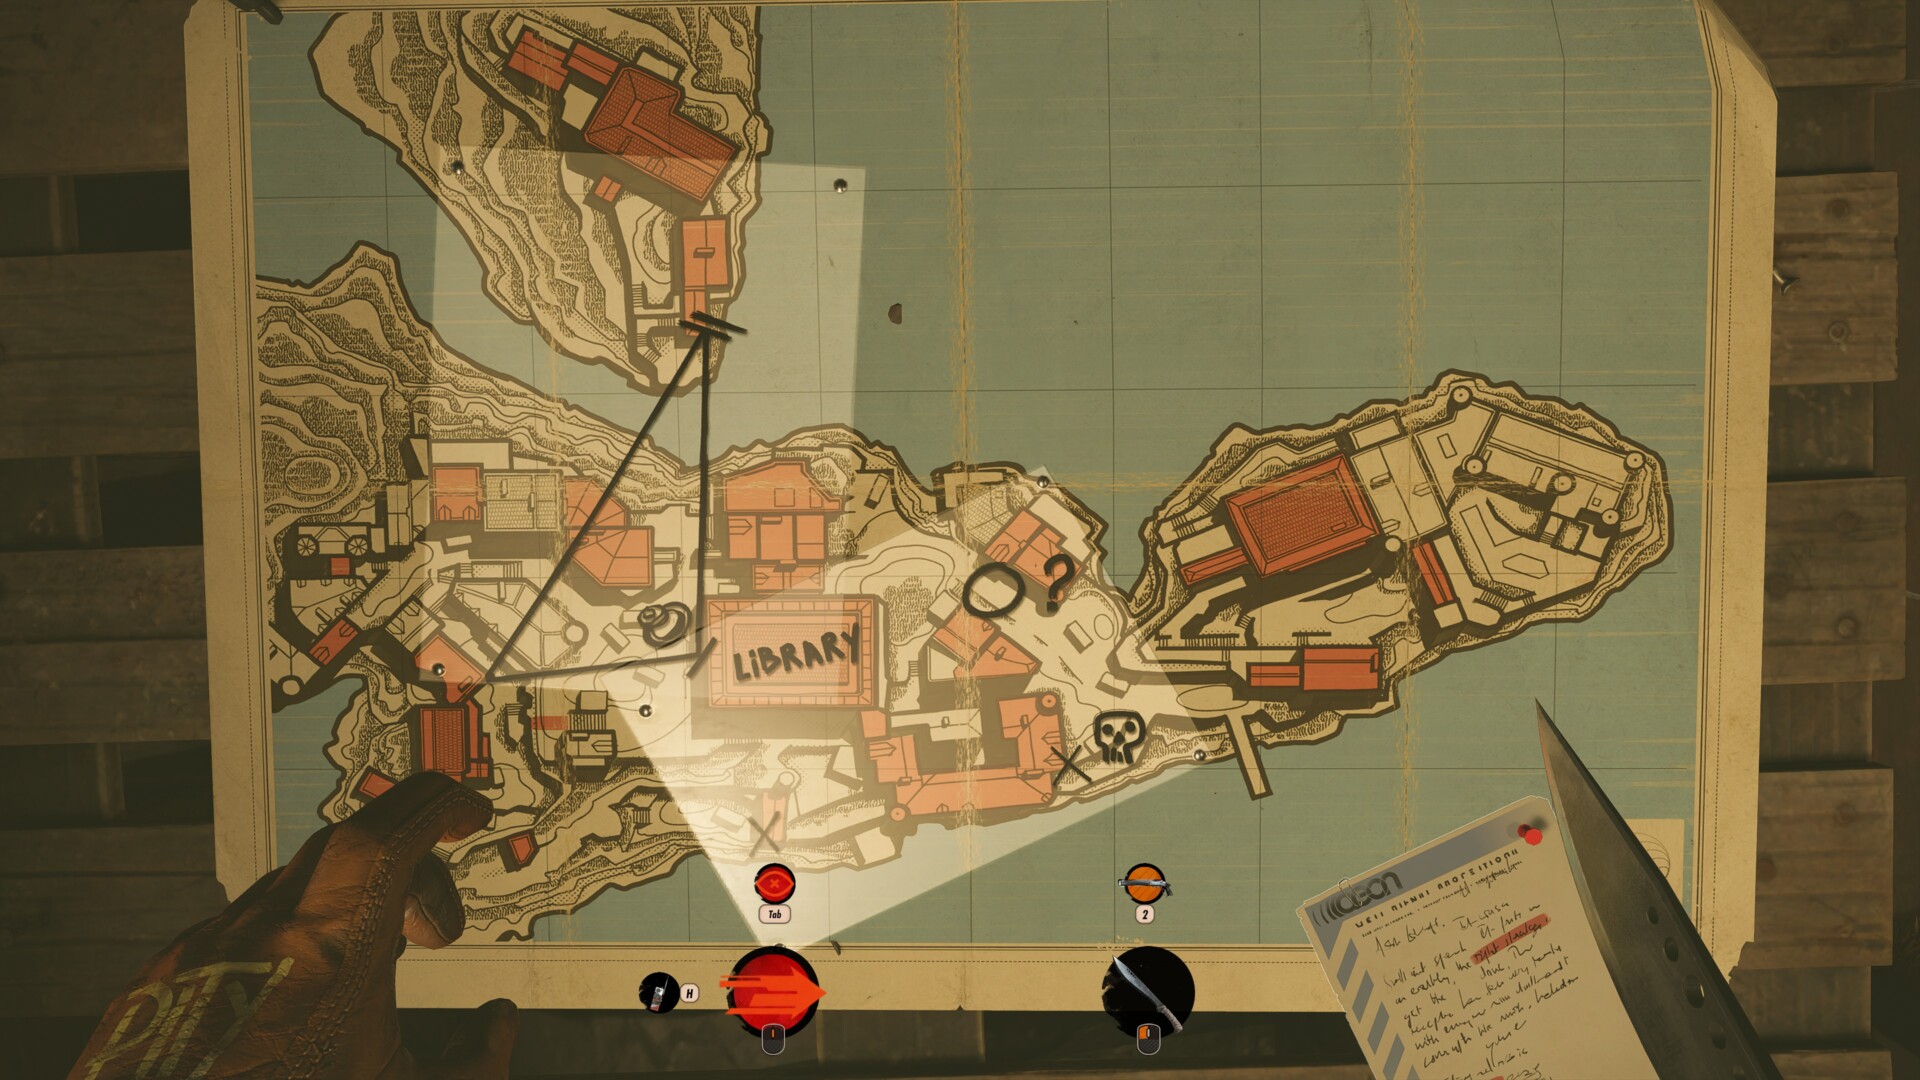
Library
This is the only location that’s clearly mentioned on the map.
The glyph/number is etched on a pillar next to the library’s plaza entrance.
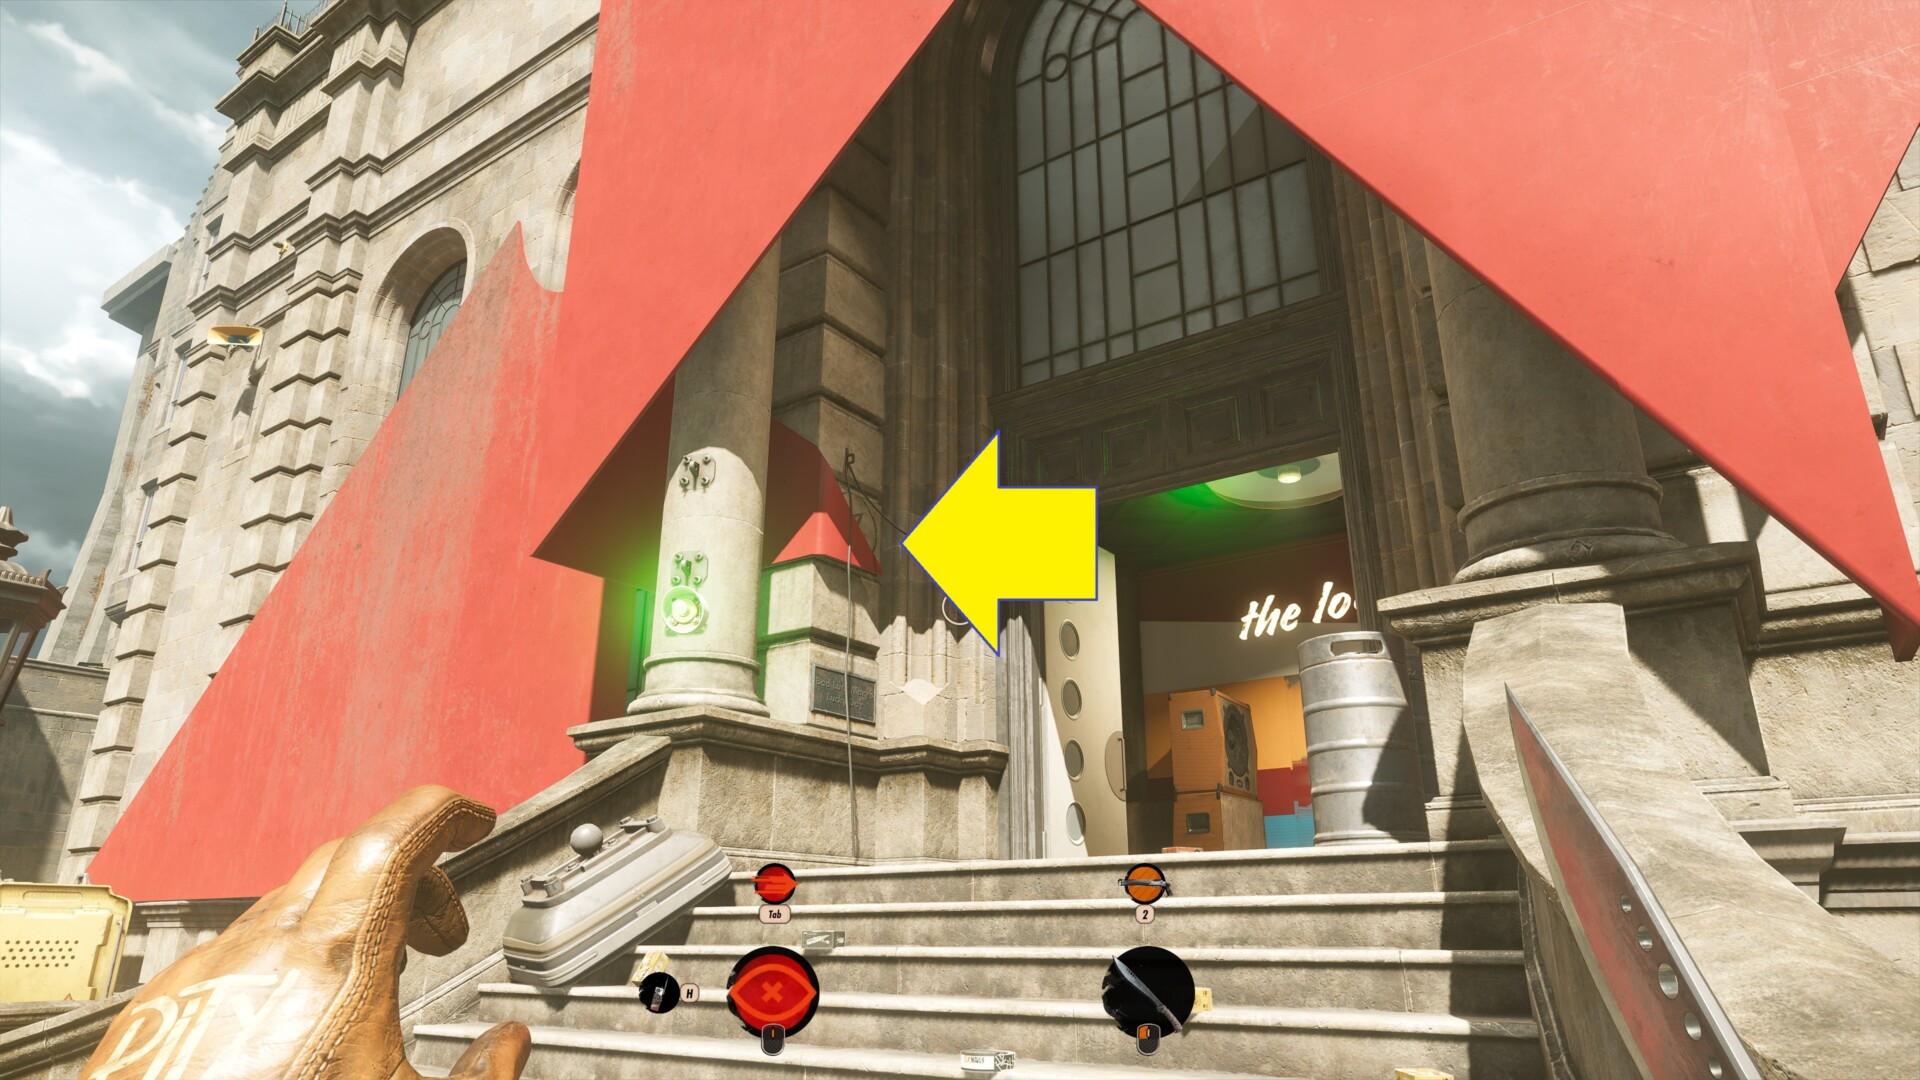
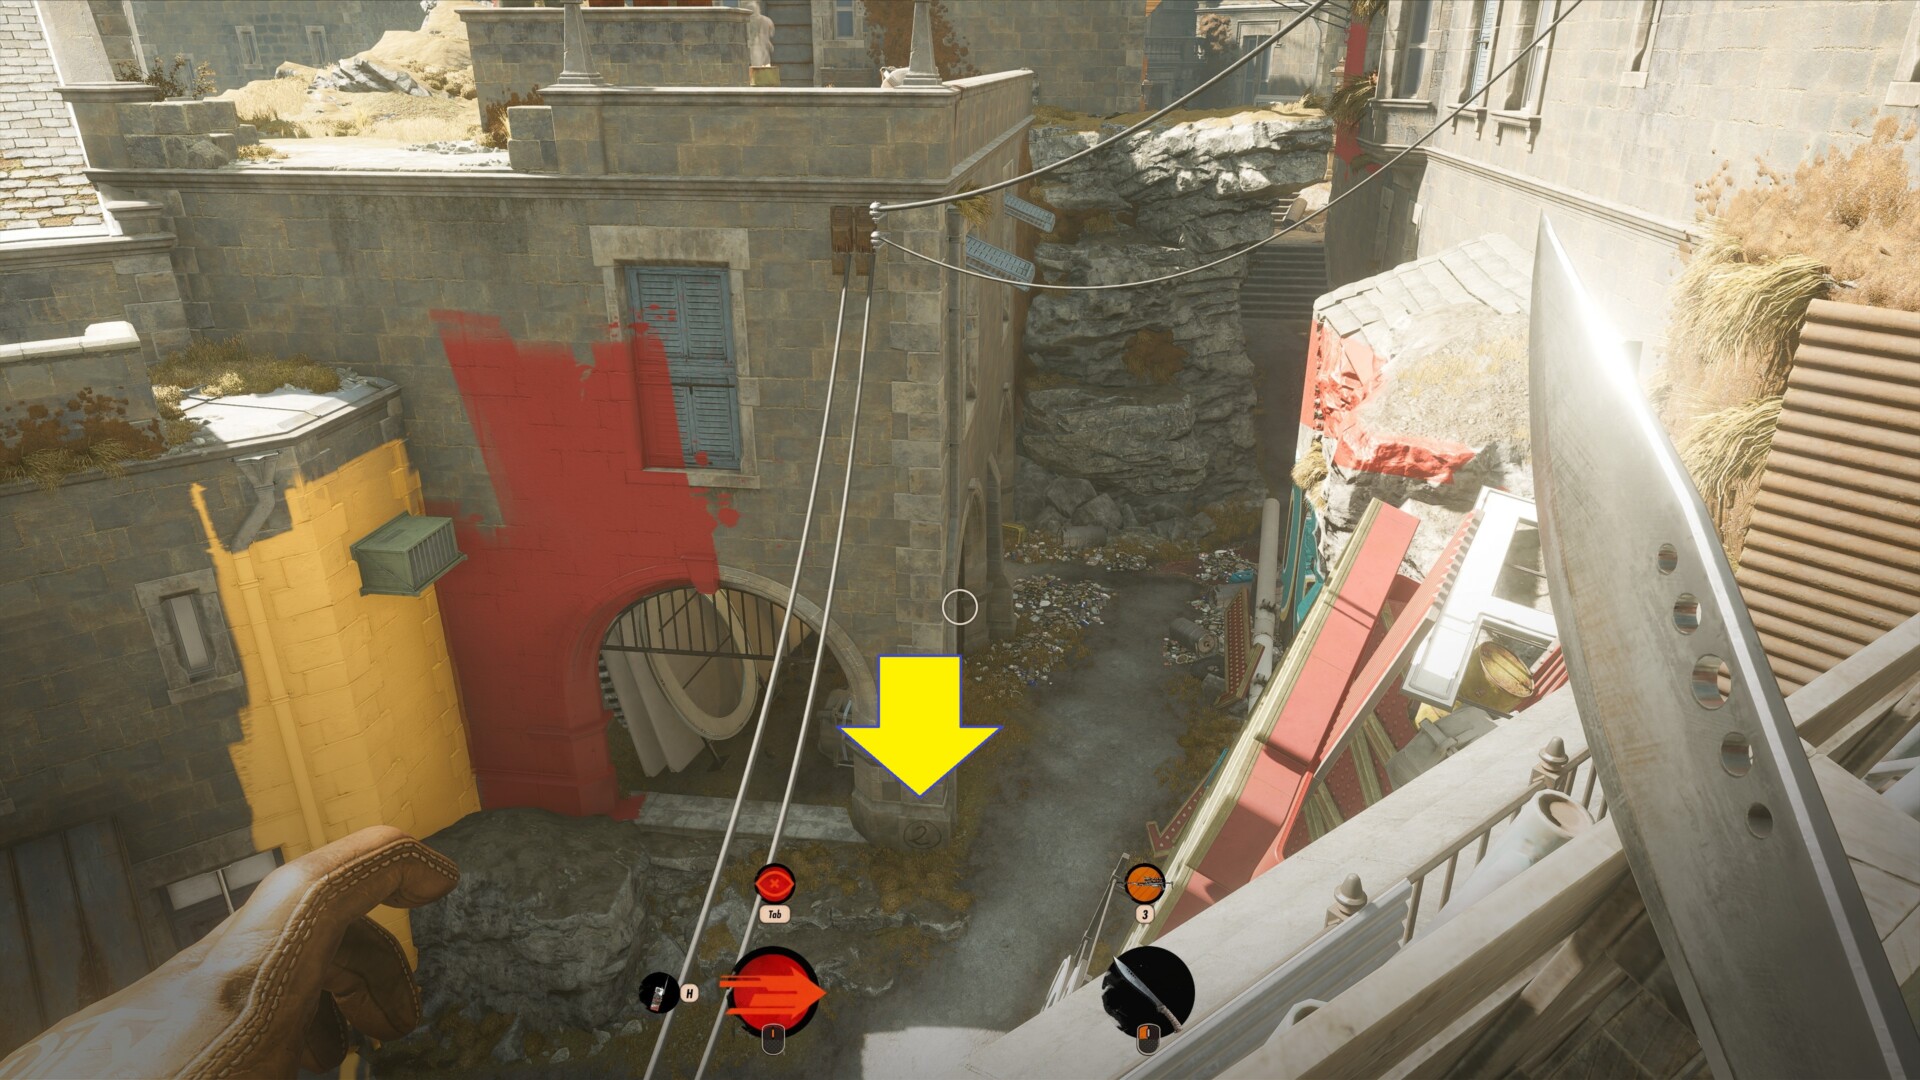
Alleyway behind the library
From the library’s main entrance, turn around and look for the delivery kiosk that’s next to some grey barrels.
Peer down below to find a vehicle and a storage area. The glyph is close to the ground.
Condition Detachment
There’s only one landmass that’s separated from the rest of Updaam, and it’s this one. The reason we want to visit this place at noon is because that’s the only time the bridge is lowered, allowing you to go closer to see the glyph. However, if you have the Sepulchra Breteira, you can just zoom in with your scope.
Okay, these three form the initial triangle that you see on the Updaam glyph puzzle map. However, there are still three marked spots with their own glyphs/numbers.

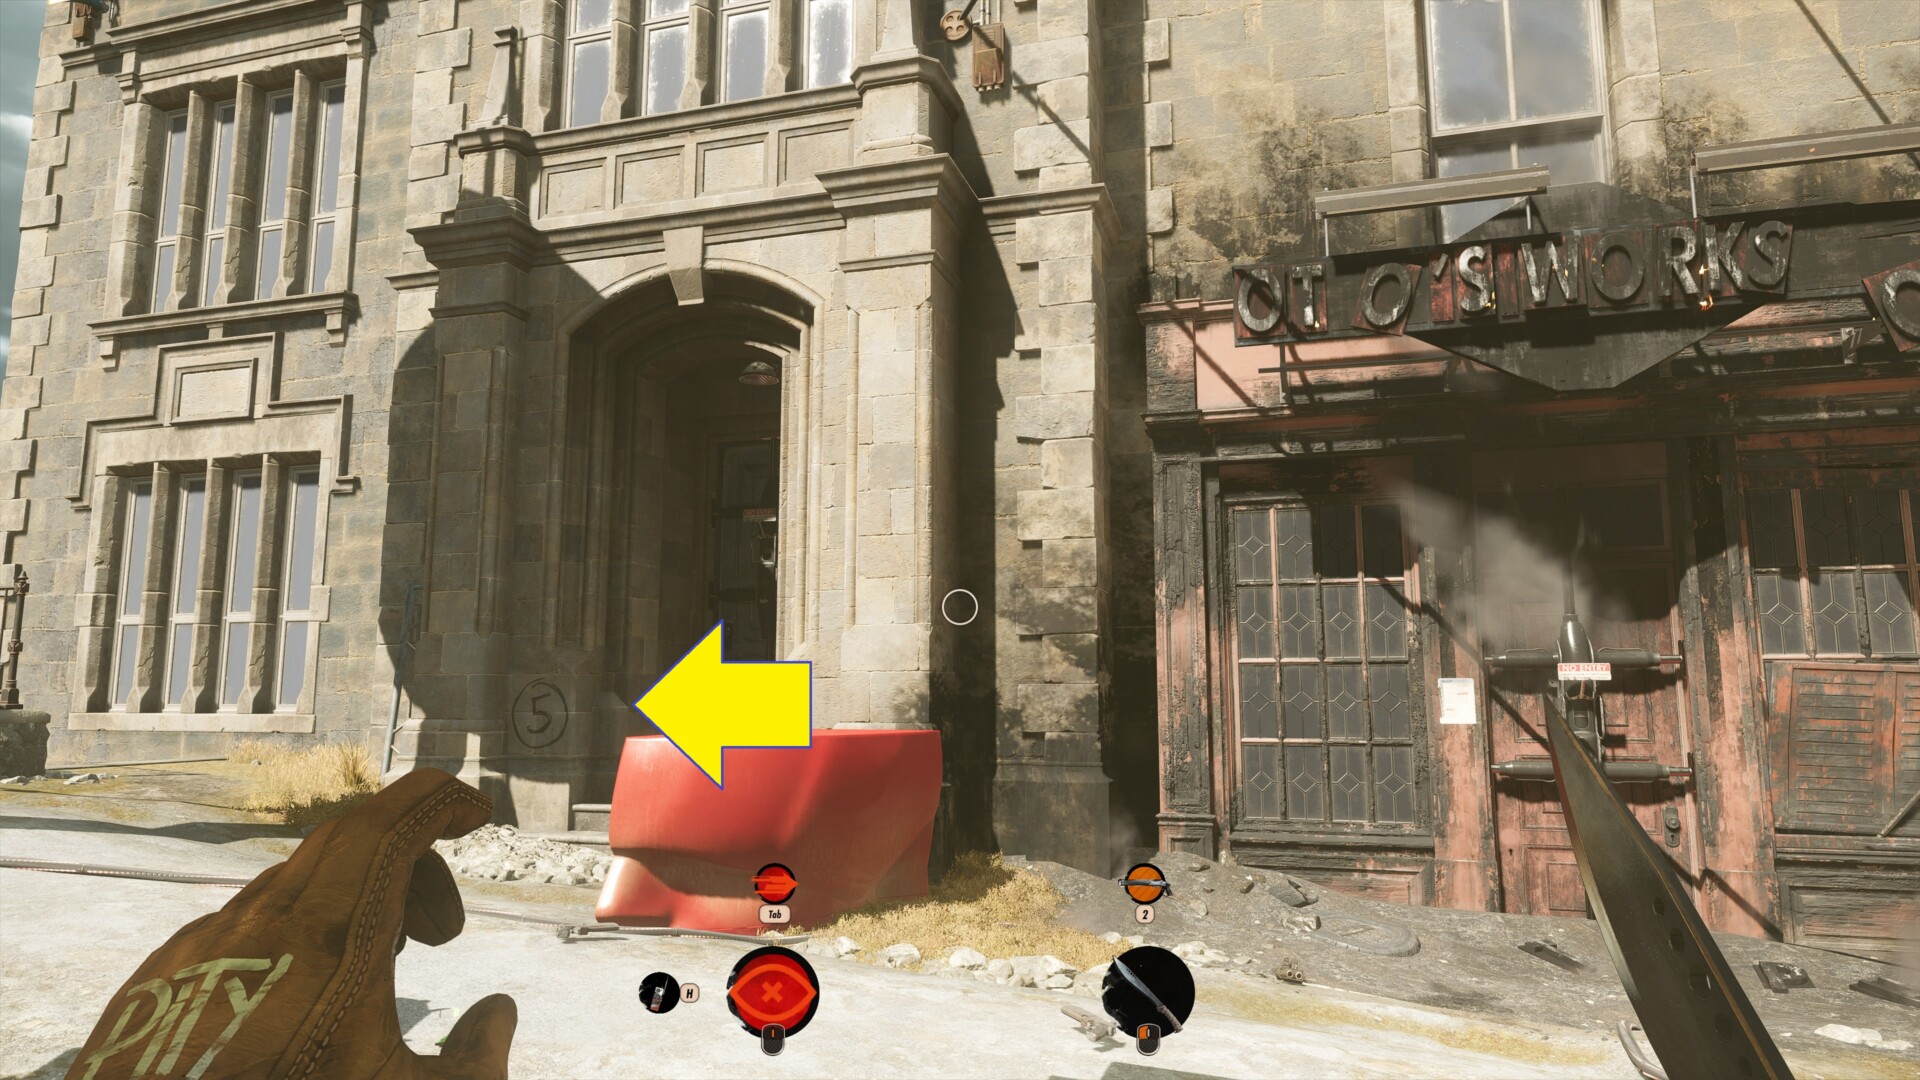
Otto’s Workshop
This one is close to the small cave tunnel with the Updaam glyph map.
Just take a look at the building that’s adjacent to Otto’s store (that’s probably burning now).
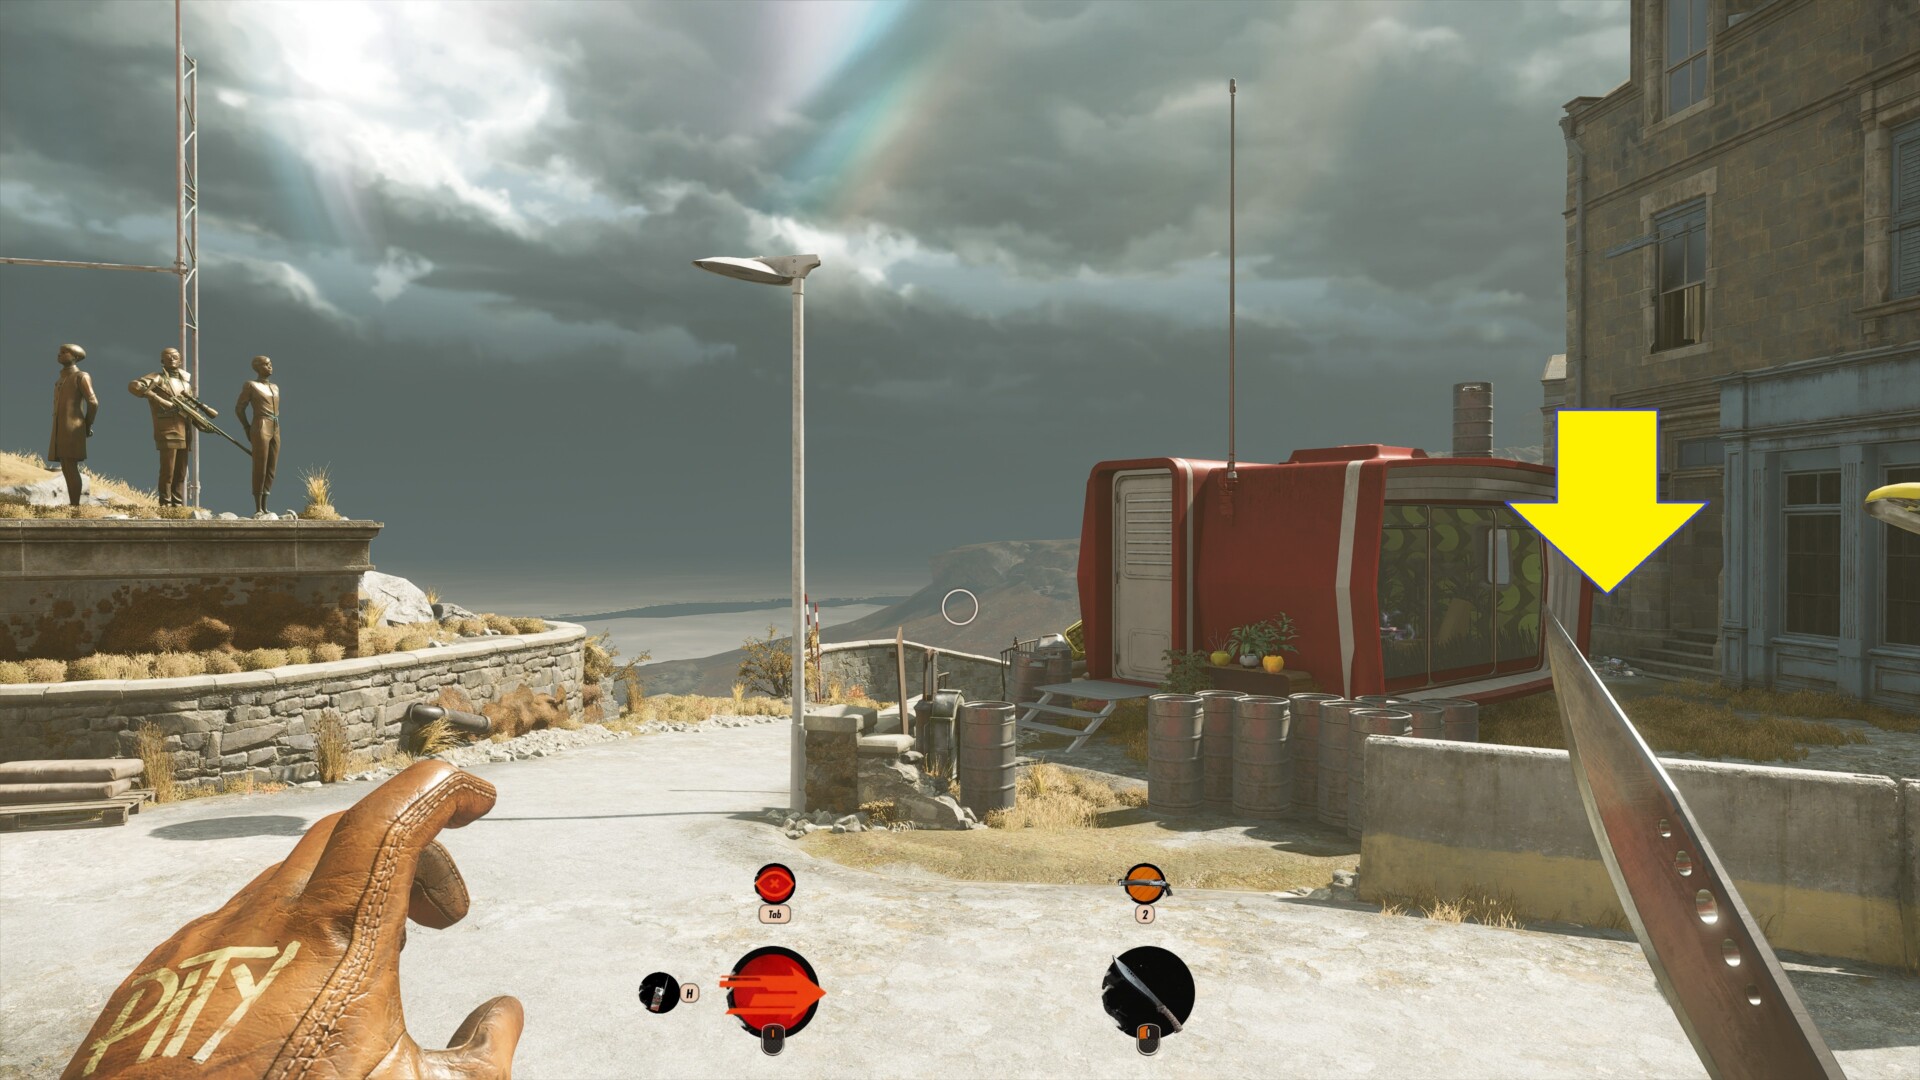
Apartment near Dorsey Square
Continue along the street until you see the statues in Dorsey Square.
There’s an apartment here with a barred door. The glyph is etched on the entrance.
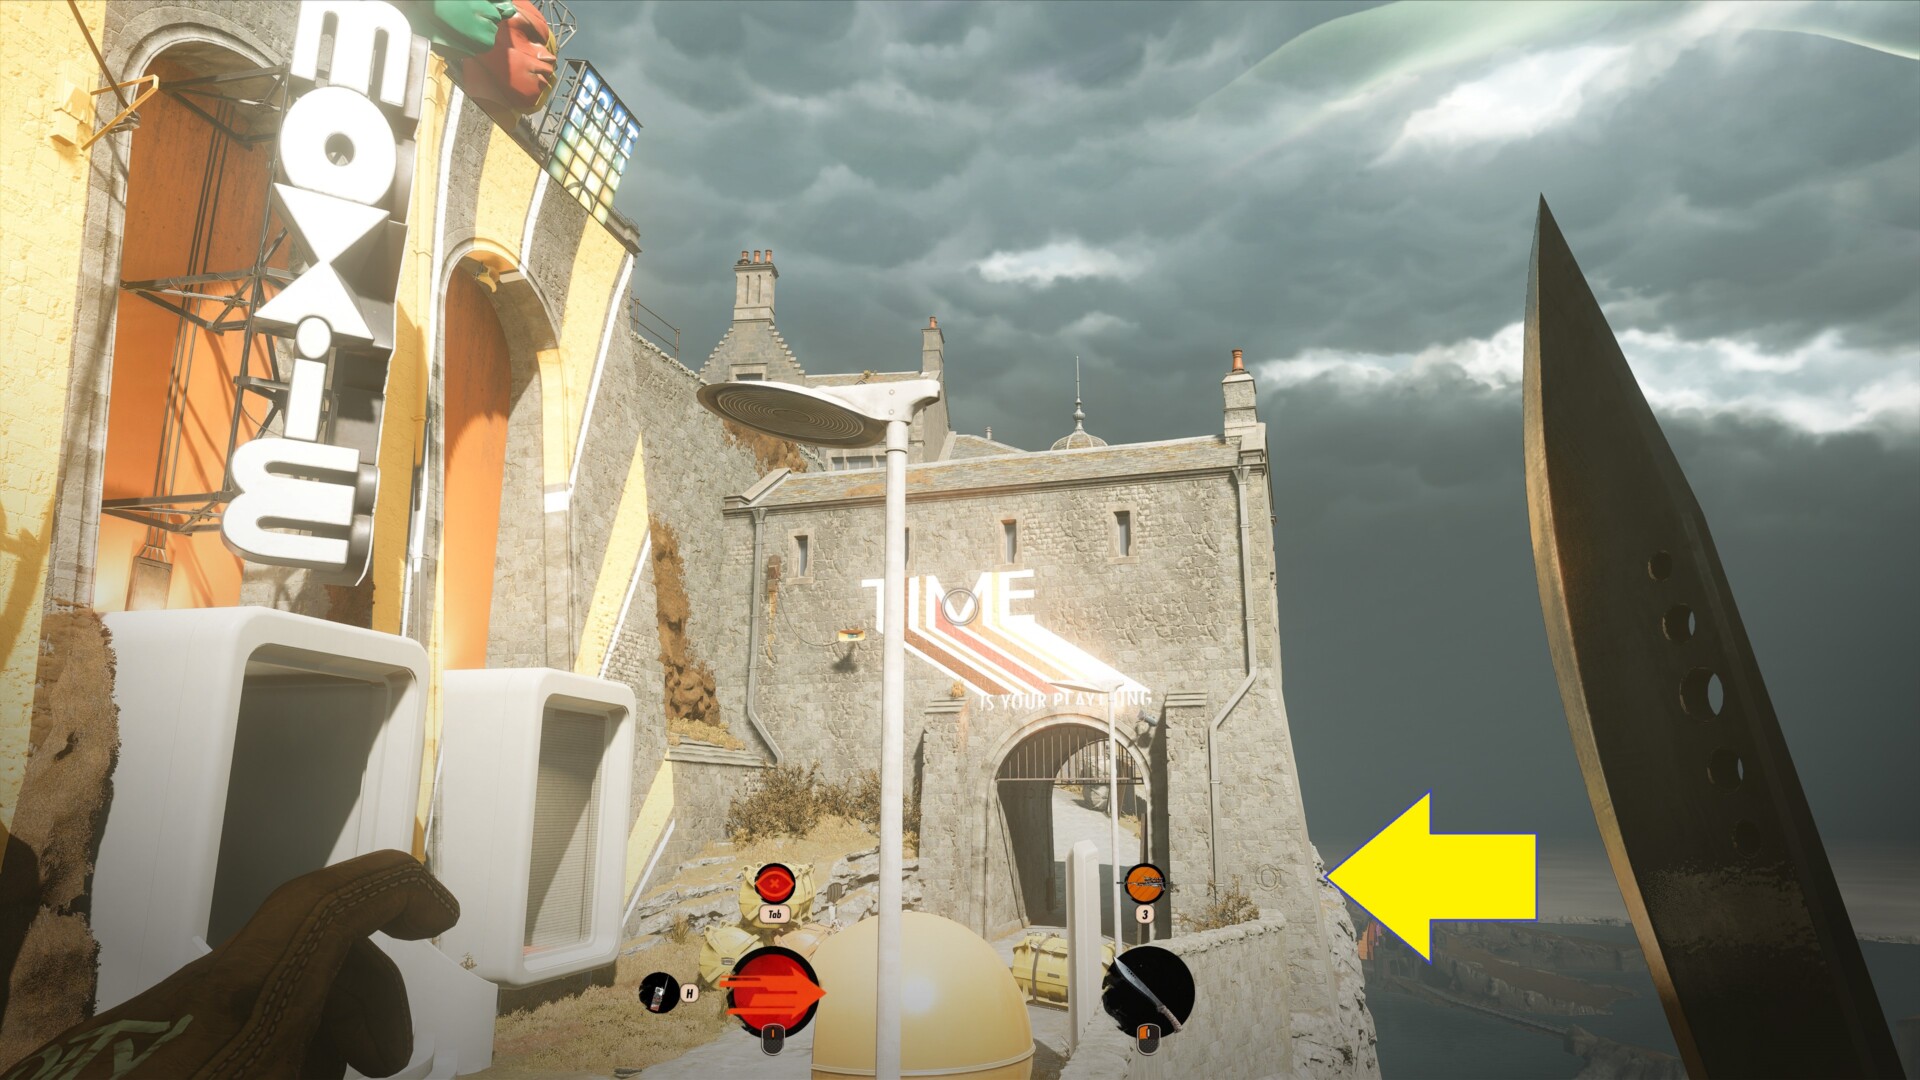
Stone archway near Moxie
Finally, head to the passage where you see the flashing sign of Moxie.
The stone archway here has the last numeral.
What exactly do we do with all these numbers and triangles?
Regardless of the numbers that you’ve obtained, here are some general suggestions for the Updaam glyph puzzle in Deathloop:
- Take screenshots or jot down what you’ve found. Then, copy these numbers on a screenshot of the map (respective of their locations).
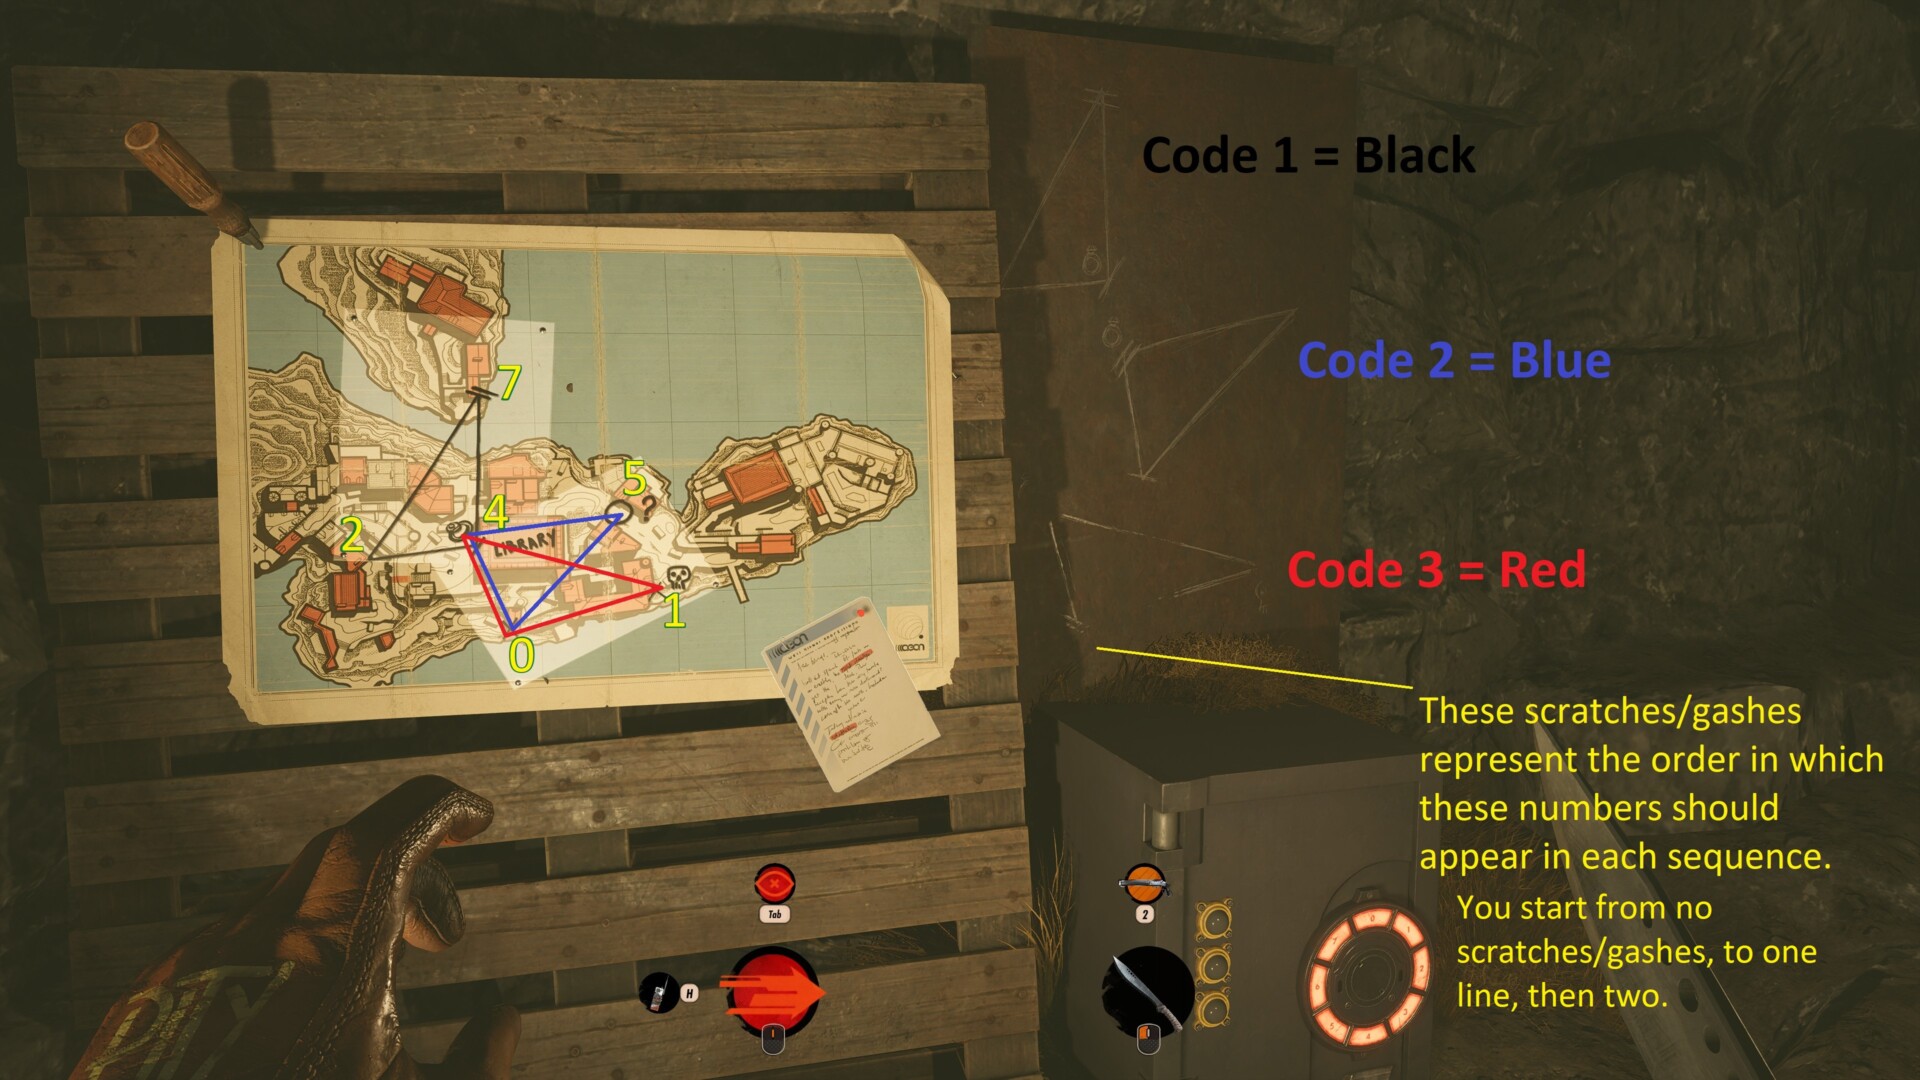
- Next, look at the three drawings of triangles. These triangles pertain to the three codes needed for the safe. The first one is already drawn. As such, you can draw the other two (you’ll see how they overlap with the number in the library).
- Finally, look at the scratches or gashes on the triangles. These represent the order of the numbers from those glyphs. You start at no/zero scratches, followed by one line, then two.
You can see how things look like on my end. Again, the numbers that I have are different from the ones that you might obtain in your Deathloop campaign.
The keycodes for the Updaam glyph puzzle safe and getting our reward
Based on all of the above, these are the combinations that I got:
- First triangle/code: 2-4-7
- Second triangle/code: 5-0-4
- Third triangle/code:4-1-0
The safe will then open, revealing… an object that gives 5,000 Residuum. Wait, that’s it? Yep.
I know it can seem very disappointing, especially if you did other puzzles that rewarded golden weapons like the Strelak Verso and Heritage Gun. But, it is what it is. At the very least, Colt will know about the combination permanently. That means you can open Deathloop‘s Updaam glyph puzzle safe anytime you’re at this location for some extra Residuum. It certainly helps if you wish to infuse and keep your weapons and powers.

Deathloop is available via Steam and its official website.


Published: Sep 14, 2021 10:35 pm